編輯:關於Android編程
自從Fragment出現,曾經有段時間,感覺大家談什麼都能跟Fragment談上關系,做什麼都要問下Fragment能實現不~~~哈哈,是不是有點過~~~
本文力求為大家說明Fragment如何產生,什麼是Fragment,Fragment生命周期,如何靜態和動態的使用Fragment,Fragment回退棧,Fragment事務;以及Fragment的一些特殊用途,例如:沒有布局的Fragment有何用處?Fragment如何與Activity交互?Fragment如何創建對話框?Fragment如何與ActionBar集成等等。
1、Fragment的產生與介紹
Android運行在各種各樣的設備中,有小屏
幕的手機,超大屏的平板甚至電視。針對屏幕尺寸的差距,很多情況下,都是先針對手機開發一套App,然後拷貝一份,修改布局以適應平板神馬超級大屏的。難道無法做到一個App可以同時適應手機和平板麼,當然了,必須有啊。Fragment的出現就是為了解決這樣的問題。你可以把Fragment當成Activity的一個界面的一個組成部分,甚至Activity的界面可以完全有不同的Fragment組成,更帥氣的是Fragment擁有自己的生命周期和接收、處理用戶的事件,這樣就不必在Activity寫一堆控件的事件處理的代碼了。更為重要的是,你可以動態的添加、替換和移除某個Fragment。
2、Fragment的生命周期
Fragment必須是依存與Activity而存在的,因此Activity的生命周期會直接影響到Fragment的生命周期。官網這張圖很好的說明了兩者生命周期的關系:

可以看到Fragment比Activity多了幾個額外的生命周期回調方法:
onAttach(Activity)
當Fragment與Activity發生關聯時調用。
onCreateView(LayoutInflater, ViewGroup,Bundle)
創建該Fragment的視圖
onActivityCreated(Bundle)
當Activity的onCreate方法返回時調用
onDestoryView()
與onCreateView想對應,當該Fragment的視圖被移除時調用
onDetach()
與onAttach相對應,當Fragment與Activity關聯被取消時調用
注意:除了onCreateView,其他的所有方法如果你重寫了,必須調用父類對於該方法的實現,
3、靜態的使用Fragment
嘿嘿,終於到使用的時刻了~~
這是使用Fragment最簡單的一種方式,把Fragment當成普通的控件,直接寫在Activity的布局文件中。步驟:
1、繼承Fragment,重寫onCreateView決定Fragemnt的布局
2、在Activity中聲明此Fragment,就當和普通的View一樣
下面展示一個例子(我使用2個Fragment作為Activity的布局,一個Fragment用於標題布局,一個Fragment用於內容布局):
TitleFragment的布局文件:
<?xml version="1.0" encoding="utf-8"?>
<RelativeLayout xmlns:android="http://schemasandroidcom/apk/res/android"
  android:layout_width="match_parent"
  android:layout_height="45dp"
  android:background="@drawable/title_bar" >

  <ImageButton
    android:id="@+id/id_title_left_btn"
    android:layout_width="wrap_content"
    android:layout_height="wrap_content"
    android:layout_centerVertical="true"
    android:layout_marginLeft="3dp"
    android:background="@drawable/showleft_selector" />

  <TextView
    android:layout_width="fill_parent"
    android:layout_height="fill_parent"
    android:gravity="center"
    android:text="我不是微信"
    android:textColor="#fff"
    android:textSize="20sp"
    android:text />

</RelativeLayout>
TitleFragment
package comzhyzhy_fragments;

import androidappFragment;
import androidosBundle;
import androidviewLayoutInflater;
import androidviewView;
import androidviewViewOnClickListener;
import androidviewViewGroup;
import androidwidgetImageButton;
import androidwidgetToast;

public class TitleFragment extends Fragment
{

  private ImageButton mLeftMenu;

  @Override
  public View onCreateView(LayoutInflater inflater, ViewGroup container,
      Bundle savedInstanceState)
  {
    View view = inflaterinflate(Rlayoutfragment_title, container, false);
    mLeftMenu = (ImageButton) viewfindViewById(Ridid_title_left_btn);
    mLeftMenusetOnClickListener(new OnClickListener()
    {
      @Override
      public void onClick(View v)
      {
        ToastmakeText(getActivity(),
            "i am an ImageButton in TitleFragment ! ",
            ToastLENGTH_SHORT)show();
      }
    });
    return view;
  }
}
同理還有ContentFragment的其布局文件:
<?xml version="1.0" encoding="utf-8"?>
<LinearLayout xmlns:android="http://schemasandroidcom/apk/res/android"
  android:layout_width="match_parent"
  android:layout_height="match_parent"
  android:orientation="vertical" >

  <TextView
    android:layout_width="fill_parent"
    android:layout_height="fill_parent"
    android:gravity="center"
    android:text="使用Fragment做主面板"
    android:textSize="20sp"
    android:text />

</LinearLayout>
package com.zhy.zhy_fragments;

import androidappFragment;
import androidosBundle;
import androidviewLayoutInflater;
import androidviewView;
import androidviewViewGroup;

public class ContentFragment extends Fragment
{

  @Override
  public View onCreateView(LayoutInflater inflater, ViewGroup container,
      Bundle savedInstanceState)
  {
    return inflaterinflate(Rlayoutfragment_content, container, false);
  }

}
MainActivity
package com.zhy.zhy_fragments;

import androidappActivity;
import androidosBundle;
import androidviewWindow;

public class MainActivity extends Activity
{

  @Override
  protected void onCreate(Bundle savedInstanceState)
  {
    superonCreate(savedInstanceState);
    requestWindowFeature(WindowFEATURE_NO_TITLE);
    setContentView(Rlayoutactivity_main);
  }

}
Activity的布局文件:
<RelativeLayout xmlns:android="http://schemasandroidcom/apk/res/android"
  xmlns:tools="http://schemasandroidcom/tools"
  android:layout_width="match_parent"
  android:layout_height="match_parent" >

  <fragment
    android:id="@+id/id_fragment_title"
    android:name="comzhyzhy_fragmentsTitleFragment"
    android:layout_width="fill_parent"
    android:layout_height="45dp" />

  <fragment
    android:layout_below="@id/id_fragment_title"
    android:id="@+id/id_fragment_content"
    android:name="comzhyzhy_fragmentsContentFragment"
    android:layout_width="fill_parent"
    android:layout_height="fill_parent" />

</RelativeLayout>
是不是把Fragment當成普通的View一樣聲明在Activity的布局文件中,然後所有控件的事件處理等代碼都由各自的Fragment去處理,瞬間覺得Activity好干淨有木有~~代碼的可讀性、復用性以及可維護性是不是瞬間提升了~~~下面看下效果圖:

4、動態的使用Fragment
上面已經演示了,最簡單的使用Fragment的方式~下面介紹如何動態的添加、更新、以及刪除Fragment
為了動態使用Fragment,我們修改一下Actvity的布局文件,中間使用一個FrameLayout,下面添加四個按鈕~~~嘿嘿~~不是微信的按鈕- -!
<RelativeLayout xmlns:android="http://schemas.android.com/apk/res/android"
  xmlns:tools="http://schemasandroidcom/tools"
  android:layout_width="match_parent"
  android:layout_height="match_parent" >

  <fragment
    android:id="@+id/id_fragment_title"
    android:name="comzhyzhy_fragmentsTitleFragment"
    android:layout_width="fill_parent"
    android:layout_height="45dp" />

  <include
    android:id="@+id/id_ly_bottombar"
    android:layout_width="fill_parent"
    android:layout_height="55dp"
    android:layout_alignParentBottom="true"
    layout="@layout/bottombar" />

  <FrameLayout
    android:id="@+id/id_content"
    android:layout_width="fill_parent"
    android:layout_height="fill_parent"
    android:layout_above="@id/id_ly_bottombar"
    android:layout_below="@id/id_fragment_title" />

</RelativeLayout>
底部四個按鈕的布局就不貼了,到時看效果圖就明白了~~
下面主Activity
package com.zhy.zhy_fragments;

import androidappActivity;
import androidappFragmentManager;
import androidappFragmentTransaction;
import androidosBundle;
import androidviewView;
import androidviewViewOnClickListener;
import androidviewWindow;
import androidwidgetLinearLayout;

public class MainActivity extends Activity implements OnClickListener
{
  private LinearLayout mTabWeixin;
  private LinearLayout mTabFriend;

  private ContentFragment mWeixin;
  private FriendFragment mFriend;

  @Override
  protected void onCreate(Bundle savedInstanceState)
  {
    superonCreate(savedInstanceState);
    requestWindowFeature(WindowFEATURE_NO_TITLE);
    setContentView(Rlayoutactivity_main);

    // 初始化控件和聲明事件
    mTabWeixin = (LinearLayout) findViewById(Ridtab_bottom_weixin);
    mTabFriend = (LinearLayout) findViewById(Ridtab_bottom_friend);
    mTabWeixinsetOnClickListener(this);
    mTabFriendsetOnClickListener(this);

    // 設置默認的Fragment
    setDefaultFragment();
  }

  private void setDefaultFragment()
  {
    FragmentManager fm = getFragmentManager();
    FragmentTransaction transaction = fmbeginTransaction();
    mWeixin = new ContentFragment();
    transactionreplace(Ridid_content, mWeixin);
    transactioncommit();
  }

  @Override
  public void onClick(View v)
  {
    FragmentManager fm = getFragmentManager();
    // 開啟Fragment事務
    FragmentTransaction transaction = fmbeginTransaction();

    switch (vgetId())
    {
    case Ridtab_bottom_weixin:
      if (mWeixin == null)
      {
        mWeixin = new ContentFragment();
      }
      // 使用當前Fragment的布局替代id_content的控件
      transactionreplace(Ridid_content, mWeixin);
      break;
    case Ridtab_bottom_friend:
      if (mFriend == null)
      {
        mFriend = new FriendFragment();
      }
      transactionreplace(Ridid_content, mFriend);
      break;
    }
    // transactionaddToBackStack();
    // 事務提交
    transactioncommit();
  }

}
可以看到我們使用FragmentManager對Fragment進行了動態的加載,這裡使用的是replace方法~~下一節我會詳細介紹FragmentManager的常用API。
注:如果使用Android3.0以下的版本,需要引入v4的包,然後Activity繼承FragmentActivity,然後通過getSupportFragmentManager獲得FragmentManager。不過還是建議版Menifest文件的uses-sdk的minSdkVersion和targetSdkVersion都改為11以上,這樣就不必引入v4包了。
代碼中間還有兩個Fragment的子類,ContentFragment上面已經見過,FriendFragment其實類似:
package com.zhy.zhy_fragments;

import androidappFragment;
import androidosBundle;
import androidviewLayoutInflater;
import androidviewView;
import androidviewViewGroup;

public class FriendFragment extends Fragment
{

  @Override
  public View onCreateView(LayoutInflater inflater, ViewGroup container,
      Bundle savedInstanceState)
  {
    return inflaterinflate(Rlayoutfragment_friend, container, false);
  }

}
效果圖:

可以看到很好的實現了效果,其實這個效果以前的博客中也出現過,Fragment+TabPageIndicator+ViewPager,有興趣可以看看。ps:為了代碼的簡潔,就不添加按鈕的點擊變化什麼的了,主要講解功能了~~~
5、Fragment家族常用的API
Fragment常用的三個類:
a、獲取FragmentManage的方式:
getFragmentManager() // v4中,getSupportFragmentManager
b、主要的操作都是FragmentTransaction的方法
FragmentTransaction transaction = fm.benginTransatcion();//開啟一個事務

transaction.add()
往Activity中添加一個Fragment
從Activity中移除一個Fragment,如果被移除的Fragment沒有添加到回退棧(回退棧後面會詳細說),這個Fragment實例將會被銷毀。
transaction.replace()
使用另一個Fragment替換當前的,實際上就是remove()然後add()的合體~
transaction.hide()
隱藏當前的Fragment,僅僅是設為不可見,並不會銷毀
transaction.show()
顯示之前隱藏的Fragment
detach()
會將view從UI中移除,和remove()不同,此時fragment的狀態依然由FragmentManager維護。
attach()
重建view視圖,附加到UI上並顯示。
transatcion.commit()//提交一個事務
注意:常用Fragment的哥們,可能會經常遇到這樣Activity狀態不一致:State loss這樣的錯誤。主要是因為:commit方法一定要在Activity.onSaveInstance()之前調用。
上述,基本是操作Fragment的所有的方式了,在一個事務開啟到提交可以進行多個的添加、移除、替換等操作。
值得注意的是:如果你喜歡使用Fragment,一定要清楚這些方法,哪個會銷毀視圖,哪個會銷毀實例,哪個僅僅只是隱藏,這樣才能更好的使用它們。
a、比如:我在FragmentA中的EditText填了一些數據,當切換到FragmentB時,如果希望會到A還能看到數據,則適合你的就是hide和show;也就是說,希望保留用戶操作的面板,你可以使用hide和show,當然了不要使勁在那new實例,進行下非null判斷。
b、再比如:我不希望保留用戶操作,你可以使用remove(),然後add();或者使用replace()這個和remove,add是相同的效果。
c、remove和detach有一點細微的區別,在不考慮回退棧的情況下,remove會銷毀整個Fragment實例,而detach則只是銷毀其視圖結構,實例並不會被銷毀。那麼二者怎麼取捨使用呢?如果你的當前Activity一直存在,那麼在不希望保留用戶操作的時候,你可以優先使用detach。
上述已經介紹完成了Fragment常用的一些方法,相信看完,大家一定清楚了Fragment的產生理由,以及如何使用Fragment,再根據API的講解,也能明白,曾經為何覺得Fragment會出現一些列亂七八槽的問題,終究是因為沒有弄清楚其生命周期。
由於篇幅原因,剩下的內容留到下一篇了。在下一篇,會介紹:
1、如何管理Fragment回退棧
2、Fragment如何與Activity交互
3、Fragment與Activity交互的最佳實踐
4、沒有視圖的Fragment的用處
5、使用Fragment創建對話框
6、如何與ActionBar,MenuItem集成等~~
以上就是本文的全部內容,希望對大家的學習有所幫助,也希望大家多多支持本站。
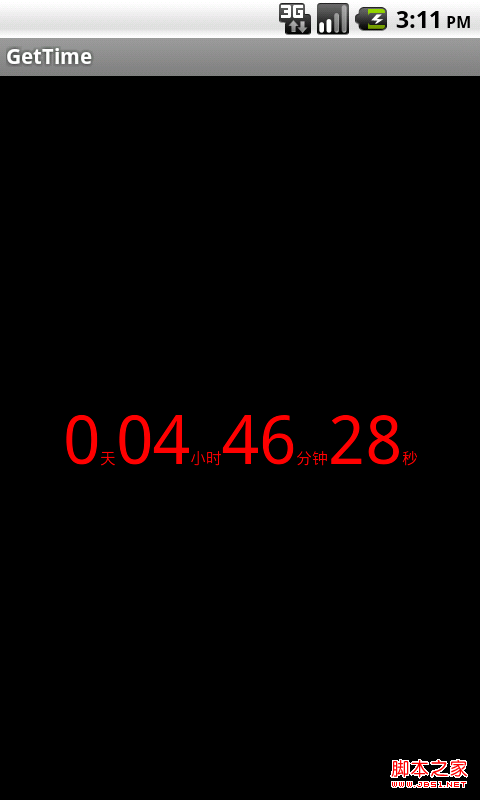 android實現倒計時功能代碼
效果圖,每隔1秒,變換一下時間 xml: 復制代碼 代碼如下: <RelativeLayout xmlns:android=http://schemas
 android 游戲 實戰打飛機游戲 菜單頁面
目標 實現 控制 小飛機 左右移動 躲避子彈 打boss.本節 實現 開始菜單界面1 首先 資源文件拷過來2, 劃分游戲狀態 public static final
 [Android] 徹底了解Binder機制原理和底層實現
1.Binder通信機制介紹這篇文章會先對比Binder機制與Linux的通信機制的差別,了解為什麼Android會另起爐灶,采用Binder。接著,會根據 Binder
 手機qq安裝失敗怎麼辦 手機qq安裝後打不開是什麼原因
手機qq安裝失敗怎麼辦?手機qq安裝後打不開是什麼原因?下面我們一起看看解決方法吧!手機安裝失敗原因及解決方法1、證書過期(或者未生效): 下載安裝前將手