編輯:Android技術基礎
一、設計界面
1、布局文件
打開res/layout/activity_main.xml文件。
輸入以下代碼:
二、程序文件
打開“src/com.genwoxue.handlemessageloop/MainActivity.java”文件。
然後輸入以下代碼:
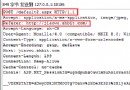
三、配置文件
打開“AndroidManifest.xml”文件。
然後輸入以下代碼:
[html] view plain copy注意:采用默認AndroidManifest.xml即可,無需額外配置。
四、運行結果


 10.8 LayoutInflater(布局服務)
本節引言: 本節繼續帶來的是Android系統服務中的LayoutInflater(布局服務),說到布局,大家第一時間可能想起的是寫完一個布局的xm
 第70章、初識Intent-打開另一個Activity:雙向傳值(從零開始學Android)
在Android應用中實現activity之間的跳轉使用intent機制。本例子簡單地簡紹如何利用intent使程序由MainActivity跳轉到另一個OtherAct
 7.3.1 Android 文件上傳
本節引言 本節和下一節文件下載一樣,慎入...現在實際開發涉及文件上傳不會自己寫上傳代碼,一般 會集成第三網絡庫來做圖片上傳,比如android-async-http
 2.2.3 TableLayout(表格布局)
本節引言:前面我們已經學習了平時實際開發中用得較多的線性布局(LinearLayout)與相對布局(RelativeLayout),其實學完這兩個基