編輯:關於Android編程
Android的RecyclerView的使用
Android推出RecyclerView的時間不算短了,一直沒有具體去了解。前段時間公司做代碼優化,用到這個。具體了解之後發現其功能確實強大。下面來基本解釋RecyclerView控件
可以理解為效率更高的ListView和GridView,而且功能更強大。最關鍵的一個地方,貌似是聽說在Adapter中復用之前已經產生的item,這個估計得查看內存方可以看得清楚。
使用RecyclerView,我們需要了解一下三個元素
1、RecyclerView.Adapter
2、LayoutManager
3、ItemAnimator
作為這麼一個看起來蠻叼的控件,自然用到了各種很厲害的設計模式(這個,我不清楚)。面向接口編程是肯定的,那麼我們來看看它的Adapter
public class MyAdapter extends RecyclerView.Adapter{ public class ViewHolder extends RecyclerView.ViewHolder { public VideoListItem txt1; public VideoListItem txt2; public VideoListItem txt3; public VideoListItem txt4; public ViewHolder(View itemView) { super(itemView); } public VideoListItem getTxt1() { return txt1; } public void setTxt1(VideoListItem txt1) { this.txt1 = txt1; } public VideoListItem getTxt2() { return txt2; } public void setTxt2(VideoListItem txt2) { this.txt2 = txt2; } public VideoListItem getTxt3() { return txt3; } public void setTxt3(VideoListItem txt3) { this.txt3 = txt3; } public VideoListItem getTxt4() { return txt4; } public void setTxt4(VideoListItem txt4) { this.txt4 = txt4; } } private LayoutInflater inflater; public MyAdapter() { inflater = LayoutInflater.from(VideoListActivity.this); } @Override public int getItemCount() { int size = mVideoList.size(); if (size == 0) { return 0; } int count = mVideoList.size() / COLUMN; if (size % COLUMN == 0) { return count + 1; } else { return count + 2; } } @Override public long getItemId(int position) { return 0; } @Override public void onBindViewHolder(ViewHolder viewHolder, int position) { System.out.println("wangzx**" +"onCreateViewHolder"); int firstIndex = position * COLUMN; int size = mVideoList.size(); bindItem(firstIndex + 0, size, position, viewHolder.txt1); bindItem(firstIndex + 1, size, position, viewHolder.txt2); bindItem(firstIndex + 2, size, position, viewHolder.txt3); bindItem(firstIndex + 3, size, position, viewHolder.txt4); } private void bindItem(int index, int size, int position, VideoListItem item) { VideoInfo historyData0 = null; if (size > index) { item.setVisibility(View.VISIBLE); historyData0 = mVideoList.get(index); item.setCurrentLine(position); item.setIndex(index); item.setView_id(historyData0.getVideo_id()); item.getmTextView().setText(historyData0.getVideo_name()); item.getmRoundedImageView().setCornerRadiusDimen(R.dimen.video_list_corner_radius); item.getmRoundedImageView().setImageResource(R.drawable.history_default); imageLoader.displayImage(historyData0.getVideo_img_url(),item.getmRoundedImageView()); } else{ item.setVisibility(View.INVISIBLE); } } @Override public MyAdapter.ViewHolder onCreateViewHolder(ViewGroup parent, int viewType) { System.out.println("wangzx**" +"onCreateViewHolder"); View convertView = inflater.inflate(R.layout.video_list_itemlist, parent, false); ViewHolder viewHolder = new ViewHolder(convertView); viewHolder.txt1 = (VideoListItem) convertView .findViewById(R.id.item1); viewHolder.txt2 = (VideoListItem) convertView .findViewById(R.id.item2); viewHolder.txt3 = (VideoListItem) convertView .findViewById(R.id.item3); viewHolder.txt4 = (VideoListItem) convertView .findViewById(R.id.item4); View itemBackground_focus1 = viewHolder.txt1.findViewById(R.id.background_focus); View itemBackground_focus2 = viewHolder.txt2.findViewById(R.id.background_focus); View itemBackground_focus3 = viewHolder.txt3.findViewById(R.id.background_focus); View itemBackground_focus4 = viewHolder.txt4.findViewById(R.id.background_focus); itemBackground_focus1.setOnFocusChangeListener(mVideoListItemOnFocus); itemBackground_focus2.setOnFocusChangeListener(mVideoListItemOnFocus); itemBackground_focus3.setOnFocusChangeListener(mVideoListItemOnFocus); itemBackground_focus4.setOnFocusChangeListener(mVideoListItemOnFocus); //焦點的變換暫時不考慮在內(焦點的獲取同步更新videoCount數據) itemBackground_focus1.setOnClickListener(mOnClick); itemBackground_focus2.setOnClickListener(mOnClick); itemBackground_focus3.setOnClickListener(mOnClick); itemBackground_focus4.setOnClickListener(mOnClick); itemBackground_focus1.setOnKeyListener(mWheelKeyListener); itemBackground_focus2.setOnKeyListener(mWheelKeyListener2); itemBackground_focus3.setOnKeyListener(mWheelKeyListener2); itemBackground_focus4.setOnKeyListener(mWheelKeyListener2); return viewHolder; } }
圖RecyclerView
public class Byhistory__Adapater extends BaseAdapter {

	private ArrayList byhistorylist;
	private LayoutInflater mInflater;

	public Byhistory__Adapater(Context context,ArrayList byhistory_list){
		this.byhistorylist = byhistory_list;
		this.mInflater = LayoutInflater.from(context);
	}

	@Override
	public int getCount() {
		return this.byhistorylist.size();
	}

	@Override
	public Object getItem(int arg0) {
		return null;
	}

	@Override
	public long getItemId(int arg0) {
		return 0;
	}

	@Override
	public View getView(int position, View convertView, ViewGroup arg2) {
		Byhistory_Item holder;
		if(convertView == null){
			convertView = mInflater.inflate(R.layout.byhistory_item, null);
			holder = new Byhistory_Item();
			holder.setLayout_Image((ImageView) convertView.findViewById(R.id.history_item_image));
			holder.setLayout_ID((TextView) convertView.findViewById(R.id.history_item_name));
//			holder.setLayout_price((TextView) convertView.findViewById(R.id.history_item_price));
			holder.setLayout_count((TextView) convertView.findViewById(R.id.history_item_count));
			holder.setLayout_business((ImageView) convertView.findViewById(R.id.history_item_more));

			convertView.setTag(holder);
		}else{
			holder = (Byhistory_Item) convertView.getTag();
		}
		Byhistory_Item dd = byhistorylist.get(position);
//		holder.getLayout_Image().setBackgroundResource(Integer.valueOf(dd.getItem_Tile_Image()));
		holder.getLayout_ID().setText(dd.getItem_Title_ID());
//		holder.getLayout_price().setText(dd.getItem_price());
		holder.getLayout_count().setText(dd.getItem_count());
//		holder.getLayout_business().setBackgroundResource(Integer.valueOf(dd.getItem_business()));


		return convertView;
	}

}
對比listview的adapater我們立馬就能看出來。這裡它單獨弄出來了一個ViewHolder。這個ViewHolder可以是多個layout的組合,這樣做更加靈活,使得布局更加多變(可以仔細想一下是為什麼)。
ListView的Adapter通常是直接導入數據,下滑。但是RecyclerView的Adapter就不是下滑這麼簡單,上下滑動和左右滑動都成為可能。這個關鍵就是LayoutManager的功勞了。配合ViewHolder的多樣性,功能真是很強大。
知道android貌似確實是有不止一種LayoutManager,但是其他的沒有接觸過,暫就不發表評論,以後可能會補充
LinearLayoutManager
public class MyLinearLayoutManager extends LinearLayoutManager {
	public MyLinearLayoutManager(Context context) {
		super(context);
	}

	public MyLinearLayoutManager(Context context, int orientation,
			boolean reverseLayout) {
		super(context, orientation, reverseLayout);
	}

	@Override
	public boolean requestChildRectangleOnScreen(RecyclerView parent,
			View child, Rect rect, boolean immediate) {
		final int parentLeft = getPaddingLeft();
		final int parentTop = getPaddingTop();
		final int parentRight = getWidth() - getPaddingRight();
		final int parentBottom = getHeight() - getPaddingBottom();
		final int childLeft = child.getLeft() + rect.left;
		final int childTop = child.getTop() + rect.top;
		final int childRight = childLeft + rect.right;
		final int childBottom = childTop + rect.bottom;

		final int offScreenLeft = Math.min(0, childLeft - parentLeft);
		final int offScreenTop = Math.min(0, childTop - parentTop);
		final int offScreenRight = Math.max(0, childRight - parentRight);
		final int offScreenBottom = Math.max(0, childBottom - parentBottom);

		// Favor the "start" layout direction over the end when bringing one
		// side or the other
		// of a large rect into view.
		final int dx;
		if (ViewCompat.getLayoutDirection(parent) == ViewCompat.LAYOUT_DIRECTION_RTL) {
			dx = offScreenRight != 0 ? offScreenRight : offScreenLeft;
		} else {
			dx = offScreenLeft != 0 ? offScreenLeft : offScreenRight;
		}

		// Favor bringing the top into view over the bottom
		int dy = offScreenTop != 0 ? offScreenTop : offScreenBottom;
		if (dy > 0) {
			//偏移量是40,焦點計算的高是360,比整體高少40,原因是焦點的view是item的子View,item的高度是400
			dy += 40;
//			dy += 400;
		}
		if (dy < 0) {
//			dy -= 400;
		}
		if (dx != 0 || dy != 0) {
			if (immediate) {
				parent.scrollBy(dx, dy);
			} else {
				parent.smoothScrollBy(dx, dy);
			}
			return true;
		}
		return false;
	}


	@Override
	public int scrollHorizontallyBy(int dx, Recycler recycler, State state) {
		return dx;
	}

}
public boolean requestChildRectangleOnScreen(RecyclerView parent,
View child, Rect rect, boolean immediate)函數是相當重要的,它基本就能夠確定在布局中滾動或者滑動時候,子Item和parent之間的位置。仔細查看這個函數的父類源碼我們可以知道,dy,dx的實際意義就是在滾動中下滑和左右滑動的距離。而這個值的確定會嚴重影響滑動的流暢程度(我一直在調試這兩個值……)
public int scrollHorizontallyBy(int dx, Recycler recycler, State state)這個函數是滑動中的回調函數。見到的人肯定很多,不足為奇。
是滑動進行中的動畫,聽別人說很炫,但是自己貌似沒有親手去實現,知道有這麼個東西而已吧。
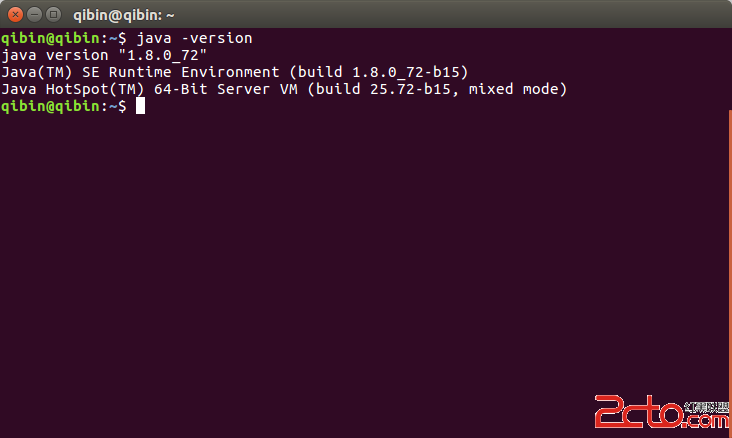 ubuntu下安裝AndroidStudio
最近將電腦的操作系統換成了ubuntu,對於不習慣win8/win10的人來說ubuntu確實是一個不錯的選擇,基本的軟件都ok了,至於QQ什麼的,大家可以去找wine版
 Android實現從底部彈出的Dialog示例(一)
一.概述先給大家看一下效果圖:點擊中間的顯示彈框按鈕,從底部彈出來一個對話框,用戶可以點擊拍照或者從相冊選擇進行相應的操作,下面看看怎麼實現。二.代碼實現主頁面布局文件,
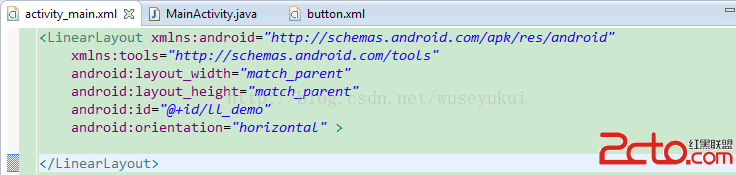 android——如何理解控件的寬高及layout_grivaty與grivaty的區別
關於Layout_width/height引發的寬高思考方式一: 結果不符合預期。運行結果: 方式二:
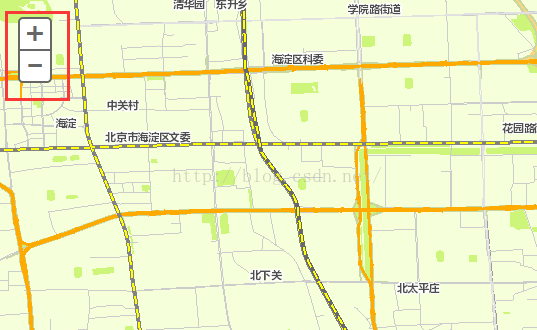 arcgis api for js共享干貨系列之二自定義Navigation控件樣式風格
arcgis api for js默認的Navigation控件樣式風格如下圖: 這樣的風格不能說不好,各有各的愛好,審美觀,這裡也不是重點,這裡的重點是如何自