編輯:關於Android編程
一.概述
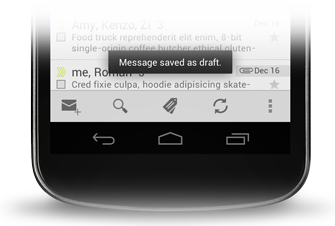
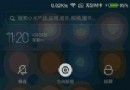
先給大家看一下效果圖:
點擊中間的顯示彈框按鈕,從底部彈出來一個對話框,用戶可以點擊拍照或者從相冊選擇進行相應的操作,下面看看怎麼實現。
二.代碼實現
主頁面布局文件,很簡單,一個按鈕,響應點擊事件:
<?xml version="1.0" encoding="utf-8"?>
<RelativeLayout
  xmlns:android="http://schemas.android.com/apk/res/android"
  xmlns:tools="http://schemas.android.com/tools" android:layout_width="match_parent"
  android:layout_height="match_parent" android:fitsSystemWindows="true"
  tools:context="com.example.dialogdemo.MainActivity">
    <Button
      android:layout_width="wrap_content"
      android:layout_height="wrap_content"
      android:layout_centerInParent="true"
      android:onClick="show"
      android:text="顯示彈框"
      />
</RelativeLayout>
接下來看對話框的布局:
<?xml version="1.0" encoding="utf-8"?>
<LinearLayout xmlns:android="http://schemas.android.com/apk/res/android"
  android:layout_width="match_parent"
  android:orientation="vertical"
  android:background="@drawable/background"
  android:layout_height="match_parent">
  <TextView
    android:id="@+id/takePhoto"
    android:layout_width="match_parent"
    android:layout_height="45dp"
    android:layout_margin="2dp"
    android:gravity="center"
    android:text="拍照"
    android:textColor="#0000ff"
    android:textSize="18sp"
    android:text />
  <View
    android:layout_width="match_parent"
    android:layout_height="1px"
    android:background="#9e9e9e"
    />
  <TextView
    android:id="@+id/choosePhoto"
    android:layout_width="match_parent"
    android:layout_height="45dp"
    android:layout_margin="2dp"
    android:gravity="center"
    android:text="從相冊選擇"
    android:textColor="#0000ff"
    android:textSize="18sp"
    android:text />
</LinearLayout>
根布局為垂直的線性布局,加了一個背景,白色矩形,四個角弧度為5dp,代碼如下
<?xml version="1.0" encoding="utf-8"?>
<shape xmlns:android="http://schemas.android.com/apk/res/android">
  <solid android:color="#ffffff"/>
  <corners android:radius="5dp"/>
</shape>
線性布局中是兩個TextView和一條橫線。也很簡單
下面是java代碼:
public class MainActivity extends AppCompatActivity implements View.OnClickListener{

  private View inflate;
  private TextView choosePhoto;
  private TextView takePhoto;
  private Dialog dialog;
  @Override
  protected void onCreate(Bundle savedInstanceState) {
    super.onCreate(savedInstanceState);
    setContentView(R.layout.activity_main);
  }
  public void show(View view){
    dialog = new Dialog(this,R.style.ActionSheetDialogStyle);
    //填充對話框的布局
    inflate = LayoutInflater.from(this).inflate(R.layout.dialog_layout, null);
    //初始化控件
    choosePhoto = (TextView) inflate.findViewById(R.id.choosePhoto);
    takePhoto = (TextView) inflate.findViewById(R.id.takePhoto);
    choosePhoto.setOnClickListener(this);
    takePhoto.setOnClickListener(this);
    //將布局設置給Dialog
    dialog.setContentView(inflate);
    //獲取當前Activity所在的窗體
    Window dialogWindow = dialog.getWindow();
    //設置Dialog從窗體底部彈出
    dialogWindow.setGravity( Gravity.BOTTOM);
    //獲得窗體的屬性
    WindowManager.LayoutParams lp = dialogWindow.getAttributes();
    lp.y = 20;//設置Dialog距離底部的距離
//    將屬性設置給窗體
    dialogWindow.setAttributes(lp);
    dialog.show();//顯示對話框
  }

  @Override
  public void onClick(View view) {
    switch (view.getId()){
      case R.id.takePhoto:
        Toast.makeText(this,"點擊了拍照",Toast.LENGTH_SHORT).show();
        break;
      case R.id.choosePhoto:
        Toast.makeText(this,"點擊了從相冊選擇",Toast.LENGTH_SHORT).show();
        break;
    }
    dialog.dismiss();
  }
}
窗口的樣式:
 <style name="ActionSheetDialogStyle" parent="@android:style/Theme.Dialog">

    <!-- 背景透明 -->
    <item name="android:windowBackground">@android:color/transparent</item>
    <item name="android:windowContentOverlay">@null</item>
    <!-- 浮於Activity之上 -->
    <item name="android:windowIsFloating">true</item>
    <!-- 邊框 -->
    <item name="android:windowFrame">@null</item>
    <!-- Dialog以外的區域模糊效果 -->
    <item name="android:backgroundDimEnabled">true</item>
    <!-- 無標題 -->
    <item name="android:windowNoTitle">true</item>
    <!-- 半透明 -->
    <item name="android:windowIsTranslucent">true</item>
    <!-- Dialog進入及退出動畫 -->
    <item name="android:windowAnimationStyle">@style/ActionSheetDialogAnimation</item>
  </style>
  <!-- ActionSheet進出動畫 -->
  <style name="ActionSheetDialogAnimation" parent="@android:style/Animation.Dialog">
    <item name="android:windowEnterAnimation">@anim/actionsheet_dialog_in</item>
    <item name="android:windowExitAnimation">@anim/actionsheet_dialog_out</item>
  </style>
對話框出現動畫代碼:
<?xml version="1.0" encoding="utf-8"?>
<translate xmlns:android="http://schemas.android.com/apk/res/android"
  android:duration="200"
  android:fromYDelta="100%"
  android:toYDelta="0" />
對話框消失的代碼:
<?xml version="1.0" encoding="utf-8"?>
<translate xmlns:android="http://schemas.android.com/apk/res/android"
  android:duration="200"
  android:fromYDelta="0"
  android:toYDelta="100%" />
三.總結
本次實現的Dialog主要是通過TextView來實現的,並且沒有加入狀態選擇器以及取消按鈕,在下篇文章中將對對話框的表現形式稍微進行一下改動。以適應項目中的開發需求。
以上就是本文的全部內容,希望對大家的學習有所幫助,也希望大家多多支持本站。
 開源項目circular-progress-button源碼解析
這次我們以circular-progress-button開源項目為案例進行分析,這個開源項目裡涉及到Drawable的使用,所以是一個不錯分析案例。一、項目概述這個項目
 android 特殊用戶通知用法匯總--Notification源碼分析
一直用的android手機,用過這麼多的app,平時也會遇到有趣的通知提醒,在這裡先總結兩種吧,notification和圖標數字,有的以後看到再研究。還有,推廣一下哈,
 Android NDK環境搭建與簡單實例
一、NDK與JNI簡介 NDK全稱為native development kit本地語言(C&C++)開發包。而對應的是經常接觸的Android-SDK
 Android TV開發總結(一)構建一個TV app前要知道的事兒
前言:近年來,智能電視的發展如火如荼,Googel 也在大力推進TV及穿帶設備的發展,在互聯網的風口,是豬也會飛,這句話並不是沒有道理的。傳統電視機廠商,基本都轉型致力於