編輯:關於Android編程
Service是一種能長期在後台運行同時不需要與用戶進行交互的應用組件。其他組件可以開啟service,開啟後service可以自行運行及時用戶已經切換到其他的應用。此外,組件可以與service進行綁定來進行交互,及時是跨進程的交互(Android的IPC機制)。網絡操作、播放音樂、執行文件IO操作或是與內容提供者進行交互,這些操作都可以通過service在後台進行。
Service的兩種形式:
Started
通過調用startService(),你可以啟動一個service。一旦被啟動,service可以獨立的運行在後台,即使啟動的組件被銷毀。通常,被啟動的service用來執行一個單一的操作,並且沒有返回值。例如,下載網絡上的一個文件。當操作執行完畢後,service應當自行結束。
Bound
通過調用bindService(),你可以綁定一個service。一個被綁定的service一般會提供一個接口用來與組件進行交互、發送請求、獲取結果、甚至進行進程間的交互(IPC)。被綁定的service的生命周期和其綁定的組件相同。盡管多個組件可以同時綁定一個service,但是但所有這些組件進行解綁後,service會被銷毀。
雖然文檔中一般會對兩種形式的service分開介紹,但是你可以同時開啟和綁定service。只需要同時覆寫兩個回調-onStartCommand和onBind即可。
無論是用哪種方式啟動service(或是兩者都用),你都可以使用Intent來操作service,就想操作Activity一樣。然而,如果你不想讓其他應用使用你的service,你可以在manifest文件中將service申明為私有的,具體請看Service在清單文件中的申明。
基礎介紹
想要使用service,你需要繼承Service類或其子類。你需要覆寫一些回調方法同時在這些方法中進行一些關鍵操作。一下是一些較為重要的生命周期回調回調:
onStartCommand()
系統會在你調用了startService後調用該函數。一旦該方法執行,service會被啟動並獨立運行在後台。如果你實現了該方法,你必須在合適的時機調用stopSelf()或者stopService()來停止service。(如果你僅提供綁定接口,你可以不實現該方法)
onBind()
當有其他組件通過bindService()綁定service後,系統會調用onBind()函數。你需要在該方法中提供一個實現了IBinder接口的類供給client使用。該方法必須要覆寫,如果你不希望你的service提供綁定功能,你可以直接返回null。
Android系統會在內存較低時強制停止service;如果service被綁定在一個擁有焦點的activity上時,其被kill的風險會降低;如果一個service被申明為前台service,那麼它幾乎不會被kill。否者的話,如果service被長時間開啟,那麼隨著時間的推移,service在系統中的優先級就會越低,被kill的風險就會越高。如果你的service被啟動了,那麼你就應該考慮到其被系統kill的情況。如果系統kill了一個service,那麼在資源寬松的情況下,系統會重啟它(這個需要根據你在onStartCommand()的返回值決定重啟的策略)。
Service在清單文件中的申明
和activity一樣,你需要在清單文件中申明service。
  ...


      ...
在service節點中可以申明一些其他的屬性。這些屬性都是可選的。只有android:name這一屬性是必須的——該屬性用來描述一個唯一的service類名,你應該確保不去修改該類名。
為了確保你的應用的安全性,應該使用顯式意圖來啟動或者綁定service,並且不在service中申明intent-filters。
此外,你可以通過設置android:exported屬性為false來確保你的service僅可以在你自己的應用中被使用。這可以有效得阻止其他應用使用你的service,即使通過顯式意圖也不可以。
以啟動方式創建service
可以通過startService()來啟動service,你可以監聽到onStartCommand()回調。
當一個service被啟動後,它將擁有獨立的生命周期並且獨立的運行在後台,即使開啟它的組件被銷毀。這種情況下,你需要在合適的時機調用stopSelf()來結束它或者通過調用stopServie()來結束它。
調用startService()時傳遞的Intent會在onStartCommand()回調時接收到。
注意:service會默認運行在申明service的那個應用進程中,並且會運行在主線程中。所以如果你的service在執行一些密集或阻塞的操作,那麼可能會造成ANR現象。為了避免這種情況,你需要開啟一個新的線程。
一般來說,你可以通過繼承IntentService類來加速你的開發。
繼承IntentService類
由於大部分的service都不需要處理並發請求,因此你可以通過繼承IntentService類來加速你的開發。
IntentService有以下特性:
1.創建了一個工作線程來執行由onStartCommand()中傳遞的intent,該線程是和主線程分離的。
2.創建了一個工作隊列用來依次執行intent,因此你不需要考慮多線程問題。
3.當所有任務執行結束後會自動的調用stopSelf()。
4.提供了onBind()的默認實現(return null)
5.提供了onStartCommand()的默認實現,發送任務到任務隊列中並且回調onHandleIntent()
上述這些特性使得你只需要實現onHandleIntent()就可以完成client端的任務(你還需要提供一個簡單的構造函數)
以下是IntentService的一個實現:
public class HelloIntentService extends IntentService {

  /**
   * A constructor is required, and must call the super IntentService(String)
   * constructor with a name for the worker thread.
   */
  public HelloIntentService() {
      super("HelloIntentService");
  }

  /**
   * The IntentService calls this method from the default worker thread with
   * the intent that started the service. When this method returns, IntentService
   * stops the service, as appropriate.
   */
  @Override
  protected void onHandleIntent(Intent intent) {
      // Normally we would do some work here, like download a file.
      // For our sample, we just sleep for 5 seconds.
      try {
          Thread.sleep(5000);
      } catch (InterruptedException e) {
          // Restore interrupt status.
          Thread.currentThread().interrupt();
      }
  }
}
對比一下,如果你繼承自service要實現相同功能所需寫的代碼:
public class HelloService extends Service {
  private Looper mServiceLooper;
  private ServiceHandler mServiceHandler;

  // Handler that receives messages from the thread
  private final class ServiceHandler extends Handler {
      public ServiceHandler(Looper looper) {
          super(looper);
      }
      @Override
      public void handleMessage(Message msg) {
          // Normally we would do some work here, like download a file.
          // For our sample, we just sleep for 5 seconds.
          try {
              Thread.sleep(5000);
          } catch (InterruptedException e) {
              // Restore interrupt status.
              Thread.currentThread().interrupt();
          }
          // Stop the service using the startId, so that we don't stop
          // the service in the middle of handling another job
          stopSelf(msg.arg1);
      }
  }

  @Override
  public void onCreate() {
    // Start up the thread running the service.  Note that we create a
    // separate thread because the service normally runs in the process's
    // main thread, which we don't want to block.  We also make it
    // background priority so CPU-intensive work will not disrupt our UI.
    HandlerThread thread = new HandlerThread("ServiceStartArguments",
            Process.THREAD_PRIORITY_BACKGROUND);
    thread.start();

    // Get the HandlerThread's Looper and use it for our Handler
    mServiceLooper = thread.getLooper();
    mServiceHandler = new ServiceHandler(mServiceLooper);
  }

  @Override
  public int onStartCommand(Intent intent, int flags, int startId) {
      Toast.makeText(this, "service starting", Toast.LENGTH_SHORT).show();

      // For each start request, send a message to start a job and deliver the
      // start ID so we know which request we're stopping when we finish the job
      Message msg = mServiceHandler.obtainMessage();
      msg.arg1 = startId;
      mServiceHandler.sendMessage(msg);

      // If we get killed, after returning from here, restart
      return START_STICKY;
  }

  @Override
  public IBinder onBind(Intent intent) {
      // We don't provide binding, so return null
      return null;
  }

  @Override
  public void onDestroy() {
    Toast.makeText(this, "service done", Toast.LENGTH_SHORT).show();
  }
}
是不是累覺不愛,果斷IntentService好啊。
然而,如果你希望實現並發操作,即不等上一個請求執行完畢就進行下一個請求的話,那麼直接繼承service是有必要的。
注意到onStartCommand()方法必須返回一個整型變量。這個整型變量用來指定當系統殺死service後應當如何返回。以下是各個返回值:
START_NOT_STICKY
系統殺死service後不會重新創建該service,除非需要傳遞pending intents。適用於當你的程序可以簡單的重啟未完成任務的service。
START_STICKY
如果系統殺死了service,那麼之後會重啟該service並且調用onStartCommand(),但是不會重新發送上一個intent,而是返回一個null的intent(除非是一個pending intents。)這種模式很適合音樂播放器這種不需要執行commands,但是需要獨立運行並且等待任務的service。
START_REDELIVER_INTENT
如果系統殺死了service,那麼之後會重啟該service並且掉哦那個onStartCommand(),並且會傳遞上一個intent。這中模式適合那些需要立即返回的service,例如下載文件。
以綁定方式啟動service
詳見Android開發文檔翻譯之-Bound Services
給用戶發送通知
一旦service運行,你可以通過Toast Notifications或者Status Bar Notifications來告知用戶某些事件。
Toast Notifications是一種短時間內出現在當前窗口表面的一條消息。Status Bar Notifications是一種提供了圖標和消息的通知欄,用戶可以通過點擊來執行某個動作(例如開啟一個activity)
前台Service
前台Service通常用來執行一些需要用戶意識到正在執行的一些操作,因此系統在低內存狀態時也不會kill掉該service。前台Service需要在狀態欄上提供一個通知,該通知不會消失,直到service被停止或者從前台移除。
例如,音樂播放器Service應該是被設置為運行在前台的service,因為用戶應該一直意識到這個操作。狀態欄應該顯示當前正在播放的歌曲,並且當前點擊後應該跳轉到能和用戶進行交互的activity。
通過調用startForeground()函數可以讓你的service運行在前台。使用示例如下:
Notification notification = new Notification(R.drawable.icon, getText(R.string.ticker_text),
        System.currentTimeMillis());
Intent notificationIntent = new Intent(this, ExampleActivity.class);
PendingIntent pendingIntent = PendingIntent.getActivity(this, 0, notificationIntent, 0);
notification.setLatestEventInfo(this, getText(R.string.notification_title),
        getText(R.string.notification_message), pendingIntent);
startForeground(ONGOING_NOTIFICATION_ID, notification);
管理Service的生命周期
Service的生命周期相對Activity要簡單的多。但是卻更需要你注意,因為通常service是運行在後台的。
 Android自定義控件---繼承ProgressBar功能擴展
一、前言前一段時間在做視頻開發,由於本人剛接觸視頻開發這塊,所以領導沒有對我提很高的要求,僅僅要求能夠播放本地視頻即可。我想怎麼簡單怎麼做。於是選擇用Android Vi
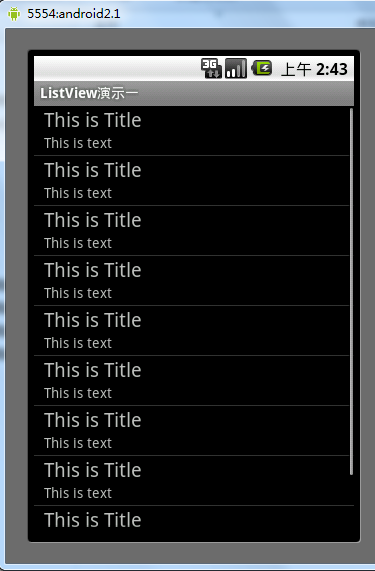 Android控件之ListView用法實例詳解
本文實例講述了Android控件之ListView用法。分享給大家供大家參考。具體如下:示例一:在android開發中ListView是比較常用的組件,它以列表的形式展示
 Android 7.1.1 鎖屏界面啟動流程
Android 7.1.1 鎖屏界面啟動流程。前幾天遇到一個低概率復現鎖屏界面不顯示,只顯示狀態欄的問題,跟了下鎖屏界面啟動顯示的流程,在這分享下,也方便以後自己查看。前
 Android 設計模式之 淺談MVP
一.概述MVP(Model-View-Presenter) 是總所周知MVC模式的一個演變,他們的主要目的都是劃分模塊職責,降低模塊耦合,易測試,提高代碼復用,這裡主要針