編輯:關於Android編程
譯文:能夠構建自己的UI組件對你來說有很大的優勢,比如你可以完全控制你的內容的顯示樣式。但成為一個自定義視圖專家的最好理由之一,就是你將有能力使自己的視圖層級結構變得扁平化。
One custom view can be designed to do the job of several nested framework widgets, and the fewer views you have in your hierarchy, the better your application will perform.
譯文:一個自定義視圖可以用來做幾個系統原生視圖合在一起才能做的事情。視圖層級結構中的view視圖越少,你的app也會運行的越流暢。
Our first example will be a simple widget that displays a pair of overlapping image logos, with a text element on the right and vertically centered. You might use a widget like this to represent the score of a sports matchup, for example.
譯文:我們的第一個例子是做一個簡單的小控件,它顯示的是一對重疊的logo圖片,logo右邊是文本,並且左邊圖片和右邊文本在豎直方向上呈居中對稱。你可能會使用類似這樣的一個小控件來表示體育比賽中的比分情況。

When we build custom views, there are two primary functions we must take into consideration:
譯文:當我們構建自定義視圖時,有兩個主要方法我們必須考慮:
Let's have a look at measurement first...
讓我們先看下測量方法...
Before a view hierarchy can be drawn, the first task of the Android framework will be a measurement pass. In this step, all the views in a hierarchy will be measured top-down; meaning measure starts at the root view and trickles through each child view.
譯文:在一個視圖層級可以被繪制之前,Android框架的第一個任務就是測量是否合格。在這個步驟中,一個層級結構中的所有視圖將自上而下地被測量一遍;意思是從根視圖開始測量,然後是它的孩子,接著是它孩子的孩子,以此類推,直到測量到每個子視圖。
Eachview receives a call toonMeasure()when its parent requests that it update its measured size. It is the responsibility of each view to set its own size based on the constraints given by the parent, and store those measurements by callingsetMeasuredDimension(). Forgetting to do this will result in an exception.
譯文:當一個父視圖要求其子視圖更新它的測量尺寸時,該子視圖將會回調onMeasure()方法。每個子視圖必須根據其父視圖所給定的約束條件來設置自己的尺寸大小,並且通過調用setMeasuredDimension()方法來存儲這些設置的測量值。如果不這樣做的話將會導致異常發生。
@Override
protected void onMeasure(int widthMeasureSpec, int heightMeasureSpec) {
    //Get the width measurement
    int widthSize = View.resolveSize(getDesiredWidth(), widthMeasureSpec);

    //Get the height measurement
    int heightSize = View.resolveSize(getDesiredHeight(), heightMeasureSpec);

    //MUST call this to store the measurements
    setMeasuredDimension(widthSize, heightSize);
}
Each view is given two packed-int values inonMeasure(), each know as aMeasureSpec, that the view should inspect to determine how to set its size. AMeasureSpecis simply a size value with a mode flag encoded into its high-order bits.
譯文:在onMeasure()方法中,有兩個int類型的包裝過的參數值,這就是傳說中的MeasureSpec(測量規格),每個視圖應該根據MeasureSpec來確定該如何設置它的尺寸大小。MeasureSpec簡單來說只是一個測量模式的標記值,實際上它是一個32位的int值,其中高2位是測量的模式,低30位是測量的大小。
There are three possible values for a spec's mode:UNSPECIFIED,AT_MOST, andEXACTLY.UNSPECIFIEDtells the view to set its dimensions to any desired size.AT_MOSTtells the view to set its dimensions to any size less than or equal to the given spec.EXACTLYtells the view to set its dimensions only to the size given.
譯文:有三種可能的測量模式:UNSPECIFIED,AT_MOST和EXACTLY。UNSPECIFIED指的是view視圖可以設置任意大小的尺寸。AT_MOST指的是view視圖可以設置成小於或等於給定的規范大小,EXACTLY 指的是視圖只能設置為規定的尺寸大小。
The video tutorial mentions aMeasureUtilshelper class to assist in resolving the appropriate view size. This tutorial has since replaced that utility with the built-inView.resolveSize()method to accomplish the same end. It may also be important to provide measurements of what your desired size is, for situations where wrap_content will be used to lay out the view. Here is the method we use to compute the desired width for our custom view example. We obtain width values for the three major elements in this view, and return the space that will be required to draw the overlapping logos and text.
譯文:在使用wrap_content來布局你的view視圖的情況下,另一個可能比較重要的事情是提供你期望的大小的測量值。下面就是我們這個例子中用來計算期望的寬度的方法。我們先獲取到這個視圖中三個主要元素的寬度值,然後返回繪制出重疊logo圖片和文字所需要的總的寬度空間大小。
private int getDesiredWidth() {
    int leftWidth;
    if (mLeftDrawable == null) {
        leftWidth = 0;
    } else {
        leftWidth = mLeftDrawable.getIntrinsicWidth();
    }

    int rightWidth;
    if (mRightDrawable == null) {
        rightWidth = 0;
    } else {
        rightWidth = mRightDrawable.getIntrinsicWidth();
    }

    int textWidth;
    if (mTextLayout == null) {
        textWidth = 0;
    } else {
        textWidth = mTextLayout.getWidth();
    }

    return (int)(leftWidth * 0.67f)
            + (int)(rightWidth * 0.67f)
            + mSpacing
            + textWidth;
}
Similarly, here is the method our example uses to compute its desired height value. This is governed completely by the image content, so we don't need to pay attention to the text element when measuring in this direction.
譯文:同樣的,這也是我們的例子中用來計算view的期望高度所使用的方法。在高度方向上測量時,這完全由圖像內容所控制,所以我們不需要注意文本元素。
TIP:Favor efficiency over flexibility! Don't spend time testing and overriding states you don't need.Unlike the framework widgets, your custom view only needs to suit your application's use case.Place your custom view inside of its final layout, inspect the values the framework gives you for MeasureSpecs, and THEN build the measuring code to handle those specific cases.
溫馨提示:寧願選擇效率,而不選擇靈活!不要把時間花在測試和重復一個你不需要的情況。與系統框架裡的原生控件不同的是,你的自定義視圖只需要滿足您的app的實際需求就可以了。簡單來說,就是先把你的自定義視圖放在它最終要放的布局內,然後檢查系統框架根據MeasureSpecs測量規格給的值,最後構建測量代碼來處理這些特定的情況。
View Drawing(視圖的繪制)A custom view's other primary job is to draw its content. For this, you are given a blank Canvas via the onDraw() method. This Canvas is sized and positioned according to your measured view, so the origin matches up with the top-left of the view bounds. Canvas supports calls to draw shapes, colors, text, bitmaps, and more.
譯文:自定義視圖的另一個主要工作是繪制出它的內容。為此,通過復寫onDraw()方法,你將得到一個空白的canvas畫布。這個畫布的大小和位置已經根據你測量好的view指定好了,所以畫布的坐標原點與你的view視圖的左上角是重合的。該畫布可以用來畫各種形狀,顏色,文本,bitmap等等。
Many framework components such as Drawable images and text Layouts provide their own draw() methods to render their contents onto the Canvas directly; which we have taken advantage of in this example.
譯文:許多系統框架組件諸如圖片和文本布局等都提供了自己的draw()方法,來把他們的內容直接直接渲染到畫布上去;在本例中我們就利用了這個特點。
@Override
protected void onDraw(Canvas canvas) {
    if (mLeftDrawable != null) {
        mLeftDrawable.draw(canvas);
    }

    if (mTextLayout != null) {
        canvas.save();
        canvas.translate(mTextOrigin.x, mTextOrigin.y);

        mTextLayout.draw(canvas);

        canvas.restore();
    }

    if (mRightDrawable != null) {
        mRightDrawable.draw(canvas);
    }
}
Custom Attributes(自定義屬性)You may find yourself wanting to provide attributes to your custom view from within the layout XML. We can accomplish this by declaring a style-able block in the project resources. This block must contain all the attributes we would like to read from the layout XML.
譯文:你可能會發現自己希望從XML布局文件中提取屬性來設置到你的自定義視圖上。我們可以通過在資源文件中聲明style-able代碼塊來做到這一點。這個代碼塊必須包含所有我們想要從XML布局文件中讀取出來的屬性。
When possible, it is most efficient to reuse attributes already defined by the framework, as we have done here. We are utilizing existing text, and drawable attributes, to feed in the content sources and text styling information that the view should apply.
譯文:如果可以的話,重用系統框架已經定義好的屬性是最有效率的,就像我們現在做的這樣。我們正利用系統現有的文本和圖片屬性去表達自定義視圖所需要的內容資源及文本的樣式信息。
During view creation, we use theobtainStyledAttributes()method to extract the values of the attributes named in our style-able block. This method returns aTypedArrayinstance, which allows us to retrieve each attribute as the appropriate type; whether it be a Drawable, dimension, or color.
譯文:在創建視圖的過程中,我們使用obtainStyledAttributes()方法來提取style-able代碼塊中定義的屬性值。該方法返回一個TypedArray實例,它讓我們可以根據指定的類型來檢索拿到相應的屬性值,不管是圖片類型,尺寸類型還是顏色類型。
DON'T FORGET:TypedArrays are heavyweight objects that should be recycled immediately after all the attributes you need have been extracted.
切記:TypedArray是一個重量級對象,在你提取出所需的所有屬性之後應立即回收它。
public DoubleImageView(Context context, AttributeSet attrs, int defStyle) {
    super(context, attrs, defStyle);
    mTextPaint = new TextPaint(Paint.ANTI_ALIAS_FLAG);
    mTextOrigin = new Point(0, 0);

    TypedArray a = context.obtainStyledAttributes(attrs,
            R.styleable.DoubleImageView, 0, defStyle);

    Drawable d = a.getDrawable(R.styleable.DoubleImageView_android_drawableLeft);
    if (d != null) {
        setLeftDrawable(d);
    }

    d = a.getDrawable(R.styleable.DoubleImageView_android_drawableRight);
    if (d != null) {
        setRightDrawable(d);
    }

    int spacing = a.getDimensionPixelSize(
            R.styleable.DoubleImageView_android_spacing, 0);
    setSpacing(spacing);

    int color = a.getColor(R.styleable.DoubleImageView_android_textColor, 0);
    mTextPaint.setColor(color);

    int rawSize = a.getDimensionPixelSize(
            R.styleable.DoubleImageView_android_textSize, 0);
    mTextPaint.setTextSize(rawSize);

    CharSequence text = a.getText(R.styleable.DoubleImageView_android_text);
    setText(text);

    a.recycle();
}
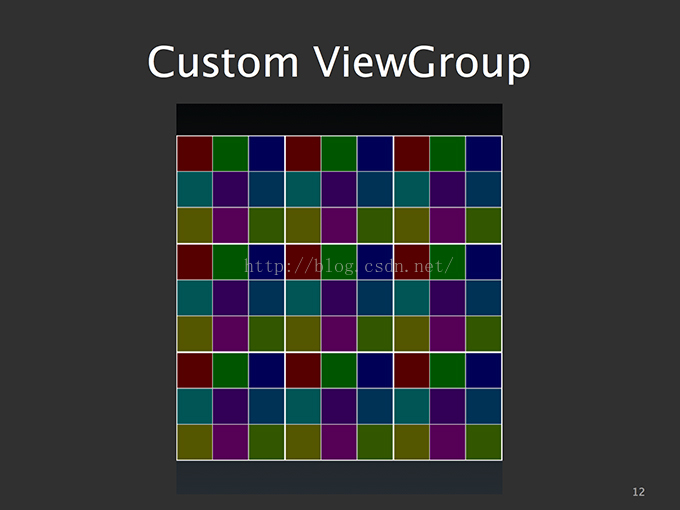
Custom ViewGroup(自定義ViewGroup)Now that we've seen how easy it is to build our own custom content into a view, what about building a custom layout manager? Widgets likeLinearLayoutandRelativeLayouthave A LOT of code in them to manage child views, so this must be really hard, right?
譯文:現在你看到了吧,搞一個自定義view是多麼容易的一件事,那搞一個自定義的布局管理器又如何呢?類似LinearLayout和RelativeLayout 這樣的控件它內部有很多的代碼去管理各種子視圖,看上去這一定是很難是嗎?
Hopefully this next example will convince you that this is not the case. Here we are going to build aViewGroupthat lays out all its child views with equal spacing in a 3x3 grid. This same effect could be accomplished by nesting LinearLayouts inside of LinearLayouts inside of LinearLayouts...creating a hierarchy many many levels deep. However, with just a little bit of effort we can drastically flatten that hierarchy into something much more performant.
譯文:我希望接下來的這個例子能讓你覺得,這其實並不難。接下來我們要搞一個自定義的ViewGroup,它將它的所有子視圖放置在相等間隔的3x3網格中。其實可以通過一層層地嵌套LinearLayouts…搞一個層級很深的結構來達到這樣的效果。然而,我們只需要一點點的努力就可以大大降低這種結構層級,從而使性能更加流暢。
ViewGroup Measurement(ViewGroup的測量)Just as with views, ViewGroups are responsible for measuring themselves. For this example we are computing the size of the ViewGroup using the framework'sgetDefaultSize()method, which essentially returns the size provided by the MeasureSpec in all cases except when an exact size requirement is imposed by the parent.
譯文:和view一樣,viewgroup也要測量他們自己。對於本例來說,我們計算ViewGroup的尺寸,用的是系統框架提供的getDefaultSize()方法,它實質上返回了所有情況下的由MeasureSpec提供的尺寸值,除非它的父控件強加給它一個精確的尺寸值。
ViewGroup has one more job during measurement, though; it must also tell all its child views to measure themselves. We want to have each view take up exactly 1/3 of both the containers height and width. This is done by constructing a new MeasureSpec with the computed fraction of the view size and the mode flag set toEXACTLY. This will notify each child view that they must be measured to exactly the size we are giving them.
譯文:ViewGroup在測量過程中還有一個額外工作要做,那就是它還必須告訴其所有子視圖來測量自己。我們想要每個子視圖占用整個容器高度和寬度的1/3。這是通過構造一個新的MeasureSpec對象來完成的,這個對象包含了計算好的視圖大小和設置為EXACTLY的測量模式。這就是要告知每個子視圖,他們必須要按我們給的精確尺寸來設置測量值。
One method of dispatching these commands it to call themeasure()method of every child view, but there are also helper methods inside ofViewGroupto simplify this process. In our example here we are callingmeasureChildren(), which applies the same spec to every child view for us. Of course, we are still required to mark our own dimensions as well, viasetMeasuredDimension(), before we return.
譯文:分發這些命令的一個方法就是分別去調用每個子視圖的measure()方法,在ViewGroup中也有一個更好的方法可以簡化這個過程。在我們的這個示例中,我們調用了ViewGroup 的 measureChildren()方法,它可以為我們將同樣的尺寸規范應用到每個子視圖身上。當然,在return之前,我們仍然需要通過調用setMeasuredDimension()方法來設置好自己的測量尺寸。
@Override
protected void onMeasure(int widthMeasureSpec, int heightMeasureSpec) {
    int widthSize, heightSize;

    //Get the width based on the measure specs
    widthSize = getDefaultSize(0, widthMeasureSpec);

    //Get the height based on measure specs
    heightSize = getDefaultSize(0, heightMeasureSpec);

    int majorDimension = Math.min(widthSize, heightSize);
    //Measure all child views
    int blockDimension = majorDimension / mColumnCount;
    int blockSpec = MeasureSpec.makeMeasureSpec(blockDimension,
            MeasureSpec.EXACTLY);
    measureChildren(blockSpec, blockSpec);

    //MUST call this to save our own dimensions
    setMeasuredDimension(majorDimension, majorDimension);
}
Layout(布局)After measurement, ViewGroups are also responsible for setting the BOUNDS of their child views via theonLayout()callback. With our fixed-size grid, this is pretty straightforward. We first determine, based on index, which row & column the view is in. We can then calllayout()on the child view to set its left, right, top, and bottom position values.
譯文:測量工作做完之後,viewgroup還需要通過onLayout()回調來設置其子視圖的邊界范圍。因為我們這裡都是固定尺寸的網格,所以相對來說比較簡單。我們首先可以根據index來確定一個視圖應該在哪一行哪一列。然後我們可以調用子視圖的layout()方法來設置其左,右,上,下值。
@Override
protected void onLayout(boolean changed, int l, int t, int r, int b) {
    int row, col, left, top;
    for (int i=0; i < getChildCount(); i++) {
        row = i / mColumnCount;
        col = i % mColumnCount;
        View child = getChildAt(i);
        left = col * child.getMeasuredWidth();
        top = row * child.getMeasuredHeight();

        child.layout(left,
                top,
                left + child.getMeasuredWidth(),
                top + child.getMeasuredHeight());
    }
}
Notice that inside layout we can use thegetMeasuredWidth()andgetMeasuredHeight()methods on the view. These will always be valid at this stage since the measurement pass comes before layout, and this is a handy way to set the bounding box of each child.
譯文:注意,在子視圖的layout()方法內部,我們可以使用子視圖的getMeasuredWidth()和getMeasuredHeight()方法。因為在layout布局之前就已經測量過了,因此在這個階段這些方法是永遠有效的。而且這也是一個很方便的設置每個子視圖邊界的途徑。
TIP:Measurement and layout can be as simple or complex as you make it. It is easy to get lost attempting to handle every possible configuration change that may affect how you lay out child views. Stick to writing code for the cases your application will actually encounter.
溫馨提示:測量和布局既可以很簡單,也可以很復雜的,就看你怎麼做。你很容易在試圖處理所有可能影響你如何布局子視圖的配置變化中迷失自己。你只要堅持為那些app真正會碰到的情況而寫代碼就可以了。
ViewGroup Drawing(ViewGroup的繪制)While ViewGroups don't generally draw any content of their own, there are many situations where this can be useful. There are two helpful instances where we can askViewGroupto draw.
譯文:雖然viewgroup通常不用繪制自己的任何內容,但是在很多情況下,這可能是有用的。這裡有兩個讓ViewGroup來繪制的有用的例子。
The first is inside ofdispatchDraw()after super has been called. At this stage, child views have been drawn, and we have an opportunity to do additional drawing on top. In our example, we are leveraging this to draw the grid lines over our box views.
譯文:第一個例子是在dispatchDraw()方法內部,在super.dispatchDraw()方法被調用之後,在這個階段,子視圖已經繪制出來了,我們可以在他們之上做額外的繪制了。在我們的示例中,我們就利用這個來繪制子視圖之上的網格線。
@Override
protected void dispatchDraw(Canvas canvas) {
    //Let the framework do its thing
    super.dispatchDraw(canvas);

    //Draw the grid lines
    for (int i=0; i <= getWidth(); i += (getWidth() / mColumnCount)) {
        canvas.drawLine(i, 0, i, getHeight(), mGridPaint);
    }
    for (int i=0; i <= getHeight(); i += (getHeight() / mColumnCount)) {
        canvas.drawLine(0, i, getWidth(), i, mGridPaint);
    }
}
The second is using the sameonDraw()callback as we saw before withView. Anything we draw here will be drawn before the child views, and thus will show up underneath them. This can be helpful for drawing any type of dynamic backgrounds or selector states.
譯文:第二個例子是使用之前我們看到過的和view相同的onDraw()回調方法。我們在這裡繪制的任何東西都會在子視圖被繪制出來之前,因此這些繪制出來的東西將會出現在子視圖的下面。這個特點對於繪制任何類型的動態背景或狀態選擇器是很有幫助的。
If you wish to put code in theonDraw()of aViewGroup, you must also remember to enable drawing callbacks withsetWillNotDraw(false). Otherwise youronDraw()method will never be triggered. This is because ViewGroups have self-drawing disabled by default.
譯文:如果你想在ViewGroup的onDraw()方法裡寫任何代碼,記住,你還需要調用一下setWillNotDraw(false)來使繪制的回調方法onDraw()可用。否則的話,你的onDraw()方法將永遠不會被觸發。這是因為viewgroup自動繪制是默認禁用的。
More Custom Attributes(更多的自定義屬性)So back to attributes for a moment. What if the attributes we want to feed into the view don't already exist in the platform, and it would be awkward to try and reuse one for a different purpose?
譯文:回到屬性這個話題,如果我們想給view視圖定義的屬性在系統中並不存在,而且嘗試和重用一個屬性來用於不同的目的這也顯得很尴尬,那這時我們該怎麼辦?
In that case, we can define custom attributes inside of our style-able block. The only difference here is that we must also define the type of data that attribute represents; something we did not need to do for the framework since it already has them pre-defined.
譯文:在這種情況下,我們可以在style-able代碼塊中自己定義新的屬性。唯一的區別是,現在我們還必須要定義屬性要表示的數據的類型;這在之前我們是不需要做的,因為系統框架已經定義好了。
Here, we are defining a dimension and color attribute to provide the styling for the box's grid lines via XML.
譯文:在這裡,我們通過XML文件定義了一個尺寸和顏色屬性,來為這個3x3網格線做樣式描述。
…
Now, we can apply these attributes externally in our layouts. Notice that attributes defined in our own application package require a separate namespace that points to our internal APK resources.
譯文:現在,我們可以在我們布局中引用這些外部定義的屬性了。需要注意的是,在我們自己app的包中定義的屬性需要一個單獨的命名空間,來指向我們內部的APK資源。
Notice also that our custom layout behaves no differently than the other layout widgets in the framework. We can simply add child views to it directly through the XML layout file.
譯文:還需要注意的是,我們的自定義布局和其他系統的布局在使用起來沒有任何差別。我們也可以在XML布局文件中直接添加子視圖。
…
Just for fun, we will even include the layout inside itself, to create the full 9x9 effect that you saw in the earlier screenshot. We have also defined a slightly thicker grid separator to distinguish the major blocks from the minor blocks.
譯文:純粹為了好玩的緣故,我們甚至可以在這個布局本身內部再包含這個布局,從而創建出一個完整的9x9網格的效果,正如你在前面看到的那個截圖一樣。我們還定義了一個稍微厚一點的網格分割線從而可以區分大的方塊和較小的方塊。
<framelayout android:layout_height="match_parent" android:layout_width="match_parent" xmlns:android="http://schemas.android.com/apk/res/android" xmlns:app="http://schemas.android.com/apk/res-auto">


</framelayout>
Thanks!I hope that now you can see how simple it is to get started building custom views and layouts. Reduced dependence on the framework widgets leads to better user interfaces and less clutter in your view hierarchy. Your users and your devices will thank you for it.
譯文:我希望現在你可以發現,開始構建自定義視圖和布局是一件多麼簡單的事情。減少對系統框架原生控件的依賴,將使你做出更加友好的UI界面,同時也會使你的視圖層級機構更合理規范。你的用戶和設備都將因此而感謝你。
Be sure to visit theGitHub linkto find the full examples shown here, as well as others to help you get comfortable building custom views.
一定要去看看我的github,裡面除了有我這裡講的所有示例之外還有些其他示例,他們能幫助你更好地構建自定義view。
Thanks for your time today, and I hope you learned something new!
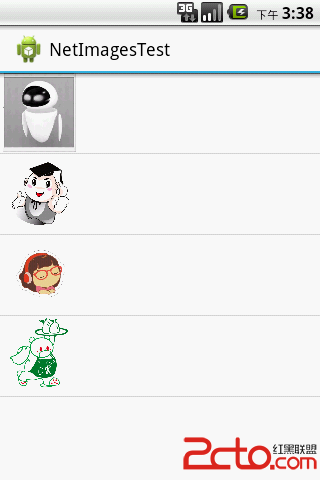 學習Android之SimpleAdapter顯示網絡圖片
效果圖: 此程序主要的知識點是:SimpleAdapter本身是不支持網絡圖片的, 如果在Map.put(a,b)中 b為一個Bitmap,程序不會報紅色字體
 Android - 位置定位(Location)服務(Service)類的基本操作
位置定位(Location)服務(Service)類的基本操作本文地址: http://blog.csdn.net/caroline_wendy定位服務(Location
 解決MySQL忘記密碼問題的方法
為大家提供的MySQL忘記密碼的解決方案,供大家參考,具體內容如下1.在操作系統windows操作系統,xp或win7.中進入如下目錄:復制代碼 代碼如下:C:\User
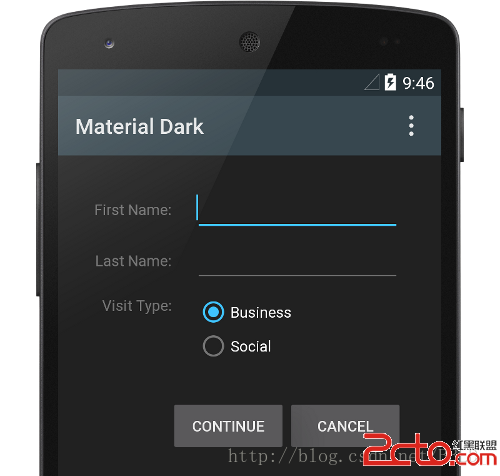 Android Material Design-Using the Material Theme(使用Material主題)-(二)
新的material主題提供了: l 可以讓你設置調色板的系統控件。 l 為控件(設計的)觸摸反饋動畫。 l Activity過渡動畫 你可以