編輯:關於Android編程
首先請讓我們看看沒有使用沉浸式的效果:
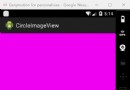
上面這張圖是沒有使用沉浸式的美團外賣,我們可以看到最上面的黑色的那一條就是狀態欄,大部分android默認是黑色底,白色字。
好了,下面讓我祭出使用了沉浸式以後的效果圖:
說回來吧,狀態欄(系統)跟我們的app的標題欄的顏色融為一體,非常美觀大方得體。而這樣就是我今天要介紹的效果。
這裡需要注意的的是:ISO很早以前原生就支持了沉浸式狀態欄,但是android要到API 19以上才有了支持,也就是說,API 19以下的手機是不能兼容的。如果你們的項目經理叫你們去適配API 19以下的手機,那你就可以告訴他唯一的解決的辦法就是要用戶去買一台API 19以上的手機,哈哈!為了能夠和ISO盡量統一風格,為了更加美觀大方,我們還是有必要學習一下沉浸式的實現方法。
這種方法主要是通過GitHub上面的一個開源庫實現,下面讓我原汁原味貼出項目的源碼:
//需要引入的類庫
compile 'com.readystatesoftware.systembartint:systembartint:1.0.4'

import android.annotation.TargetApi;
import android.app.Activity;
import android.os.Build;
import android.view.View;
import android.view.Window;
import android.view.WindowManager;

import com.readystatesoftware.systembartint.SystemBarTintManager;

import java.lang.reflect.Field;
import java.lang.reflect.Method;

/**
 * 設置狀態欄顏色的工具類
 */
public class TintBarUtils {

    /**
     * 設置activity的狀態欄顏色,注意需要在activity的布局當中添加屬性:android:fitsSystemWindows="true"
     *
     * @param activity
     * @param statusBarTintColor
     */
    public static void setStatusBarTintColor(Activity activity, int statusBarTintColor) {

        if (Build.VERSION.SDK_INT >= Build.VERSION_CODES.KITKAT) {
            setTranslucentStatus(true, activity);
            SystemBarTintManager mTintManager = new SystemBarTintManager(activity);
            mTintManager.setStatusBarTintEnabled(true);
            mTintManager.setNavigationBarTintEnabled(true);
            mTintManager.setTintColor(statusBarTintColor);

            setStatusBarTextStyle(activity, true);
        }
    }

    public static void setStatusBarTextStyle(Activity activity, boolean lightMode) {
        if (Build.VERSION.SDK_INT >= Build.VERSION_CODES.M) {
            if (lightMode) {
                activity.getWindow().getDecorView().setSystemUiVisibility(View.SYSTEM_UI_FLAG_LAYOUT_FULLSCREEN | View.SYSTEM_UI_FLAG_LIGHT_STATUS_BAR);
            }
        } else {
            MIUISetStatusBarLightMode(activity.getWindow(), lightMode);
            FlymeSetStatusBarLightMode(activity.getWindow(), lightMode);
        }
    }

    @TargetApi(19)
    private static void setTranslucentStatus(boolean on, Activity activity) {
        Window win = activity.getWindow();
        WindowManager.LayoutParams winParams = win.getAttributes();
        final int bits = WindowManager.LayoutParams.FLAG_TRANSLUCENT_STATUS;
        if (on) {
            winParams.flags |= bits;
        } else {
            winParams.flags &= ~bits;
        }
        win.setAttributes(winParams);
    }

    @TargetApi(19)
    public static void hideStatusBar(Activity activity) {

        if (Build.VERSION.SDK_INT >= Build.VERSION_CODES.KITKAT) {

            setTranslucentStatus(false, activity);

            SystemBarTintManager mTintManager = new SystemBarTintManager(activity);
            mTintManager.setStatusBarTintEnabled(false);
            mTintManager.setNavigationBarTintEnabled(false);

            Window win = activity.getWindow();
            WindowManager.LayoutParams winParams = win.getAttributes();
            final int bits = WindowManager.LayoutParams.FLAG_FULLSCREEN;
            winParams.flags &= ~bits;
            win.setAttributes(winParams);
        }
    }

    /**
     * 設置狀態欄圖標為深色和魅族特定的文字風格 * 可以用來判斷是否為Flyme用戶 * @param window 需要設置的窗口 * @param dark 是否把狀態欄字體及圖標顏色設置為深色 * @return boolean 成功執行返回true *
     */
    public static boolean FlymeSetStatusBarLightMode(Window window, boolean dark) {
        boolean result = false;
        if (window != null) {
            try {
                WindowManager.LayoutParams lp = window.getAttributes();
                Field darkFlag = WindowManager.LayoutParams.class.getDeclaredField("MEIZU_FLAG_DARK_STATUS_BAR_ICON");
                Field meizuFlags = WindowManager.LayoutParams.class.getDeclaredField("meizuFlags");
                darkFlag.setAccessible(true);
                meizuFlags.setAccessible(true);
                int bit = darkFlag.getInt(null);
                int value = meizuFlags.getInt(lp);
                if (dark) {
                    value |= bit;
                } else {
                    value &= ~bit;
                }
                meizuFlags.setInt(lp, value);
                window.setAttributes(lp);
                result = true;
            } catch (Exception e) {
                e.printStackTrace();
            }
        }
        return result;
    }

    /**
     * 設置狀態欄字體圖標為深色,需要MIUIV6以上
     *
     * @param window 需要設置的窗口
     * @param dark   是否把狀態欄字體及圖標顏色設置為深色
     * @return boolean 成功執行返回true
     */
    public static boolean MIUISetStatusBarLightMode(Window window, boolean dark) {
        boolean result = false;
        if (window != null) {
            Class clazz = window.getClass();
            try {
                int darkModeFlag = 0;
                Class layoutParams = Class.forName("android.view.MiuiWindowManager$LayoutParams");
                Field field = layoutParams.getField("EXTRA_FLAG_STATUS_BAR_DARK_MODE");
                darkModeFlag = field.getInt(layoutParams);
                Method extraFlagField = clazz.getMethod("setExtraFlags", int.class, int.class);
                if (dark) {
                    extraFlagField.invoke(window, darkModeFlag, darkModeFlag);//狀態欄透明且黑色字體 }else{ extraFlagField.invoke(window, 0, darkModeFlag);//清除黑色字體 } result=true; }catch (Exception e){ } } return result; }
                }
            } catch (Exception e) {
                e.printStackTrace();
            }
        }
        return result;
    }

}
這裡需要特別強調一點就是activity布局文件中的跟布局必須有下面這個屬性,否則我們的設置是沒有效果的:
android:fitsSystemWindows="true"
我們要關注的核心方法是setStatusBarTintColor,這個方法需要傳入一個Activity對象,以及顏色值,即可設置狀態欄的顏色。需要注意的是這個方法需要判斷當前的API版本是不是大於19才能使用。至於具體的實現,大家可以仔細看源碼。這裡只強調如何快速使用到你的項目當中。
但是這裡有一個尴尬的問題就是:當我們的APP標題欄是白色的時候,例如上面的第二張圖,如果我們設置了白色的狀態欄,那麼狀態辣女白色的文字將會看不到。解決的辦法比較棘手,我當時也是懵逼了好久,在項目經理的重壓之下還是找到了解決方案。在android M也就是API23以上,google官方提供了設置狀態欄文字風格的方法:
activity.getWindow().getDecorView().setSystemUiVisibility(View.SYSTEM_UI_FLAG_LAYOUT_FULLSCREEN | View.SYSTEM_UI_FLAG_LIGHT_STATUS_BAR);
為了向下兼容,小米和魅族兩個品牌由於深度定制過android的ROM,都提供了通過反射的方式是改變狀態欄的文字顏色。他們分別是:

MIUISetStatusBarLightMode和FlymeSetStatusBarLightMode,通過傳入的參數dark為true就可改變狀態欄文字顏色,至於怎麼改變,大家可以親自嘗試一下,這裡不再啰嗦。
方式2:布局的內容進入狀態欄如上面第三張圖所示,我們的contentView進入了狀態欄,這又是怎麼實現的呢?其實很簡單,只要把我們的布局延伸到狀態欄,並且添加一個高度為狀態欄高度的View(status_bar_top)或者上Padding即可。
protected int statusBarHeight;

@Override
protected void onCreate(Bundle savedInstanceState) {
    super.onCreate(savedInstanceState);
    immerseLayout();
}

protected void immerseLayout() {
    if (Build.VERSION.SDK_INT >= Build.VERSION_CODES.KITKAT) {
        Window window = getWindow();
        window.addFlags(WindowManager.LayoutParams.FLAG_TRANSLUCENT_STATUS);
        statusBarHeight = getStatusBarHeight(this.getBaseContext());
        viewStatusBarTop = findViewById(R.id.status_bar_top);
        RelativeLayout.LayoutParams params2 = (RelativeLayout.LayoutParams) viewStatusBarTop.getLayoutParams();
        params2.height = statusBarHeight;
        viewStatusBarTop.setLayoutParams(params2);
        viewStatusBarTop.setVisibility(View.VISIBLE);
    }
}

public int getStatusBarHeight(Context context) {
    if (statusBarHeight != 0)
        return statusBarHeight;

    int resourceId = context.getResources().getIdentifier("status_bar_height", "dimen", "android");
    if (resourceId > 0) {
        statusBarHeight = context.getResources().getDimensionPixelSize(resourceId);
    }
    return statusBarHeight;
}
下面給出這個activity的布局文件
<relativelayout xmlns:android="http://schemas.android.com/apk/res/android" android:layout_width="match_parent" android:layout_height="match_parent" android:fitssystemwindows="false">

    <view android:id="@+id/status_bar_top" android:layout_width="match_parent" android:layout_height="0dp" android:layout_alignparenttop="true" android:background="@drawable/status_bar" android:visibility="gone">

    。。。這裡是我們的布局

</view></relativelayout>
 android sdk 8-10M/S下載速度,有圖有教程
1.強制使用http替換https鏈接 Tools》選擇Options,勾選上”Use Download Cache”和”Force
 android Graphics( 五):drawText()詳解
前言:但行好事,莫問前程。只需努力每一天。一、概述1、四線格與基線小時候,我們在剛開始學習寫字母時,用的本子是四線格的,我們必須把字母按照規則寫在四線格內。比如:那麼問題
 Android實現三級聯動下拉框 下拉列表spinner的實例代碼
主要實現辦法:動態加載各級下拉值的適配器在監聽本級下拉框,當本級下拉框的選中值改變時,隨之修改下級的適配器的綁定值 &
 android RecyclerView布局真的只是那麼簡單!
如今android N都已經出來了,作為一個android開發者如果還不知道如何使用android5.X的 RecyclerView未免有點說不過去了。RecyclerV