編輯:關於Android編程
android Fragments詳解
Fragment是activity的界面中的一部分或一種行為。你可以把多個Fragment們組合到一個activity中來創建一個多面界面並且你可以在多個activity中重用一個Fragment。你可以把Fragment認為模塊化的一段activity,它具有自己的生命周期,接收它自己的事件,並可以在activity運行時被添加或刪除。
Fragment不能獨立存在,它必須嵌入到activity中,而且Fragment的生命周期直接受所在的activity的影響。例如:當activity暫停時,它擁有的所有的Fragment們都暫停了,當activity銷毀時,它擁有的所有Fragment們都被銷毀。然而,當activity運行時(在onResume()之後,onPause()之前),你可以單獨地操作每個Fragment,比如添加或刪除它們。當你在執行上述針對Fragment的事務時,你可以將事務添加到一個棧中,這個棧被activity管理,棧中的每一條都是一個Fragment的一次事務。有了這個棧,就可以反向執行Fragment的事務,這樣就可以在Fragment級支持“返回”鍵(向後導航)。
當向activity中添加一個Fragment時,它須置於ViewGroup控件中,並且需定義Fragment自己的界面。你可以在layout xml文件中聲明Fragment,元素為:fragment;也可以在代碼中創建Fragment,然後把它加入到ViewGroup控件中。然而,Fragment不一定非要放在activity的界面中,它可以隱藏在後台為actvitiy工作。
本章描述如何使用fragment,包括fragment在加入activity的後退棧中時如何保持自己的狀態,如何與activity以及其它fragment們共享事件,如何顯示在activity的動作欄,等等。
設計哲學
Android從3.0開始引入fragment,主要是為了支持更動態更靈活的界面設計,比如在平板上的應用。平板機上擁有比手機更大的屏幕空間來組合和交互界面組件們。Fragment使你在做那樣的設計時,不需應付view樹中復雜的變化。通過把activity的layout分成fragment,你可以在activity運行時改變它的樣子,並且可以在activity的後退棧中保存這些改變。
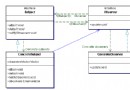
例如:寫一個讀新聞的程序,可以用一個fragment顯示標題列表,另一個fragment顯示選中標題的內容,這兩個fragment都在一個activity上,並排顯示。那麼這兩個fragment都有自己的生命周期並響應自己感興趣的事件。於是,不需再像手機上那樣用一個activity顯示標題列表,用另一個activity顯示新聞內容;現在可以把兩者放在一個activity上同時顯示出來。如下圖:

Fragment必須被寫成可重用的模塊。因為fragment有自己的layout,自己進行事件響應,擁有自己的生命周期和行為,所以你可以在多個activity中包含同一個Fragment的不同實例。這對於讓你的界面在不同的屏幕尺寸下都能給用戶完美的體驗尤其重要。比如你可以在程序運行於大屏幕中時啟動包含很多fragment的activity,而在運行於小屏幕時啟動一個包含少量fragment的activity。
舉個例子--還是剛才那個讀新聞的程序-當你檢測到程序運行於大屏幕時,啟動activityA,你將標題列表和新聞內容這兩個fragment都放在activityA中;當檢測到程序運行於小屏幕時,還是啟動activityA,但此時A中只有標題列表fragment,當選中一個標題時,activityA啟動activityB,B中含有新聞內容fragment。
創建Fragment
要創建fragment,必須從Fragment或Fragment的派生類派生出一個類。Fragment的代碼寫起來有些像activity。它具有跟activity一樣的回調方法,比如 onCreate(),onStart(),onPause()和onStZ喎?/kf/ware/vc/" target="_blank" class="keylink">vcCgpoaPKtbzKyc+jrMjnufvE48/rsNHAz7XEs8zQ8rjEzqrKudPDZnJhZ21lbnSjrLv5sb7Jz9a70OjSqrDRYWN0aXZpdHm1xLvYtfe3vbeotcS0+sLr0sa1vWZyYWdtZW501tC21NOmtcS3vbeovLS/yaGjPC9wPg0KPHA+zaizo9Do0qrKtc/W0tTPwsn6w/zW3Mbauq/K/aO6PC9wPg0KPHA+b25DcmVhdGUoKTo8L3A+DQo8cD61sbS0vahmcmFnbWVudMqxz7XNs7X308O0y7e9t6iho9TaxuTW0MTjsdjQ67P1yry7r2ZyYWdtZW50tcS7+bSh1+m8/sPHoaO/ybLOv7xhY3Rpdml0ebXEy7XD96GjPC9wPg0KPHA+b25DcmVhdGVWaWV3KCmjujwvcD4NCjxwPs+1zbPU2mZyYWdtZW500qq7rdfUvLq1xL3nw+bKsbX308OjqNTa1ebV/c/Uyr7Wrsewo6m0y7e9t6ihozxzdHJvbmc+1eK49re9t6ix2NDrt7W72GZyYW1lbnS1xGxheW91dLXEuPm/2Lz+oaPI57n71eK49mZyYWdtZW50srvM4bmpvefD5qOsxMfL/NOmt7W72G51bGyhozwvc3Ryb25nPjwvcD4NCjxwPm9uUGF1c2UoKaO6PC9wPg0KPHA+0+thY3Rpdml0edK70fmhozwvcD4NCjxwPrTztuDK/bPM0PLTptfuydm21GZyYWdtZW50yrXP1tXiyP249re9t6iho7WxyLu7udPQxuTL/Ly4uPa72LX3t723qL/J06a4w7C0x+m/9sq1z9bWrqGjPC9wPg0KPHA+z8LNvM6qZnJhZ21lbnS1xMn6w/zW3Mbao6jL/Mv51Nq1xGFjdGl2aXR5tKbT2tTL0NDXtMyso6mhozwvcD4NCjxwPjxpbWcgYWx0PQ=="fragment生命周期" src="/uploadfile/Collfiles/20150702/20150702083805129.gif" title="\" />
還有幾個現成的fragemtn的派生類,你可能需要從它們派生,如下所列:
DialogFragment
顯示一個浮動的對話框。使用這個類創建對話框是替代activity創建對話框的最佳選擇.因為你可以把fragmentdialog放入到activity的返回棧中,使用戶能再返回到這個對話框。
ListFragment
顯示一個列表控件,就像ListActivity類,它提供了很多管理列表的方法,比如onListItemClick()方法響應click事件。
PreferenceFragment
顯示一個由Preference對象組成的列表,與PreferenceActivity相同。它用於為程序創建“設置”activity。
為fragment添加用戶界面
fragment一般作為activity的用戶界面的一部分,把它自己的layout嵌入到activity的layout中。要為fragment提供layout,你必須實現onCreateView()回調方法,然後在這個方法中返回一個View對象,這個對象是fragment的layout的根。
注:如果你的fragment是從ListFragment中派生的,就不需要實現onCreateView()方法了,因為默認的實現已經為你返回了ListView控件對象。
要從onCreateView()方法中返回layout對象,你可以從layout xml中生成layout對象。為了幫助你這樣做,onCreateView()提供了一個LayoutInflater對象。
舉例:以下代碼展示了一個Fragment的子類如何從layout xml文件example_fragment.xml中生成對象。
public static class ExampleFragmentextendsFragment{
   @Override
  public View onCreateView (LayoutInflater inflater,ViewGroup container,Bundle savedInstanceState){
       //Inflate the layout for this fragment
       return inflater.inflate(R.layout.example_fragment,container,false);
   }
}
onCreateView()參數中的container是存放fragment的layout的ViewGroup對象。savedInstanceState參數是一個Bundle,跟activity的onCreate()中Bundle差不多,用於狀態恢復。但是fragment的onCreate()中也有Bundle參數,所以此處的Bundle中存放的數據與onCreate()中存放的數據還是不同的。
現在你看到如何為fragment創建layout了,下面講述如何把它添加到activity中。
把fragment添加到activity
一般情況下,fragment把它的layout作為activitiy的loyout的一部分合並到activity中,有兩種方法將一個fragment添加到activity中:
方法一:在activity的layoutxml文件中聲明fragment
如下代碼,一個activity中包含兩個fragment:
fragment中聲明一個fragment
當系統創建上例中的layout時,它實例化每一個fragment,然後調用它們的onCreateView()方法,以獲取每個fragment的layout。系統把fragment返回的view對象插入到元素的位置,直接代替元素。
注:每個fragment都需要提供一個ID,系統在activity重新創建時用它來恢復fragment們,你也可以用它來操作fragment進行其它的事物,比如刪除它。有三種方法給fragment提供ID:
1 為android:id屬性賦一個數字。
2 為android:tag屬性賦一個字符串。
3 如果你沒有使用上述任何一種方法,系統將使用fragment的容器的ID。
方法二:在代碼中添加fragment到一個ViewGroup
這種方法可以在運行時,把fragment添加到activity的layout中。你只需指定一個要包含fragment的ViewGroup。
為了完成fragment的事務(比如添加,刪除,替換等),你必須使用FragmentTransaction的方法。你可以從activity獲取到FragmentTransaction,如下:
FragmentManager fragmentManager = getFragmentManager();
FragmentTransaction fragmentTransaction =fragmentManager.beginTransaction();
然後你可以用add()方法添加一個fragment,它有參數用於指定容納fragment的ViewGroup。如下:
ExampleFragment fragment =newExampleFragment();
fragmentTransaction.add(R.id.fragment_container,fragment);
fragmentTransaction.commit();
Add()的第一個參數是容器ViewGroup,第二個是要添加的fragment。一旦你通過FragmentTransaction對fragment做出了改變,你必須調用方法commit()提交這些改變。
不僅在無界面的fragment中,在有界面的fragment中也可以使用tag來作為唯一標志,這樣在需要獲取fragment對象時,要調用findFragmentTag()。
添加一個沒有界面的fragment
上面演示了如何添加fragment來提供界面,然而,你也可以使用fragment為activity提供後台的行為而不用顯示fragment的界面。
要添加一個沒有界面的fragment,需在activity中調用方法add(Fragment,String)(它支持用一個唯一的字符串做為fragment的”tag”,而不是viewID)。這樣添加的fragment由於沒有界面,所以你在實現它時不需調用實現onCreateView()方法。
使用tag字符串來標識一個fragment並不是只能用於沒有界面的fragment上,你也可以把它用於有界面的fragment上,但是,如果一個fragment沒有界面,tag字符串將成為它唯一的選擇。獲取以tag標識的fragment,需使用方法findFragmentByTab()。
管理fragment
要管理fragment們,需使用FragmentManager,要獲取它,需在activity中調用方法getFragmentManager()。
你可以用FragmentManager來做以下事情:
1使用方法findFragmentById()或findFragmentByTag(),獲取activity中已存在的fragment們。
2使用方法popBackStack()從activity的後退棧中彈出fragment們(這可以模擬後退鍵引發的動作)。
3用方法addOnBackStackChangedListerner()注冊一個偵聽器以監視後退棧的變化。
4使用FragmentManager打開一個FragmentTransaction來執行fragment的事務,比如添加或刪除fragment。
執行Fragment的事務
在activity中使用fragment的一個偉大的好處是能跟據用戶的輸入對fragment進行添加、刪除、替換以及執行其它動作的能力。你提交的一組fragment的變化叫做一個事務。事務通過FragmentTransaction來執行。你還可以把每個事務保存在activity的後退棧中,這樣就可以讓用戶在fragment變化之間導航(跟在activity之間導航一樣)。
你可以通過FragmentManager來取得FragmentTransaction的實例,如下:
FragmentManager fragmentManager=getFragmentManager();
FragmentTransaction fragmentTransaction=fragmentManager.beginTransaction();
一個事務是在同一時刻執行的一組動作(很像數據庫中的事務)。你可以用add(),remove(),replace()等方法構成事務,最後使用commit()方法提交事務。
在調用commit()之前,你可以用addToBackStack()把事務添加到一個後退棧中,這個後退棧屬於所在的activity。有了它,就可以在用戶按下返回鍵時,返回到fragment們執行事務之前的狀態。
如下例:演示了如何用一個fragment代替另一個fragment,同時在後退棧中保存被代替的fragment的狀態。
//Create new fragment and transaction
Fragment newFragment=new ExampleFragment();
FragmentTransaction transaction=getFragmentManager().beginTransaction();

//Replace whatever is in the fragment_container view with thisfragment,
//and add the transaction to the backstack
transaction.replace(R.id.fragment_container,newFragment);
transaction.addToBackStack(null);

//Commit the transaction
transaction.commit();
解釋:newFragment代替了控件ID R.id.fragment_container所指向的ViewGroup中所含的任何fragment。然後調用addToBackStack(),此時被代替的fragment就被放入後退棧中,於是當用戶按下返回鍵時,事務發生回溯,原先的fragment又回來了。
如果你向事務添加了多個動作,比如多次調用了add(),remove()等之後又調用了addToBackStack()方法,那麼所有的在commit()之前調用的方法都被作為一個事務。當用戶按返回鍵時,所有的動作都被反向執行(事務回溯)。
事務中動作的執行順序可隨意,但要注意以下兩點:
1你必須最後調用commit()。
2如果你添加了多個fragment,那麼它們的顯示順序跟添加順序一至(後顯示的覆蓋前面的)。
如果你在執行的事務中有刪除fragment的動作,而且沒有調用addToBackStack(),那麼當事務提交時,那些被刪除的fragment就被銷毀了。反之,那些fragment就不會被銷毀,而是處於停止狀態。當用戶返回時,它們會被恢復。
對於fragment事務,你可以應用動畫。在commit()之前調用setTransition()就行。。
但是,調用commit()後,事務並不會馬上執行。它會在activity的UI線程(其實就是主線程)中等待直到線程能執行的時候才執行(廢話)。如果必要,你可以在UI線程中調用executePendingTransactions()方法來立即執行事務。但一般不需這樣做,除非有其它線程在等待事務的執行。
警告:你只能在activity處於可保存狀態的狀態時,比如running中,onPause()方法和onStop()方法中提交事務,否則會引發異常。這是因為fragment的狀態會丟失。如果要在可能丟失狀態的情況下提交事務,請使用commitAllowingStateLoss()。
android Fragments詳解五:與activity通訊
與activity通訊
盡管fragment的實現是獨立於activity的,可以被用於多個activity,但是每個activity所包含的是同一個fragment的不同的實例。
Fragment可以調用getActivity()方法很容易的得到它所在的activity的對象,然後就可以查找activity中的控件們(findViewById())。例如:
View listView =getActivity().findViewById(R.id.list);
同樣的,activity也可以通過FragmentManager的方法查找它所包含的frament們。例如:
ExampleFragment fragment=(ExampleFragment)getFragmentManager().findFragmentById(R.id.example_fragment
activity響應fragment的事件
有時,你可能需要fragment與activity共享事件。一個好辦法是在fragment中定義一個回調接口,然後在activity中實現之。
例如,還是那個新聞程序的例子,它有一個activity,activity中含有兩個fragment。fragmentA顯示新聞標題,fragmentB顯示標題對應的內容。fragmentA必須在用戶選擇了某個標題時告訴activity,然後activity再告訴fragmentB,fragmentB就顯示出對應的內容(為什麼這麼麻煩?直接fragmentA告訴fragmentB不就行了?也可以啊,但是你的fragment就減少了可重用的能力。現在我只需把我的事件告訴宿主,由宿主決定如何處置,這樣是不是重用性更好呢?)。如下例,OnArticleSelectedListener接口在fragmentA中定義:
public static class FragmentA extends ListFragment{
   ...
   //Container Activity must implement this interface
   public interface OnArticleSelectedListener{
       public void onArticleSelected(Uri articleUri);
   }
   ...
}
然後activity實現接口OnArticleSelectedListener,在方法onArticleSelected()中通知fragmentB。當fragment添加到activity中時,會調用fragment的方法onAttach(),這個方法中適合檢查activity是否實現了OnArticleSelectedListener接口,檢查方法就是對傳入的activity的實例進行類型轉換,如下所示:
public static class FragmentA extends ListFragment{
   OnArticleSelectedListener mListener;
   ...
   @Override
   public void onAttach(Activity activity){
       super.onAttach(activity);
       try{
           mListener =(OnArticleSelectedListener)activity;
       }catch(ClassCastException e){
           throw new ClassCastException(activity.toString()+must implement OnArticleSelectedListener);
       }
   }
   ...
}
如果activity沒有實現那個接口,fragment拋出ClassCastException異常。如果成功了,mListener成員變量保存OnArticleSelectedListener的實例。於是fragmentA就可以調用mListener的方法來與activity共享事件。例如,如果fragmentA是一個ListFragment,每次選中列表的一項時,就會調用fragmentA的onListItemClick()方法,在這個方法中調用onArticleSelected()來與activity共享事件,如下:
public static class FragmentA extends ListFragment{
   OnArticleSelectedListener mListener;
   ...
   @Override
   public void onListItemClick(ListView l,View v,int position,long id){
       //Append the clicked item's row ID with the content provider Uri
       Uri noteUri =ContentUris.withAppendedId(ArticleColumns.CONTENT_URI,id);
       //Send the event and Uri to the host activity
       mListener.onArticleSelected(noteUri);
   }
   ...
}
onListItemClick()傳入的參數id是列表的被選中的行ID,另一個fragment用這個ID來從程序的ContentProvider中取得標題的內容。
把條目添加到動作欄
你的fragment們可以向activity的菜單(按Menu鍵時出現的東西)添加項,同時也可向動作欄(界面中頂部的那個區域)添加條目,這都需通過實現方法onCreateOptionManu()來完成。
你從fragment添加到菜單的任何條目,都會出現在現有菜單項之後。Fragment之後可以通過方法onOptionsItemSelected()來響應自己的菜單項被選擇的事件。
你也可以在fragemnt中注冊一個view來提供快捷菜單(上下文菜單)。當用戶要打開快捷菜單時,fragment的onCreateContextMenu()方法會被調用。當用戶選擇其中一項時,fragemnt的onContextItemSelected()方法會被調用。
注:盡管你的fragment可以分別收到它所添加的菜單項的選中事件,但是activity才是第一個接收這些事件的家伙,只有當activity對某個事件置之不理時,fragment才能接收到這個事件,對於菜單和快捷菜單都是這樣。
處理fragement的生命周期
管理fragment的生命周期有些像管理activity的生命周期。Fragment可以生存在三種狀態:
Resumed:
Fragment在一個運行中的activity中並且可見。
Paused:
另一個activity處於最頂層,但是fragment所在的activity並沒有被完全覆蓋(頂層的activity是半透明的或不占據整個屏幕)。
Stoped:
Fragment不可見。可能是它所在的activity處於stoped狀態或是fragment被刪除並添加到後退棧中了。此狀態的fragment仍然存在於內存中。
同樣類似於activity,你可以把fragment的狀態保存在一個Bundle中,在activity被recreated時就需用到這個東西。你可以在onSaveInstanceState()方法中保存狀態並在onCreate()或onCreateView()或onActivityCreated()中恢復。
Fragment與Activity的生命周期中最大的不同就是存儲到後退棧中的過程。Activity是在停止時自動被系統壓入停止棧,並且這個棧是被系統管理的;而fragment是被壓入activity所管理的一個後退棧,並且只有你在刪除fragment後並明確調用addToBackStack()方法時才被壓入。
然而,管理fragment的生命周期與管理activity的生命周期極其相似。你所需要去思考的是activity的生命周期如何影響fragment的生命周期。

協調與activity生命周期的關系
Activity直接影響它所包含的fragment的生命周期,所以對activity的某個生命周期方法的調用也會產生對fragment相同方法的調用。例如:當activity的onPause()方法被調用時,它所包含的所有的fragment們的onPause()方法都會被調用。
Fragment比activity還要多出幾個生命周期回調方法,這些額外的方法是為了與activity的交互而設立,如下:
onAttach()
當fragment被加入到activity時調用(在這個方法中可以獲得所在的activity)。
onCreateView()
當activity要得到fragment的layout時,調用此方法,fragment在其中創建自己的layout(界面)。
onActivityCreated()
當activity的onCreated()方法返回後調用此方法。
onDestroyView()
當fragment的layout被銷毀時被調用。
onDetach()
當fragment被從activity中刪掉時被調用。
一旦activity進入resumed狀態(也就是running狀態),你就可以自由地添加和刪除fragment了。因此,只有當activity在resumed狀態時,fragment的生命周期才能獨立的運轉,其它時候是依賴於activity的生命周期變化的。
下例中實驗了上面所講的所有內容。
此例有一個activity,其含有兩個fragment。一個顯示莎士比亞劇的播放曲目,另一個顯示選中曲目的摘要。此例還演示了如何跟據屏幕大小配置fragment。
主activity創建layout。
@Override
protected void onCreate(Bundle savedInstanceState) {
   super.onCreate(savedInstanceState);

   setContentView(R.layout.fragment_layout);
}
主activity的layout xml文檔
    <framelayout android:background="?android:attr/detailsElementBackground" android:id="@+id/details" android:layout_height="match_parent" android:layout_weight="1" android:layout_width="0px">

</framelayout>
系統在activity加載此layout時初始化TitlesFragment(用於顯示標題列表),TitlesFragment的右邊是一個FrameLayout,用於存放顯示摘要的fragment,但是現在它還是空的,fragment只有當用戶選擇了一項標題後,摘要fragment才會被放到FrameLayout中。
然而,並不是所有的屏幕都有足夠的寬度來容納標題列表和摘要。所以,上述layout只用於橫屏,現把它存放於ret/layout-land/fragment_layout.xml。
之外,當用於豎屏時,系統使用下面的layout,它存放於ret/layout/fragment_layout.xml:
<framelayout android:layout_height="match_parent" android:layout_width="match_parent" xmlns:android="http://schemas.android.com/apk/res/android">

</framelayout>
這個layout只包含TitlesFragment。這表示當使用豎屏時,只顯示標題列表。當用戶選中一項時,程序會啟動一個新的activity去顯示摘要,而不是加載第二個fragment。
下一步,你會看到Fragment類的實現。第一個是TitlesFragment,它從ListFragment派生,大部分列表的功能由ListFragment提供。
當用戶選擇一個Title時,代碼需要做出兩種行為,一種是在同一個activity中顯示創建並顯示摘要fragment,另一種是啟動一個新的activity。
public static class TitlesFragment extends ListFragment {
    boolean mDualPane;
    int mCurCheckPosition = 0;

    @Override
    public void onActivityCreated(Bundle savedInstanceState) {
        super.onActivityCreated(savedInstanceState);

        // Populate list with our static array of titles.
        setListAdapter(new ArrayAdapter(getActivity(),
                android.R.layout.simple_list_item_activated_1, Shakespeare.TITLES));

        // Check to see if we have a frame in which to embed the details
        // fragment directly in the containing UI.
        View detailsFrame = getActivity().findViewById(R.id.details);
        mDualPane = detailsFrame != null && detailsFrame.getVisibility() == View.VISIBLE;

        if (savedInstanceState != null) {
            // Restore last state for checked position.
            mCurCheckPosition = savedInstanceState.getInt(curChoice, 0);
        }

        if (mDualPane) {
            // In dual-pane mode, the list view highlights the selected item.
            getListView().setChoiceMode(ListView.CHOICE_MODE_SINGLE);
            // Make sure our UI is in the correct state.
            showDetails(mCurCheckPosition);
        }
    }

    @Override
    public void onSaveInstanceState(Bundle outState) {
        super.onSaveInstanceState(outState);
        outState.putInt(curChoice, mCurCheckPosition);
    }

    @Override
    public void onListItemClick(ListView l, View v, int position, long id) {
        showDetails(position);
    }

    /**
     * Helper function to show the details of a selected item, either by
     * displaying a fragment in-place in the current UI, or starting a
     * whole new activity in which it is displayed.
     */
    void showDetails(int index) {
        mCurCheckPosition = index;

        if (mDualPane) {
            // We can display everything in-place with fragments, so update
            // the list to highlight the selected item and show the data.
            getListView().setItemChecked(index, true);

            // Check what fragment is currently shown, replace if needed.
            DetailsFragment details = (DetailsFragment)
                    getFragmentManager().findFragmentById(R.id.details);
            if (details == null || details.getShownIndex() != index) {
                // Make new fragment to show this selection.
                details = DetailsFragment.newInstance(index);

                // Execute a transaction, replacing any existing fragment
                // with this one inside the frame.
                FragmentTransaction ft = getFragmentManager().beginTransaction();
                ft.replace(R.id.details, details);
                ft.setTransition(FragmentTransaction.TRANSIT_FRAGMENT_FADE);
                ft.commit();
            }

        } else {
            // Otherwise we need to launch a new activity to display
            // the dialog fragment with selected text.
            Intent intent = new Intent();
            intent.setClass(getActivity(), DetailsActivity.class);
            intent.putExtra(index, index);
            startActivity(intent);
        }
    }
第二個fragment,DetailsFragment顯示被選擇的Title的摘要:
public static class DetailsFragment extends Fragment {
    /**
     * Create a new instance of DetailsFragment, initialized to
     * show the text at 'index'.
     */
    public static DetailsFragment newInstance(int index) {
        DetailsFragment f = new DetailsFragment();

        // Supply index input as an argument.
        Bundle args = new Bundle();
        args.putInt(index, index);
        f.setArguments(args);

        return f;
    }

    public int getShownIndex() {
        return getArguments().getInt(index, 0);
    }

    @Override
    public View onCreateView(LayoutInflater inflater, ViewGroup container,
            Bundle savedInstanceState) {
        if (container == null) {
            // We have different layouts, and in one of them this
            // fragment's containing frame doesn't exist.  The fragment
            // may still be created from its saved state, but there is
            // no reason to try to create its view hierarchy because it
            // won't be displayed.  Note this is not needed -- we could
            // just run the code below, where we would create and return
            // the view hierarchy; it would just never be used.
            return null;
        }

        ScrollView scroller = new ScrollView(getActivity());
        TextView text = new TextView(getActivity());
        int padding = (int)TypedValue.applyDimension(TypedValue.COMPLEX_UNIT_DIP,
                4, getActivity().getResources().getDisplayMetrics());
        text.setPadding(padding, padding, padding, padding);
        scroller.addView(text);
        text.setText(Shakespeare.DIALOGUE[getShownIndex()]);
        return scroller;
    }
}
如果當前的layout沒有R.id.detailsView(它被用於DetailsFragment的容器),那麼程序就啟動DetailsActivity來顯示摘要。
下面是DetailsActivity,它只是簡單地嵌入DetailsFragment來顯示摘要。
public static class DetailsActivity extends Activity {

    @Override
    protected void onCreate(Bundle savedInstanceState) {
        super.onCreate(savedInstanceState);

        if (getResources().getConfiguration().orientation
                == Configuration.ORIENTATION_LANDSCAPE) {
            // If the screen is now in landscape mode, we can show the
            // dialog in-line with the list so we don't need this activity.
            finish();
            return;
        }

        if (savedInstanceState == null) {
            // During initial setup, plug in the details fragment.
            DetailsFragment details = new DetailsFragment();
            details.setArguments(getIntent().getExtras());
            getFragmentManager().beginTransaction().add(android.R.id.content, details).commit();
        }
    }
}
注意這個activity在檢測到是豎屏時會結束自己,於是主activity會接管它並顯示出TitlesFragment和DetailsFragment。這可以在用戶在豎屏時顯示在TitleFragment,但用戶旋轉了屏幕,使顯示變成了橫屏。
 Android 底部TabActivity(1)——FragmentActivity
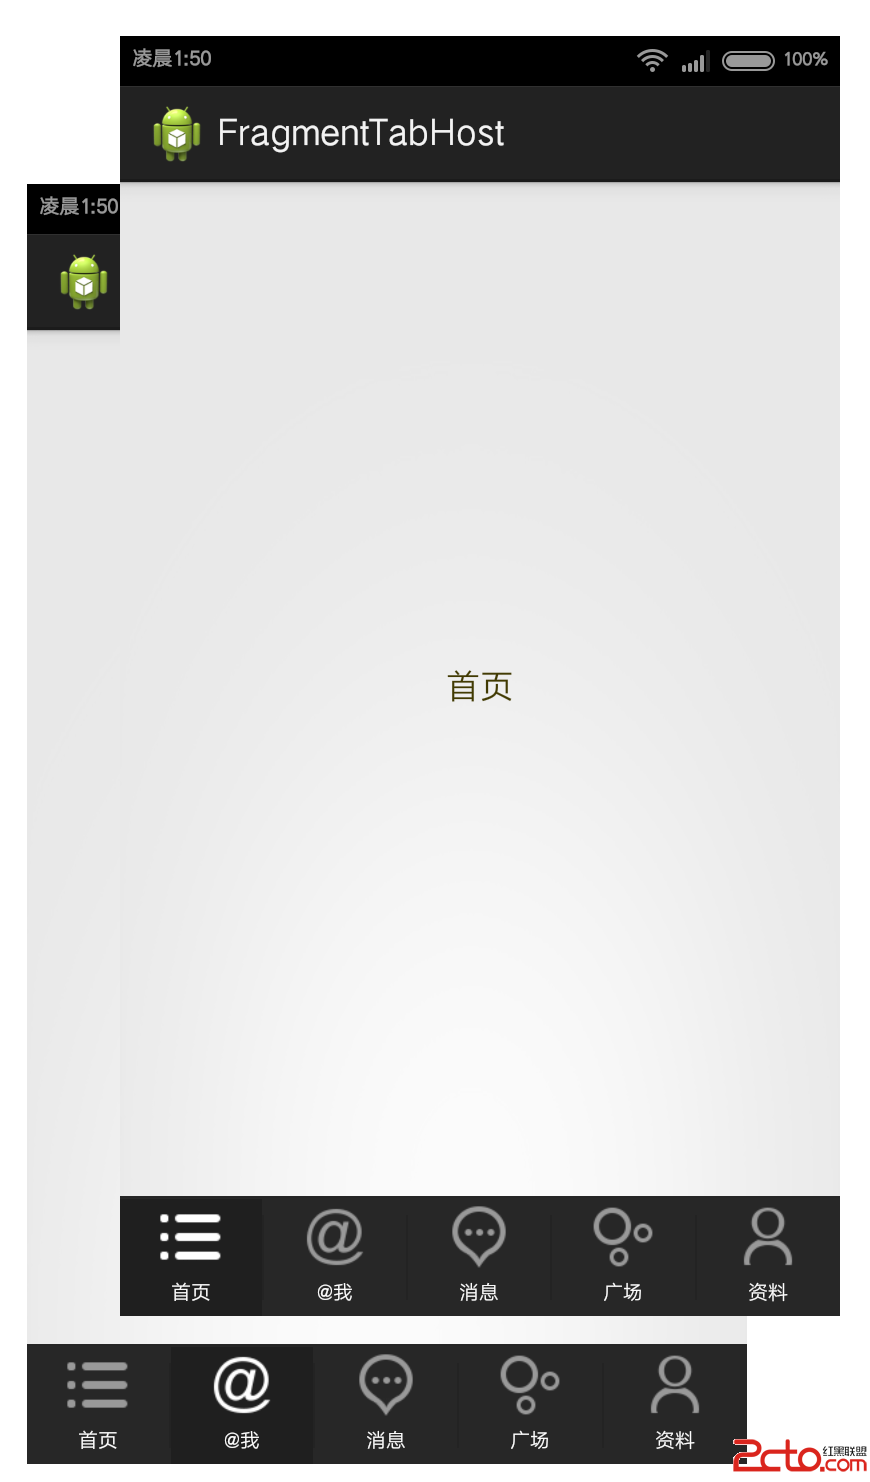
先看看效果圖: 第一篇Tab系列的文章首先實現這種風格的底部Tab:背景條顏色不變,我們是用了深灰的顏色,圖標會發生相應的變化,當選中某個標簽後該標簽的背
 Android 編程下的代碼混淆
什麼是代碼混淆 Java 是一種跨平台的、解釋型語言,Java 源代碼編譯成中間”字節碼”存儲於 class 文件中。由於跨平台的需要,Java
 微信小視頻保存路徑地址介紹
大家都發過微信小視頻到朋友圈,有時候,想看看以前自己發的小視頻,但是發現朋友圈的動態已經刪除了,那麼這樣怎麼去找回微信小視頻呢?微信小視頻保存在哪裡呢?下面
 Day34-Animation 動畫
根據人眼視覺殘留現象,連續播放一些列的圖像,形成動畫效果。Android中的動畫:游戲:利用自定義View的繪制方法,開啟線程頻繁的刷新界面,形成動畫; Android