編輯:關於android開發
本人是。NET出身 但苦於領導要讓研究Android 外殼然後准備套html5 ,當試驗兵真坑啊 但也沒辦法 咱還得研究啊,索性 不辜負領導的期望(也研究好兩三天了)總算弄明白了 app本地存儲 和 Android Studio 調用 Webservice 了,中間出現了好幾處問題 ,自己也百度了好久 都沒有解決我的問題,且它們那些答案都是復制粘貼下根本就沒有測試可不可以 就貼出來了 這我就很氣憤啊 下面為了給和我一樣的新手和想研究的各位一點便利,把自己遇到的問題與如何解決分享下 以便自己也加深印象。
如有不對了還請不要噴 請@我呦!
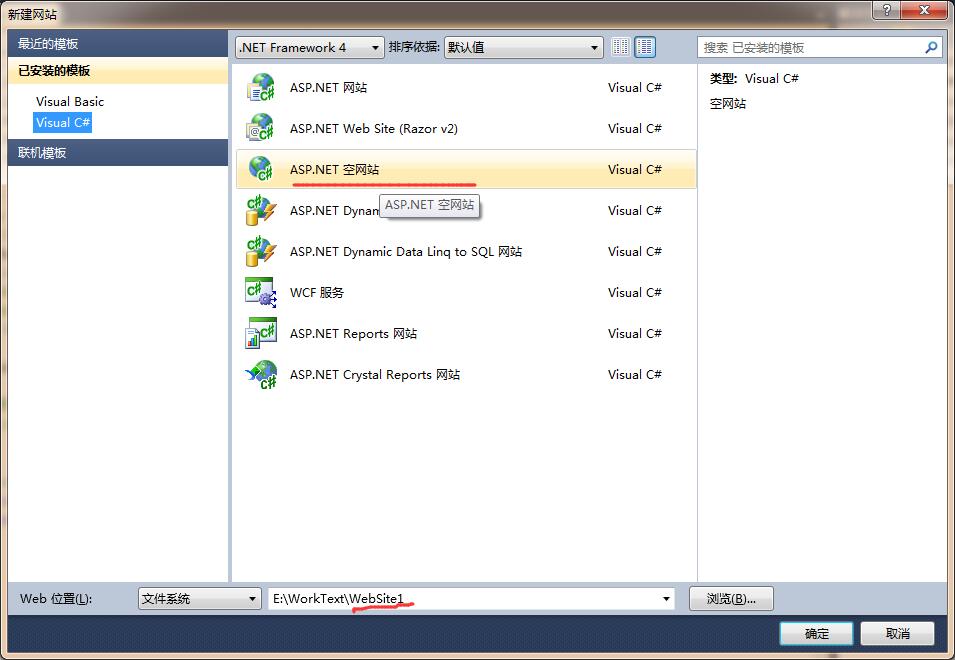
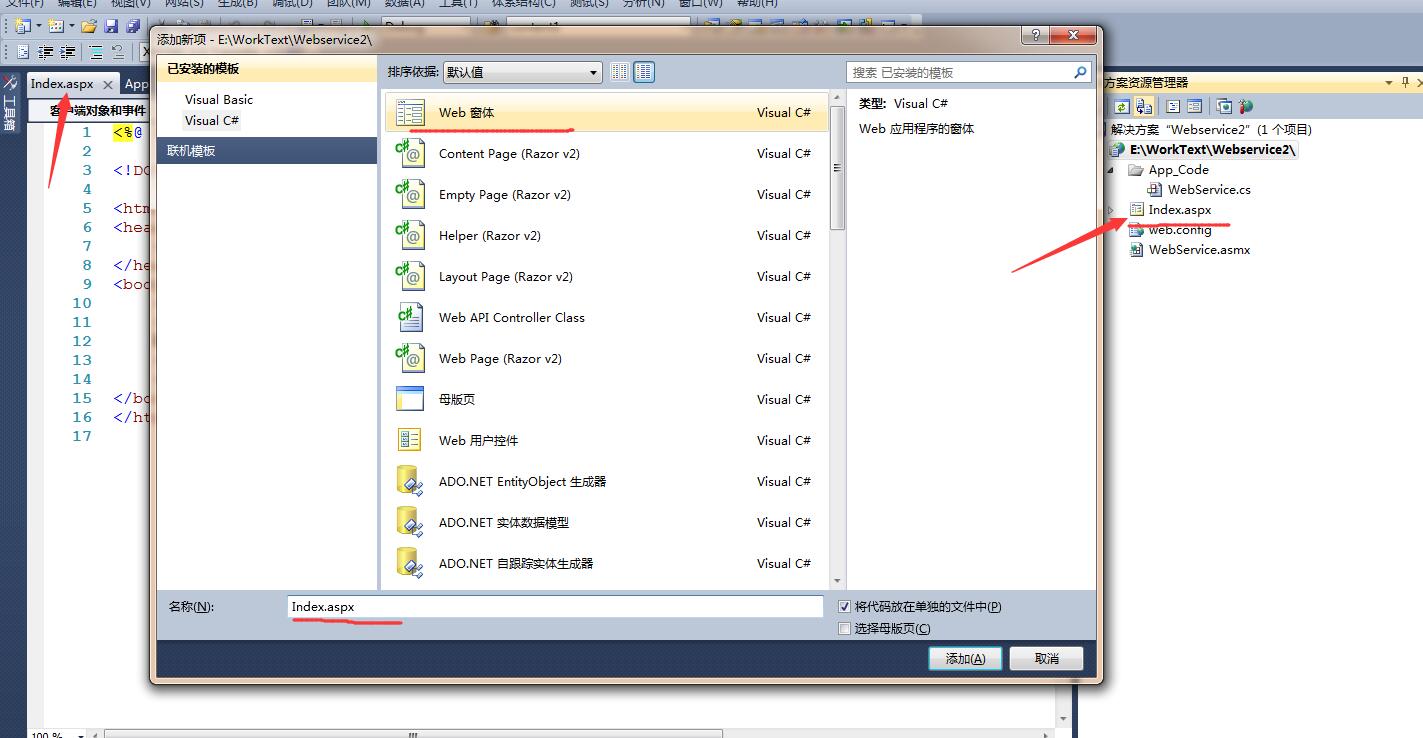
1.首先本人做的也是簡單webserivce且能調試通就可以,所以新建了一個空網站:
名字可以隨便取的啦。
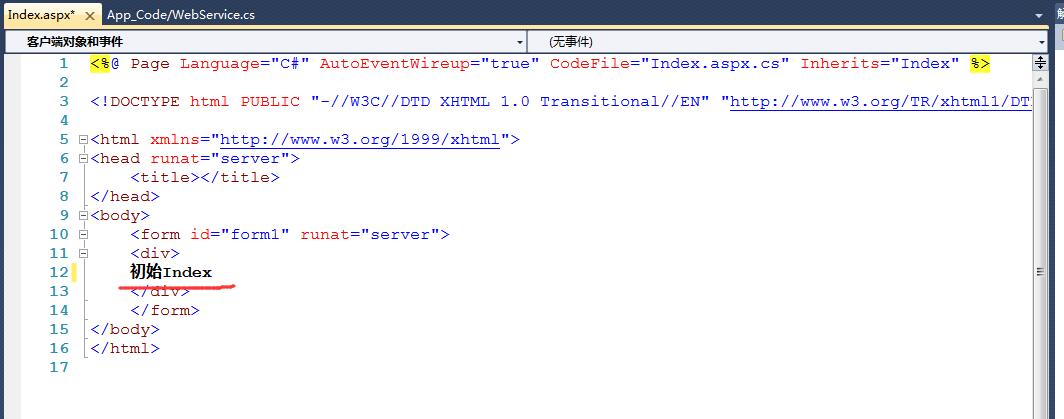
2.最好在建立一個web窗體,這樣你在發布的時候就有個初始的頁面了,不至於沒有初始頁面。
裡面文字隨便寫下:初始Index
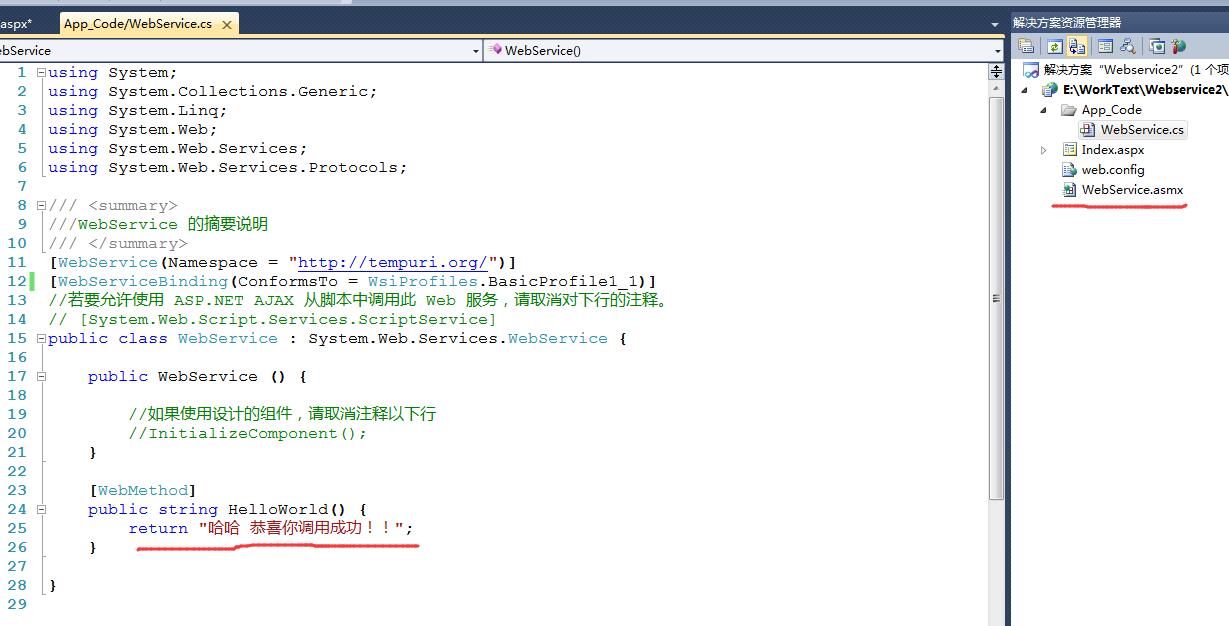
3.新建一個WebService 服務:便於測試 隨便返回幾個文字就好:
以上就是C# VS webservice的創建了,下面才是重頭戲:Android Studio開始
在寫代碼之前需要下載並導入jar 工具類包。
Google為Android平台開發Web Service客戶端提供了ksoap2-android項目,但這個項目並未直接集成在Android平台中,還需要開發人員自行下載。為Android應用增加ksoap2-android運行請按如下步驟進行:
1.1 登錄http://simpligility.github.io/ksoap2-android/getting-started.html站點,下拉一直到如下界面。(另:再見,Google Code,你好,GitHub)
此時最新為3.6.1,我下載的是3.3.0。
1.2 切換到Project面板
將ksoap2JAR包直接復制粘貼到app->libs目錄下
右鍵Add as Library…,彈出對話框,OK就行了。
<?xml version="1.0" encoding="utf-8"?>
<RelativeLayout xmlns:android="http://schemas.android.com/apk/res/android"
xmlns:tools="http://schemas.android.com/tools"
android:layout_width="match_parent"
android:layout_height="match_parent"
android:paddingBottom="@dimen/activity_vertical_margin"
android:paddingLeft="@dimen/activity_horizontal_margin"
android:paddingRight="@dimen/activity_horizontal_margin"
android:paddingTop="@dimen/activity_vertical_margin"
tools:context="com.example.user.app_webservice3.MainActivity">
<TextView
android:layout_width="wrap_content"
android:layout_height="wrap_content"
android:text="Hello World!"
android:id="@+id/textView" />
<Button
android:layout_width="wrap_content"
android:layout_height="wrap_content"
android:text="顯示"
android:id="@+id/button"
android:layout_below="@+id/textView"
android:layout_alignParentLeft="true"
android:layout_alignParentStart="true"
android:layout_marginTop="109dp" />
</RelativeLayout>
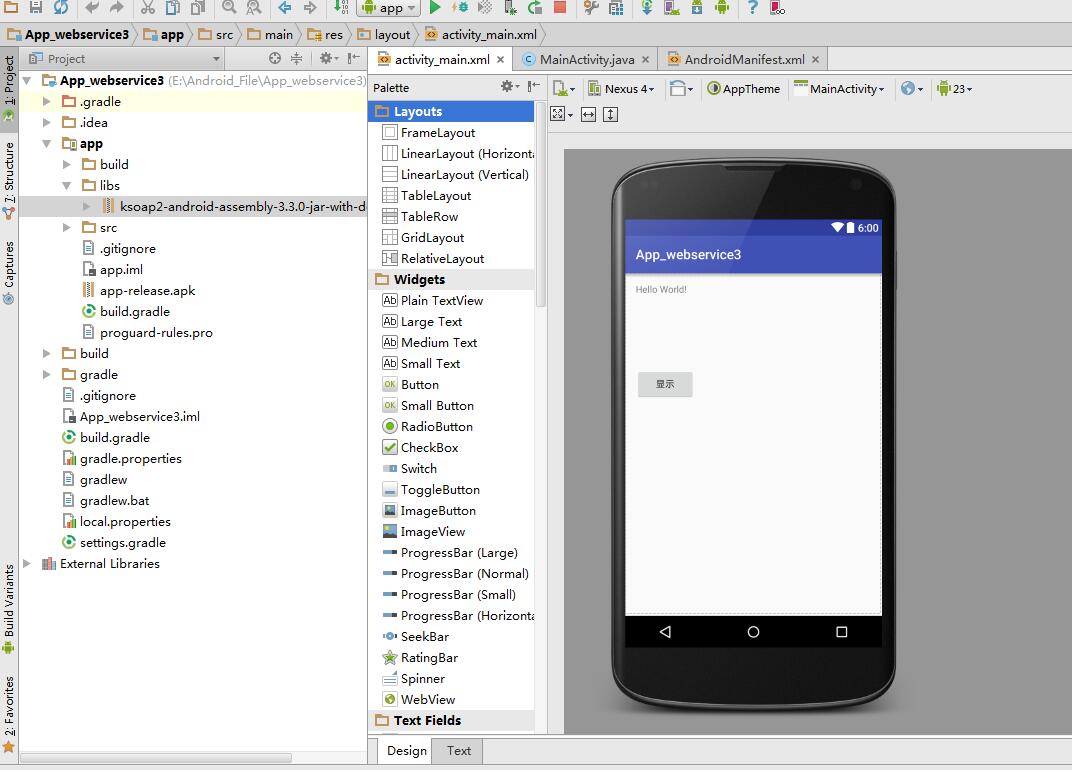
design界面如下圖所示:
4. MainActivity.java
//訪問網絡同時加入這個 @SuppressLint("NewApi")
 protected void onCreate(Bundle savedInstanceState) {
//允許使用webervice同時啟用網絡訪問
     StrictMode.ThreadPolicy policy=new StrictMode.ThreadPolicy.Builder().permitAll().build();
     StrictMode.setThreadPolicy(policy);
     super.onCreate(savedInstanceState);
     setContentView(R.layout.activity_main);
    queryButton = (Button) findViewById(R.id.button);
    queryButton.setOnClickListener(new OnClickListener() {
@Override
public void onClick(View v) {
getRemoteInfo();
}
}); }
public void getRemoteInfo() {
    // 命名空間     String nameSpace = "http://tempuri.org/";
     // 調用的方法名稱     String methodName = "HelloWorld";
     // EndPoint     String endPoint = "http://192.168.16.39:1215/WebService.asmx";
     // SOAP Action     String soapAction = "http://tempuri.org//HelloWorld/";
    // 指定WebService的命名空間和調用的方法名
    SoapObject rpc = new SoapObject(nameSpace, methodName);
    // 設置需調用WebService接口需要傳入的兩個參數mobileCode、userId
    //rpc.addProperty("mobileCode", phoneSec);
    //rpc.addProperty("userId", "");
    // 生成調用WebService方法的SOAP請求信息,並指定SOAP的版本
    SoapSerializationEnvelope envelope = new SoapSerializationEnvelope(SoapEnvelope.VER12);
    envelope.bodyOut = rpc;
     // 設置是否調用的是dotNet開發的WebService
     envelope.dotNet = true;
     (new MarshalBase64()).register(envelope);
    // 等價於envelope.bodyOut = rpc;
    envelope.setOutputSoapObject(rpc);
    HttpTransportSE transport = new HttpTransportSE(endPoint);
     transport.debug=true;
     try {
        // 調用WebService
        transport.call(soapAction, envelope);
        if (envelope.getResponse() != null) {
            System.out.println(envelope.getResponse());
            result = String.valueOf(envelope.getResponse());
             Toast.makeText(MainActivity.this, result, Toast.LENGTH_SHORT)                     .show();
        }     } catch (Exception e) {         e.printStackTrace();     }
報錯總結:
調用webserivce時返回錯誤:服務器未能識別 HTTP 頭 SOAPAction 的值: http://tempuri.org/HelloWorld/......省略。
請根據請求的本地webservice SOAP版本來設置值:
如果為SOAP 1.2的請求和響應示例 那麼SoapEnvelope 也需要改 :12 如不行試試11或10;
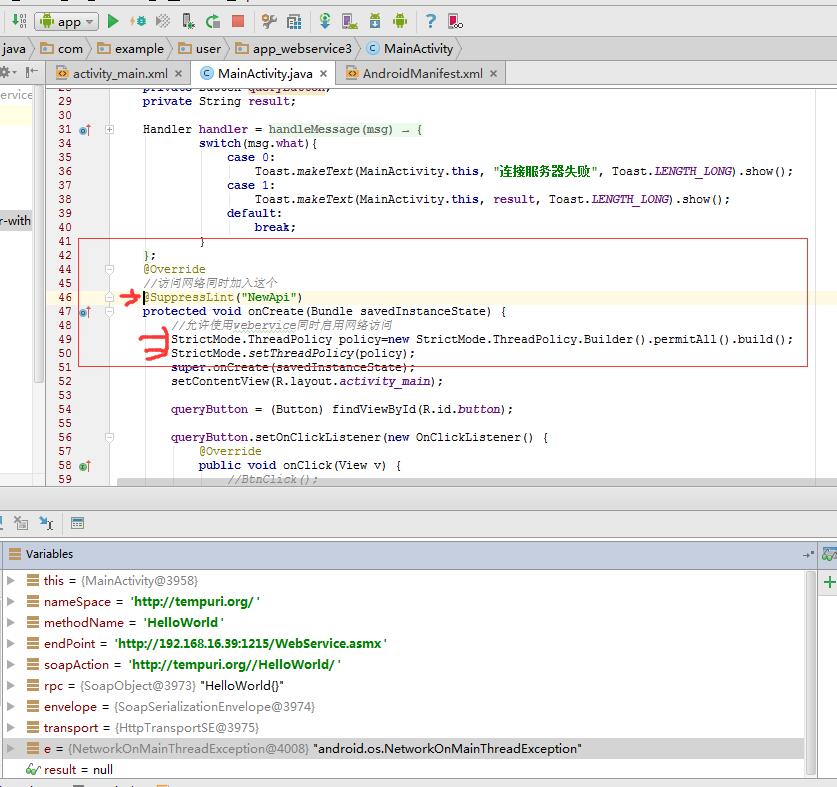
另外一個報錯:android.os.NetworkOnMainThreadException :是網絡請求在MainThread中產生的異常
原因是在onCreate()方法中不能同時使用網絡訪問
搜索原因說,從Honeycomb SDK(3.0)開始,google不再允許網絡請求(HTTP、Socket)等相關操作直接在Main Thread類中,其實本來就不應該這樣做,
直接在UI線程進行網絡操作,會阻塞UI、用戶體驗相當bad!
現在我的代碼已解決這個問題,使之不用線程也可以調用,簡單測試可以,如果擁於大項目請詳細查詢 我就不多說了。
 OuNews 簡單的新聞客戶端應用源碼,ounews源碼
OuNews 簡單的新聞客戶端應用源碼,ounews源碼 一直想練習MVP模式開發應用,把學習的RxJava、Retrofit等熱門的開源庫結合起來,
 AndroidStudio項目提交(更新)到github最詳細步驟
AndroidStudio項目提交(更新)到github最詳細步驟 在使用studio開發的項目過程中有時候我們想將項目發布到github上,以前都是用一種比較麻煩的方式
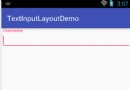 Android Design Support Library——TextInputLayout,designsupportlibrary
Android Design Support Library——TextInputLayout,designsupportlibrary前沿 上一篇介紹了Naviga
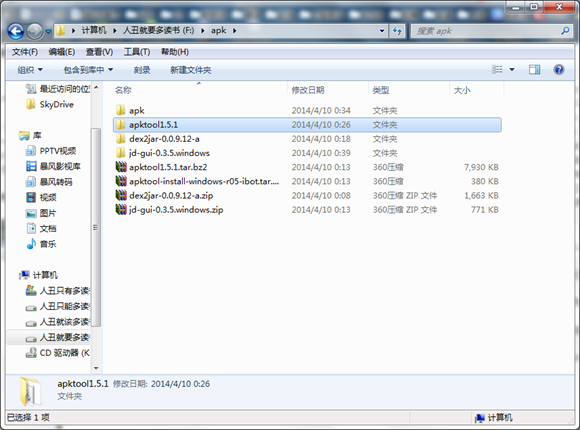 Android程序apk反編譯破解方法,androidapk
Android程序apk反編譯破解方法,androidapk簡短不割了,我們直接奔主題吧。 把apktool-install-windows-r05-ibot文件裡的兩個