編輯:關於android開發
If your unit test has no dependencies or only has simple dependencies on Android, you should run your test on a local development machine. This testing approach is efficient because it helps you avoid the overhead of loading the target app and unit test code onto a physical device or emulator every time your test is run. Consequently, the execution time for running your unit test is greatly reduced. With this approach, you normally use a mocking framework, like Mockito, to fulfill any dependency relationships.
In your Android Studio project, you must store the source files for local unit tests at module-name/src/test/java/. This directory already exists when you create a new project.
You also need to configure the testing dependencies for your project to use the standard APIs provided by the JUnit 4 framework. If your test needs to interact with Android dependencies, include theMockito library to simplify your local unit tests. To learn more about using mock objects in your local unit tests, see Mocking Android dependencies.
In your app's top-level build.gradle file, you need to specify these libraries as dependencies:
dependencies {
    // Required -- JUnit 4 framework
    testCompile 'junit:junit:4.12'
    // Optional -- Mockito framework
    testCompile 'org.mockito:mockito-core:1.10.19'
}
Your local unit test class should be written as a JUnit 4 test class. JUnit is the most popular and widely-used unit testing framework for Java. The latest version of this framework, JUnit 4, allows you to write tests in a cleaner and more flexible way than its predecessor versions. Unlike the previous approach to Android unit testing based on JUnit 3, with JUnit 4, you do not need to extend the junit.framework.TestCase class. You also do not need to prefix your test method name with the ‘test’ keyword, or use any classes in the junit.framework or junit.extensions package.
//JUnit是最流行的和廣泛使用的Java測試框架。最近的版本Junit4比之前的版本都更加簡潔和流暢。你也不需要繼承TestCase類,你也不需要強制讓測試方法的前綴為test
To create a basic JUnit 4 test class, create a Java class that contains one or more test methods. A test method begins with the @Test annotation and contains the code to exercise and verify a single functionality in the component that you want to test.
The following example shows how you might implement a local unit test class. The test method emailValidator_CorrectEmailSimple_ReturnsTrueverifies that the isValidEmail() method in the app under test returns the correct result.
import org.junit.Test;
import java.util.regex.Pattern;
import static org.junit.Assert.assertFalse;
import static org.junit.Assert.assertTrue;

public class EmailValidatorTest {

    @Test
    public void emailValidator_CorrectEmailSimple_ReturnsTrue() {
        assertThat(EmailValidator.isValidEmail("[email protected]"), is(true));
    }
    ...
}
To test that components in your app return the expected results, use the junit.Assert methods to perform validation checks (or assertions) to compare the state of the component under test against some expected value. To make tests more readable, you can use Hamcrest matchers (such as the is() and equalTo() methods) to match the returned result against the expected result.
By default, the Android Plug-in for Gradle executes your local unit tests against a modified version of the android.jar library, which does not contain any actual code. Instead, method calls to Android classes from your unit test throw an exception.
You can use a mocking framework to stub out external dependencies in your code, to easily test that your component interacts with a dependency in an expected way. By substituting Android dependencies with mock objects, you can isolate your unit test from the rest of the Android system while verifying that the correct methods in those dependencies are called. The Mockito mocking framework for Java (version 1.9.5 and higher) offers compatibility with Android unit testing. With Mockito, you can configure mock objects to return some specific value when invoked.
To add a mock object to your local unit test using this framework, follow this programming model:
The following example shows how you might create a unit test that uses a mock Context object.
import static org.hamcrest.MatcherAssert.assertThat;
import static org.hamcrest.CoreMatchers.*;
import static org.mockito.Mockito.*;
import org.junit.Test;
import org.junit.runner.RunWith;
import org.mockito.Mock;
import org.mockito.runners.MockitoJUnitRunner;
import android.content.SharedPreferences;

@RunWith(MockitoJUnitRunner.class)
public class UnitTestSample {

    private static final String FAKE_STRING = "HELLO WORLD";

    @Mock
    Context mMockContext;

    @Test
    public void readStringFromContext_LocalizedString() {
        // Given a mocked Context injected into the object under test...
        when(mMockContext.getString(R.string.hello_word))
                .thenReturn(FAKE_STRING);
        ClassUnderTest myObjectUnderTest = new ClassUnderTest(mMockContext);

        // ...when the string is returned from the object under test...
        String result = myObjectUnderTest.getHelloWorldString();

        // ...then the result should be the expected one.
        assertThat(result, is(FAKE_STRING));
    }
}
To learn more about using the Mockito framework, see the Mockito API reference and the SharedPreferencesHelperTest class in the sample code.
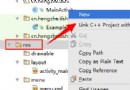
To run your local unit tests, follow these steps:
The Android Plugin for Gradle compiles the local unit test code located in the default directory (src/test/java/), builds a test app, and executes it locally using the default test runner class. Android Studio then displays the results in the Run window.
 Android自定義Dialog簡單實例
Android自定義Dialog簡單實例 做Android應用中,最缺少不了的就是自定義Dialog,對於系統默認提供的Dialog樣式,一般都不復合我們應用的樣式。
 編譯器開發系列--Ocelot語言5.表達式的有效性檢查,--ocelot有效性
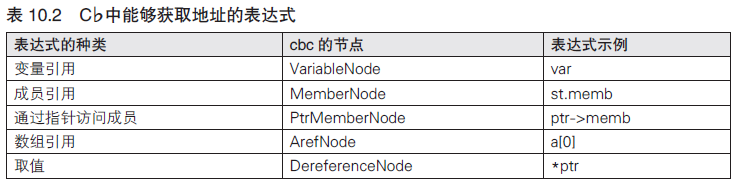
編譯器開發系列--Ocelot語言5.表達式的有效性檢查,--ocelot有效性本篇將對“1=3”“&5”這樣無法求值的不正確的表達式進行檢查。 將檢查如下這些問
 簡單的為圖片添加水印,簡單圖片添加水印
簡單的為圖片添加水印,簡單圖片添加水印 1 package com.zzw.addwatermark; 2 3 import android.app.Activ
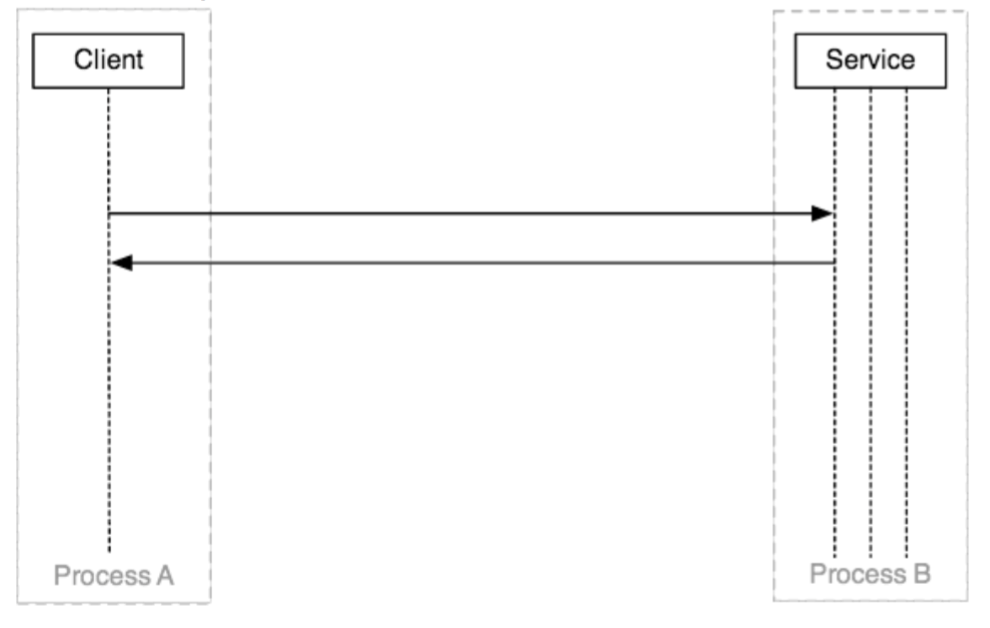 Android Binder機制介紹,androidbinder機制
Android Binder機制介紹,androidbinder機制做過Android開發的同學可能有些體會,入門初期,工作內容主要是實現各式各樣的UI界面,以及實現應用