編輯:Android技術基礎
android4.0以上版本出現的GridLayout布局解決了以上問題。GridLayout布局使用虛細線將布局劃分為行、列和單元格,也支持一個控件在行、列上都有交錯排列。而GridLayout使用的其實是跟LinearLayout類似的API,只不過是修改了一下相關的標簽而已,所以對於開發者來說,掌握GridLayout還是很容易的事情。GridLayout的布局策略簡單分為以下三個部分:
首先它與LinearLayout布局一樣,也分為水平和垂直兩種方式,默認是水平布局,一個控件挨著一個控件從左到右依次排列,但是通過指定android:columnCount設置列數的屬性後,控件會自動換行進行排列。另一方面,對於GridLayout布局中的子控件,默認按照wrap_content的方式設置其顯示,這只需要在GridLayout布局中顯式聲明即可。
其次,若要指定某控件顯示在固定的行或列,只需設置該子控件的android:layout_row和android:layout_column屬性即可,但是需要注意:android:layout_row=”0”表示從第一行開始,android:layout_column=”0”表示從第一列開始,這與編程語言中一維數組的賦值情況類似。
最後,如果需要設置某控件跨越多行或多列,只需將該子控件的android:layout_rowSpan或者layout_columnSpan屬性設置為數值,再設置其layout_gravity屬性為fill即可,前一個設置表明該控件跨越的行數或列數,後一個設置表明該控件填滿所跨越的整行或整列。
我們下面通過XML布局和Java代碼布局兩種方式分別舉例:
一、XML方式布局
1、創建一個空白Activity

3、打開“res/layout/activity_main.xml”文件,修改成以下代碼。
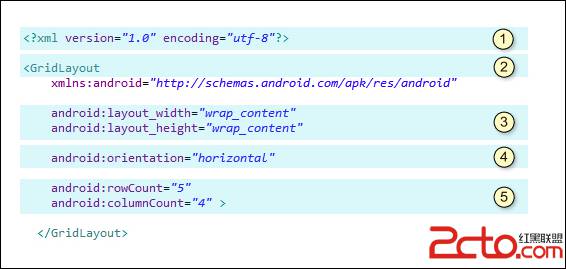
(1)第①部分
,每個XML文檔都由XML序言開始,在前面的代碼中的第一行便是XML序言,。這行代碼表示按照1.0版本的XML規則進行解析。encoding = "utf-8"表示此xml文件采用utf-8的編碼格式。編碼格式也可以是GB2312。
(2)第②部分
(3)第③部分
android:layout_width="match_parent" android:layout_height="match_parent"表示布局管理器寬度和高充將填充整個屏幕寬度和高度。
(4)第④部分
android:orientation="horizontal"表示采用水平布局,垂直為vertical。
(5)第⑤部分
該網格布局管理器采用5行4列。
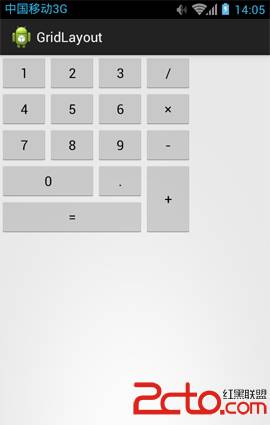
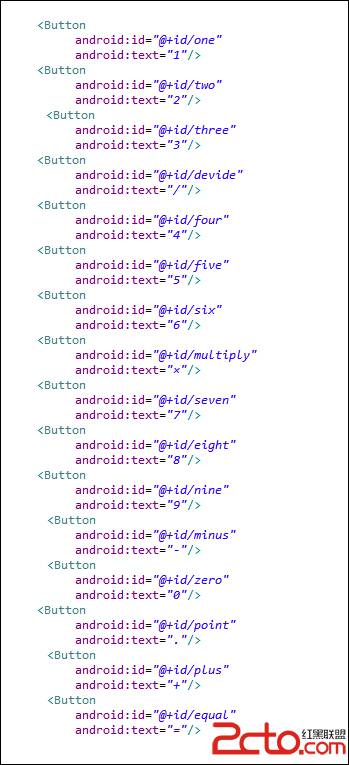
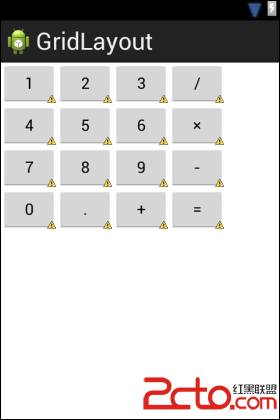
4、我們向GridLayout放入16個按鈕Button。
5、找不同。
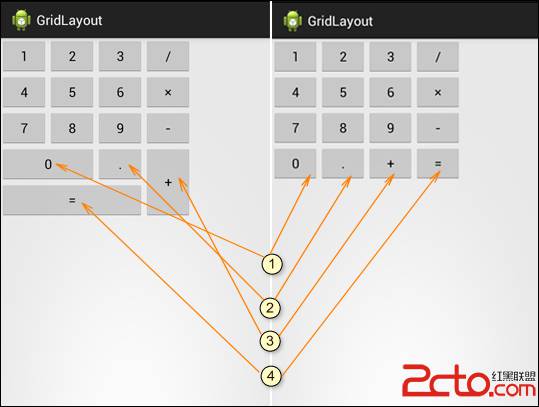
我們對一下,找出不同地方。
(1)第①部分
目標0按鈕是占據2個格;當前0按鈕占1格。
[html] view plain copy(2)第②部分
目標·按鈕在第4行第3列;當前·按鈕在第4行第2列。
解決辦法:0按鈕占據2格後,·按鈕會自動到這個位置。
(3)第③部分
目標+按鈕在第4行第4列並且行擴展2行;當前·按鈕在第4行第3列。
解決辦法:由於0按鈕占據2格後,目標+會自動到這個位置。
[html] view plain copy(4)第④部分
目標=按鈕在第5行,占據3列位置;當前=按鈕在第4行第4列。
解決辦法:位置由於0的擴展後,目前=按鈕會自動到第5行;列擴展同0按鈕。
[html] view plain copy
完整源代碼:
[html] view plain copy6、最終顯示效果如下:
二、Java代碼方式布局
上面我們已經了解采用XML進行LinearLayout布局,我們現在再來學習一下如何使用Java代碼完成與之同樣功能。
暫略。
題外話:
[html] view plain copy 8.3.2 繪圖類實戰示例
本節引言:前兩節我們學了Bitmap和一些基本的繪圖API的屬性以及常用的方法,但心裡總覺得有點不踏實,總得寫點什麼加深下映像是吧,嗯,本節我們就來
 4.4.2 ContentProvider再探——Document Provider
本節引言:學完上一節,相信你已經知道如何去使用系統提供的ContentProvider或者自定義ContentProvider了,已經基本滿足日常開
 2.4.4 Adapter基礎講解
本節引言從本節開始我們要講的UI控件都是跟Adapter(適配器)打交道的,了解並學會使用這個Adapter很重要,Adapter是用來幫助填充數據
 第69章、初識Intent-打開另一個Activity:單向傳值(從零開始學Android)
在Android應用中實現activity之間的跳轉使用intent機制。本例子簡單地簡紹如何利用intent使程序由MainActivity跳轉到另一個OtherAct