編輯:關於Android編程
妙趣剪紙下載


ProcessFactory.IniGauss_2(ProcessFactory.gauss_radius); //初始化高斯矩陣
Bitmap bmpGrayscale=ProcessFactory.toGray2(activity.imageBmp); //轉化為灰度圖
Bitmap bmpGauss=ProcessFactory.toInverse(bmpGrayscale); //反色
bmpGauss=ProcessFactory.toGauss(bmpGauss); //高斯模糊
/**
     * 處理顏色減淡
     * @param bmpGauss 高斯模糊完畢的圖像
     * @param bmpGrayscale 灰度圖像
     * @return
     */
     // 在原先的灰度圖上做顏色減淡,使用反色高斯圖輔助```
    bmpPapercut=ProcessFactory.toColorDodge(bmpGauss,bmpGrayscale);
    // TODO bmpColorDodge 圖即為素描圖
bmpPapercut=ProcessFactory.toPapercut(bmpPapercut);
bmpPapercut = ProcessFactory.toPengzhang(bmpPapercut);for(int i = 0; i < 2; i++)
        {
            bmpPapercut = ProcessFactory.toPengzhang(bmpPapercut);
        }
for(int i = 0; i < 2; i++)
        {
            bmpPapercut = ProcessFactory.toFushi(bmpPapercut);
        }
Bitmap min_img = ProcessFactory.toFramed(bmpPapercut);
ProcessFactory.IniGauss_2(ProcessFactory.gauss_radius); //初始化高斯矩陣
Bitmap bmpGrayscale=ProcessFactory.toGray2(activity.imageBmp); //轉化為灰度圖
Bitmap bmpGauss=ProcessFactory.toInverse(bmpGrayscale); //反色
bmpGauss=ProcessFactory.toGauss(bmpGauss); //高斯模糊
/**
     * 處理顏色減淡
     * @param bmpGauss 高斯模糊完畢的圖像
     * @param bmpGrayscale 灰度圖像
     * @return
     */
     // 在原先的灰度圖上做顏色減淡,使用反色高斯圖輔助```
    bmpPapercut=ProcessFactory.toColorDodge(bmpGauss,bmpGrayscale);
    // TODO bmpColorDodge 圖即為素描圖
bmpPapercut=ProcessFactory.toYinkePapercut(bmpPapercut);
for(int i = 0; i < 2; i++)
            bmpPapercut = ProcessFactory.toFushi(bmpPapercut);
/**
     * 初始化高斯矩陣
     * @param fi
     */
    public static void IniGauss_2(int fi)
    {
        toOne = 0;           //一定要對此變量進行初始化操作!
        GAUSS = new double[(fi*2+1)*(fi*2+1)];
        int index = 0;

        for (int x=-fi; x<=fi; x++){
            for (int y=-fi; y<=fi; y++){
                double sqrtFi = sigma*sigma;
                double ex = Math.pow(Math.E, (-(double)(x*x + y*y)/(2*(double)sqrtFi)));
                double result = ex/(double)(2 * Math.PI * sqrtFi);
                GAUSS[index] = result;
                toOne += result;
                index++;
                //MessageBox.Show(result.ToString());
                }
            }
        for (int i = 0; i < index; i++){
            GAUSS[i] = GAUSS[i] / toOne;
            //System.out.println("GAUSS["+i+"] = " + GAUSS[i]);
        }

        double sum = 0;
        for( double i : GAUSS) {
            sum += i;
        }
        //System.out.println("sum is"+sum);

    }

    /**
     * 取灰度圖像函數1
     * @param bmpOriginal
     * @return
     */
    public static Bitmap toGray1(Bitmap bmpOriginal){
        int width = bmpOriginal.getWidth(); //獲取位圖的寬
        int height = bmpOriginal.getHeight(); //獲取位圖的高

        int[] pixels = new int[width*height]; //通過位圖的大小創建像素點數組

        bmpOriginal.getPixels(pixels, 0, width, 0, 0, width, height);
        int alpha = (pixels[0] & 0xFF000000)>>24;
        //int alpha = (byte)0xFF;
        for(int i = 0; i < height; i++){
            for(int j = 0; j < width; j++){
                int pixel_src = pixels[width * i + j];
                int red = (pixel_src & 0x00FF0000 ) >> 16;
                int green = (pixel_src & 0x0000FF00) >> 8;
                int blue = pixel_src & 0x000000FF;
                //注意需要先轉換成float類型
                int pixel_gray = (int)(((float)red) * 0.299 + ((float)green) * 0.587 + ((float)blue) * 0.114);
                int pixel_output = ((alpha <<24) & 0xFF000000) | ((pixel_gray << 16) & 0x00FF0000) |
                        ((pixel_gray << 8) & 0x0000FF00) | (pixel_gray & 0x000000FF);
                pixels[width * i + j] = pixel_output;
                }
            }
        Bitmap bmpGrayscale = Bitmap.createBitmap(width, height, Config.ARGB_8888);
        bmpGrayscale.setPixels(pixels, 0, width, 0, 0, width, height);
        return bmpGrayscale;

        //bmpOriginal.setPixels(pixels, 0, width, 0, 0, width, height);
        //return bmpOriginal;
    }

//  public static Bitmap toGray5(Bitmap bmpOriginal){
//      int row;
//      int pixel;
//      int R, G, B, A = 255;
//
//      int width = bmpOriginal.getWidth(); //獲取位圖的寬
//      int height = bmpOriginal.getHeight(); //獲取位圖的高
//      int[] pixels = new int[width*height]; //通過位圖的大小創建像素點數組
//      bmpOriginal.getPixels(pixels, 0, width, 0, 0, width, height);
//
//      for(int i = 0; i < height; i++)
//      {
//          row = width * i;
//          for(int j = 0; j < width; j++)
//          {
//              int pixel_src = pixels[row + j];
//
//              R = (pixel_src & 0x00FF0000 ) >> 16;
//              G = (pixel_src & 0x0000FF00) >> 8;
//              B = pixel_src & 0x000000FF;
//
//              pixel = (int)(R * 0.299 + G * 0.587 + B * 0.114);
//              R = G = B = pixel;
//
//              pixel = (A << 24) | (R << 16) | (G << 8) | B;
//              pixels[row + j] = pixel;
//          }
//      }
//      Bitmap bmpGrayscale = Bitmap.createBitmap(width, height, Config.ARGB_8888);
//      bmpGrayscale.setPixels(pixels, 0, width, 0, 0, width, height);
//      return bmpGrayscale;
//  }

    /**
     * 取灰度圖像函數2
     * @param bmpOriginal
     * @return
     */
     public static Bitmap toGray2(Bitmap bmpOriginal) {
        int width, height;
        height = bmpOriginal.getHeight();
        width = bmpOriginal.getWidth();

        Bitmap bmpGrayscale = Bitmap.createBitmap(width, height, Bitmap.Config.ARGB_8888);
        Canvas c = new Canvas(bmpGrayscale);
        Paint paint = new Paint();
        ColorMatrix cm = new ColorMatrix();
        cm.setSaturation(0);
        ColorMatrixColorFilter f = new ColorMatrixColorFilter(cm);
        paint.setColorFilter(f);
        c.drawBitmap(bmpOriginal, 0, 0, paint);
        return bmpGrayscale;
        }

     /**
      * 取反色
      * @param bmpOriginal
      * @return
      */
     public static Bitmap toInverse(Bitmap bmpOriginal){
        int width = bmpOriginal.getWidth(); //獲取位圖的寬
        int height = bmpOriginal.getHeight(); //獲取位圖的高

        int[] pixels = new int[width*height]; //通過位圖的大小創建像素點數組

        bmpOriginal.getPixels(pixels, 0, width, 0, 0, width, height);
        int alpha = (byte)((pixels[0] & 0xFF000000)>>24);
        for(int i = 0; i < height; i++){
            for(int j = 0; j < width; j++){
                int pixel_src = pixels[width * i + j];
                int red = ((pixel_src & 0x00FF0000 ) >> 16);
                int green = ((pixel_src & 0x0000FF00) >> 8);
                int blue = (pixel_src & 0x000000FF);

                red = 255 - red;
                green = 255 - green;
                blue = 255 - blue;

                pixel_src = (alpha<<24) | (red << 16) | (green << 8) | blue;
                pixels[width * i + j] = pixel_src;
                }
            }
        Bitmap bmpInverse = Bitmap.createBitmap(width, height, Config.ARGB_8888);
        bmpInverse.setPixels(pixels, 0, width, 0, 0, width, height);
        return bmpInverse;

//      bmpOriginal.setPixels(pixels, 0, width, 0, 0, width, height);
//      return bmpOriginal;
        }
 Android系統升級的完整過程
下面是HTC官方的一個圖片,展示了Android系統從發布最終到用戶手中的一個完整的過程: Awesome Infographic: HTC Shows Us “Th
 Android SurfaceView實戰 打造抽獎轉盤
1、概述 今天給大家帶來SurfaceView的一個實戰案例,話說自定義View也是各種寫,一直沒有寫過SurfaceView,這個玩意是什麼東西?什麼時候
 Android平台的全景視頻播放器——1.2 用OpenGL ES 2.0畫一個三角形
Github項目地址,歡迎star~!初始化OpenGL ES環境OpenGL ES的使用,一般包括如下幾個步驟:1. EGL Context初始化2. OpenGL E
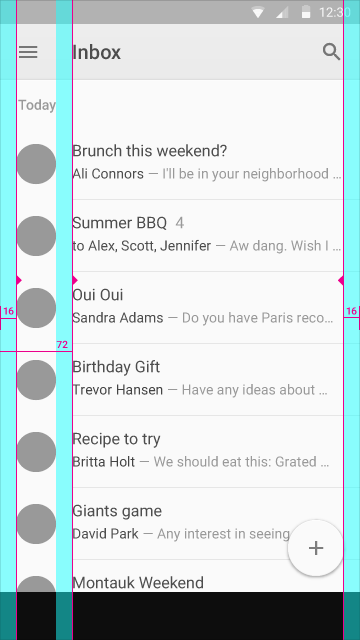 android - UI知識
前言對ios和android使用同一套ios的交互設計這種做法不置可否,畢竟很多人都這麼干,對此我們在開發中就要能夠換算出適合分辨率的尺寸大小,我們可直接對比雙方的分辨率