編輯:關於Android編程
IntentService(Service)的使用場景 IntentService與Service的區別 IntentService使用 IntentService原理源碼實現
Service 是Android系統中實現程序後台運行的解決方案,非常適合那些不需要跟用戶直接交互並且長期運行的任務。
Service運行於UiThread,因此若想要在Service 執行耗時操作,就需要在Service中創建線程成完成耗時任務。
IntentService 是繼承於Service的並處理異步請求的一個類,二者的啟動方式並沒有什麼差別。區別是IntentService 會自動運行在子線程中,並且執行完畢會自我stop。
區別總結:如果必須在Service (IntentService) 中執行耗時任務,在Service 中我們必須要采用開啟新線程的方式,(比如new Thread().start()),且執行完畢要手動退出。而在IntentService中則可以直接執行,也不必手動干預退出。
一:模擬耗時任務,執行完畢更新界面ui
首先看下效果圖
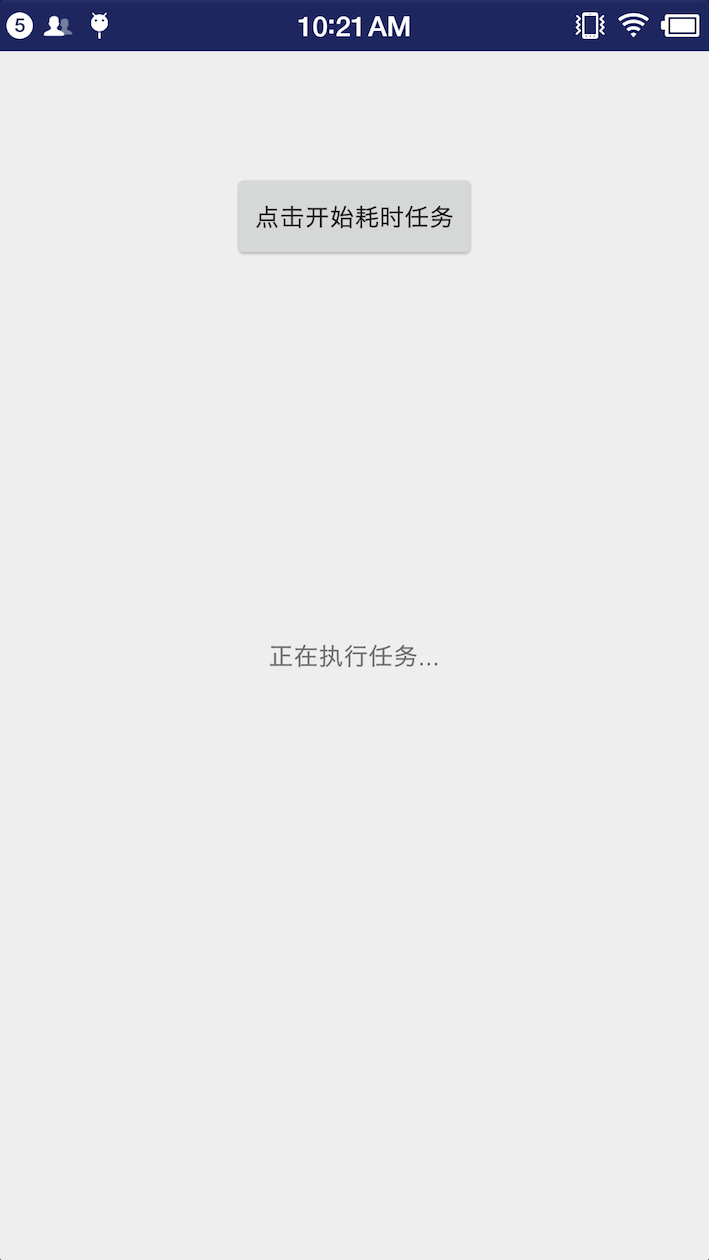
點擊耗時任務,啟動IntentService模擬耗時任務執行,執行完畢通過廣播更新界面ui,(也可以采用handler)
二:代碼實現
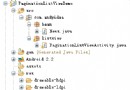
IntentService
package com.huanjulu.intentservice;/*
 * Copyright (C) 2016,
 * Author: huanjulu on 16/6/17
 * to:
 */

import android.app.IntentService;
import android.content.Intent;

public class TaskIntentService extends IntentService {
    public TaskIntentService() {
        super("TaskIntentService-Thread");
    }
    public TaskIntentService(String name) {
        super(name);
    }
    @Override
    protected void onHandleIntent(Intent intent) {
        //直接在此執行耗時任務
        if (null != intent) {
            onTashHandler();
        }
    }

    /**
     * 模擬耗時任務  如果采用serivce 你就需new Thread 處理
     */
    private void onTashHandler() {
        try {
            Thread.sleep(3000);
            Intent intent = new Intent();
            intent.setAction(MainActivity.TNTENT_SERVICE);
            sendBroadcast(intent);
        } catch (InterruptedException e) {
            e.printStackTrace();
        }
    }

    @Override
    public void onCreate() {
        super.onCreate();
    }

    @Override
    public void onDestroy() {
        super.onDestroy();
    }
}
繼承IntentService的類至少要實現兩個函數:構造函數和onHandleIntent()函數。要覆蓋IntentService的其它函數時,注意要通過super調用父類的對應的函數。
此處注意一下IntentService 的生命周期。我們在onHandleIntent()中模擬耗時任務(Thread.sleep(3000):模擬執行時間為3秒)執行完畢,發送廣播,通知主界面更新ui。
Activity 代碼實現
package com.huanjulu.intentservice;

import android.app.Activity;
import android.content.BroadcastReceiver;
import android.content.Context;
import android.content.Intent;
import android.content.IntentFilter;
import android.os.Bundle;
import android.util.Log;
import android.view.View;
import android.widget.TextView;

public class MainActivity extends Activity {
    public static final String TNTENT_SERVICE = "com.huanjulu.intentservice.TaskIntentService";
    TextView textView;

    private BroadcastReceiver uploadImgReceiver = new BroadcastReceiver() {
        @Override
        public void onReceive(Context context, Intent intent) {
            Log.d("TAG","onReceive");
            if (intent.getAction() .equals(TNTENT_SERVICE)) {
                Log.d("TAG","intent.getAction()");
                textView.setText("耗時任務執行完畢!");
            }
        }
    };

    @Override
    protected void onCreate(Bundle savedInstanceState) {
        super.onCreate(savedInstanceState);
        setContentView(R.layout.activity_main);
        textView = (TextView) findViewById(R.id.message_tv);

        IntentFilter intentFilter = new IntentFilter();
        intentFilter.addAction(TNTENT_SERVICE);
        registerReceiver(uploadImgReceiver, intentFilter);

        findViewById(R.id.button).setOnClickListener(new View.OnClickListener() {
            @Override
            public void onClick(View v) {
                textView.setText("正在執行任務...");
                Intent intent = new Intent(MainActivity.this, TaskIntentService.class);
                startService(intent);
            }
        });
    }
    @Override
    protected void onDestroy() {
        super.onDestroy();
        unregisterReceiver(uploadImgReceiver);
    }
}
在onCreate()中我們注冊廣播,在onDestroy()中注銷,點擊事件去開啟IntentService 執行任務。
Service 為四大組件之一,所以必須在AndroidMainfest.xml中聲明。
通過IntentService 的執行生命周期,第一次執行是要走onCreat()
    @Override
    public void onCreate() {
        super.onCreate();
    }
super.onCreate(); 調用 父類(也就是IntentService) 的onCreat()函數。
分析一下IntentService 的onCreat() 做了什麼
   @Override
    public void onCreate() {
        // TODO: It would be nice to have an option to hold a partial wakelock
        // during processing, and to have a static startService(Context, Intent)
        // method that would launch the service & hand off a wakelock.

        super.onCreate();
        HandlerThread thread = new HandlerThread("IntentService[" + mName + "]");
        thread.start();

        mServiceLooper = thread.getLooper();
        mServiceHandler = new ServiceHandler(mServiceLooper);
    }
可以看到主要做了兩件事,一是開啟了一個HandlerThread 線程(有關HandlerThread 我稍後的博文會分析,這裡只要知道HandlerThread 繼承了Thread, 重點分析run()方法),二是通過mServiceLooper 實例化了ServiceHandler 對象。
分析 thread.start() ,
    @Override
    public void run() {
        mTid = Process.myTid();
        Looper.prepare();
        synchronized (this) {
            mLooper = Looper.myLooper();
            notifyAll();
        }
        Process.setThreadPriority(mPriority);
        onLooperPrepared();
        Looper.loop();
        mTid = -1;
    }
我們看到了什麼? 沒錯!實例化mq ,開啟消息循環..依舊是采用了android中的異步消息機制。
      Looper.prepare();
      Looper.loop();
通過 thread.getLooper();得到 實例化的looper 並作為參數實例化ServiceHandler()
    private volatile Looper mServiceLooper;
    private volatile ServiceHandler mServiceHandler;


    private final class ServiceHandler extends Handler {
        public ServiceHandler(Looper looper) {
            super(looper);
        }

        @Override
        public void handleMessage(Message msg) {
        //這裡就是我們IntnetService 中覆寫onHandleIntent 的邏輯
        //執行完畢調用stopSelf()自動退出
            onHandleIntent((Intent)msg.obj);
            stopSelf(msg.arg1);
        }
    }
有了looper,實例化了handler ,總得有個sendMessage吧。
在onStart中
    @Override
    public void onStart(Intent intent, int startId) {
        Message msg = mServiceHandler.obtainMessage();
        msg.arg1 = startId;
        msg.obj = intent;
        mServiceHandler.sendMessage(msg);
    }
流程總結
就是每次調用onStartCommand的時候 ,onStartCommand繼續調用onStart ,通過mServiceHandler發送一個消息,消息中包含我們的intent。然後在該mServiceHandler的handleMessage中去回調onHandleIntent(intent);
 手機微信怎麼用 微信怎麼注冊
微信作為現代主要通訊之一,很多朋友已經使用微信作為通訊工具了,出門微信一步到位,見面交友也多是問你微信號多少,我加你。那麼手機微信怎麼用呢?怎樣注冊微信號來
 Android自定義控件之百分比圓環進度條
首先我們先來看一下效果分析我們來看這個進度條應該分為3個小部分1.中間的圓2.外邊的圓環3.中間的文字分開畫這3部分就是需要我們自己畫出來的,因此我們需要3根畫筆//設置
 FrameLayout和Fragment處理Android應用UI布局實例
將Fragment與Layout結合使用,一般都是主Activity以frame填充Activity的方式交互管理Fragment :1.由於用到getSupportFr
 Android實現文本排版
在項目中有一個小功能需要實現,就是對多行文本進行排版布局,每一行的內容又分為兩部分,左邊為標題,右邊為描述,左邊內容長度不確定,右邊的內容需要對齊,如有換行