編輯:關於Android編程
今天在調ViewPager的時候,感覺ViewPager+Fragment這種做法更靈活,所以,現在拿出來Fragment再整理下。
Fragment表現Activity中用UI的一個行為或者一部分。可以組合多個fragment放在一個單獨的activity中來創建一個多界面區域的UI,並可以在多個activity裡重用某一個fragment。把fragment想象成一個activity的模塊化區域,有它自己的生命周期,接收屬於它的輸入事件,並且可以在activity運行期間添加和刪除。加入了Fragment,可以根據用戶或設備的需要,activity界面可以在運行時組裝,甚至是重新組裝。
另外,從實現上說,采用fragment而不是activity進行應用的UI管理,可以繞開安卓系統activity規則的限制。
Android在3.0中引入了fragments的概念,主要目的是用在大屏幕設備上--例如平板電腦上,支持更加動態和靈活的UI設計。平板電腦的屏幕要比手機的大得多,有更多的空間來放更多的UI組件,並且這些組件之間會產生更多的交互.Fragment允許這樣的一種設計,而不需要你親自來管理viewhierarchy的復雜變化。通過將activity的布局分散到fragment中,你可以在運行時修改activity的外觀,並在由activity管理的back stack中保存那些變化。
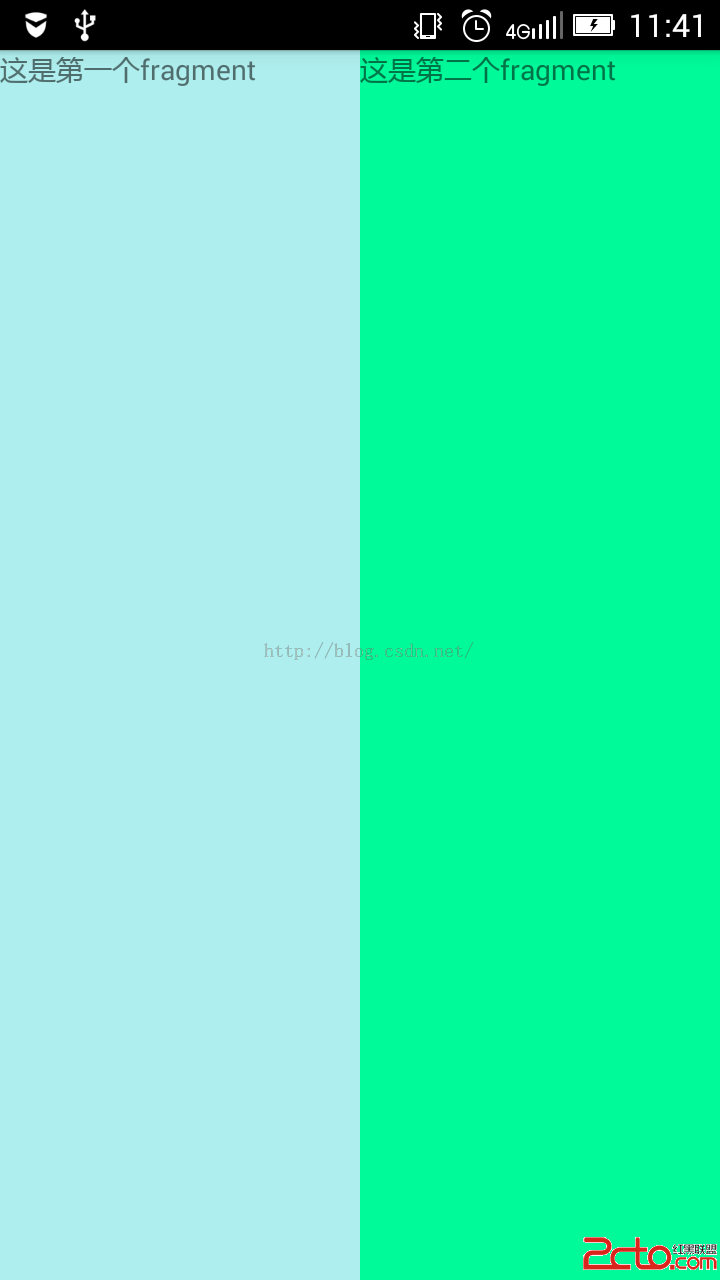
下面來用fragment寫一個簡單的布局,兩個fragment布到一個activity上面:
先是第一個fragment:
<framelayout android:background="#AFEEEE" android:layout_height="match_parent" android:layout_width="match_parent" tools:context="com.example.liuhuichao.projecttest.ExampleFragment" xmlns:android="http://schemas.android.com/apk/res/android" xmlns:tools="http://schemas.android.com/tools">


</framelayout>
在oncreate裡面,加載這個fragment的布局文件及進行view的初始化:
public class ExampleFragment extends Fragment {
    @Override
    public void onCreate(Bundle savedInstanceState) {
        super.onCreate(savedInstanceState);

    }

    @Override
    public View onCreateView(LayoutInflater inflater, ViewGroup container,
                             Bundle savedInstanceState) {
        // Inflate the layout for this fragment
        return inflater.inflate(R.layout.fragment_example, container, false);
    }
}
第二個fragment,基本類似:
<framelayout android:background="#00FA9A" android:layout_height="match_parent" android:layout_width="match_parent" tools:context="com.example.liuhuichao.projecttest.ExampleFragmentTwo" xmlns:android="http://schemas.android.com/apk/res/android" xmlns:tools="http://schemas.android.com/tools">


</framelayout>
public class ExampleFragmentTwo extends Fragment {
    @Override
    public void onCreate(Bundle savedInstanceState) {
        super.onCreate(savedInstanceState);

    }

    @Override
    public View onCreateView(LayoutInflater inflater, ViewGroup container,
                             Bundle savedInstanceState) {
        return inflater.inflate(R.layout.fragment_example_fragment_two, container, false);
    }
}
Activity的布局:
activity裡面關聯兩個fragment:
public class MainFragmentActivity extends AppCompatActivity {

    @Override
    protected void onCreate(Bundle savedInstanceState) {
        super.onCreate(savedInstanceState);
        setContentView(R.layout.mainfragment);

        //獲得FragmentManager ,然後獲取FragmentTransaction
        FragmentManager fm=getFragmentManager();
        FragmentTransaction transaction=fm.beginTransaction();
        //用Fragment動態代替布局文件中內容
        transaction.replace(R.id.fragmentOne,new ExampleFragment());
        transaction.replace(R.id.fragmentTwo,new ExampleFragmentTwo());
        //提交事務
        transaction.commit();
    }

}
run下:
先說下,這種方式是推介方式,感覺挺能體現出靈活性來。
fragment還是用上面的兩個,activity布局改一下:
Activity代碼:
public class MainFragmentActivity extends AppCompatActivity {

    private Button btn_show_fragment1;
    private Button btn_show_fragment2;

    @Override
    protected void onCreate(Bundle savedInstanceState) {
        super.onCreate(savedInstanceState);
        setContentView(R.layout.fragmentmaintwo);
        btn_show_fragment1=(Button)findViewById(R.id.btn_show_fragment1);
        btn_show_fragment2=(Button)findViewById(R.id.btn_show_fragment2);

        btn_show_fragment1.setOnClickListener(new View.OnClickListener() {
            @Override

            public void onClick(View v) {
                FragmentManager manager=getFragmentManager();
                FragmentTransaction ft=manager.beginTransaction();
                ExampleFragment ef1=new ExampleFragment();
                /*
                * add是將一個fragment實例添加到Activity的最上層
                * replace替換containerViewId中的fragment實例,
                *   注意,它首先把containerViewId中所有fragment刪除,然後再add進去當前的fragment
                * */
                ft.add(R.id.fragment_container, ef1);
                ft.commit();
            }
        });
        btn_show_fragment2.setOnClickListener(new View.OnClickListener() {
            @Override
            public void onClick(View v) {
                FragmentManager manager=getFragmentManager();
                FragmentTransaction ft=manager.beginTransaction();
                ExampleFragmentTwo ef2=new ExampleFragmentTwo();
                ft.add(R.id.fragment_container,ef2);
                ft.commit();
            }
        });

       /* setContentView(R.layout.mainfragment);

        //獲得FragmentManager ,然後獲取FragmentTransaction
        FragmentManager fm=getFragmentManager();
        FragmentTransaction transaction=fm.beginTransaction();
        //用Fragment動態代替布局文件中內容
        transaction.replace(R.id.fragmentOne,new ExampleFragment());
        transaction.replace(R.id.fragmentTwo,new ExampleFragmentTwo());
        //提交事務
        transaction.commit();*/
    }

}
感覺用FragmentManager跟FragmentTransaction來管理fragment的時候,很像事物。百度下原理瞅瞅,發現確實有那個意思。
 Android UI實現單行文本水平觸摸滑動效果
本文實例為大家分享了單行文本水平觸摸滑動效果,通過EditText實現TextView單行長文本水平滑動效果。下一篇再為大家介紹 多行文本折疊展開效果,自定義布局View
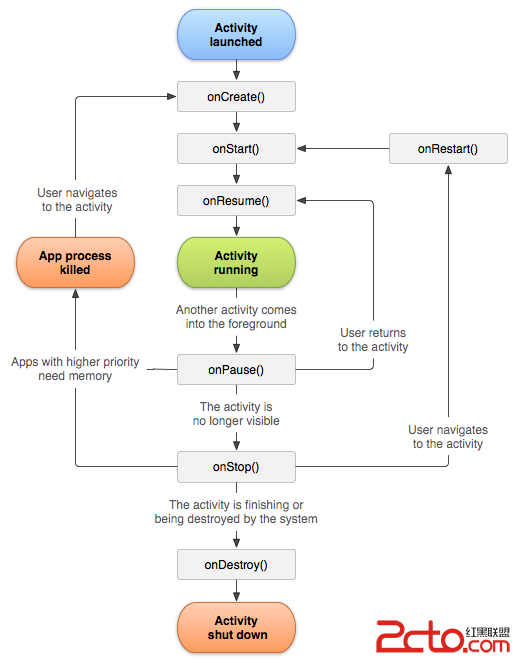 Andorid Activity的本質是什麼
本文我主要通過查看Activity的實現源碼和推測其設計思想的方法來探討一下Android的本質是什麼。 Activity恐怖是Android用得最多且是最基本的組
 Android開發中TextView 實現右上角跟隨文本動態追加圓形紅點
在一個比較坑的需求裡,一段文字右上角需要追加一個圓形紅點。最右側有個金額,紅點動態隨著文字移動,然後各種擺布局,一下午坑死我了。後來果斷放棄。然後就想試試直接自定義vie
 Android開發之機頂盒上gridview和ScrollView的使用詳解
最近在機頂盒上做一個gridview,其焦點需要在item的子控件上,但gridview的焦點默認在item上,通過android:descendantFocusabil