編輯:關於Android編程
1、首先在AndroidManifest.xml中的<manifest>中加入android:sharedUserId="共享id"----具有相同id的apk可以不受限制訪問。
2、根據包名創建Context,在Activity下有提供方法createPackageContext能夠依據包名創建。
3、獲取共享的Apk資源。
注意:
1、Activity中的findViewById()與View中的findViewById()區別在於:
Activity需要對setContextView()後的Layout才能由findViewById()獲得View。
View只需要有對象即可由findViewById()獲得在View中包含id的View。
2、在資源獲取方面主要獲取那個apk下的資源主要是由Context決定。
主apk包名:com.app.share;
資源apk包名:com.app.share2;
主Activity中獲取資源apk中R,並且生成Layout對id為button1的按鈕設置監聽。
view plainpublic class StartAct extends Activity {
/** Called when the activity is first created. */
@Override
public void onCreate(Bundle savedInstanceState) {
super.onCreate(savedInstanceState);
// setContentView(R.layout.main);
Button btn = new Button(this);
btn.setText("TO SECOND");
btn.setOnClickListener(new OnClickListener() {
@Override
public void onClick(View v) {
// TODO Auto-generated method stub
Intent intent = new Intent(StartAct.this, SecontAct.class);
StartAct.this.startActivity(intent);
}
});
this.setContentView(btn);
try {
Context other = this.createPackageContext("com.app.share2", CONTEXT_IGNORE_SECURITY|CONTEXT_INCLUDE_CODE);
Class<?> c = other.getClassLoader().loadClass("com.app.share2.R");
Class<?>[] cl = c.getClasses();
int b =0;
for (int i = 0; i < cl.length; i++) {
Log.d("TAG", cl[i].getSimpleName());
Field field[] = cl[i].getFields();
for (int j = 0; j < field.length; j++) {
Log.d("TAG", "NAME:"+field[j].getName()+"--VALUE:"+field[j].getInt(field[j].getName()));
if(field[j].getName().equals("button1")) {
b = field[j].getInt(field[j].getName());
Log.d("TAG", "--------id");
}
};
}
View v = LayoutInflater.from(other).inflate(R.layout.main, null);
Button btn1 = (Button) v.findViewById(b);
btn1.setOnClickListener(new OnClickListener() {
@Override
public void onClick(View v) {
// TODO Auto-generated method stub
Log.d("TAG", "BUTTON FROM Share2");
Toast.makeText(StartAct.this, "BUTTON FROM Share2", Toast.LENGTH_SHORT).show();
}
});
this.setContentView(v);
} catch (NameNotFoundException e) {
// TODO Auto-generated catch block
e.printStackTrace();
} catch (ClassNotFoundException e) {
// TODO Auto-generated catch block
e.printStackTrace();
} catch (IllegalArgumentException e) {
// TODO Auto-generated catch block
e.printStackTrace();
} catch (IllegalAccessException e) {
// TODO Auto-generated catch block
e.printStackTrace();
}
}
}
資源apk包Layout view plain<?xml version="1.0" encoding="utf-8"?>
<LinearLayout xmlns:android="http://schemas.android.com/apk/res/android"
android:orientation="vertical"
android:layout_width="fill_parent"
android:layout_height="fill_parent"
>
<TextView
android:layout_width="fill_parent"
android:layout_height="wrap_content"
android:text="Share2"
/>
<Button android:text="Button" android:id="@+id/button1" android:layout_width="wrap_content" android:layout_height="wrap_content"></Button>
</LinearLayout>
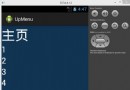 Android向上推送式菜單,兩個視圖在同一布局內同屏顯示。
最近在寫一個百度地圖的小應用,畢竟屏就那麼大一點,要在上面放幾個按鈕,怎麼布置都難看。百度了一下,發現側滑菜單挺好,可百度地圖就是用手滑的啊,你妹,這兩個玩意居然還沖突,
 Android--藍牙操作(藍牙的打開與關閉,可見性的打開與關閉)
BluetoothAdapter 用法藍牙運行原理:通過BluetoothAdapter 藍牙適配器處理任務,如果藍牙被啟動之後,系統會自動去搜索其它
 Android自定義View分享——仿微信朋友圈圖片合並效果
寫在前面筆者近來在學習Android自定義View,收集了一些不算復雜但又“長得”還可以的自定義View效果實現,之前分享過兩個效果:一個水平的進
 Android自定義組合控件(一)
最近參加濟南一分享會,感受頗深,也很欣賞大神們的分享精神,好東西大家一起分享 不能做只會搬磚的碼農,要成為一個真正的程序員,當然我是媛,程序員分為三類,初級程序員,中級程