編輯:關於Android編程
這是一篇翻譯文章,自己作為android工程師以來,第一次翻譯國外網站的文章,所以不免會有一些遺漏和錯誤。
原文請參考
RecyclerView 是一種新的ViewGroup,它的存在是為了像其他的viewGroup一樣提供以adapter 為基礎的view。它將成為ListView和GridView的繼承者(這也是我翻譯這篇文章的原因)。這個類是由support-v7提供的支持;之所以這麼說的原因有:recyclerView 擁有更加可以拓展的framework,尤其是在它支持了實現水平和垂直的layout。當你的數據集會根據用戶的action或者網絡事件而進行change的時候要使用RecyclerView。
如果你想要使用RecyclerView,你需要進行下面的工作:
. RecyclerView.Adapter-用於處理數據集和綁定它到一個view .LayoutManager- 用於定位items.ItemAnimator- 為通用的操作(如:增加和移除item)進行動畫處理
另外,它為listView添加和刪除添加的動畫效果和現在目前的實現是完全不同的。RecyclerView也在開始加強ViewHolderPattern
這個動作目前是一個值得推薦的經驗,而且現在已經深深的在新的framework中集成了。
更多的細節請看這個link:
RecyclerView 不同於它的父本ListView是因為一下的功能:
. Required VIewHolder in Adapters- ListView adapters不要求使用ViewHolder模式去增加性能(一般開發者會用到viewHolder),相反,RecylcerView是被要求使用ViewHolder的。.Customizable Item Layouts –ListView 能夠且只能夠布局垂直Linear而且這個不能由用戶定制。相反,RecyclerView因為擁有RecylerView.LayoutManger所以可以允許所有的itemlayouts包括水平list和staggeredgrids. easy item animations – listView 並不包含特別提供的產品來提供對於item增減時可以產生動畫的內容。相反,RecyclerView擁有RecyclerView.ItemAnimator類來處理itemanimations.Manual Data Source Listview擁有類似與ArrayAdapterCursorAdapter等不同的Adapters用於處理arrays 和database結果集。相反,RecyclerView.Adapter要求用戶實現來支持數據adapter。.Manual Item Decoration –ListView 擁有android:divider屬性來快速的間隔list中的各item。相對的,RecyclerView要求使用RecyclerView。ItemDecoration對象來實現更多的手動的divider修飾。. Manual Click Detection –Listview 擁有一個AdapterView.OnItemClickListener接口來綁定按鍵事件。相應的,REcyclerVIew只支持RecyclerView.OnItemTouchListener,它將管理分散的touch事件,但是RecyclerView卻沒有創建好了的clickhanding。一個RecyclerView需要擁有一個layout Manager 和一個Adapter來進行實例化。一個layoutmanager 將itemviews插入到RecyclerView同時決定什麼時候重用那些相當用戶不在可見的itemviews。
RecyclerView 提供下面這些build-inlayout managers:LinearLayoutManager 顯示在垂直和水平滾動的itemsGridLayoutManger 顯示在grid中的itemsStaggerdGridLayoutManager 顯示在staggered grid 中的items
在創建一個用戶的layout manager,extend RecyclerView.LyaoutManager類.
這個link 裡面是 Dave Smith’s talk 關於custom layout manager
RecyclerView 包含一個新品質的adapter。它類似於一個你已經使用過的adpter,但又具備了一些特殊的特征,例如,要求ViewHolder.你將必須override兩個主要的方法:一個是inflate這個view和它的viewholder,另一個是bind 數據給這個view. 好消息是第一個方法只是在我們真的需要創建一個新view的時候。不需要檢查它是否被回收了。
RecyclerView.ItemAnimator將使ViewGroup給adapter提醒的修改(如:增刪選擇)產生動畫效果。DefaultItemAnimator將被用來作為基本的默認動畫,而且有非常好的作用效果。可以看這個後面相關的section來獲取更多的信息
使用一個RecyclerView 有以下幾個關鍵的步驟:
1. 增加RecyclerView支持庫到gradle build file
2. 定義一個modelclass 作為datasource
3. 添加一個RecyclerView給你的activity來顯示這個items
4. 創建一個customrow layout XML 文件來可視化一個item
5. 創建一個RecyclerView.Adapter和ViewHolder 來提供給item
6. 綁定這個adapter給datasource 來populatethe RecyclerView.
這些步驟在下面會有詳細的闡述
確認recyclerView支持庫在你的app/build.gradle中列出了了:
dependencies {
    ...
    compile 'com.android.support:recyclerview-v7:23.2.1'
}
每個RecyclerView 都是有一個數據集的作為背景的。由此,我們將定義一個Contact 類,這個類將代表需要被RecylcerView使用的數據模型。
public class Contact {
    private String mName;
    private boolean mOnline;
    public Contact(String name, boolean online) {
        mName = name;
        mOnline = online;
    }
    public String getName() {
        return mName;
    }
    public boolean isOnline() {
        return mOnline;
    }
    private static int lastContactId = 0;
    public static ArrayList createContactsList(int numContacts) {
        ArrayList contacts = new ArrayList();
        for (int i = 1; i <= numContacts; i++) {
            contacts.add(new Contact("Person " + ++lastContactId, i <= numContacts / 2));
        }
        return contacts;
    }
}
在activity的layout XML 文件中,添加一個RecyclerView
在layout的preview窗口我們將看到在activity中的RecylcerView。
我們在創建adapter之前,我們需要先創建在每一row中需要使用的XMLlayout 文件。現在我們試圖穿件一個水平的Linearlayout,它帶有一個textVIew用於顯示名字,和一個button,來提醒這個person:

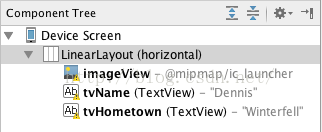
這個layout文件可以在res/layout/item_contact.xml 創建,而且它將提供給每行item。注意你應該為屬性layout_height使用wrap_content,因為在先於版本23.2.1的RecyclerView忽略了layout參數。可以參考這個link for 更多的信息。
在定義了custom item layout之後,我們可以創建一個adapter來放置數據到這個recyclerview中。
我們將在這裡創建一個adapter,這個將從實際上將數據填充到RecyclerView中。這個Adapter的角色是將一個position上的對象轉變從list上面的一個item並插入之。
然而,這個adapter要求存在一個“ViewHolder”對象,這個對象描述和提供進入每一行的所有的views。我們可以在ConatactsAdapter.java中提供基本的空adapter和 holder:
// Create the basic adapter extending from RecyclerView.Adapter
// Note that we specify the custom ViewHolder which gives us access to our views
public class ContactsAdapter extends
    RecyclerView.Adapter {

    // Provide a direct reference to each of the views within a data item
    // Used to cache the views within the item layout for fast access
    public static class ViewHolder extends RecyclerView.ViewHolder {
        // Your holder should contain a member variable
        // for any view that will be set as you render a row
        public TextView nameTextView;
        public Button messageButton;

        // We also create a constructor that accepts the entire item row
        // and does the view lookups to find each subview
        public ViewHolder(View itemView) {
            // Stores the itemView in a public final member variable that can be used
            // to access the context from any ViewHolder instance.
            super(itemView);

            nameTextView = (TextView) itemView.findViewById(R.id.contact_name);
            messageButton = (Button) itemView.findViewById(R.id.message_button);
        }
}
}
現在我們已經定義了基本的adapter和ViewHolder,我們現在需要填充adapter。首先,讓我們保存一個變量用於contacts list,同時通過構造器傳遞這個list
public class ContactsAdapter extends
    RecyclerView.Adapter {

    // ... view holder defined above...

    // Store a member variable for the contacts
    private List mContacts;
    // Store the context for easy access
    private Context mContext;

    // Pass in the contact array into the constructor
    public ContactsAdapter(Context context, List contacts) {
        mContacts = contacts;
        mContext = context;
    }

    // Easy access to the context object in the recyclerview
    private Context getContext() {
       return mContext;
    }
}
每個adapter擁有3個基本方法:onCreateViewHolder用來inflate一個item 的layout和創建這個holder,onBindViewHolder用於設置基於數據的view的屬性,getItemCount來獲取items的數量。我們需要implement所有的這三個來完成adapter:
public class ContactsAdapter extends
    RecyclerView.Adapter {

    // ... constructor and member variables

    // Usually involves inflating a layout from XML and returning the holder
    @Override
    public ContactsAdapter.ViewHolder onCreateViewHolder(ViewGroup parent, int viewType) {
        Context context = parent.getContext();
        LayoutInflater inflater = LayoutInflater.from(context);

        // Inflate the custom layout
        View contactView = inflater.inflate(R.layout.item_contact, parent, false);

        // Return a new holder instance
        ViewHolder viewHolder = new ViewHolder(contactView);
        return viewHolder;
    }

    // Involves populating data into the item through holder
    @Override
    public void onBindViewHolder(ContactsAdapter.ViewHolder viewHolder, int position) {
        // Get the data model based on position
        Contact contact = mContacts.get(position);

        // Set item views based on your views and data model
        TextView textView = viewHolder.nameTextView;
        textView.setText(contact.getName());
        Button button = viewHolder.messageButton;
        button.setText("Message");
    }

    // Returns the total count of items in the list
    @Override
    public int getItemCount() {
        return mContacts.size();
    }
}
在adapter完成後,所有剩余的工作是綁定數據從adapter到RecyclerView。
在我們的activyt中,我們創建了一個用戶集用於在recyclerview中顯示。
public class UserListActivity extends AppCompatActivity {

     ArrayList contacts;

     @Override
     protected void onCreate(Bundle savedInstanceState) {
         // ...
         // Lookup the recyclerview in activity layout
         RecyclerView rvContacts = (RecyclerView) findViewById(R.id.rvContacts);

         // Initialize contacts
         contacts = Contact.createContactsList(20);
         // Create adapter passing in the sample user data
         ContactsAdapter adapter = new ContactsAdapter(this, contacts);
         // Attach the adapter to the recyclerview to populate items
         rvContacts.setAdapter(adapter);
         // Set layout manager to position the items
         rvContacts.setLayoutManager(new LinearLayoutManager(this));
         // That's all!
     }
}
最後,編譯運行,將看到下面圖像類似的結果。如果你創建了足夠多的items,當scroll這個list,這個views將循環利用而且相對listView更加順暢的滾動。
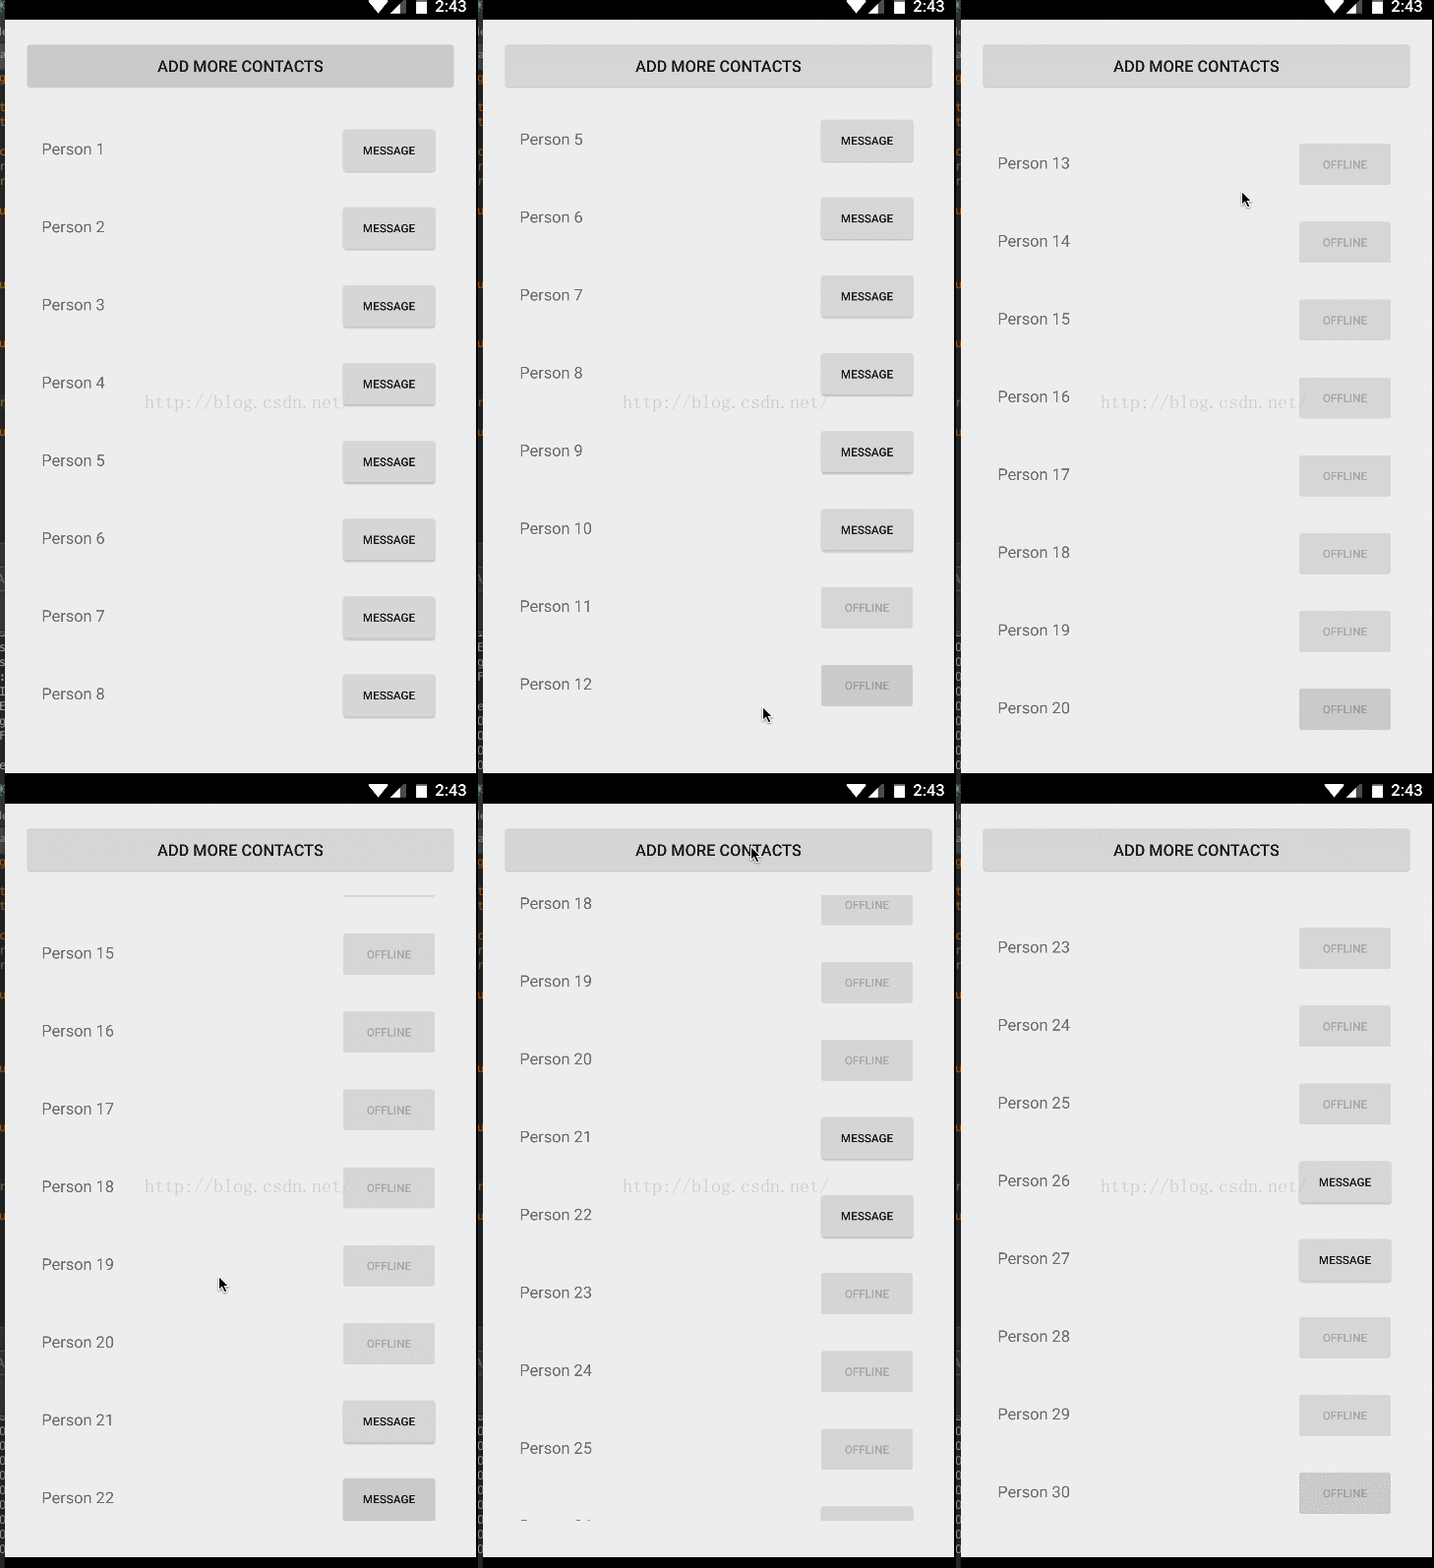
不像ListView,RecyclerView沒有直接添加或者刪除item的方法。你需要直接修改原始數據並且通知Adapter相關的任何修改。同時,在你添加或者刪除元素的時候,需要同時修改已經存在的list。例如,重新初始化下面的contactslist將不會產生任何對adapter的效果,因為它擁有一個對oldlist 的memory的一個引用。
// do not reinitialize an existing reference used by an adapter
Contacts = Contact.createContactsList(5);
Instead,你需要直接對已經存在的引用進行操作:
// add to the existing list
Contacts.addAll(Contact.createContactsList(5));
有很多接口用於提醒adapter關於不同的修改:
Method Description
notifyItemChanged(int pos)
Notifythat item at position has changed. notifyItemInserted(intpos) Notifythat item reflected at position has been newly inserted. notifyItemRemoved(intpos)Notify that items previously located at position has beenremoved from the data set.
notifyDataSetChanged()Notify that the dataset has changed. Use only as lastresort.
我們能夠如下在activity和fragment中使用它們
// Add a new contact
contacts.add(0, new Contact("Barney", true));
// Notify the adapter that an item was inserted at position 0
Adapter.nofityItemInserted(0);
每當我們想從RecyclerView添加或者刪除items的時候,我們需要清楚的通知adapter這個事件。不像ListViewadapter,一個RecyclerViewadapter不能夠依賴notifyDataSetChanged(),而是需要使用更加細粒度的action。可以參考如下API文檔。
另外,如果你試圖update一個存在的list,在進行任何修改前,確定你獲取到了當前item的數量。例如,在adapter上面的getItemCount()應該被調用來記錄即將修改的第一個index。
// record this value before making any changes to the existing list int curSize = adapter.getItemCount(); // replace this line with wherever you get new records ArrayListnewItems = Contact.createContactsList(20); // update the existing list contacts.addAll(newItems); // curSize should represent the first element that got added // newItems.size() represents the itemCount Adapter.nofityItemRangeInserted(curSize,newItems,size());
如果我們給要在list的前面插入元素而且想讓這個元素保持在最前面,我們可以將位置滾動到1st 元素
adapter.notifyItemInserted(0); rvContacts.scrollToPosition(0); // index 0 position
如果我們要在list的最後添加items而且想要滾動到底部作為item的添加。我們可以提醒這個adapter一個添加的元素已經被添加,而且能夠調用RecyclerView的smoothScrollToPosition():
adapter.notifyItemInserted(contacts.size() - 1); // contacts.size() - 1 is the last element positionrvContacts.scrollToPosition(mAdapter.getItemCount() - 1); // update based on adapter
為了實現集成更多的數據,並且像用戶滾動到list的底部一樣滾動到底部,可以使用RecyclerView中的addOnScrollListener()並且添加一個onLoadMore方法leveraging theEndlessScrollViewScrollListener文檔。
RecyclerVIew 是一個非常的具有彈性和用戶定制化的控件。一些可用的options可以在下面看到。
在所有的item是同樣的高度和寬度的情況下,我們可以使得滾動更加的平滑:
recyclerView.setHasFixedSize(true);
每個item的位置是被layout manager 來進行配置的。默認情況下,我們可以選擇LinearLayoutManager,GridLayoutManager,和StaggerdGridLayoutManager。Linear 顯示items要麼是水平的要麼就是垂直的:
// Setup layout manager for items LinearLayoutManager layoutManager = new LinearLayoutManager(this); // Control orientation of the items // also supports LinearLayoutManager.HORIZONTAL layoutManager.setOrientation(LinearLayoutManager.VERTICAL); // Optionally customize the position you want to default scroll to layoutManager.scrollToPosition(0); // Attach layout manager to the RecyclerView recyclerView.setLayoutManager(layoutManager);
使用grid 或者 staggerd grid(交錯的grid)也可以有類似的操作:
// First param is number of columns and second param is orientation i.e Vertical or Horizontal StaggeredGridLayoutManager gridLayoutManager = new StaggeredGridLayoutManager(2, StaggeredGridLayoutManager.VERTICAL); // Attach the layout manager to the recycler view recyclerView.setLayoutManager(gridLayoutManager);
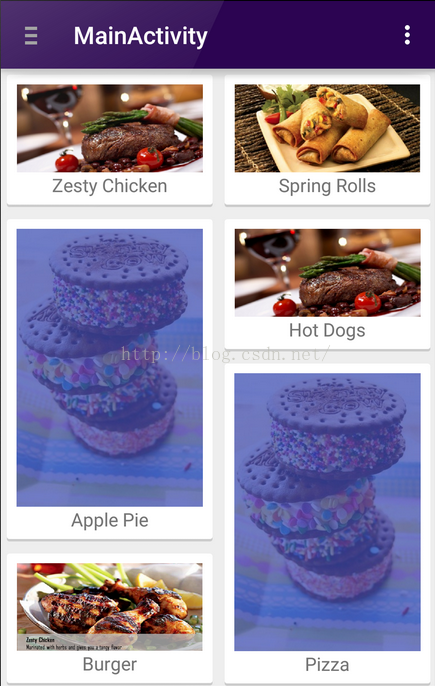
我們可以創建用戶的layout mangers,就像這個link提供的一樣。
我們可以使用多種裝飾品來為recyclerview裝飾這些item就像DividerItemDecoration一樣:
RecyclerView.ItemDecoration itemDecoration = new
DividerItemDecoration(this, DividerItemDecoration.VERTICAL_LIST);
recyclerView.addItemDecoration(itemDecoration);
這個decorator顯示這個分界線的效果圖如下:
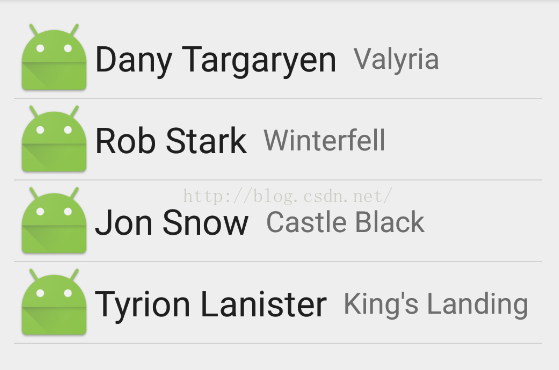
裝飾可以同時被用來添加在grid layout或staggerd grid中items周圍的相關空間。可以CopySpacesItemDecoration.java decorator 到你的project同時使用addItemDecoration方法將其應用到RecyclerView。參考staggered grid tutorial 獲取更多的細節。
RecyclerView支持用戶動畫來為item 提供enter,move,或者刪除,是通過ItemAnimator來實現這一點的。默認的動畫效果是被 DefaultItemAnimator 定義的,它復雜的實現方式(看 source code)顯示了它的動畫效果可以在特殊的操作中(remove, move,add)中同樣可以表現的非常好。
目前,最快的實現RecyclerView的動畫效果的是使用第3方的lib。這個 Third-partyrecyclerview-animators libray 包含了很多動畫以提供你使用而無需創建你自己的。只需要簡單的修改你的app/build.gradle:
repositories {
    jcenter()
}

dependencies {
compile 'jp.wasabeef:recyclerview-animators:2.2.0'
}
接著,我們就可以使用任何已經定義的動畫來修改RecyclerView 的行為了:
recyclerView.setItemAnimator(new SlideInUpAnimator());
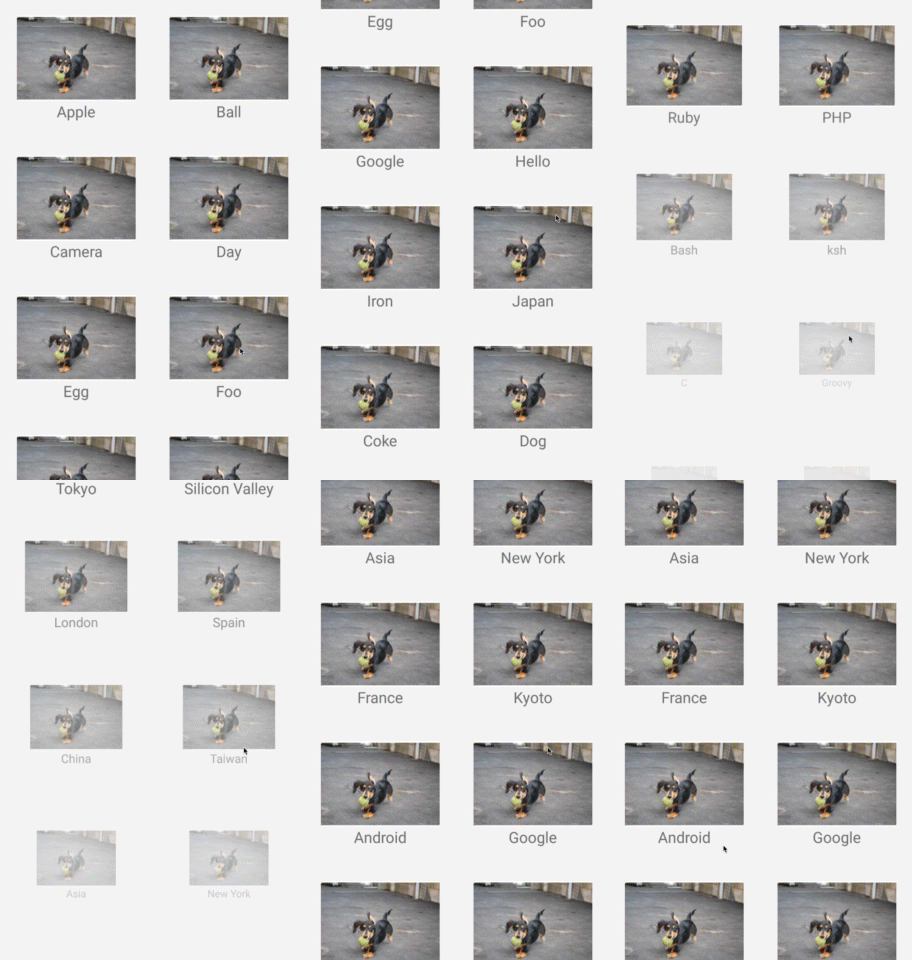
從為了支持RecyclerView的supportv23.1.0 library開始,同時也為ItemAnimator接口提供了一個新的接口。這個老的接口已經被deprecated to SimpleItemAnimator。這個lib 添加了一個 ItemHolderInfo 類,他的表現和被DefaultItemAnimator定義MoveInfo類相似,但是被使用的更加普遍以在animationtransition states中傳遞狀態信息。很可能在下一個版本的defaultItemAnimator中將簡化的使用這個新的類和新定制的接口。
如果你想inflate多種類型的row到一個單獨的RecyclerVIew請看link中的 guide這個將可以幫助我們將包含多種不同類型的items添加到一個single list,效果圖如下:
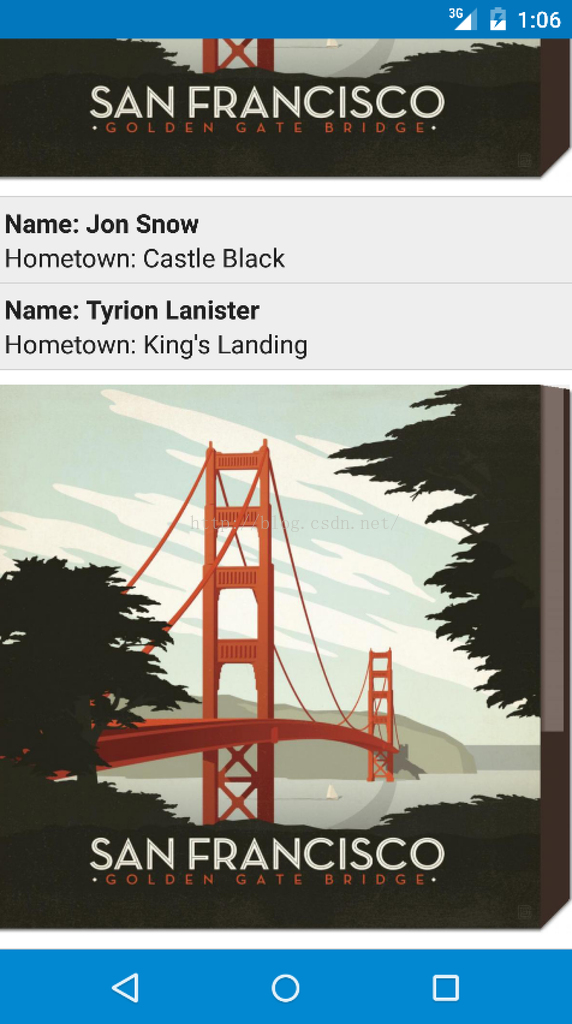
在single list中包含非常多不同類型的items的時候,這個設計時非常有用的。
RecyclerView 允許我們處理touch events使用下面的代碼:
recyclerView.addOnItemTouchListener(new RecyclerView.OnItemTouchListener() {
    @Override
    public void onTouchEvent(RecyclerView recycler, MotionEvent event) {
        // Handle on touch events here
    }
    @Override
    public boolean onInterceptTouchEvent(RecyclerView recycler, MotionEvent event) {
        return false;
    }
});
最早的解決RecyclerView 的處理item click handlers 的解決方案是使用一個decorator類來管理itemclick listener。在擁有了這個 Clever ItemClickSupportdecorator後,添加一個clickhandler可以用下面的方式:
ItemClickSupport.addTo(mRecyclerView).setOnItemClickListener(
  new ItemClickSupport.OnItemClickListener() {
      @Override
      public void onItemClicked(RecyclerView recyclerView, int position, View v) {
          // do it
      }
}
);
在掩護下,這個接口的封裝會在下面有詳細的描述。如果你使用了上面的這些code,你你講不需要下面的任何的手動clickhanding。這個技術最原始的來歷是在這個Android-RecyclerView-Clicks/" target="_blank">link中。
RecyclerView 不像ListView 擁有setOnItemClickListener一樣擁有一些特殊的前置的給itemsattach click handlers 的方法。為了實現同樣的效果(代替上面的使用decorator utility),我們可以將clickevent attach 到我們的adapter中的ViewHolder中:
public class ContactsAdapter extends RecyclerView.Adapter{ // ... // Used to cache the views within the item layout for fast access public class ViewHolder extends RecyclerView.ViewHolder implements View.OnClickListener { public TextView tvName; public TextView tvHometown; private Context context; public ViewHolder(Context context, View itemView) { super(itemView); this.tvName = (TextView) itemView.findViewById(R.id.tvName); this.tvHometown = (TextView) itemView.findViewById(R.id.tvHometown); // Store the context this.context = context; // Attach a click listener to the entire row view itemView.setOnClickListener(this); } // Handles the row being being clicked @Override public void onClick(View view) { int position = getLayoutPosition(); // gets item position User user = users.get(position); // We can access the data within the views Toast.makeText(context, tvName.getText(), Toast.LENGTH_SHORT).show(); } } // ... }
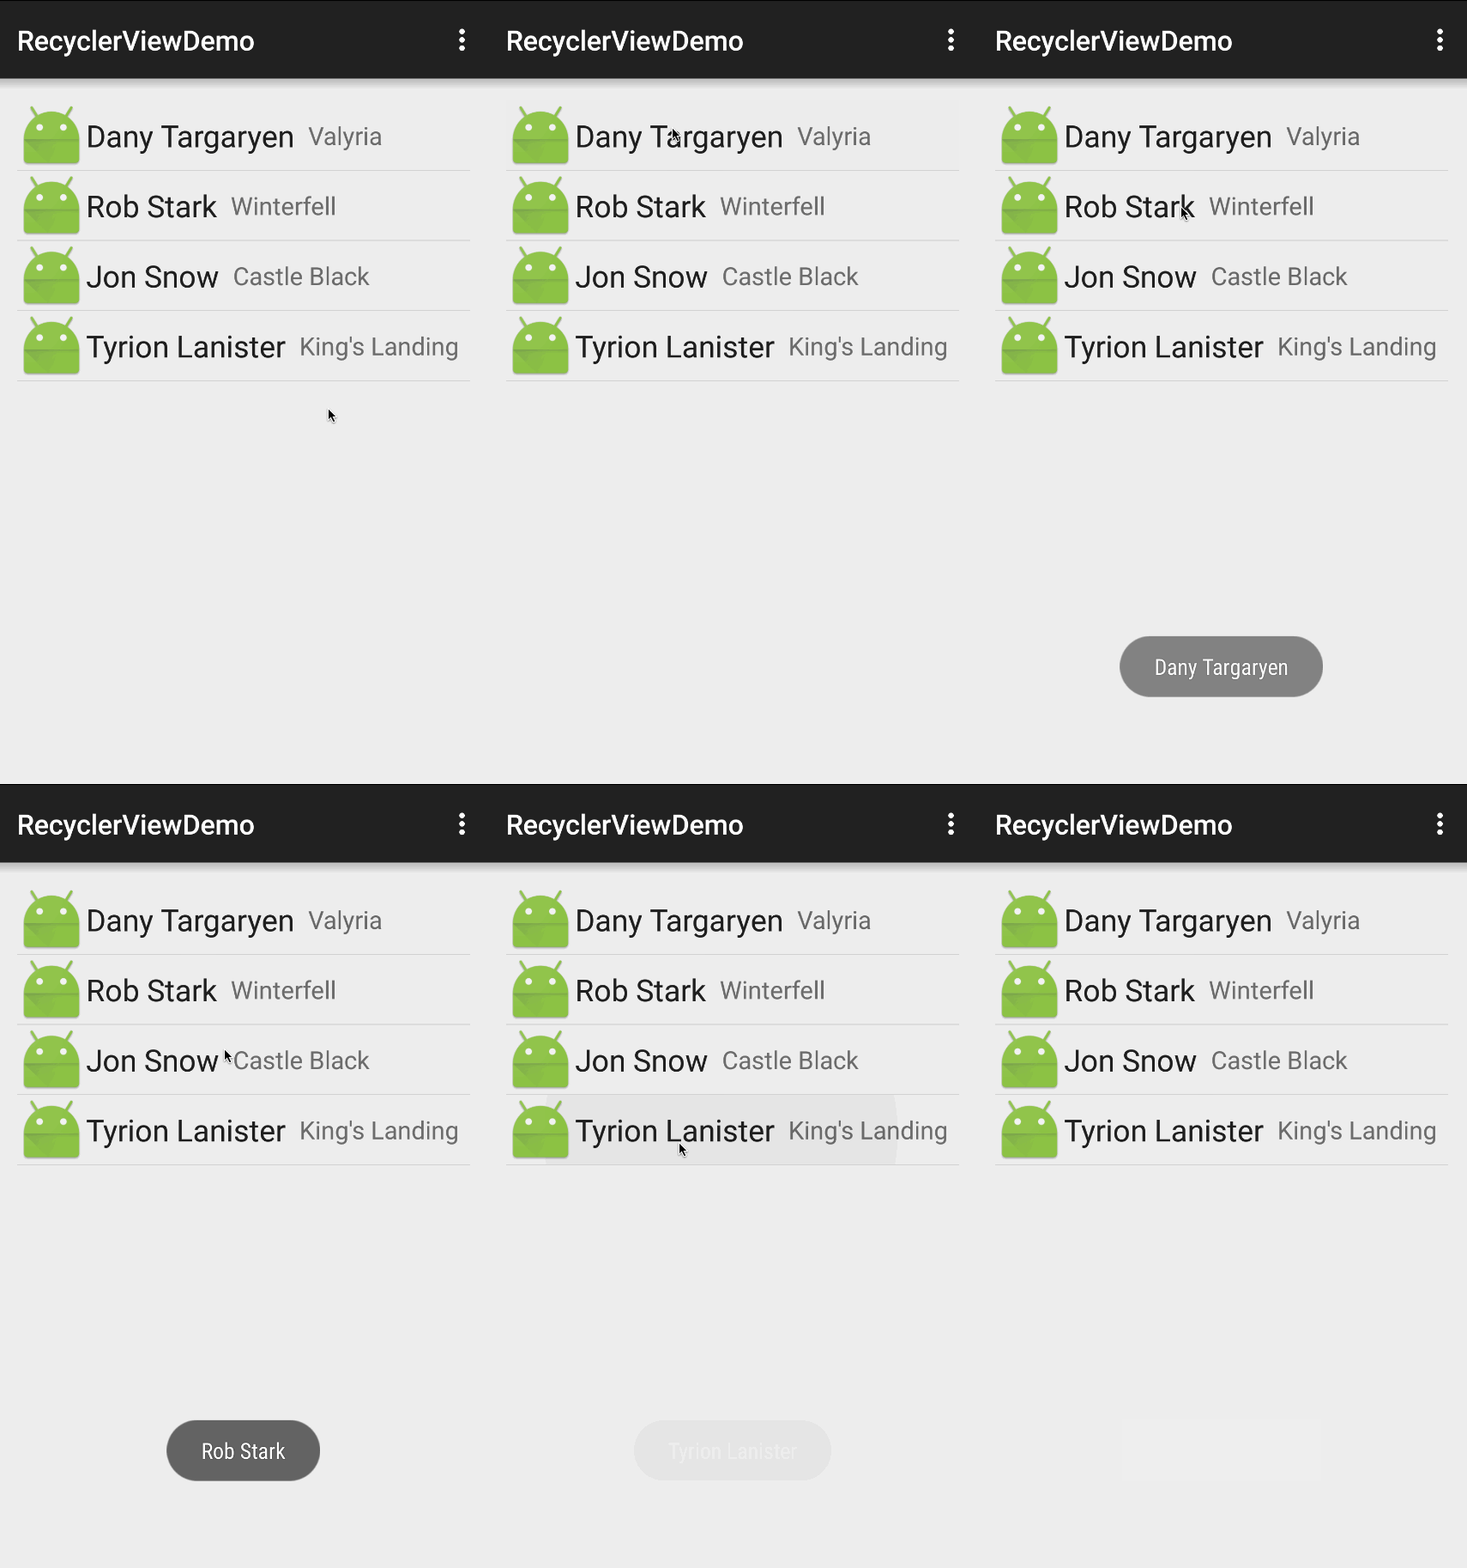
如果我們想在press item時顯示“selected”效果,我們可以給row的rootlayout設置android:background屬性成為?android:attr/selectableItemBackground:
這個將帶來如下圖所示的效果:
在實際的運用中,你可能在RecyclerView中想給view設置clickhandlers,但是將click的邏輯定義在Activity或者Fragment中。為了達到這個目的,在adapter中創建一個 custom listener(http://guides.codepath.com/android/Creating-Custom-Listeners)然後firethe events upwards to an interface implementation defined within the parent :
public class ContactsAdapter extends RecyclerView.Adapter{ // ... /***** Creating OnItemClickListener *****/ // Define listener member variable private static OnItemClickListener listener; // Define the listener interface public interface OnItemClickListener { void onItemClick(View itemView, int position); } // Define the method that allows the parent activity or fragment to define the listener public void setOnItemClickListener(OnItemClickListener listener) { this.listener = listener; } public static class ViewHolder extends RecyclerView.ViewHolder { public TextView tvName; public TextView tvHometown; public ViewHolder(final View itemView) { super(itemView); this.tvName = (TextView) itemView.findViewById(R.id.tvName); this.tvHometown = (TextView) itemView.findViewById(R.id.tvHometown); // Setup the click listener itemView.setOnClickListener(new View.OnClickListener() { @Override public void onClick(View v) { // Triggers click upwards to the adapter on click if (listener != null) listener.onItemClick(itemView, getLayoutPosition()); } }); } } // ... }
然後,我們可以attach a click handler 給adapter,如下:
// In the activity or fragment
ContactsAdapter adapter = ...;
adapter.setOnItemClickListener(new ContactsAdapter.OnItemClickListener() {
    @Override
    public void onItemClick(View view, int position) {
        String name = users.get(position).name;
        Toast.makeText(UserListActivity.this, name + " was clicked!", Toast.LENGTH_SHORT).show();
}
});
可以參考這個stackoverflow post來看看如何在RecyclerView中設置一個item-level的clickhandlers
SwipeRefreshLayout 應該在當RecyclerVIew像通過向下拉的動作刷新內容的時候使用到。請參考我們的關於RecyclerView with SwipeRefreshLayout 的詳細的detailguide,一步一步的實現下來刷新。
 Android學習筆記038之WebView網頁視圖
前面我們介紹過了HTTP協議和Socket,這一篇我們來介紹一下Android的一個網絡控件:WebView-網頁視圖。我們知道,現在移動端有兩種開發方向:原生開發和H5
 Android Studio 將module打成jar包
1.新建測試工程,工程裡面有兩個module,app是Android工程,mylibrary是Android Library庫。2.打開mylibrary目錄下的buil
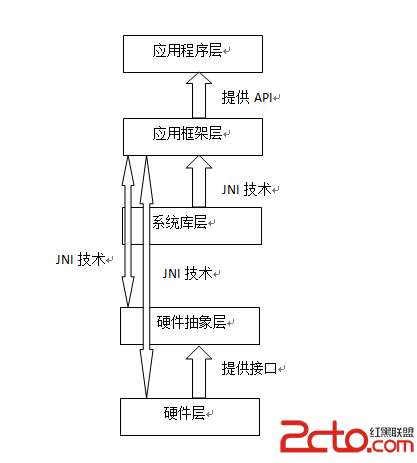 Android Framework應用框架層和HAL硬件抽象層以及Linux Kernel底層之間的關系
Android應用框架層和硬件抽象層以及底層之間的關系1. JNI技術:(1).JNI技術簡單的說就是在本地Java語言聲明本地方法和加載動態鏈接庫(.so文件)(2).
 DatePicker
DatePicker實戰效果圖:依賴導入compile 'cn.aigestudio.datepicker:DatePicker:2.2.0'DatePi