編輯:關於Android編程
現在越來越多的軟件都開始使用沉浸式狀態欄了,下面總結一下沉浸式狀態欄的兩種使用方法
注意!沉浸式狀態欄只支持安卓4.4及以上的版本
狀態欄:4.4上是漸變色,5.0上是完全透明,本文模擬器為4.4演示
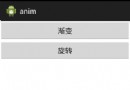
效果圖:
注意!兩種方法的區別:
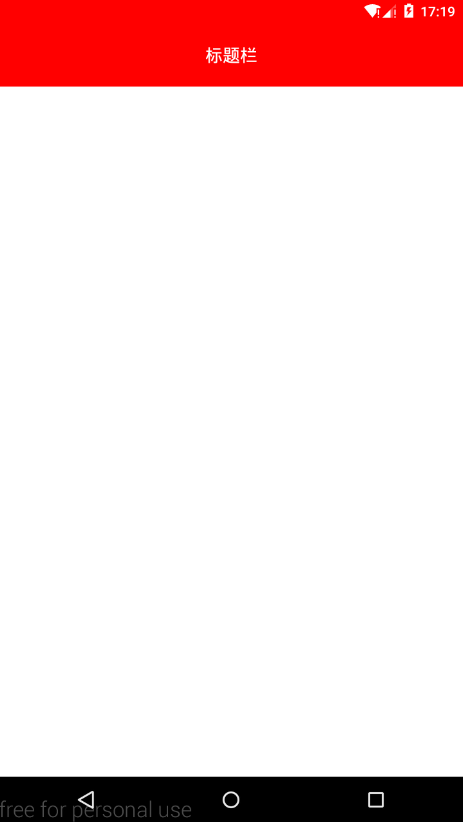
第一種:為頂部欄跟隨當前activity的布局文件的背景的顏色,使用方便,不過也有點問題就是,如果有底部虛擬導航鍵的話,導航鍵的背景跟頂部的顏色一樣,比如:
第二種:是通過設置頂部欄的顏色來顯示的,可以解決第一種的不足,比如:
第一種使用方法:
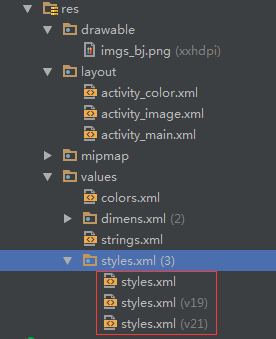
第一、首先在values、values-v19、values-v21文件夾下的styles.xml都設置一個 Translucent System Bar 風格的Theme,如下圖:
values/style.xml:
<style name="TranslucentTheme" parent="AppTheme">
  <!--在Android 4.4之前的版本上運行,直接跟隨系統主題-->
</style>

values-v19/style.xml:

<style name="TranslucentTheme" parent="Theme.AppCompat.Light.DarkActionBar">
  <item name="android:windowTranslucentStatus">true</item>
  <item name="android:windowTranslucentNavigation">true</item>
</style>
values-v21/style.xml:
<style name="TranslucentTheme" parent="Theme.AppCompat.Light.DarkActionBar">
  <item name="android:windowTranslucentStatus">false</item>
  <item name="android:windowTranslucentNavigation">true</item>
  <!--Android 5.x開始需要把顏色設置透明,否則導航欄會呈現系統默認的淺灰色-->
  <item name="android:statusBarColor">@android:color/transparent</item>
</style>
第二、在清單文件中配置需要沉浸式狀態欄的activity加入theme
<activity android:name=".ImageActivity" android:theme="@style/TranslucentTheme" />
<activity android:name=".ColorActivity" android:theme="@style/TranslucentTheme" />
第三、在Activity的布局文件中的跟布局加入“android:fitsSystemWindows=”true””,但是,這裡需要區分一下,就是背景是圖片還是純色:
1.當背景為圖片時,布局可以這麼寫:
<?xml version="1.0" encoding="utf-8"?>
<RelativeLayout xmlns:android="http://schemas.android.com/apk/res/android"
  android:layout_width="match_parent"
  android:layout_height="match_parent"
  android:background="@drawable/imgs_bj"
  android:fitsSystemWindows="true">

</RelativeLayout>
效果:

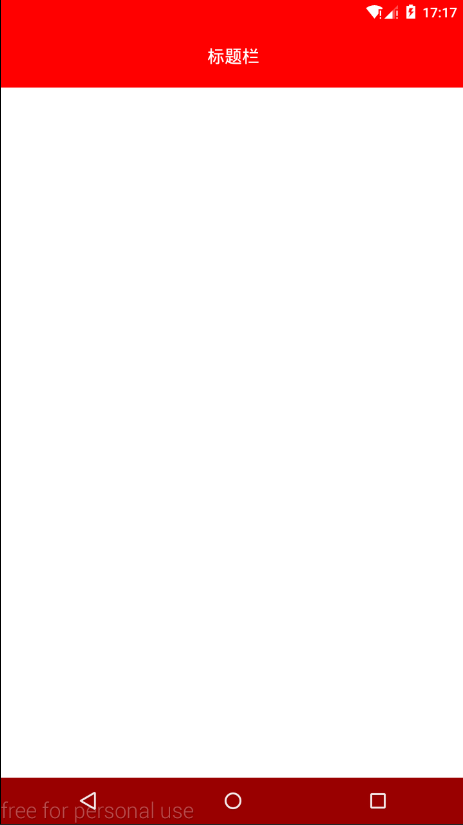
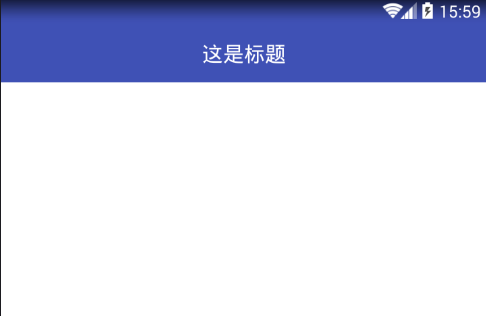
2.當背景為純色,我們需要對布局劃分一下,標題布局與內容布局,先把根布局背景設置成標題布局的背景色,然後標題背景色可以不用設置直接使用根布局的背景色,最後內容布局背景色設置為白色
<?xml version="1.0" encoding="utf-8"?>
<LinearLayout xmlns:android="http://schemas.android.com/apk/res/android"
  android:layout_width="match_parent"
  android:layout_height="match_parent"
  android:background="@color/colorPrimary" //根布局背景設置成“標題布局”想要的顏色
  android:fitsSystemWindows="true"
  android:orientation="vertical">

  <!--標題布局-->
  <RelativeLayout
    android:layout_width="match_parent"
    android:layout_height="55dp"
    android:background="@color/color_31c27c">

    <TextView
      android:layout_width="wrap_content"
      android:layout_height="wrap_content"
      android:layout_centerInParent="true"
      android:text="這是標題"
      android:textColor="@android:color/white"
      android:textSize="20sp" />

  </RelativeLayout>

  <!--內容布局-->
  <LinearLayout
    android:layout_width="match_parent"
    android:layout_height="match_parent"
    android:background="@android:color/white" //內容區域背景設置成白色
    android:gravity="center"
    android:orientation="vertical">

    <Button
      android:layout_marginTop="120dp"
      android:layout_width="wrap_content"
      android:layout_height="wrap_content"
      android:padding="8dp"
      android:text="顯示信息"
      android:onClick="showMsg"
      />
  </LinearLayout>

</LinearLayout>
效果圖:
好了,以上就是沉浸式狀態欄實現的全過程,但是還有一點值得注意的就是,如果我們activity比較多,每一個頁面都添加Android:fitsSystemWindows="true" 比較麻煩,我們需要改動一下:
寫一個基類BaseColorActivity.class,代碼如下:
public abstract class BaseColorActivity extends AppCompatActivity {

  @Override
  protected void onCreate(Bundle savedInstanceState) {
    super.onCreate(savedInstanceState);
    //這一行注意!看本文最後的說明!!!!
    supportRequestWindowFeature(Window.FEATURE_NO_TITLE);

    setContentView(getLayoutResId());//把設置布局文件的操作交給繼承的子類

    ViewGroup contentFrameLayout = (ViewGroup) findViewById(Window.ID_ANDROID_CONTENT);
    View parentView = contentFrameLayout.getChildAt(0);
    if (parentView != null && Build.VERSION.SDK_INT >= 14) {
      parentView.setFitsSystemWindows(true);
    }
  }

  /**
   * 返回當前Activity布局文件的id
   *
   * @return
   */
  abstract protected int getLayoutResId();

}
然後需要沉浸狀態欄的activity繼承該基類:
public class ColorActivity extends BaseColorActivity {

  @Override
  protected void onCreate(Bundle savedInstanceState) {
    super.onCreate(savedInstanceState);
    //這裡不需要寫setContentView()!
  }

  @Override
  protected int getLayoutResId() {
    //onCreate的方法中不需要寫setContentView(),直接把當前activity的布局文件在這裡返回就行了!
    return R.layout.activity_color;
  }
}
然後需要沉浸狀態欄的activity的布局文件中就可以把android:fitsSystemWindows="true"這行代碼給省略了!
第二種使用方法(未完):

寫個工具類StatusBarCompat.class:
public class StatusBarCompat {

  private static final int INVALID_VAL = -1;
  private static final int COLOR_DEFAULT = Color.parseColor("#20000000");

  @TargetApi(Build.VERSION_CODES.LOLLIPOP)
  public static void compat(Activity activity, int statusColor)
  {

    //當前手機版本為5.0及以上
    if (Build.VERSION.SDK_INT >= Build.VERSION_CODES.LOLLIPOP)
    {
      if (statusColor != INVALID_VAL)
      {
        activity.getWindow().setStatusBarColor(statusColor);
      }
      return;
    }

    //當前手機版本為4.4
    if (Build.VERSION.SDK_INT >= Build.VERSION_CODES.KITKAT && Build.VERSION.SDK_INT < Build.VERSION_CODES.LOLLIPOP)
    {
      int color = COLOR_DEFAULT;
      ViewGroup contentView = (ViewGroup) activity.findViewById(android.R.id.content);
      if (statusColor != INVALID_VAL)
      {
        color = statusColor;
      }
      View statusBarView = new View(activity);
      ViewGroup.LayoutParams lp = new ViewGroup.LayoutParams(ViewGroup.LayoutParams.MATCH_PARENT,
          getStatusBarHeight(activity));
      statusBarView.setBackgroundColor(color);
      contentView.addView(statusBarView, lp);
    }

  }

  public static void compat(Activity activity)
  {
    compat(activity, INVALID_VAL);
  }


  public static int getStatusBarHeight(Context context)
  {
    int result = 0;
    int resourceId = context.getResources().getIdentifier("status_bar_height", "dimen", "android");
    if (resourceId > 0)
    {
      result = context.getResources().getDimensionPixelSize(resourceId);
    }
    return result;
  }

}
使用方法:
在當前activity的onCreate中,調用方法StatusBarCompat.compat就可以了:
//第二個參數是想要設置的顏色
StatusBarCompat.compat(this, Color.RED);
如果嫌每個activity都要寫有點麻煩,那就寫個基類來完成這一步:
public class BaseActivity extends AppCompatActivity {

  @Override
  protected void onCreate(Bundle savedInstanceState) {
    supportRequestWindowFeature(Window.FEATURE_NO_TITLE);
    super.onCreate(savedInstanceState);

    StatusBarCompat.compat(this, Color.RED);
  }
}
然後每個activity的頁面繼承該BaseActivity就可以了!
關於上面代碼中提示注意的那個地方的說明:
隱藏系統title注意的兩點:
1、繼承AppCompatActivity時使用:
supportRequestWindowFeature(Window.FEATURENOTITLE)
2、繼承activity時使用:
requestWindowFeature(Window.FEATURENOTITLE)
文本相關下載:點擊免費下載源碼及apk文件
以上就是本文的全部內容,希望對大家的學習有所幫助,也希望大家多多支持本站。
 Android 面試題總結之Android 進階(二)
本章節將繼續深入理解View,關於View的繪制流程,View的事件分發。刷新機制等等。掌握Window是什麼? View的繪制流程 View的事件分發機制 View
 Dalvik學習筆記——Zygote啟動
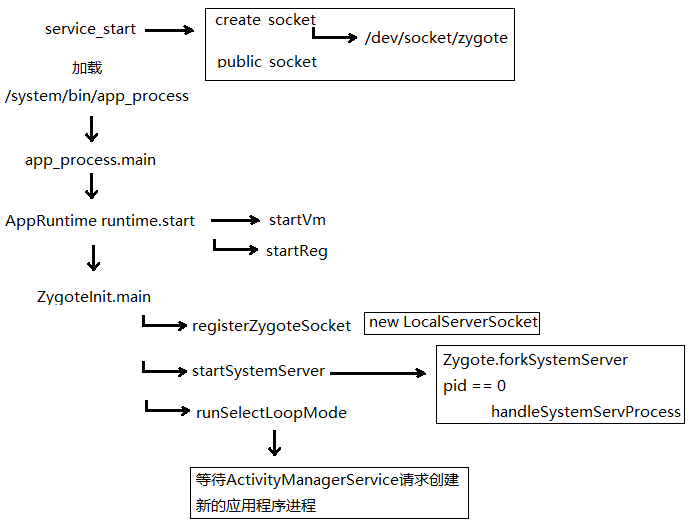
這張圖簡單說明了Zygote的啟動過程下面重點解析這些函數,從app_process.main開始 int main(int argc, char* const
 實例講解Android中的AIDL內部進程通信接口使用
首先描述下我們想要實現的內容,我們希望在一個應用中通過點擊按鈕,去操作另一個進程中應用的音樂播放功能。如圖,我們點擊“播放”時,系統就會去遠程調用我們提供的一個servi
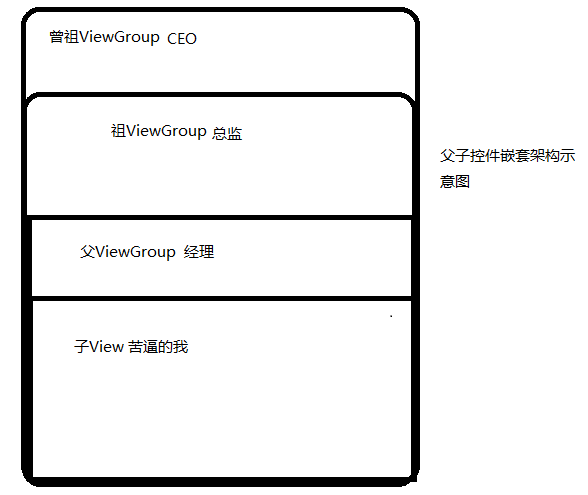
 Android自定義ViewGroup實戰-----流式布局
本文是參考了鴻神之後的文章之後做的一些修改與總結,添加了一些自己的筆記,增加對自定義ViewGroup的理解。文章後面會給出原文地址。首先,什麼是流式布局(FlowLay