編輯:關於Android編程
轉載請注明出處:http://blog.csdn.net/singwhatiwanna/article/details/23387079 (來自singwhatiwanna的csdn博客)
我們知道,在activity內部訪問資源(字符串,圖片等)是很簡單的,只要getResources然後就可以得到Resources對象,有了Resources對象就可以訪問各種資源了,這很簡單,不過本文不是介紹這個的,本文主要介紹在這套邏輯之下的資源加載機制
很明確,不同的Context得到的都是同一份資源。這是很好理解的,請看下面的分析
得到資源的方式為context.getResources,而真正的實現位於ContextImpl中的getResources方法,在ContextImpl中有一個成員 private Resources mResources,它就是getResources方法返回的結果,mResources的賦值代碼為:
mResources = mResourcesManager.getTopLevelResources(mPackageInfo.getResDir(),
Display.DEFAULT_DISPLAY, null, compatInfo, activityToken);
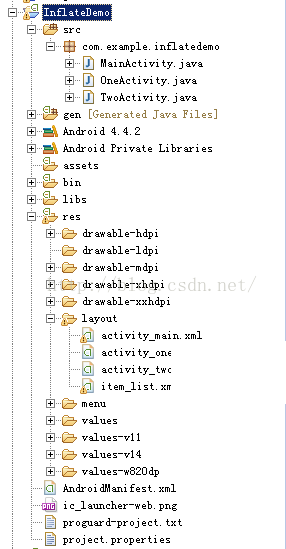
下面看一下ResourcesManager的getTopLevelResources方法,這個方法的思想是這樣的:在ResourcesManager中,所有的資源對象都被存儲在ArrayMap中,首先根據當前的請求參數去查找資源,如果找到了就返回,否則就創建一個資源對象放到ArrayMap中。有一點需要說明的是為什麼會有多個資源對象,原因很簡單,因為res下可能存在多個適配不同設備、不同分辨率、不同系統版本的目錄,按照android系統的設計,不同設備在訪問同一個應用的時候訪問的資源可以不同,比如drawable-hdpi和drawable-xhdpi就是典型的例子。
public Resources getTopLevelResources(String resDir, int displayId,
		Configuration overrideConfiguration, CompatibilityInfo compatInfo, IBinder token) {
	final float scale = compatInfo.applicationScale;
	ResourcesKey key = new ResourcesKey(resDir, displayId, overrideConfiguration, scale,
			token);
	Resources r;
	synchronized (this) {
		// Resources is app scale dependent.
		if (false) {
			Slog.w(TAG, "getTopLevelResources: " + resDir + " / " + scale);
		}
		WeakReference wr = mActiveResources.get(key);
		r = wr != null ? wr.get() : null;
		//if (r != null) Slog.i(TAG, "isUpToDate " + resDir + ": " + r.getAssets().isUpToDate());
		if (r != null && r.getAssets().isUpToDate()) {
			if (false) {
				Slog.w(TAG, "Returning cached resources " + r + " " + resDir
						+ ": appScale=" + r.getCompatibilityInfo().applicationScale);
			}
			return r;
		}
	}

	//if (r != null) {
	//    Slog.w(TAG, "Throwing away out-of-date resources!!!! "
	//            + r + " " + resDir);
	//}

	AssetManager assets = new AssetManager();
	if (assets.addAssetPath(resDir) == 0) {
		return null;
	}

	//Slog.i(TAG, "Resource: key=" + key + ", display metrics=" + metrics);
	DisplayMetrics dm = getDisplayMetricsLocked(displayId);
	Configuration config;
	boolean isDefaultDisplay = (displayId == Display.DEFAULT_DISPLAY);
	final boolean hasOverrideConfig = key.hasOverrideConfiguration();
	if (!isDefaultDisplay || hasOverrideConfig) {
		config = new Configuration(getConfiguration());
		if (!isDefaultDisplay) {
			applyNonDefaultDisplayMetricsToConfigurationLocked(dm, config);
		}
		if (hasOverrideConfig) {
			config.updateFrom(key.mOverrideConfiguration);
		}
	} else {
		config = getConfiguration();
	}
	r = new Resources(assets, dm, config, compatInfo, token);
	if (false) {
		Slog.i(TAG, "Created app resources " + resDir + " " + r + ": "
				+ r.getConfiguration() + " appScale="
				+ r.getCompatibilityInfo().applicationScale);
	}

	synchronized (this) {
		WeakReference wr = mActiveResources.get(key);
		Resources existing = wr != null ? wr.get() : null;
		if (existing != null && existing.getAssets().isUpToDate()) {
			// Someone else already created the resources while we were
			// unlocked; go ahead and use theirs.
			r.getAssets().close();
			return existing;
		}

		// XXX need to remove entries when weak references go away
		mActiveResources.put(key, new WeakReference(r));
		return r;
	}
}
根據上述代碼中資源的請求機制,再加上ResourcesManager采用單例模式,這樣就保證了不同的ContextImpl訪問的是同一套資源,注意,這裡說的同一套資源未必是同一個資源,因為資源可能位於不同的目錄,但它一定是我們的應用的資源,或許這樣來描述更准確,在設備參數和顯示參數不變的情況下,不同的ContextImpl訪問到的是同一份資源。設備參數不變是指手機的屏幕和android版本不變,顯示參數不變是指手機的分辨率和橫豎屏狀態。也就是說,盡管Application、Activity、Service都有自己的ContextImpl,並且每個ContextImpl都有自己的mResources成員,但是由於它們的mResources成員都來自於唯一的ResourcesManager實例,所以它們看似不同的mResources其實都指向的是同一塊內存(C語言的概念),因此,它們的mResources都是同一個對象(在設備參數和顯示參數不變的情況下)。在橫豎屏切換的情況下且應用中為橫豎屏狀態提供了不同的資源,處在橫屏狀態下的ContextImpl和處在豎屏狀態下的ContextImpl訪問的資源不是同一個資源對象。 public static ResourcesManager getInstance() {
synchronized (ResourcesManager.class) {
if (sResourcesManager == null) {
sResourcesManager = new ResourcesManager();
}
return sResourcesManager;
}
}通過閱讀Resources類的源碼可以知道,Resources對資源的訪問實際上是通過AssetManager來實現的,那麼如何創建一個Resources對象呢,有人會問,我為什麼要去創建一個Resources對象呢,直接getResources不就可以了嗎?我要說的是在某些特殊情況下你的確需要去創建一個資源對象,比如動態加載apk。很簡單,首先看一下它的幾個構造方法:
    /**
     * Create a new Resources object on top of an existing set of assets in an
     * AssetManager.
     *
     * @param assets Previously created AssetManager.
     * @param metrics Current display metrics to consider when
     *                selecting/computing resource values.
     * @param config Desired device configuration to consider when
     *               selecting/computing resource values (optional).
     */
    public Resources(AssetManager assets, DisplayMetrics metrics, Configuration config) {
        this(assets, metrics, config, CompatibilityInfo.DEFAULT_COMPATIBILITY_INFO, null);
    }

    /**
     * Creates a new Resources object with CompatibilityInfo.
     *
     * @param assets Previously created AssetManager.
     * @param metrics Current display metrics to consider when
     *                selecting/computing resource values.
     * @param config Desired device configuration to consider when
     *               selecting/computing resource values (optional).
     * @param compatInfo this resource's compatibility info. Must not be null.
     * @param token The Activity token for determining stack affiliation. Usually null.
     * @hide
     */
    public Resources(AssetManager assets, DisplayMetrics metrics, Configuration config,
            CompatibilityInfo compatInfo, IBinder token) {
        mAssets = assets;
        mMetrics.setToDefaults();
        if (compatInfo != null) {
            mCompatibilityInfo = compatInfo;
        }
        mToken = new WeakReference(token);
        updateConfiguration(config, metrics);
        assets.ensureStringBlocks();
} 除了這兩個構造方法還有一個私有的無參方法,由於是私有的,所以沒法訪問。上面兩個構造方法,從簡單起見,我們應該采用第一個public Resources(AssetManager assets, DisplayMetrics metrics, Configuration config)
它接受3個參數,第一個是AssetManager,後面兩個是和設備相關的配置參數,我們可以直接用當前應用的配置就好,所以,問題的關鍵在於如何創建AssetManager,下面請看分析,為了創建一個我們自己的AssetManager,我們先去看看系統是怎麼創建的。還記得getResources的底層實現嗎,在ResourcesManager的getTopLevelResources方法中有這麼兩句:
	AssetManager assets = new AssetManager();
	if (assets.addAssetPath(resDir) == 0) {
		return null;
	}
這兩句就是創建一個AssetManager對象,後面會用這個對象來創建Resources對象,ok,AssetManager就是這麼創建的,assets.addAssetPath(resDir)這句話的意思是把資源目錄裡的資源都加載到AssetManager對象中,具體的實現在jni中,大家感興趣自己去了解下。而資源目錄就是我們的res目錄,當然resDir可以是一個目錄也可以是一個zip文件。有沒有想過,如果我們把一個未安裝的apk的路徑傳給這個方法,那麼apk中的資源是不是就被加載到AssetManager對象裡面了呢?事實證明,的確是這樣,具體情況可以參見Android apk動態加載機制的研究(二):資源加載和activity生命周期管理這篇文章。addAssetPath方法的定義如下,注意到它的注釋裡面有一個{@hide}關鍵字,這意味著即使它是public的,但是外界仍然無法訪問它,因為android sdk導出的時候會自動忽略隱藏的api,因此只能通過反射來調用。
    /**
     * Add an additional set of assets to the asset manager.  This can be
     * either a directory or ZIP file.  Not for use by applications.  Returns
     * the cookie of the added asset, or 0 on failure.
     * {@hide}
     */
    public final int addAssetPath(String path) {
        int res = addAssetPathNative(path);
        return res;
    }
有了AssetManager對象後,我們就可以創建自己的Resources對象了,代碼如下:
	try {
		AssetManager assetManager = AssetManager.class.newInstance();
		Method addAssetPath = assetManager.getClass().getMethod("addAssetPath", String.class);
		addAssetPath.invoke(assetManager, mDexPath);
		mAssetManager = assetManager;
	} catch (Exception e) {
		e.printStackTrace();
	}
	Resources currentRes = this.getResources();
	mResources = new Resources(mAssetManager, currentRes.getDisplayMetrics(),
			currentRes.getConfiguration());
有了Resources對象,我們就可以通過Resources對象來訪問裡面的各種資源了,通過這種方法,我們可以完成一些特殊的功能,比如換膚、換語言包、動態加載apk等,歡迎大家交流。
 NFC 不僅配對這麼簡單
雖然NFC並非什麼新技術,但它至今仍僅是中高端手機的專利。令人遺憾的是,很多用戶對NFC的態度卻是“永不錄用”,一方面是擔心它的高耗
 Android熱修復實踐應用--AndFix
實現的原理這裡說的不是熱修復怎麼實現修bug的原理,這裡說的是怎麼使用AndFix。如果你想了解更多的andFix實現原理,你可以參考下面的文章:https://gith
 RecyclerView綜合解析
什麼是RecyclerView?RecyclerView其實就是一個在5.0推出的控件,可以用它來代替ListView和GridView,從這一點也能看出來它的特性和Li
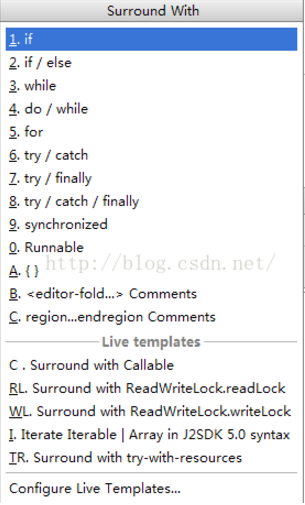 Android studio中快速try catch的快捷鍵
選擇要包裹的代碼塊,然後按下ctrl + alt + t