編輯:關於Android編程
在App開發中,對於信息的獲取與演示,不可能全部將其獲取與演示,為了在用戶使用中,給予用戶以友好、方便的用戶體驗,以滑動、下拉的效果動態加載數據的要求就會出現。為此,該效果功能就需要應用到所需要的展示頁面中。
"PullToRefresh">


            "pullDownFromTop"value="0x1">

            "pullUpFromBottom"value="0x2">

            "both"value="0x3">
srings.xml
"app_name">SampleDemo "action_settings">Settings "pull_to_refresh_pull_down_label">滑動刷新 "pull_to_refresh_release_label">釋放刷新 "pull_to_refresh_refreshing_label">加載中 "pull_to_refresh_tap_label">點擊刷新
importjava.util.LinkedList;
importcom.example.sampledemo.view.PullToRefreshListView;
importandroid.os.AsyncTask;
importandroid.widget.BaseAdapter;
publicclassPullTask
extendsAsyncTask<void,
string="">{
privatePullToRefreshListView
pullToRefreshListView; //實現下拉刷新與上拉加載的ListView
privateintpullState;
//記錄判斷,上拉與下拉動作
privateBaseAdapter
baseAdapter; //ListView適配器,用於提醒ListView數據已經更新
privateLinkedList
linkedList;
publicPullTask(PullToRefreshListView
pullToRefreshListView, intpullState,
BaseAdapter
 baseAdapter, LinkedList linkedList) {
this.pullToRefreshListView
= pullToRefreshListView;
this.pullState
= pullState;
this.baseAdapter
= baseAdapter;
this.linkedList
= linkedList;
}
@Override
protectedString
doInBackground(Void... params) {
try{
Thread.sleep(1000);
}catch(InterruptedException
e) {
}
returnStringTest;
}
@Override
protectedvoidonPostExecute(String
result) {
if(pullState
== 1)
{//name=pullDownFromTop
value=0x1 下拉
linkedList.addFirst(頂部數據);
}
if(pullState
== 2)
{//name=pullUpFromBottom
value=0x2 上拉
linkedList.addLast(底部數據);
}
baseAdapter.notifyDataSetChanged();
pullToRefreshListView.onRefreshComplete();
super.onPostExecute(result);
}
}void,>


【PullAdapter.java】


?


1

2

3

4

5

6

7

8

9

10

11

12

13

14

15

16

17

18

19

20

21

22

23

24

25

26

27

28

29

30

31

32

33

34

35

36

37

38

39

40

41

42

43

44

45

46

47

48

49

50

51

52

53

54

55

56

57

58

59


importjava.util.LinkedList;


importcom.example.sampledemo.R;


importandroid.content.Context;

importandroid.view.LayoutInflater;

importandroid.view.View;

importandroid.view.ViewGroup;

importandroid.widget.BaseAdapter;

importandroid.widget.TextView;


publicclassPullAdapter
extendsBaseAdapter
 {


    privateLinkedList
 linkedList;

    privateLayoutInflater
 mInflater;


    publicPullAdapter(LinkedList
 linkedList, Context context) {

        mInflater
 = LayoutInflater.from(context);

        this.linkedList
 = linkedList;

    }


    @Override

    publicintgetCount()
 {

        returnlinkedList.size();

    }


    @Override

    publicObject
 getItem(intposition)
 {

        returnlinkedList.get(position);

    }


    @Override

    publiclonggetItemId(intposition)
 {

        returnposition;

    }


    @Override

    publicView
 getView(intposition,
 View convertView, ViewGroup parent) {

        ViewHolder
 holder=null;


        if(convertView
 == null)
 {

            holder
 = newViewHolder();

            convertView
 = mInflater.inflate(R.layout.layout_main_listitem, null);

            holder.textView
 = (TextView) convertView.findViewById(R.id.textView);

            convertView.setTag(holder);

        }else{

            holder
 = (ViewHolder) convertView.getTag();

        }

        if(linkedList.size()>0){

            finalString
 dataStr = linkedList.get(position);

            holder.textView.setText(dataStr);

        }

        returnconvertView;

    }


    privatestaticclass

ViewHolder {

        TextView
 textView;        //數據顯示區域

    }

}


第四步:為PullAdapter.java 設計布局文件layout_main_listitem.xml


?


1

2

3

4


"#FFFFFF"android:layout_height="match_parent"android:layout_width="match_parent"android:orientation="vertical"xmlns:android="http://schemas.android.com/apk/res/android">

    "left"android:id="@+id/textView"android:layout_height="wrap_content"android:layout_margintop="4dp"android:layout_width="match_parent"android:textcolor="#99CC66"android:textsize="18dp">


滑動時出現提醒布局文件pull_to_refresh_header.xml


?


1

2

3

4

5

6


"fill_parent"android:layout_width="fill_parent"android:paddingbottom="10dip"android:paddingtop="10dp"xmlns:android="http://schemas.android.com/apk/res/android">

     "@+id/pull_to_refresh_text"android:layout_centerinparent="true"android:layout_height="wrap_content"android:layout_width="wrap_content"android:text="@string/pull_to_refresh_pull_down_label"android:textappearance="?android:attr/textAppearanceMedium"android:textstyle="bold">

    "@+id/pull_to_refresh_progress"android:indeterminate="true"android:layout_centervertical="true"android:layout_height="wrap_content"android:layout_marginleft="30dip"android:layout_marginright="20dip"android:layout_width="wrap_content"android:visibility="gone"style="?android:attr/progressBarStyleSmall">

    "@+id/pull_to_refresh_image"android:layout_centervertical="true"android:layout_height="wrap_content"android:layout_marginleft="30dip"android:layout_marginright="20dip"android:layout_width="wrap_content">


MainActivity.java 主布局文件activity_main.xml


?


1

2

3

4


"#FFFFFF"android:layout_height="match_parent"android:layout_width="match_parent"xmlns:android="http://schemas.android.com/apk/res/android"xmlns:cp="http://schemas.android.com/apk/res/com.example.sampledemo"xmlns:tools="http://schemas.android.com/tools">

    "#FFFFFF"android:cachecolorhint="#00000000"android:divider="@android:color/black"android:dividerheight="0.1dip"android:id="@+id/pullrefresh"android:layout_height="fill_parent"android:layout_width="fill_parent"cp:mode="both">


第五步:編寫MainActivity.java


?


1

2

3

4

5

6

7

8

9

10

11

12

13

14

15

16

17

18

19

20

21

22

23

24

25

26

27

28

29

30

31

32

33

34

35

36

37

38

39

40

41

42

43

44

45

46

47

48

49

50

51

52

53


importjava.util.Arrays;

importjava.util.LinkedList;


importcom.example.sampledemo.view.PullToRefreshBase.OnRefreshListener;

importcom.example.sampledemo.view.PullToRefreshListView;

importcom.example.sampledemo.view.adapter.PullAdapter;

importcom.example.sampledemo.view.task.PullTask;


importandroid.os.Bundle;

importandroid.widget.ArrayAdapter;

importandroid.widget.ListView;

importandroid.app.Activity;

/**

 *
 @ClassName MainActivity.java

 *
 @Author MaHaochen

 *
 @Date 2014-4-30 15:56:47

 */

publicclassMainActivity
extendsActivity
 {

    privateLinkedList
 mListItems;

    privatePullToRefreshListView
 mPullRefreshListView;

    privateArrayAdapter
 mAdapter;

    privateListView
 mListView;

    privatePullAdapter
 pullAdapter;

    privateString[]
 mStrings = { 初始數據01,初始數據02,初始數據03,初始數據04,初始數據05


};


    @Override

    protectedvoidonCreate(Bundle
 savedInstanceState) {

        super.onCreate(savedInstanceState);

        setContentView(R.layout.activity_main);

        initViews();

    }


    privatevoidinitViews()
 {

        mPullRefreshListView
 = (PullToRefreshListView) findViewById(R.id.pullrefresh);

        mPullRefreshListView.setOnRefreshListener(mOnrefreshListener);

        mListView
 = mPullRefreshListView.getRefreshableView();

        mListItems
 = newLinkedList();

        mListItems.addAll(Arrays.asList(mStrings));

        pullAdapter
 = newPullAdapter(mListItems,
 MainActivity.this);

        mListView.setAdapter(pullAdapter);

    }


    OnRefreshListener
 mOnrefreshListener = newOnRefreshListener()
 {

        publicvoidonRefresh()
 {

        PullTask
 pullTask = newPullTask(mPullRefreshListView,


mPullRefreshListView.getRefreshType(),
 pullAdapter, mListItems);

        pullTask.execute();

        }

    };

}


下載地址:http://download.csdn.net/detail/fngy123/7611567
 Android編程使用自定義View實現水波進度效果示例
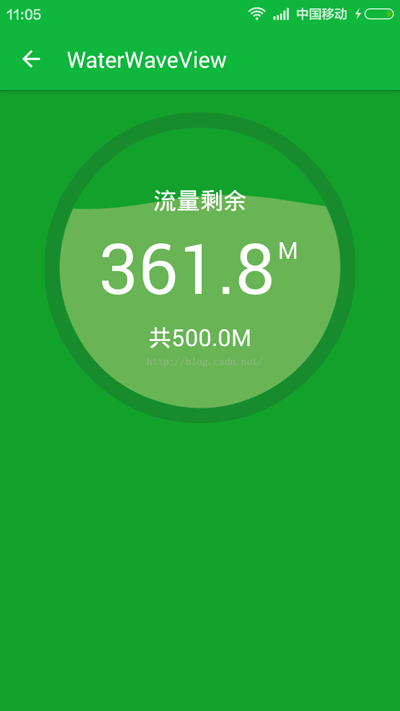
本文實例講述了Android編程使用自定義View實現水波進度效果。分享給大家供大家參考,具體如下:首先上效果圖:簡介:1.自動適應屏幕大小;2.水波自動橫向滾動;3.各
 Android 電話服務(完成版)
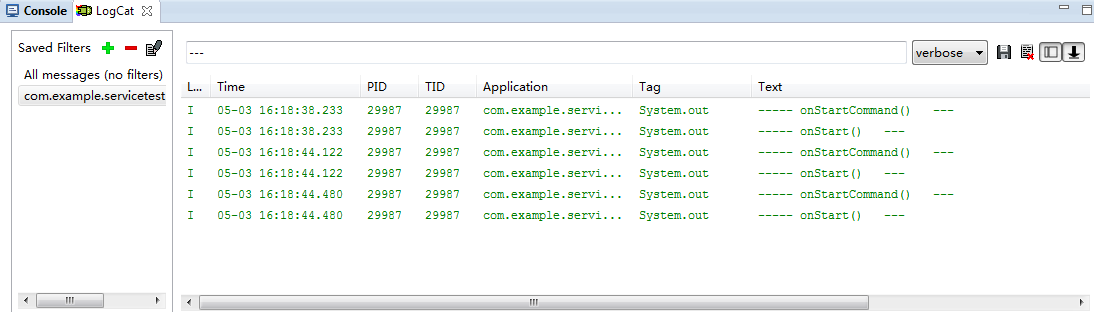
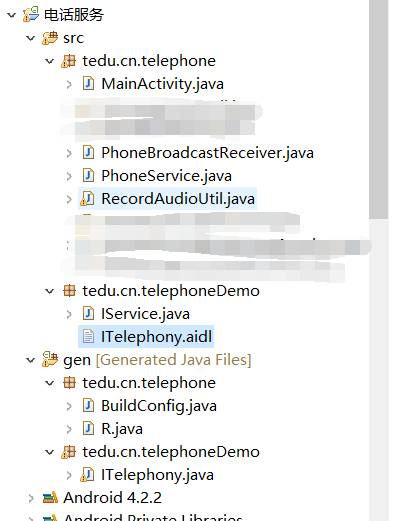
之前的代碼是分開寫的,並沒有實現一個完成電話相關服務,這次就給大家來一記猛藥,望大家提出寶貴意見和建議與我分享,感謝! 電話監聽主Activity
 華為麥芒5高配版怎麼樣 高配版和標配版有什麼區別
麥芒5的正面仍堅持了大黑邊的設計風格,真的很華為,那麼新款的華為麥芒5標配版和高配版有什麼區別呢?高配版如何?讓我們一起來看看吧!華為麥芒5標配版和高配版區
 android底部彈出iOS7風格對話選項框(QQ對話框)--第三方開源之IOS_Dialog_Library
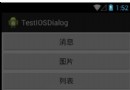
先給大家展示下效果圖,喜歡的朋友可以下載源碼哦。完成這個效果的是使用了 IOS_Dialog_Library下載地址:http://xiazai.jb51.net/201