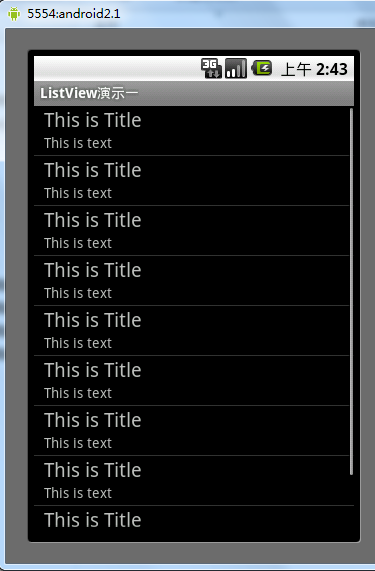
在android系統中使用的是sqlite數據庫,前面的簡易登錄系統已經講述了數據庫的應用。本例的重點是實現數據庫與listview的綁定。demo的數據是將個人的信息綁定到listview中,並存在sqlite。
1.person類
復制代碼
1 public class PersonInfo
2 {
3 public PersonInfo()
4 {
5
6 }
7 private String name;
8 private int age;
9 public void setNmae(String name)
10 {
11 this.name=name;
12 }
13 public String getName()
14 {
15 return name;
16 }
17 public int getAge()
18 {
19 return age;
20 }
21 public void setAge(int age)
22 {
23 this.age=age;
24 }
25 }
復制代碼
person類定義了name和age兩個屬性字段
2.list_item.xml
本例是將person信息綁定到listview中,有必要定義自己的listview項。
復制代碼
1 <?xml version="1.0" encoding="utf-8"?>
2 <LinearLayout xmlns:android="http://schemas.android.com/apk/res/android"
3 android:layout_width="match_parent"
4 android:layout_height="match_parent"
5 android:orientation="vertical" >
6
7 <LinearLayout
8 android:layout_width="match_parent"
9 android:layout_height="wrap_content"
10 android:orientation="horizontal" >
11
12 <TextView
13 android:layout_width="wrap_content"
14 android:layout_height="wrap_content"
15 android:text="@string/tvname" />
16
17 <TextView
18 android:id="@+id/tv_name"
19 android:layout_width="match_parent"
20 android:layout_height="wrap_content" />
21
22 </LinearLayout>
23
24 <LinearLayout
25 android:layout_width="match_parent"
26 android:layout_height="wrap_content"
27 android:orientation="horizontal" >
28
29 <TextView
30 android:layout_width="wrap_content"
31 android:layout_height="wrap_content"
32 android:text="@string/tvage" />
33
34 <TextView
35 android:id="@+id/tv_age"
36 android:layout_width="match_parent"
37 android:layout_height="wrap_content" />
38
39 </LinearLayout>
40 </LinearLayout>
復制代碼
xml文檔中定義了幾個textview分別用來顯示name和age。
3.main.xml
復制代碼
1 <RelativeLayout xmlns:android="http://schemas.android.com/apk/res/android"
2 xmlns:tools="http://schemas.android.com/tools"
3 android:layout_width="match_parent"
4 android:layout_height="match_parent"
5 tools:context=".MainActivity" >
6
7 <ListView
8 android:id="@+id/listView1"
9 android:layout_width="match_parent"
10 android:layout_height="match_parent" >
11 </ListView>
12
13 </RelativeLayout>
復制代碼
main,xml只有一個listview,用來顯示person
4.list_footer
listview可以添加底部或者頭部的視圖對象。
復制代碼
1 <?xml version="1.0" encoding="utf-8"?>
2 <LinearLayout xmlns:android="http://schemas.android.com/apk/res/android"
3 android:layout_width="match_parent"
4 android:layout_height="match_parent"
5 android:orientation="vertical" >
6
7 <Button
8 android:id="@+id/bt_load"
9 android:layout_width="fill_parent"
10 android:layout_height="wrap_content"
11 android:text="加載更多數據" />
12 <ProgressBar
13 android:id="@+id/pg"
14 android:layout_width="wrap_content"
15 android:layout_height="wrap_content"
16 android:layout_gravity="center_horizontal"
17 android:visibility="gone"
18 />
19 </LinearLayout>
復制代碼
底部xml只有button,用來加載更多的數據。
5.personinfo.xml
本例的person信息是手動添加到數據庫的,並不是在代碼中自己生成的數據。
復制代碼
1 <?xml version="1.0" encoding="utf-8"?>
2 <LinearLayout xmlns:android="http://schemas.android.com/apk/res/android"
3 android:layout_width="fill_parent"
4 android:layout_height="fill_parent"
5 android:orientation="vertical" >
6
7 <LinearLayout
8 android:layout_width="fill_parent"
9 android:layout_height="wrap_content"
10 android:layout_gravity="center"
11 android:orientation="horizontal" >
12
13 <TextView
14 android:layout_width="wrap_content"
15 android:layout_height="wrap_content"
16 android:text="@string/tvname" />
17
18 <EditText
19 android:id="@+id/edname"
20 android:layout_width="match_parent"
21 android:layout_height="wrap_content" />
22
23 </LinearLayout>
24
25 <LinearLayout
26 android:layout_width="fill_parent"
27 android:layout_height="wrap_content"
28 android:layout_gravity="center"
29 android:layout_weight="0"
30 android:orientation="horizontal" >
31
32 <TextView
33 android:layout_width="wrap_content"
34 android:layout_height="wrap_content"
35 android:text="@string/tvage" />
36
37 <EditText
38 android:id="@+id/edage"
39 android:layout_width="match_parent"
40 android:layout_height="wrap_content"
41 android:inputType="number" />
42
43 </LinearLayout>
44
45 </LinearLayout>
復制代碼
xml定義了edittext,寫入nanme和age
6.menu.xml
menu是本例的重點,本來是研究menu的使用。
復制代碼
1 <menu xmlns:android="http://schemas.android.com/apk/res/android" >
2
3 <item android:showAsAction="ifRoom|withText" android:id="@+id/action_add" android:title="@string/action_add"></item>
4 <item android:showAsAction="ifRoom|withText" android:id="@+id/action_delete" android:title="@string/action_delete"></item>
5 <item
6 android:id="@+id/action_settings"
7 android:orderInCategory="100"
8 android:showAsAction="never"
9 android:title="@string/action_settings"/>
10
11 </menu>
復制代碼
本文檔定義了幾個菜單項,如果運行在3.0以上的android系統中,ui顯示方式有很大不同。showasaction用來設置menu的顯示方式。
復制代碼
1 @Override
2 public boolean onCreateOptionsMenu(Menu menu) {
3 // Inflate the menu; this adds items to the action bar if it is present.
4 getMenuInflater().inflate(R.menu.main, menu);
5 return true;
6 }
7 public boolean onOptionsItemSelected(MenuItem menu)
8 {
9 switch(menu.getItemId())
10 {
11 case R.id.action_add:
12 addUser();
13 return true;
14 case R.id.action_delete:
15 //deleteUser();
16 return true;
17 default:
18 super.onOptionsItemSelected(menu);
19 }
20 return true;
21 }
復制代碼
這段代碼是menu的初始化以及對menu菜單項選中事件的監聽。
7.contextmenu
本例個人信息的刪除是用contextmenu實現的,用戶長按lsitview的某一項,即可彈出刪除的上下文菜單。
復制代碼
1 public void onCreateContextMenu(ContextMenu menu,View view,ContextMenuInfo menuInof)
2
3 {
4 super.onCreateContextMenu(menu, view, menuInof);
5 menu.add(0,1,Menu.NONE,"刪除");
6 }
7 public boolean onContextItemSelected(MenuItem item)
8 {
9 switch(item.getItemId())
10 {
11 case 1:
12 deleteUser(delname);
13 return true;
14 default:
15 return false;
16 }
17 }
復制代碼
registerForContextMenu(listview);菜單注冊到某視圖。
8.addperson和deleteperson
添加和刪除個人信息都與sqlite數據庫相關。
復制代碼
1 private static final String DATABASE_NAME="test";
2 public SQLiteHelper(Context context, String name, CursorFactory factory,
3 int version) {
4 super(context, name, factory, version);
5 this.getWritableDatabase();
6 // TODO Auto-generated constructor stub
7 }
8
9 @Override
10 public void onCreate(SQLiteDatabase db) {
11 // TODO Auto-generated method stub
12 db.execSQL("CREATE TABLE IF NOT EXISTS person"+"(id INTEGER PRIMARY KEY,name VARCHAR,age INTEGER)");
13
14 }
15 //關閉數據庫
16 public void close()
17 {
18 this.getWritableDatabase().close();
19 }
20 public boolean Addperson(int age,String name)
21 {
22 try
23 {
24 ContentValues cv=new ContentValues();
25 cv.put("name", name);
26 cv.put("age", age);
27 this.getWritableDatabase().insert("person", null, cv);
28 return true;
29 }
30 catch(Exception ex)
31 {
32 return false;
33 }
34 }
35 @Override
36 public void onUpgrade(SQLiteDatabase db, int oldVersion, int newVersion) {
37 // TODO Auto-generated method stub
38
39 }
復制代碼
sqlhelper類用來數據庫和表的創建,同時定義了添加person的方法。
復制代碼
1 private void addUser() {
2 // TODO Auto-generated method stub
3 final LinearLayout layout=(LinearLayout)getLayoutInflater().inflate(R.layout.personinfo, null);
4 new AlertDialog.Builder(this).setTitle("添加聯系人").setView(layout).setPositiveButton("確定",new OnClickListener() {
5
6 @Override
7 public void onClick(DialogInterface dialog, int which) {
8 // TODO Auto-generated method stub
9 EditText edname=(EditText)layout.findViewById(R.id.edname);
10 EditText edage=(EditText)layout.findViewById(R.id.edage);
11 String sql="select * from person where name=?";
12 Cursor cursor=sqlhelper.getWritableDatabase().rawQuery(sql, new String[]{edname.getText().toString()});
13 if(cursor.moveToFirst())
14 {
15 Toast.makeText(MainActivity.this, "已經存在", Toast.LENGTH_LONG).show();
16 }
17 else
18 {
19 if(sqlhelper.Addperson(Integer.parseInt(edage.getText().toString()), edname.getText().toString()))
20 {
21 PersonInfo person=new PersonInfo();
22 person.setNmae(edname.getText().toString());
23 person.setAge(Integer.parseInt(edage.getText().toString()));
24 list.add(person);
25 adapter.notifyDataSetChanged();
26 Toast.makeText(MainActivity.this, "信息添加成功", Toast.LENGTH_LONG).show();
27 }
28 }
29 }
30 }).setNegativeButton("取消", null).show();
31 }
復制代碼
該段代碼實現了個人信息的添加,通過調用AlertDialog實現。點擊menu中的添加之後,會彈出添加用戶的對話框,點擊確定信息將會被保存。
復制代碼
1 private void deleteUser(String str) {
2 // TODO Auto-generated method stub
3 try
4 {
5 sqlhelper.getWritableDatabase().delete("person", "name=?", new String[]{str});
6 for(int i=0;i<list.size();i++)
7 {
8 PersonInfo person=list.get(i);
9 if(person.getName()==str)
10 {
11 list.remove(i);
12 }
13 }
14 adapter.notifyDataSetChanged();
15 }
16 catch(Exception ex)
17 {
18 Toast.makeText(this, "刪除失敗", Toast.LENGTH_LONG).show();
19 }
20 }
復制代碼
個人信息刪除調用sqlite的delete方法實現,需要傳入表的名稱,刪除的條件。同時在完成數據的刪除後,通知listview數據已經發生變化。本例將讀取到的數據存在list中,所以移除了list中的數據。
9.Mybaseadapter
mybaseadapter是listview的適配器,繼承與baseadapter。
復制代碼
1 public class MyAdapter extends BaseAdapter
2 {
3
4 int count=5;
5 Context mcontext;
6 public MyAdapter(Context context)
7 {
8 mcontext=context;
9 }
10 @Override
11 public int getCount() {
12 // TODO Auto-generated method stub
13 if(list.size()>5)
14 {
15 return count;
16 }
17 else
18 {
19 return list.size();
20 }
21 }
22
23 @Override
24 public Object getItem(int arg0) {
25 // TODO Auto-generated method stub
26 return null;
27 }
28
29 @Override
30 public long getItemId(int arg0) {
31 // TODO Auto-generated method stub
32 return 0;
33 }
34
35 @Override
36 public View getView(int arg0, View arg1, ViewGroup arg2) {
37 // TODO Auto-generated method stub
38 PersonInfo person=new PersonInfo();
39 if(arg1==null)
40 {
41 arg1=LayoutInflater.from(mcontext).inflate(R.layout.person_item, null);
42 }
43
44 person=(PersonInfo)list.get(arg0);
45
46 TextView edname=(TextView)arg1.findViewById(R.id.tv_name);
47 TextView edage=(TextView)arg1.findViewById(R.id.tv_age);
48 edname.setText(person.name);
49 edage.setText(String.valueOf(person.age));
50 return arg1;
51 }
52
53 }
復制代碼
本例定義每次只能顯示5條數據。當小於5條數據的時候,將全部顯示。這裡設置返回的數目是關鍵。
復制代碼
1 btnpro=(Button)moreview.findViewById(R.id.bt_load);
2 pg=(ProgressBar)moreview.findViewById(R.id.pg);
3 btnpro.setOnClickListener(new View.OnClickListener() {
4
5 @Override
6 public void onClick(View v) {
7 // TODO Auto-generated method stub
8 pg.setVisibility(View.VISIBLE);// 將進度條可見
9 btnpro.setVisibility(View.GONE);// 按鈕不可見
10 Handler hanldre=new Handler();
11 hanldre.postDelayed(new Runnable(){
12
13 @Override
14 public void run() {
15 // TODO Auto-generated method stub
16
17 adapter.count+=5;
18
19 btnpro.setVisibility(View.VISIBLE);
20 pg.setVisibility(View.GONE);
21 if(adapter.count>list.size())
22
23 {
24 adapter. count=list.size();
25 btnpro.setVisibility(View.INVISIBLE);
26 }
27 adapter.notifyDataSetChanged();
28 }}, 2000);
29 }
30 });
復制代碼
這是加載更多數據按鈕的監聽事件。代碼中新建了hanlder實例,用來加載更多的數據。其中當count大於list.size,count等於list.size.
10.系統退出
在android中,很多系統在用戶按返回鍵的時候,並不是直接退出,而是彈出對話框。
復制代碼
1 public boolean onKeyDown(int keyCode, KeyEvent event)
2 {
3 if(keyCode==KeyEvent.KEYCODE_BACK && event.getRepeatCount()==0)
4 {
5 new AlertDialog.Builder(this).setTitle("系統提示").setMessage("確定退出系統嗎").setPositiveButton("確定", new OnClickListener() {
6
7 @Override
8 public void onClick(DialogInterface dialog, int which) {
9 // TODO Auto-generated method stub
10 android.os.Process.killProcess(android.os.Process.myPid());
11 }
12 }).setNegativeButton("取消", null).show();
13 return true;
14 }
15 else if(keyCode==KeyEvent.KEYCODE_MENU && event.getRepeatCount()==0)
16 {
17 openOptionsMenu();
18 return true;
19 }
20 return true;
21 }
復制代碼
這個功能通過重寫onkeydown方法實現。但是實現過程中發現menu菜單不能顯示了,所以在這裡加了一個判斷,並調用了 openOptionsMenu()。
 Qt for Android 編譯安卓原生可執行程序
 再談STM32的CAN過濾器-bxCAN的過濾器的4種工作模式以及使用方法總結
 Android UI設計系列之自定義ListView仿QQ空間阻尼下拉刷新和漸變菜單欄效果(8)
 Android控件之ListView用法實例詳解