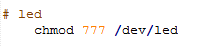
編輯:關於Android編程
在viewgroup執行:
public void snapToScreen(int whichScreen) {
		whichScreen = Math.max(0, Math.min(whichScreen, getChildCount() - 1));
		boolean changingScreens = whichScreen != mCurrentScreen;


		mNextScreen = whichScreen;
		int mScrollX = this.getScrollX();
		final int newX = whichScreen * getWidth();
		final int delta = newX - mScrollX;
		System.out.println(====snapToScreen delta=+delta);
		mScroller.startScroll(mScrollX, 0, delta, 0, Math.abs(delta) * 2); //這個含義是從x坐標mScrollX的位置滑動delta距離
		//invalidate非常重要,不然你移動一點頁面不能回復原狀
		invalidate();
	}
為了使這個動畫有效果,我們必須重載computeScroll
@Override
	public void computeScroll() {
		if (mScroller.computeScrollOffset()) {
			scrollTo(mScroller.getCurrX(), mScroller.getCurrY());
		     postInvalidate();
		} else if (mNextScreen != -1) { //這個是滑動完成後執行的,這個時候必須set當前的view
			setCurrentScreen(Math.max(0,
					Math.min(mNextScreen, getChildCount() - 1)));
			mNextScreen = -1;


		}
	}
如果這個viewgroup一次性加載太多子控件,會造成性能的很大影響,為了解決這個問題,我們應該在顯示當前的控件,其他的應該visible置為空
這樣來處理:
void setCurrentScreen(int index) {
		mCurrentScreen = index;
		resetVisibilityForChildren();
	}

	private void resetVisibilityForChildren() {
	    int count = getChildCount();
	    for (int i = 0; i < count; i++) {
	        View child = getChildAt(i);
	        if (Math.abs(mCurrentScreen - i) <= 0) {
	            child.setVisibility(View.VISIBLE);
	        } else {
	            child.setVisibility(View.INVISIBLE);
	        }
	    }
	}
@Override
	protected void dispatchDraw(Canvas canvas) {
		int childCount = getChildCount();
		if (childCount == 0) {
			return;
		}


		boolean restore = false;
		int restoreCount = 0;

		final long drawingTime = getDrawingTime();
		final float scrollPos = (float) getScrollX() / getWidth();
		final int leftScreen = (int) scrollPos;
		final int rightScreen = leftScreen + 1;
		if (leftScreen >= 0 && leftScreen < childCount) {
			drawChild(canvas, getChildAt(leftScreen), drawingTime); //這個會使leftScreen由gone的狀態顯示出來
		}
		if  (rightScreen < getChildCount()) {
			drawChild(canvas, getChildAt(rightScreen), drawingTime);
		}

		if (restore) {
			canvas.restoreToCount(restoreCount);
		}

	}
在myGroup類裡加入:
	public void setmListener(OnViewChangedListener mListener) {
		this.mListener = mListener;
	}

	public interface OnViewChangedListener {
	    /**
	     * When view changed.
	     * @param viewIndex index.
	     */
		void onViewChanged(int viewIndex);
	}
    private static final int DEFAULT_POINT_MARGIN = 5;

	/**
     * 更新點點的狀態,包括總數和當前位置。
     * @param dotsLayout 用來放置點點的layout.
     * @param total 總數。
     * @param current 當前位置。
     * @param state Bundle,參數擴展,可以為null.
     */
    public static void updateDots(ViewGroup dotsLayout, int total, int current, Bundle state) {

        if (total < 0) {
            total = 0;
        }

        int lastIndex = -1;
        Object tag = dotsLayout.getTag(R.id.dots_current);
        if (tag != null) {
            lastIndex = (Integer) tag;
        }

        int margin = DEFAULT_POINT_MARGIN;
        if (state != null) {
            margin = state.getInt(KEY_POINT_MARGIN, margin);
        }

        int childrenNum = dotsLayout.getChildCount();

        for (int i = childrenNum; i < total; i++) {
            ImageView pointView = new ImageView(dotsLayout.getContext());
            pointView.setImageResource(R.drawable.dot);
            dotsLayout.addView(pointView);
            LinearLayout.LayoutParams params = (LinearLayout.LayoutParams) pointView.getLayoutParams();
            params.leftMargin = margin;
            params.rightMargin = margin;
        }

        for (int i = childrenNum - 1; i >= total; i--) {
            dotsLayout.removeViewAt(i);
        }

        if (current == lastIndex) {
            return;
        }

        if (lastIndex >= 0 && lastIndex < total) {
            ImageView pointView = (ImageView) dotsLayout.getChildAt(lastIndex);
            pointView.setImageResource(R.drawable.dot);
        }

        if (current >= 0 && current < total) {
            ImageView pointView = (ImageView) dotsLayout.getChildAt(current);
            pointView.setImageResource(R.drawable.dot_current);
        }

        dotsLayout.setTag(R.id.dots_current, current);
    }

	public interface WorkspaceSnapListener {

		void onSnapToScreen(MyGroup workspace, int whichScreen);
	}

	public void setSnapListener(WorkspaceSnapListener listener) {
		snapListener = listener;
	}
@Override
	public void computeScroll() {
		if (mScroller.computeScrollOffset()) {

		} else if (mNextScreen != -1) {

			if (mListener != null) {
				mListener.onViewChanged(mCurrentScreen);
			}
		}
	}
public void snapToScreen(int whichScreen) {


		if (snapListener != null) {
			snapListener.onSnapToScreen(this, whichScreen);
		}
	}
<framelayout android:id="@+id/MainRoot" android:layout_height="fill_parent" android:layout_width="fill_parent" xmlns:android="http://schemas.android.com/apk/res/android">


</framelayout>
點的畫法:
oncreate:
@Override
	protected void onCreate(Bundle savedInstanceState) {
		super.onCreate(savedInstanceState);
		requestWindowFeature(Window.FEATURE_NO_TITLE);
		setContentView(R.layout.activity_main);
        final ViewGroup dotsLayout = (ViewGroup) findViewById(R.id.dots_layout);

		final int[] images = new int[]{R.drawable.help_01,R.drawable.help_02,R.drawable.help_03};
		final MyGroup myGroup = (MyGroup) findViewById(R.id.workspace);

		final Bundle dotsState = new Bundle();
		int margin = getResources().getDimensionPixelSize(R.dimen.workspace_dot_margin);
		dotsState.putInt(MyGroup.KEY_POINT_MARGIN, margin);
		MyGroup.updateDots(dotsLayout, images.length, 0, dotsState);


		for (int i = 0; i < 3; i++) {
			final View item = getLayoutInflater().inflate(
					R.layout.introduction_item_test, null);

			myGroup.addView(item);
			final ImageView imageView = (ImageView) item
					.findViewById(R.id.introduction_image_view);
			try {
				imageView.setImageResource(images[i]);
			} catch (OutOfMemoryError e) {
			}

		}

		myGroup.setmListener(new OnViewChangedListener() {

            @Override
            public void onViewChanged(int viewIndex) {
                myGroup.updateDots(dotsLayout, images.length, viewIndex, dotsState);
            }
        });

		myGroup.setSnapListener(new WorkspaceSnapListener() {

			@Override
			public void onSnapToScreen(MyGroup workspace, int whichScreen) {
				myGroup.updateDots(dotsLayout, images.length, whichScreen, dotsState);


			}
		});
	}
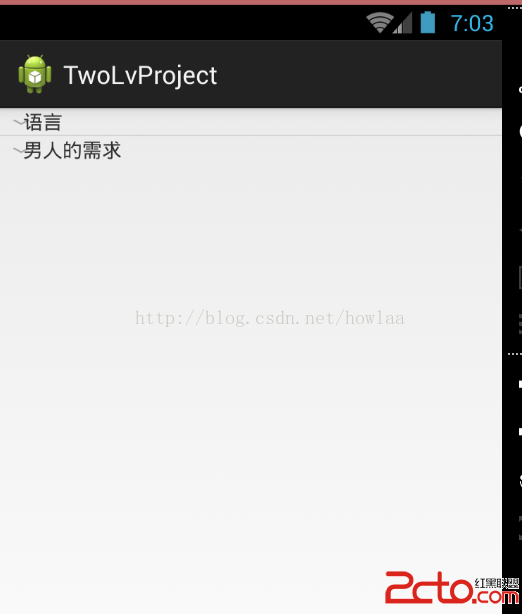 android ExpandableListView詳解
點擊顯示展開項,先看效果:開始,1.先搞個XML顯示主界面:main_activity.xml: 2.進入main_activity開始搞顯示工作:
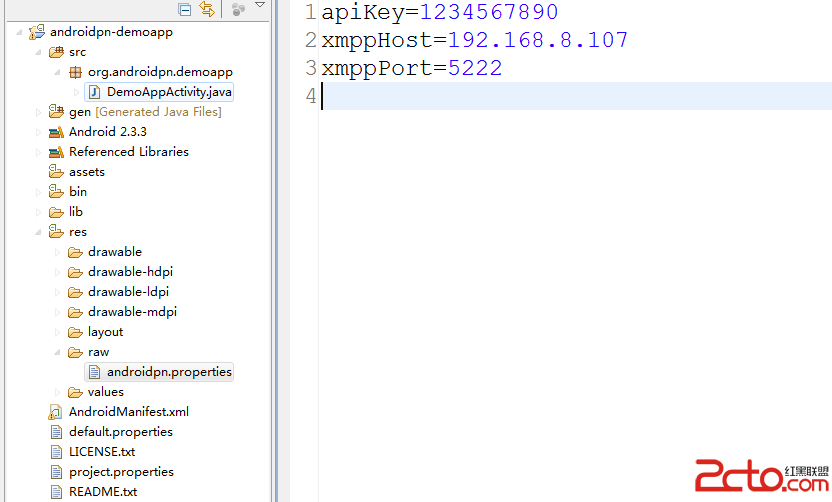 Android 消息推送 Xmpp協議
1.引言 所謂的消息推送就是從服務器端向移動終端發送連接,傳輸一定的信息。比如一些新聞客戶端,每隔一段時間收到一條或者多條通知,這就是從服務器端傳來的推送消息;還
 YingBeautyNote
項目地址:YingBeautyNote簡介:一款類似印象筆記的 App,隨時記錄您的生活點滴。一款類似印象筆記的 App,隨時記錄您的生活點滴,但時目前功能還沒達到印象筆
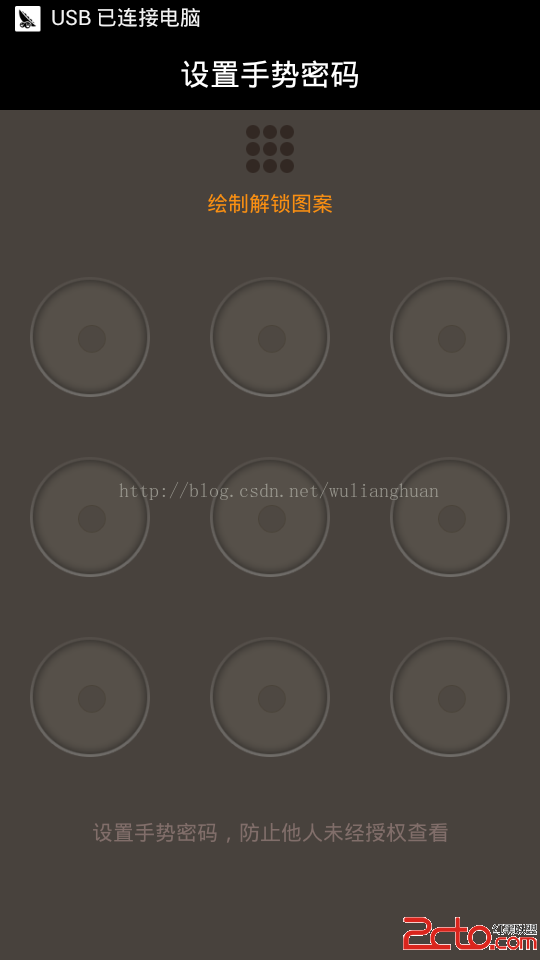 Android招財進寶手勢密碼的實現
這幾個月都是在做招財進寶項目,一個高收益低風險的理財APP,有興趣的可以下載玩玩,收益不錯哦!!! 招財進寶下載地址:http://8.shengpay.com/