編輯:關於Android編程
很久沒有使用Android的通知功能了,今天把兩年前的代碼搬出來一看,發現很多方法都廢棄了,代碼中各種刪除線看的十分不爽。於是乎,打開Google,查看官方文檔,學習最新的發送通知欄消息的方法。
1.首先,獲取系統的通知服務:
NotificationManager nm = (NotificationManager) getSystemService(Context.NOTIFICATION_SERVICE);2.發送一個最簡單的通知
    public void simpleNotice(View view) {
        //此Builder為android.support.v4.app.NotificationCompat.Builder中的,下同。
        Builder mBuilder = new Builder(this);
        //系統收到通知時,通知欄上面顯示的文字。
        mBuilder.setTicker(天津,晴,2~15度,微風);
        //顯示在通知欄上的小圖標
        mBuilder.setSmallIcon(R.drawable.consult_answer);
        //通知標題
        mBuilder.setContentTitle(天氣預報);
        //通知內容
        mBuilder.setContentText(天津,晴,2~15度,微風);

        //設置大圖標,即通知條上左側的圖片(如果只設置了小圖標,則此處會顯示小圖標)
        mBuilder.setLargeIcon(BitmapFactory.decodeResource(getResources(), R.drawable.share_sina));
        //顯示在小圖標左側的數字
        mBuilder.setNumber(6);

        //設置為不可清除模式
        mBuilder.setOngoing(true);

        //顯示通知,id必須不重復,否則新的通知會覆蓋舊的通知(利用這一特性,可以對通知進行更新)
        nm.notify(1, mBuilder.build());
    }
3.刪除一個通知。參數即為通知的id
nm.cancel(1);4.發送一個通知,點擊通知後跳轉到一個Activity,從這個Activity返回後,進入程序內的某一個頁面(一般為主頁)
//點擊通知進入一個Activity,點擊返回時進入指定頁面。
    public void resultActivityBackApp(View view) {
        Builder mBuilder = new Builder(this);
        mBuilder.setTicker(通知標題2);
        mBuilder.setSmallIcon(R.drawable.ic_launcher);
        mBuilder.setContentTitle(通知標題2);
        mBuilder.setContentText(點擊通知進入一個Activity,點擊返回時進入指定頁面。);

        //設置點擊一次後消失(如果沒有點擊事件,則該方法無效。)
        mBuilder.setAutoCancel(true);

        //點擊通知之後需要跳轉的頁面
        Intent resultIntent = new Intent(this, ResultActivityBackApp.class);

        //使用TaskStackBuilder為“通知頁面”設置返回關系
        TaskStackBuilder stackBuilder = TaskStackBuilder.create(this);
        //為點擊通知後打開的頁面設定 返回 頁面。(在manifest中指定)
        stackBuilder.addParentStack(ResultActivityBackApp.class);
        stackBuilder.addNextIntent(resultIntent);

        PendingIntent pIntent = stackBuilder.getPendingIntent(0, PendingIntent.FLAG_UPDATE_CURRENT);
        mBuilder.setContentIntent(pIntent);
        // mId allows you to update the notification later on.
        nm.notify(2, mBuilder.build());
    }
同時,需要在manifest中為點擊通知後打開的Activity指定父Activity.
(其中,activity的屬性parentActivityName為API 16中的屬性,meta-data中的代碼為兼容API 16以下。因此,對於大多數程序,這兩個地方都得寫。)
5.和上述4類似,只是在打開的Activity中返回時回到home頁
 //點擊通知進入一個Activity,點擊返回時回到桌面
    public void resultActivityBackHome(View view) {
        Builder mBuilder = new Builder(this);
        mBuilder.setTicker(通知標題3);
        mBuilder.setSmallIcon(R.drawable.ic_launcher);
        mBuilder.setContentTitle(通知標題3);
        mBuilder.setContentText(點擊通知進入一個Activity,點擊返回時回到桌面);

        //設置點擊一次後消失(如果沒有點擊事件,則該方法無效。)
        mBuilder.setAutoCancel(true);

        Intent notifyIntent = new Intent(this, ResultActivityBackHome.class);
        notifyIntent.setFlags(Intent.FLAG_ACTIVITY_NEW_TASK);
        PendingIntent pIntent = PendingIntent.getActivity(this, 0, notifyIntent, PendingIntent.FLAG_UPDATE_CURRENT);
        mBuilder.setContentIntent(pIntent);

        nm.notify(3, mBuilder.build());
    }
6.帶進度條的通知
     public void progressNotice(View view) {
        final Builder mBuilder = new Builder(this);
        mBuilder.setTicker(通知標題4);

        mBuilder.setContentTitle(Picture Download)
                .setContentText(Download in progress)
                .setSmallIcon(R.drawable.ic_launcher);

        // Start a lengthy operation in a background thread
        new Thread(new Runnable() {
            @Override
            public void run() {
                int progress;
                for (progress = 0; progress <= 100; progress++) {
                    // Sets the progress indicator to a max value, the current completion percentage,
                    // and determinate state
                    mBuilder.setProgress(100, progress, false);

                    //不明確進度的進度條
//                    mBuilder.setProgress(0, 0, true);

                    nm.notify(4, mBuilder.build());
                    // 模擬延時
                    try {
                        Thread.sleep(200);
                    } catch (InterruptedException e) {
                        e.printStackTrace();
                    }
                }

                // When the loop is finished, updates the notification
                mBuilder.setContentText(Download complete);
                // Removes the progress bar
                mBuilder.setProgress(0, 0, false);
                nm.notify(4, mBuilder.build());
            }
        }
        ).start();
    }
7.擴展布局的通知。按住通知條下滑,可以查看更詳細的內容
public void expandLayoutNotice(View view) {
        Builder mBuilder = new Builder(this);
        mBuilder.setTicker(通知標題5);
        mBuilder.setSmallIcon(R.drawable.ic_launcher);
        mBuilder.setContentTitle(通知標題5);
        mBuilder.setContentText(按住通知下拉可顯示擴展布局);

        NotificationCompat.InboxStyle inboxStyle = new NotificationCompat.InboxStyle();
        String[] events = new String[]{Beijing, Tianjin, Shanghai, Guangzhou};
        // 設置擴展布局的標題
        inboxStyle.setBigContentTitle(Event tracker details:);

        for (String s : events) {
            inboxStyle.addLine(s);
        }
        mBuilder.setStyle(inboxStyle);

        nm.notify(5, mBuilder.build());
    }
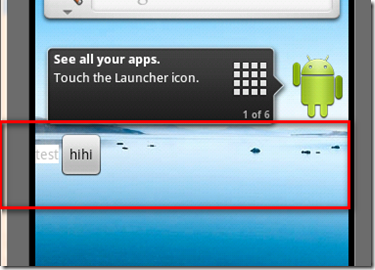
//自定義布局的通知
    public void customLayoutNotice(View view) {
        Builder mBuilder = new Builder(this);
        mBuilder.setTicker(通知標題6);
        mBuilder.setTicker(通知標題6);
        mBuilder.setSmallIcon(R.drawable.ic_launcher);

        RemoteViews remoteViews = new RemoteViews(getPackageName(), R.layout.custom_layout_notice);
        mBuilder.setContent(remoteViews);
        //為RemoteViews上的按鈕設置文字
        remoteViews.setCharSequence(R.id.custom_layout_button1, setText, Button1);
        remoteViews.setCharSequence(R.id.custom_layout_button2, setText, Button2);

        //為RemoteViews上的按鈕設置點擊事件
        Intent intent1 = new Intent(this, CustomLayoutResultActivity.class);
        intent1.putExtra(content, From button1 click!);
        PendingIntent pIntentButton1 = PendingIntent.getActivity(this, 0, intent1, PendingIntent.FLAG_UPDATE_CURRENT);
        remoteViews.setOnClickPendingIntent(R.id.custom_layout_button1, pIntentButton1);

        Intent intent2 = new Intent(this, CustomLayoutResultActivity.class);
        intent2.putExtra(content, From button2 click!);
        PendingIntent pIntentButton2 = PendingIntent.getActivity(this, 1, intent2, PendingIntent.FLAG_UPDATE_CURRENT);
        remoteViews.setOnClickPendingIntent(R.id.custom_layout_button2, pIntentButton2);

        nm.notify(6, mBuilder.build());
    }
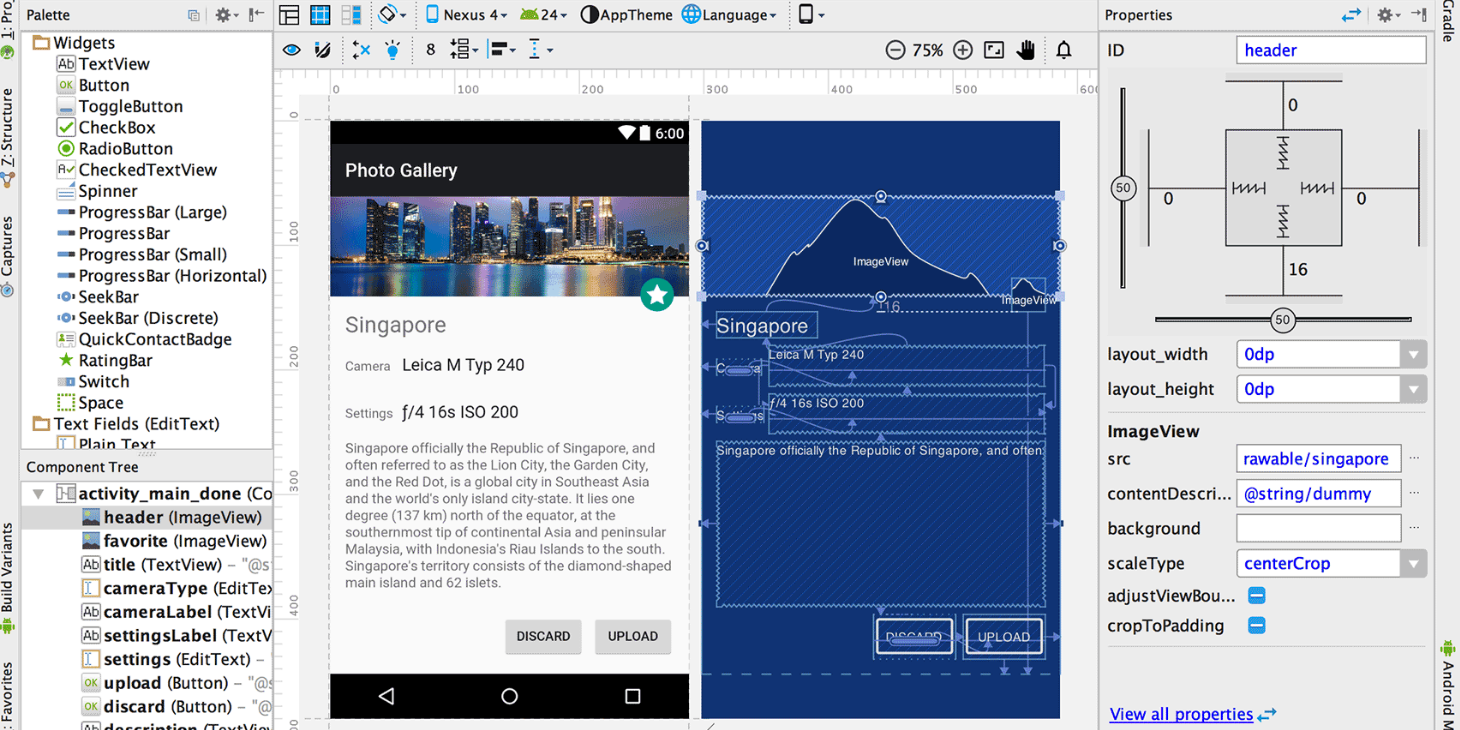 Android Studio 2.2新特性:新布局、Firebase、OpenJDK以及Java 8
前幾天,收到了Android Studio 2.2的更新推送,於是迫不及待的更新了一下。不負眾望Android Studio 2.2帶來了很多新的特性,能讓我眼前一亮。A
 安卓轉戰React-Native之windows下android環境搭建爬坑血淚史
前言 最近又有新的項目立項,所以好久都沒有寫博客了,然後都是利用閒暇時間來學習React-native。由於安卓和ios的就業環境給移動端開發帶來前所未有的沖擊,於是乎很
 qq厘米秀怎麼換角色
QQ厘米秀是手機QQ6.2.2開啟的新功能,為大家提供一個手機QQ秀功能,就像用戶在電腦端的QQ秀。有些小伙伴玩著玩著覺得不對勁了,為什麼本人性別是個女女,
 研究稱 Android 4.4 比 iOS 7.1 更穩定
根據Crittercism 發布的《移動體驗基准測試報告(需要注冊)》,研究人員在2582款設備上測試了106種操作系統和691個網絡運營商,結果顯示And