編輯:關於Android編程
Toast.makeText(context, msg, Toast.LENGTH_SHORT).show();makeText就是Toast的入口,我們從makeText的源碼來深入理解Toast的實現。源碼如下(frameworks/base/core/java/android/widget/Toast.java):
    public static Toast makeText(Context context, CharSequence text, int duration) {
        Toast result = new Toast(context);

        LayoutInflater inflate = (LayoutInflater)
                context.getSystemService(Context.LAYOUT_INFLATER_SERVICE);
        View v = inflate.inflate(com.android.internal.R.layout.transient_notification, null);
        TextView tv = (TextView)v.findViewById(com.android.internal.R.id.message);
        tv.setText(text);

        result.mNextView = v;
        result.mDuration = duration;

        return result;
} 從makeText的源碼裡,我們可以看出Toast的布局文件是transient_notification.xml,位於frameworks/base/core/res/res/layout/transient_notification.xml:系統Toast的布局文件非常簡單,就是在垂直布局的LinearLayout裡放置了一個TextView。接下來,我們繼續跟到show()方法,研究一下布局形成之後的展示代碼實現:
    public void show() {
        if (mNextView == null) {
            throw new RuntimeException("setView must have been called");
        }

        INotificationManager service = getService();
        String pkg = mContext.getPackageName();
        TN tn = mTN;
        tn.mNextView = mNextView;

        try {
            service.enqueueToast(pkg, tn, mDuration);
        } catch (RemoteException e) {
            // Empty
        }
    }
show方法中有兩點是需要我們注意的。(1)TN是什麼東東?(2)INotificationManager服務的作用。帶著這兩個問題,繼續我們Toast源碼的探索。
    public Toast(Context context) {
        mContext = context;
        mTN = new TN();
        mTN.mY = context.getResources().getDimensionPixelSize(
                com.android.internal.R.dimen.toast_y_offset);
        mTN.mGravity = context.getResources().getInteger(
                com.android.internal.R.integer.config_toastDefaultGravity);
    }
接下來,我們就從TN類的源碼出發,探尋TN的作用。TN源碼如下:
    private static class TN extends ITransientNotification.Stub {
        final Runnable mShow = new Runnable() {
            @Override
            public void run() {
                handleShow();
            }
        };

        final Runnable mHide = new Runnable() {
            @Override
            public void run() {
                handleHide();
                // Don't do this in handleHide() because it is also invoked by handleShow()
                mNextView = null;
            }
        };

        private final WindowManager.LayoutParams mParams = new WindowManager.LayoutParams();
        final Handler mHandler = new Handler();

        int mGravity;
        int mX, mY;
        float mHorizontalMargin;
        float mVerticalMargin;


        View mView;
        View mNextView;

        WindowManager mWM;

        TN() {
            // XXX This should be changed to use a Dialog, with a Theme.Toast
            // defined that sets up the layout params appropriately.
            final WindowManager.LayoutParams params = mParams;
            params.height = WindowManager.LayoutParams.WRAP_CONTENT;
            params.width = WindowManager.LayoutParams.WRAP_CONTENT;
            params.format = PixelFormat.TRANSLUCENT;
            params.windowAnimations = com.android.internal.R.style.Animation_Toast;
            params.type = WindowManager.LayoutParams.TYPE_TOAST;
            params.setTitle("Toast");
            params.flags = WindowManager.LayoutParams.FLAG_KEEP_SCREEN_ON
                    | WindowManager.LayoutParams.FLAG_NOT_FOCUSABLE
                    | WindowManager.LayoutParams.FLAG_NOT_TOUCHABLE;
            /// M: [ALPS00517576] Support multi-user
            params.privateFlags = WindowManager.LayoutParams.PRIVATE_FLAG_SHOW_FOR_ALL_USERS;
        }

        /**
         * schedule handleShow into the right thread
         */
        @Override
        public void show() {
            if (localLOGV) Log.v(TAG, "SHOW: " + this);
            mHandler.post(mShow);
        }

        /**
         * schedule handleHide into the right thread
         */
        @Override
        public void hide() {
            if (localLOGV) Log.v(TAG, "HIDE: " + this);
            mHandler.post(mHide);
        }

        public void handleShow() {
            if (localLOGV) Log.v(TAG, "HANDLE SHOW: " + this + " mView=" + mView
                    + " mNextView=" + mNextView);
            if (mView != mNextView) {
                // remove the old view if necessary
                handleHide();
                mView = mNextView;
                Context context = mView.getContext().getApplicationContext();
                if (context == null) {
                    context = mView.getContext();
                }
                mWM = (WindowManager)context.getSystemService(Context.WINDOW_SERVICE);
                // We can resolve the Gravity here by using the Locale for getting
                // the layout direction
                final Configuration config = mView.getContext().getResources().getConfiguration();
                final int gravity = Gravity.getAbsoluteGravity(mGravity, config.getLayoutDirection());
                mParams.gravity = gravity;
                if ((gravity & Gravity.HORIZONTAL_GRAVITY_MASK) == Gravity.FILL_HORIZONTAL) {
                    mParams.horizontalWeight = 1.0f;
                }
                if ((gravity & Gravity.VERTICAL_GRAVITY_MASK) == Gravity.FILL_VERTICAL) {
                    mParams.verticalWeight = 1.0f;
                }
                mParams.x = mX;
                mParams.y = mY;
                mParams.verticalMargin = mVerticalMargin;
                mParams.horizontalMargin = mHorizontalMargin;
                if (mView.getParent() != null) {
                    if (localLOGV) Log.v(TAG, "REMOVE! " + mView + " in " + this);
                    mWM.removeView(mView);
                }
                if (localLOGV) Log.v(TAG, "ADD! " + mView + " in " + this);
                mWM.addView(mView, mParams);
                trySendAccessibilityEvent();
            }
        }

        private void trySendAccessibilityEvent() {
            AccessibilityManager accessibilityManager =
                    AccessibilityManager.getInstance(mView.getContext());
            if (!accessibilityManager.isEnabled()) {
                return;
            }
            // treat toasts as notifications since they are used to
            // announce a transient piece of information to the user
            AccessibilityEvent event = AccessibilityEvent.obtain(
                    AccessibilityEvent.TYPE_NOTIFICATION_STATE_CHANGED);
            event.setClassName(getClass().getName());
            event.setPackageName(mView.getContext().getPackageName());
            mView.dispatchPopulateAccessibilityEvent(event);
            accessibilityManager.sendAccessibilityEvent(event);
        }

        public void handleHide() {
            if (localLOGV) Log.v(TAG, "HANDLE HIDE: " + this + " mView=" + mView);
            if (mView != null) {
                // note: checking parent() just to make sure the view has
                // been added...  i have seen cases where we get here when
                // the view isn't yet added, so let's try not to crash.
                if (mView.getParent() != null) {
                    if (localLOGV) Log.v(TAG, "REMOVE! " + mView + " in " + this);
                    mWM.removeView(mView);
                }

                mView = null;
            }
        }
    }
通過源碼,我們能很明顯的看到繼承關系,TN類繼承自ITransientNotification.Stub,用於進程間通信。這裡假設讀者都有Android進程間通信的基礎(不太熟的建議學習羅升陽關於Binder進程通信的一系列博客)。既然TN是用於進程間通信,那麼我們很容易想到TN類的具體作用應該是Toast類的回調對象,其他進程通過調用TN類的具體對象來操作Toast的顯示和消失。
TN類繼承自ITransientNotification.Stub,ITransientNotification.aidl位於frameworks/base/core/java/android/app/ITransientNotification.aidl,源碼如下:
package android.app;

/** @hide */
oneway interface ITransientNotification {
    void show();
    void hide();
}
ITransientNotification定義了兩個方法show()和hide(),它們的具體實現就在TN類當中。TN類的實現為:
        /**
         * schedule handleShow into the right thread
         */
        @Override
        public void show() {
            if (localLOGV) Log.v(TAG, "SHOW: " + this);
            mHandler.post(mShow);
        }

        /**
         * schedule handleHide into the right thread
         */
        @Override
        public void hide() {
            if (localLOGV) Log.v(TAG, "HIDE: " + this);
            mHandler.post(mHide);
        }
這裡我們就能知道,Toast的show和hide方法實現是基於Handler機制。而TN類中的Handler實現是:
final Handler mHandler = new Handler();而且,我們在TN類中沒有發現任何Looper.perpare()和Looper.loop()方法。說明,mHandler調用的是當前所在線程的Looper對象。所以,當我們在主線程(也就是UI線程中)可以隨意調用Toast.makeText方法,因為Android系統幫我們實現了主線程的Looper初始化。但是,如果你想在子線程中調用Toast.makeText方法,就必須先進行Looper初始化了,不然就會報出java.lang.RuntimeException: Can't create handler inside thread that has not called Looper.prepare() 。Handler機制的學習可以參考我之前寫過的一篇博客:http://blog.csdn.net/wzy_1988/article/details/38346637。 接下來,繼續跟一下mShow和mHide的實現,它倆的類型都是Runnable。
        final Runnable mShow = new Runnable() {
            @Override
            public void run() {
                handleShow();
            }
        };

        final Runnable mHide = new Runnable() {
            @Override
            public void run() {
                handleHide();
                // Don't do this in handleHide() because it is also invoked by handleShow()
                mNextView = null;
            }
        };
可以看到,show和hide的真正實現分別是調用了handleShow()和handleHide()方法。我們先來看handleShow()的具體實現:
        public void handleShow() {
            if (mView != mNextView) {
                // remove the old view if necessary
                handleHide();
                mView = mNextView;
                Context context = mView.getContext().getApplicationContext();
                if (context == null) {
                    context = mView.getContext();
                }
                mWM = (WindowManager)context.getSystemService(Context.WINDOW_SERVICE);
                // We can resolve the Gravity here by using the Locale for getting
                // the layout direction
                final Configuration config = mView.getContext().getResources().getConfiguration();
                final int gravity = Gravity.getAbsoluteGravity(mGravity, config.getLayoutDirection());
                mParams.gravity = gravity;
                if ((gravity & Gravity.HORIZONTAL_GRAVITY_MASK) == Gravity.FILL_HORIZONTAL) {
                    mParams.horizontalWeight = 1.0f;
                }
                if ((gravity & Gravity.VERTICAL_GRAVITY_MASK) == Gravity.FILL_VERTICAL) {
                    mParams.verticalWeight = 1.0f;
                }
                mParams.x = mX;
                mParams.y = mY;
                mParams.verticalMargin = mVerticalMargin;
                mParams.horizontalMargin = mHorizontalMargin;
                if (mView.getParent() != null) {
                    mWM.removeView(mView);
                }
                mWM.addView(mView, mParams);
                trySendAccessibilityEvent();
            }
        }
從源碼中,我們知道Toast是通過WindowManager調用addView加載進來的。因此,hide方法自然是WindowManager調用removeView方法來將Toast視圖移除。
總結一下,通過對TN類的源碼分析,我們知道了TN類是回調對象,其他進程調用tn類的show和hide方法來控制這個Toast的顯示和消失。
    private static INotificationManager sService;

    static private INotificationManager getService() {
        if (sService != null) {
            return sService;
        }
        sService = INotificationManager.Stub.asInterface(ServiceManager.getService("notification"));
        return sService;
    }
得到INotificationManager服務後,調用了enqueueToast方法將當前的Toast放入到系統的Toast隊列中。傳的參數分別是pkg、tn和mDuration。也就是說,我們通過Toast.makeText(context, msg, Toast.LENGTH_SHOW).show()去呈現一個Toast,這個Toast並不是立刻顯示在當前的window上,而是先進入系統的Toast隊列中,然後系統調用回調對象tn的show和hide方法進行Toast的顯示和隱藏。
這裡INofiticationManager接口的具體實現類是NotificationManagerService類,位於frameworks/base/services/java/com/android/server/NotificationManagerService.java。
首先,我們來分析一下Toast入隊的函數實現enqueueToast,源碼如下:
    public void enqueueToast(String pkg, ITransientNotification callback, int duration)
    {
    	// packageName為null或者tn類為null,直接返回,不進隊列
        if (pkg == null || callback == null) {
            return ;
        }

        // (1) 判斷是否為系統Toast
        final boolean isSystemToast = isCallerSystem() || ("android".equals(pkg));

        // 判斷當前toast所屬的pkg是否為系統不允許發生Toast的pkg.NotificationManagerService有一個HashSet數據結構,存儲了不允許發生Toast的包名
        if (ENABLE_BLOCKED_TOASTS && !noteNotificationOp(pkg, Binder.getCallingUid()) && !areNotificationsEnabledForPackageInt(pkg)) {
            if (!isSystemToast) {
                return;
            }
        }

        synchronized (mToastQueue) {
            int callingPid = Binder.getCallingPid();
            long callingId = Binder.clearCallingIdentity();
            try {
                ToastRecord record;
                // (2) 查看該Toast是否已經在隊列當中
                int index = indexOfToastLocked(pkg, callback);
                // 如果Toast已經在隊列中,我們只需要更新顯示時間即可
                if (index >= 0) {
                    record = mToastQueue.get(index);
                    record.update(duration);
                } else {
                	// 非系統Toast,每個pkg在當前mToastQueue中Toast有總數限制,不能超過MAX_PACKAGE_NOTIFICATIONS
                    if (!isSystemToast) {
                        int count = 0;
                        final int N = mToastQueue.size();
                        for (int i=0; i= MAX_PACKAGE_NOTIFICATIONS) {
                                     Slog.e(TAG, "Package has already posted " + count
                                            + " toasts. Not showing more. Package=" + pkg);
                                     return;
                                 }
                             }
                        }
                    }

                    // 將Toast封裝成ToastRecord對象,放入mToastQueue中
                    record = new ToastRecord(callingPid, pkg, callback, duration);
                    mToastQueue.add(record);
                    index = mToastQueue.size() - 1;
                    // (3) 將當前Toast所在的進程設置為前台進程
                    keepProcessAliveLocked(callingPid);
                }
                // (4) 如果index為0,說明當前入隊的Toast在隊頭,需要調用showNextToastLocked方法直接顯示
                if (index == 0) {
                    showNextToastLocked();
                }
            } finally {
                Binder.restoreCallingIdentity(callingId);
            }
        }
    }
可以看到,我對上述代碼做了簡要的注釋。代碼相對簡單,但是還有4點標注代碼需要我們來進一步探討。
(1) 判斷是否為系統Toast。如果當前Toast所屬的進程的包名為“android”,則為系統Toast,否則還可以調用isCallerSystem()方法來判斷。該方法的實現源碼為:
    boolean isUidSystem(int uid) {
        final int appid = UserHandle.getAppId(uid);
        return (appid == Process.SYSTEM_UID || appid == Process.PHONE_UID || uid == 0);
    }
    boolean isCallerSystem() {
        return isUidSystem(Binder.getCallingUid());
    }
isCallerSystem的源碼也比較簡單,就是判斷當前Toast所屬進程的uid是否為SYSTEM_UID、0、PHONE_UID中的一個,如果是,則為系統Toast;如果不是,則不為系統Toast。
是否為系統Toast,通過下面的源碼閱讀可知,主要有兩點優勢:
系統Toast一定可以進入到系統Toast隊列中,不會被黑名單阻止。系統Toast在系統Toast隊列中沒有數量限制,而普通pkg所發送的Toast在系統Toast隊列中有數量限制。
(2) 查看將要入隊的Toast是否已經在系統Toast隊列中。這是通過比對pkg和callback來實現的,具體源碼如下所示:
    private int indexOfToastLocked(String pkg, ITransientNotification callback)
    {
        IBinder cbak = callback.asBinder();
        ArrayList list = mToastQueue;
        int len = list.size();
        for (int i=0; i    通過上述代碼,我們可以得出一個結論,只要Toast的pkg名稱和tn對象是一致的,則系統把這些Toast認為是同一個Toast。
    (3) 將當前Toast所在進程設置為前台進程。源碼如下所示:
    private void keepProcessAliveLocked(int pid)
    {
        int toastCount = 0; // toasts from this pid
        ArrayList list = mToastQueue;
        int N = list.size();
        for (int i=0; i 0);
        } catch (RemoteException e) {
            // Shouldn't happen.
        }
    }    這裡的mAm=ActivityManagerNative.getDefault(),調用了setProcessForeground方法將當前pid的進程置為前台進程,保證不會系統殺死。這也就解釋了為什麼當我們finish當前Activity時,Toast還可以顯示,因為當前進程還在執行。
    (4) index為0時,對隊列頭的Toast進行顯示。源碼如下:
    private void showNextToastLocked() {
    	// 獲取隊列頭的ToastRecord
        ToastRecord record = mToastQueue.get(0);
        while (record != null) {
            try {
            	// 調用Toast的回調對象中的show方法對Toast進行展示
                record.callback.show();
                scheduleTimeoutLocked(record);
                return;
            } catch (RemoteException e) {
                Slog.w(TAG, "Object died trying to show notification " + record.callback
                        + " in package " + record.pkg);
                // remove it from the list and let the process die
                int index = mToastQueue.indexOf(record);
                if (index >= 0) {
                    mToastQueue.remove(index);
                }
                keepProcessAliveLocked(record.pid);
                if (mToastQueue.size() > 0) {
                    record = mToastQueue.get(0);
                } else {
                    record = null;
                }
            }
        }
    }    這裡Toast的回調對象callback就是tn對象。接下來,我們看一下,為什麼系統Toast的顯示時間只能是2s或者3.5s,關鍵在於scheduleTimeoutLocked方法的實現。原理是,調用tn的show方法展示完Toast之後,需要調用scheduleTimeoutLocked方法來將Toast消失。(如果大家有疑問:不是說tn對象的hide方法來將Toast消失,為什麼要在這裡調用scheduleTimeoutLocked方法將Toast消失呢?是因為tn類的hide方法一執行,Toast立刻就消失了,而平時我們所使用的Toast都會在當前Activity停留幾秒。如何實現停留幾秒呢?原理就是scheduleTimeoutLocked發送MESSAGE_TIMEOUT消息去調用tn對象的hide方法,但是這個消息會有一個delay延遲,這裡也是用了Handler消息機制)。


    private static final int LONG_DELAY = 3500; // 3.5 seconds
    private static final int SHORT_DELAY = 2000; // 2 seconds
    private void scheduleTimeoutLocked(ToastRecord r)
    {
        mHandler.removeCallbacksAndMessages(r);
        Message m = Message.obtain(mHandler, MESSAGE_TIMEOUT, r);
        long delay = r.duration == Toast.LENGTH_LONG ? LONG_DELAY : SHORT_DELAY;
        mHandler.sendMessageDelayed(m, delay);
    }    首先,我們看到這裡並不是直接發送了MESSAGE_TIMEOUT消息,而是有個delay的延遲。而delay的時間從代碼中“long delay = r.duration == Toast.LENGTH_LONG ? LONG_DELAY : SHORT_DELAY;”看出只能為2s或者3.5s,這也就解釋了為什麼系統Toast的呈現時間只能是2s或者3.5s。自己在Toast.makeText方法中隨意傳入一個duration是無作用的。
    接下來,我們來看一下WorkerHandler中是如何處理MESSAGE_TIMEOUT消息的。mHandler對象的類型為WorkerHandler,源碼如下:
    private final class WorkerHandler extends Handler
    {
        @Override
        public void handleMessage(Message msg)
        {
            switch (msg.what)
            {
                case MESSAGE_TIMEOUT:
                    handleTimeout((ToastRecord)msg.obj);
                    break;
            }
        }
    }    可以看到,WorkerHandler對MESSAGE_TIMEOUT類型的消息處理是調用了handlerTimeout方法,那我們繼續跟蹤handleTimeout源碼:
    private void handleTimeout(ToastRecord record)
    {
        synchronized (mToastQueue) {
            int index = indexOfToastLocked(record.pkg, record.callback);
            if (index >= 0) {
                cancelToastLocked(index);
            }
        }
    }    handleTimeout代碼中,首先判斷當前需要消失的Toast所屬ToastRecord對象是否在隊列中,如果在隊列中,則調用cancelToastLocked(index)方法。真相就要浮現在我們眼前了,繼續跟蹤源碼:
    private void cancelToastLocked(int index) {
        ToastRecord record = mToastQueue.get(index);
        try {
            record.callback.hide();
        } catch (RemoteException e) {
            // don't worry about this, we're about to remove it from
            // the list anyway
        }
        mToastQueue.remove(index);
        keepProcessAliveLocked(record.pid);
        if (mToastQueue.size() > 0) {
            // Show the next one. If the callback fails, this will remove
            // it from the list, so don't assume that the list hasn't changed
            // after this point.
            showNextToastLocked();
        }
    }    哈哈,看到這裡,我們回調對象的hide方法也被調用了,同時也將該ToastRecord對象從mToastQueue中移除了。到這裡,一個Toast的完整顯示和消失就講解結束了。
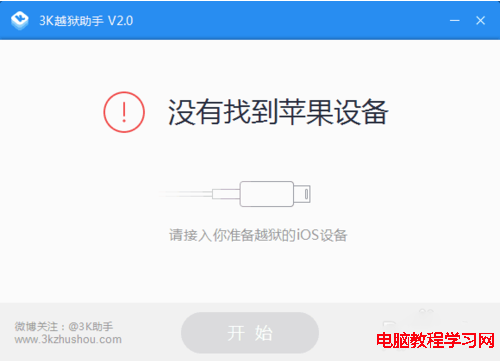 太極越獄沒有蘋果驅動應該如何解決
有些在使用越獄工具的朋友反映,使用過程中會提示“沒有找到蘋果設備”,由於這個錯誤提醒導致越獄不能繼續進行。當遇到這種情況我們應該怎麼
 Android Studio添加aar
1、把aar復制到項目中的 libs 裡面 2、在module 裡面的build.gradle 的根目錄添加repositories{ flatDir {
 Android的通知(Notification)使用詳解
這篇博客講解一下在Android中使用Notification提示消息給用戶,Notification是一種具有全局效果的通知,程序一般通過NotificationMan
 android實現簡單的畫畫板實例代碼
直接看代碼,注釋都寫清楚了復制代碼 代碼如下:public class MainActivity extends Activity { private Imag