編輯:關於Android編程
在上一篇博文中我們進行了有關Zygote進程的分析,我們知道Zygote進程創建了一個重要的進程–system_server進程後就進入了無限循環中,之後Android系統中的重要任務就交給了system_server進程,作為zygote的嫡長子進程,system_server進程的意義非凡,今天我們來分析一下system_server進程。
在ZygoteInit中main方法中,通過調用startSystemServer方法開啟了system_server進程。該方法主要為創建system_server進程准備了一些參數,並調用本地方法forkSystemServer創建system_server進程。讓我們來看一下startSystemServer方法的代碼:
    private static boolean startSystemServer()
            throws MethodAndArgsCaller, RuntimeException {

        String args[] = {
            "--setuid=1000",
            "--setgid=1000",
            "--setgroups=1001,1002,1003,1004,1005,1006,1007,1008,1009,1010,1018,1032,3001,3002,3003,3006,3007",
            "--capabilities=130104352,130104352",
            "--runtime-init",
            "--nice-name=system_server",
            "com.android.server.SystemServer",
        };
        ZygoteConnection.Arguments parsedArgs = null;

        int pid;

        try {
            parsedArgs = new ZygoteConnection.Arguments(args);
            ZygoteConnection.applyDebuggerSystemProperty(parsedArgs);
            ZygoteConnection.applyInvokeWithSystemProperty(parsedArgs);

            /* 創建system_server進程 */
            pid = Zygote.forkSystemServer(
                    parsedArgs.uid, parsedArgs.gid,
                    parsedArgs.gids,
                    parsedArgs.debugFlags,
                    null,
                    parsedArgs.permittedCapabilities,
                    parsedArgs.effectiveCapabilities);
        } catch (IllegalArgumentException ex) {
            throw new RuntimeException(ex);
        }

        /* 子進程中執行 */
        if (pid == 0) {
            handleSystemServerProcess(parsedArgs);
        }

        return true;
    }
這裡的代碼並不復雜,可以看到,他調用了forkSystemServer方法來創建一個新的進程,之後在子進程,即system_server進程中執行handleSystemServerProcess方法。下面我們來看一下forkSystemServer方法,它是一個native方法對應的源文件在dalvik\vm\native\dalvik_system_Zygote.cpp中。代碼如下:
static void Dalvik_dalvik_system_Zygote_forkSystemServer(
        const u4* args, JValue* pResult)
{
    pid_t pid;
    pid = forkAndSpecializeCommon(args, true);

    /* zygote進程檢查其子進程是否死掉 */
    if (pid > 0) {
        int status;

        ALOGI("System server process %d has been created", pid);
        gDvm.systemServerPid = pid;
        /*  如果system_server進程退出,則zygote進程也會被殺掉 */
        if (waitpid(pid, &status, WNOHANG) == pid) {
            ALOGE("System server process %d has died. Restarting Zygote!", pid);
            kill(getpid(), SIGKILL);
        }
    }
    RETURN_INT(pid);
}
從代碼中可以看到在forkAndSpecializeCommon方法中,我們創建了子進程,並返回了子進程id,接下來我檢查如果system_server進程是否退出,若是的話則zygote進程也將會被被干掉,由此可見其重要性。接下來我們來看forkAndSpecializeCommon的代碼,這個system_server進程的創建真的是千峰百轉啊。。。
static pid_t forkAndSpecializeCommon(const u4* args, bool isSystemServer)
{
    pid_t pid;

    uid_t uid = (uid_t) args[0];
    gid_t gid = (gid_t) args[1];
    ArrayObject* gids = (ArrayObject *)args[2];
    u4 debugFlags = args[3];
    ArrayObject *rlimits = (ArrayObject *)args[4];
    u4 mountMode = MOUNT_EXTERNAL_NONE;
    int64_t permittedCapabilities, effectiveCapabilities;
    char *seInfo = NULL;
    char *niceName = NULL;
    //傳入參數isSystemServer為true
    if (isSystemServer) {
        permittedCapabilities = args[5] | (int64_t) args[6] << 32;
        effectiveCapabilities = args[7] | (int64_t) args[8] << 32;
    } else {
       ......
    }

    if (!gDvm.zygote) {
        dvmThrowIllegalStateException(
            "VM instance not started with -Xzygote");

        return -1;
    }
    // 在第一次調用fork函數之前需要調用
    if (!dvmGcPreZygoteFork()) {
        ALOGE("pre-fork heap failed");
        dvmAbort();
    }
    setSignalHandler();
    //向log文件中寫入一些數據
    dvmDumpLoaderStats("zygote");
    //子進程被fork出來
    pid = fork();
    if (pid == 0) {
    //在這裡根據傳入的參數對子進程做出一些處理,例如設置進程名,設置各種id等
    ......
    }

    return pid;
}
至此system_server進程終於被創建出來,我們可以看到system_server進程也是通過Linux系統特有的Fork機制分裂克隆出來的。在fork之前,我們還有一個重要方法沒有分析–setSignalHandler方法,該方法用來設置信號處理,下面讓我來看一下吧。
static void setSignalHandler()
{
    int err;
    struct sigaction sa;

    memset(&sa, 0, sizeof(sa));

    sa.sa_handler = sigchldHandler;

    err = sigaction (SIGCHLD, &sa, NULL);//設置信號處理函數,該信號是子進程死亡的信號

    if (err < 0) {
        ALOGW("Error setting SIGCHLD handler: %s", strerror(errno));
    }
}
static void sigchldHandler(int s)
{
    pid_t pid;
    int status;

    while ((pid = waitpid(-1, &status, WNOHANG)) > 0) {
        /* 打印出我們所關心的進程的死亡狀態. */
        ......

        /*
         * 如果剛剛銷毀的進程是system_server, 同時殺死zygote進程
         * 這樣system_server進程和zygote進程將會被init進程重啟
         */
        if (pid == gDvm.systemServerPid) {
            ALOG(LOG_INFO, ZYGOTE_LOG_TAG,
                "Exit zygote because system server (%d) has terminated",
                (int) pid);
            kill(getpid(), SIGKILL);
        }
    }

    if (pid < 0) {
        ALOG(LOG_WARN, ZYGOTE_LOG_TAG,
            "Zygote SIGCHLD error in waitpid: %s",strerror(errno));
    }
}
這裡我們發現我們之前已經看到在forkSystemServer方法中已經檢查過system_server進程是否死亡,為什麼這裡還要再一次進行檢查?這是為了防止在我們還沒有得到fork子進程的pid時,system_server進程就已經死亡的情況。
總結一下:system_server進程的創建經歷了漫長的歷程:首先startSystemServer中調用了native方法forkSystemServer;之後在native方法forkSystemServer中調用了forkAndSpecializeCommon方法;在forkAndSpecializeCommon方法中fork之前還調用了setSignalHandler來設置信號處理項。這樣,我們的system_server進程終於被創建起來,同時他還和zygote進程保持著同生共死的關系。
在startSystemServer的方法中我們可以看到,在創建進程之後,在子進程即system_server進程中會執行handleSystemServerProcess方法,這便是system_server的職責所在,下面我們來看一下:
    private static void handleSystemServerProcess(
            ZygoteConnection.Arguments parsedArgs)
            throws ZygoteInit.MethodAndArgsCaller {

        closeServerSocket();
        // 設置權限.
        Libcore.os.umask(S_IRWXG | S_IRWXO);
        ......
        if (parsedArgs.invokeWith != null) {
        ......
        } else {
            /* 剩余的參數傳遞到SystemServer. */
            RuntimeInit.zygoteInit(parsedArgs.targetSdkVersion, parsedArgs.remainingArgs);
        }
    }
可以看到最後system_server進程來到了RuntimeInit中,它的實現在frameworks\base\core\java\com\android\internal\os\RuntimeInit.java中
    public static final void zygoteInit(int targetSdkVersion, String[] argv)
            throws ZygoteInit.MethodAndArgsCaller {
        if (DEBUG) Slog.d(TAG, "RuntimeInit: Starting application from zygote");

        //關閉System.out和System.err,使用Android log
        redirectLogStreams();
        //做一些常規初始化
        commonInit();
        //native層初始化,調用此方法之後system_server將與Binder通信系統建立聯系,這樣就可以使用Binder了
        nativeZygoteInit();

        applicationInit(targetSdkVersion, argv);
    }
    private static void applicationInit(int targetSdkVersion, String[] argv)
            throws ZygoteInit.MethodAndArgsCaller {
        ......
        try {
            args = new Arguments(argv);
        } catch (IllegalArgumentException ex) {
            Slog.e(TAG, ex.getMessage());
            // let the process exit
            return;
        }
        invokeStaticMain(args.startClass, args.startArgs);
    }
可以看到,最終我們調用了invokeStaticMain方法,該方法的傳入參數在startSystemServer方法中被設置,其傳入參數的類名是”com.android.server.SystemServer”
    private static void invokeStaticMain(String className, String[] argv)
            throws ZygoteInit.MethodAndArgsCaller {
        Class cl;

        try {
            cl = Class.forName(className);
        } catch (ClassNotFoundException ex) {
            throw new RuntimeException(
                    "Missing class when invoking static main " + className,
                    ex);
        }

        Method m;
        try {
            m = cl.getMethod("main", new Class[] { String[].class });
        } catch (NoSuchMethodException ex) {
            throw new RuntimeException(
                    "Missing static main on " + className, ex);
        } catch (SecurityException ex) {
            throw new RuntimeException(
                    "Problem getting static main on " + className, ex);
        }

        int modifiers = m.getModifiers();
        if (! (Modifier.isStatic(modifiers) && Modifier.isPublic(modifiers))) {
            throw new RuntimeException(
                    "Main method is not public and static on " + className);
        }

        /* 拋出的異常在ZygoteInit.main()中被截獲 */
        throw new ZygoteInit.MethodAndArgsCaller(m, argv);
    }
讓我們來看看被截獲的語句:
 catch (MethodAndArgsCaller caller) {
            caller.run();//調用了caller的run方法
        }
run方法代碼:
public void run() {
            try {
                mMethod.invoke(null, new Object[] { mArgs });
            } catch (IllegalAccessException ex) {
                throw new RuntimeException(ex);
            } catch (InvocationTargetException ex) {
                Throwable cause = ex.getCause();
                if (cause instanceof RuntimeException) {
                    throw (RuntimeException) cause;
                } else if (cause instanceof Error) {
                    throw (Error) cause;
                }
                throw new RuntimeException(ex);
            }
        }
可以看到,在函數最後拋出異常,在ZygoteInit.main()中被截獲,由於傳遞的參數類名是”com.android.server.SystemServer”,這樣我們調用了MethodAndArgsCaller.run()方法去執行了SystemServer類的靜態main方法。(關於ZygoteInit可以參考上一篇博文:Android源碼分析–Zygote進程分析)
    public static void main(String[] args) {
        ......
        // Mmmmmm... more memory!
        dalvik.system.VMRuntime.getRuntime().clearGrowthLimit();

        // system server一直在運行, 所以他需要盡可能有效的利用內存
        VMRuntime.getRuntime().setTargetHeapUtilization(0.8f);

        Environment.setUserRequired(true);

        System.loadLibrary("android_servers");

        Slog.i(TAG, "Entered the Android system server!");

        // native方法,進行一些傳感器服務的初始化
        nativeInit();

        // 創建一個單獨的線程,在這裡啟動系統的各項服務
        ServerThread thr = new ServerThread();
        thr.initAndLoop();
    }
最終,system_server開啟了一個新的線程,並執行了它的initAndLoop方法,其也被定義在SystemServer.java中,該方法的代碼較多,其主要的工作就是開啟了系統中的各項服務,如電池服務,藍牙服務等等。並調用了Looper的prepareMainLooper方法進行消息循環,然後處理消息,這裡不再贅述。
最後,我們來總結一下:
首先system_server執行handleSystemServerProcess方法來完成自己的使命; 之後調用RuntimeInit.zygoteInit方法,在這裡我們進行了一些常規的初始化工作已經native層的初始化,從而與Binder通信建立聯系; 之後調用invokeStaticMain方法,利用拋出異常的方法在ZygoteInit的main方法中截獲並去執行SystemServer的main方法; 在SystemServer的main方法中,我調用nativeInit方法去初始化一些傳感器服務,並開啟了單獨的線程去開啟Android系統中的各項服務,並調用了Looper的prepareMainLooper方法進行消息循環,然後處理消息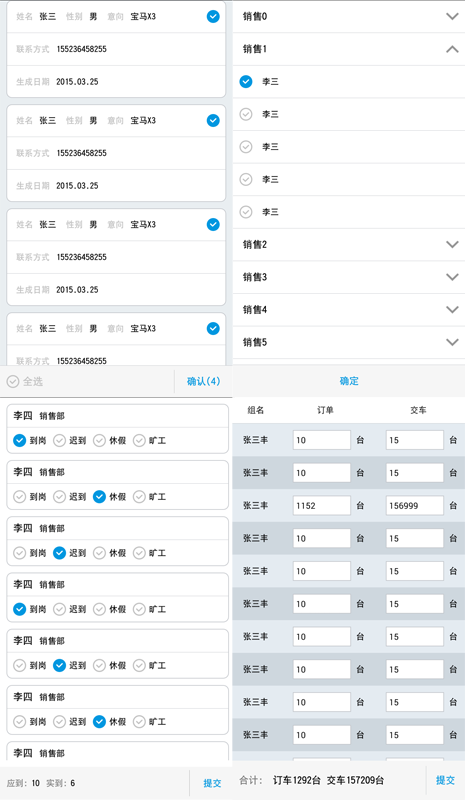 android listview ExpandableListView實現多選,單選,全選,edittext實現批量輸入
最近在項目開發中,由於項目的需求要實現一些列表的單選,多選,全選,批量輸入之類的功能,其實功能的實現倒不是很復雜,需求中也沒有涉及到復雜的動畫什麼之類,主要是解決列表數據
 Android使用Fragment實現底部導航欄分析
前言 在做移動開發過程中底部導航欄是十分常見的功能,且市面上見到的做法也有很多種,這篇博文記錄一下使用Fragment實現底部導航欄的功能,算是對這幾天學習Andr
 Android 網絡連接判斷並進行相關處理
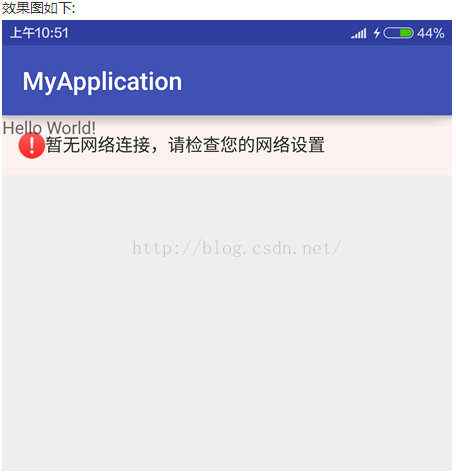
獲取網絡信息需要在AndroidManifest.xml文件中加入相應的權限。 1)判斷是否有網絡連接,沒有則進入網絡設置/***檢測網絡是否連接*@retur
 Android (supports-sceeens)的用法,適應屏幕大小
我們都知道,Android 2.3(姜餅) SDK發布的時候,在SDK中增加了第三方add-ons,其中就包括了針對平板電腦的Galaxy Tab Addon。 當我