編輯:關於Android編程
這一段時間在看Activity的工作流程,奈何內容太多,涉及到的東西有點多,暫時放下這一篇,慢慢來。先總結一下自己學過的Android自定義動畫與屬性動畫。
Android的View動畫分為兩類變換動畫(Tweened Animation)以及幀動畫(Frame by-frame Animation)。
變換動畫又分為四大類:平移(translate),旋轉(rotate),縮放(scale),透明度(alpha)。
View動畫的編程有兩種方法:一種是通過xml中編寫,另一種在Java代碼中編程控制。
在系統支持xml的view動畫中只支持ttranslate,rotate,scale,alpha四種標簽,下面是一個實例:
代碼則是這麼調用:
        Animation animation = AnimationUtils.loadAnimation(this, R.anim.anim1);
        Img.startAnimation(animation);
在這裡面,值得一提的是:屬性android:interpolator插值器,這是指動畫的是按照怎麼變化規律變化的,,比如線性變化,加速變化等等,就像初中物理那樣,一個物體在做勻速運動還是變速運動。
除了使用xml配置之外,還可以使用代碼配置並且控制:
                AlphaAnimation alphaAnimation = new AlphaAnimation(1, (float) 0.1);
                alphaAnimation.setDuration(3000);
                Img.startAnimation(alphaAnimation);
思路都是一樣的,不過只是在xml調用的時候,聲明的Animation需要調用AnimationUtils.loadAnimation(Context context,int id);代碼直接聲明相應類型的動畫類型即可。
還有一點,那就是Activity切入切出時的動畫設置,必須調用overridePendingTransition(int enterAnim,int exitAnim)。
自定義View動畫,我需要繼承一個Animation的類,再通過矩陣變換來轉換其中的動畫效果。有一位大神已經通過矩陣的方式將Animation解讀了一遍,讓我受益良多。
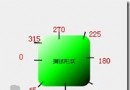
在自定義View動畫的時候,Camera類經常被用到,它相當於是一個攝像機一樣從不同的角度來觀察對象,其結果可以簡化矩陣變換的過程。同時也要重寫兩個方法:
1.public void initialize(int width,int height,int parentWidth,int parentHeight)是用來初始化一些數值或者類。
2.protected void applyTransformation(float interpolateTime,Transformation t)這是用來編寫矩陣的變換的。
讓我們編寫一個3D旋轉的自定義動畫吧。
public class Roate3dAnimation extends Animation{

    private final float mFromDegrees;
    private final float mToDegress;
    private final float mCenterX;
    private final float mCenterY;
    private final float mDepthZ;
    private final boolean mReverse;
    private Camera mCamera;

    //構造器獲取初始角度,變化都角度,獲取中心的點的x,y,z坐標
    public Roate3dAnimation(float fromDegress,float toDegress,float centerX,
            float centerY,float depthZ,boolean reverse){
        mFromDegrees = fromDegress;
        mToDegress = toDegress;
        mCenterX = centerX;
        mCenterY = centerY;
        mDepthZ = depthZ;
        mReverse = reverse;
    }

    //初始化Camera
    @Override
    public void initialize(int width,int height,int parentWidth,int parentHeight){
        super.initialize(width, height, parentWidth, parentHeight);
        mCamera = new Camera();
    }

    @Override
    protected void applyTransformation(float interpolatedTime,Transformation t){
        final float fromDegress = mFromDegrees;
        //角度變化隨著時間變化而變化:當前角度=起始角度+((結束角度-起始角度)*角度/每秒)
        float degress = fromDegress + ((mToDegress - fromDegress) * interpolatedTime);

        final float centerX = mCenterX;
        final float centerY = mCenterY;
        final Camera camera = mCamera;
        //獲取此時的矩陣
        final Matrix matrix = t.getMatrix();
        //camera保存此時camera狀態
        camera.save();
        //mReverse是指是反向旋轉還是正向旋轉
        if(mReverse){
            camera.translate(0.0f, 0.0f, mDepthZ * interpolatedTime);
        }else {
            camera.translate(0.0f, 0.0f, mDepthZ * (1.0f - interpolatedTime));
        }
        //camera對象額旋轉
        camera.rotateY(degress);
        //獲取旋轉後的矩陣
        camera.getMatrix(matrix);
        camera.restore();

        matrix.preTranslate(-centerX, -centerY);
        matrix.postTranslate(centerX, centerY);


    }


}
上面就是通過camera簡化了自己計算矩陣的過程。調用對象還是和之前一樣:
        Roate3dAnimation dAnimation = new Roate3dAnimation(0, 180, 50, 50, 1, true);
        dAnimation.setDuration(3000);
        img.startAnimation(dAnimation);
到這裡就說完了自定義View動畫了,現在已經和少用這種動畫,在API11之後Android加入了強大的動畫器:屬性動畫,來更加簡單的的完成更加絢爛多彩的動畫了。
屬性動畫,顧名思義,這不是只針對View的動畫,而是可以對任意一個對象的進行動畫操作,比如說,View動畫就很難操作Button中的寬度,而屬性動畫卻能彌補這些缺點。
屬性動畫中我們常用這麼幾個類:ValueAnimator,ObjectAnimator,AnimatorSet等。直接讓我們看一個例子吧:
        AnimatorSet set = new AnimatorSet();
        set.playTogether(
                ObjectAnimator.ofFloat(img, "rotationX", 0.0f,306.0f),
                ObjectAnimator.ofFloat(img, "rotationY", 0.0f,180.0f),
                ObjectAnimator.ofFloat(img, "rotation", 0.0f,-90.0f),
                ObjectAnimator.ofFloat(img, "translationX", 0.0f,90.0f)
                );
        set.setDuration(5000).start();
從上面這這一段代碼,可以清晰的認知到,AnimatorSet是作為一個動畫的集合,ObjectAnimator則是通過反射獲取對象的屬性來變化的。在這裡我們值得注意的是第二個參數就是指我們要變化的屬性,但是如果對象中沒有該屬性的get函數和set函數,動畫將不會生效。
就會出現如下警告:
Method setX() with type int not found on target class class android.widget.Button
我們同樣可以配置xml來處理屬性動畫:
但是用xml來配置屬性動畫有個缺點就是,很多身後我們無法知道屬性的起始值會導致我們的動畫出現一些意外的情況,如果用xml來配置,除非提前知道這些值,我們提倡使用代碼控制。

還有一個坑,那就是即使引用了本身View裡面存在的屬性獲取,設置的函數還是有可能獲取不到。我暫時在源碼裡面看不出原因。

所以基於以上種種問題,屬性動畫還是使用代碼控制比較好。
那麼我們遇到了,對象沒有提供set,get的方法的時候,難道就素手無策了嗎?不,下面提供三種方案,來解決:
我們可以獲取更高級的權限來修改對象中源碼,給相應的對象加上set,get的方法。這是最簡單直接的方法,但是比如說Button,這是SDK中實現的,我們往往不可能因此而重新編譯一個Android來。 用一個類來包裝原始對象,間接的提供get和set方法。比如說:
    private static class ViewWrapper{
        private View mTarget;
        public ViewWrapper(View target){
            mTarget = target;
        }

        public int getWidth(){
            return mTarget.getLayoutParams().width;
        }

        public void setWidth(int width){
            mTarget.getLayoutParams().width = width;
            mTarget.requestLayout();
        }
    }
我們可以使用ValueAnimator來監聽動畫的過程,實現自己的屬性的修改,ValueAnimator是ObjectAnimator的父類,它並沒有指定對象確提供了修改對象屬性的抽象類,我們往往可以調用valueAnimator.addUpdateListener(new AnimatorUpdateListner(){})的方法,下面是例子:
    private void performAnimate(final View target,final int start,final int end){
        //valueAnimator動畫進度條范圍
        ValueAnimator valueAnimator = ValueAnimator.ofInt(1,100);
        valueAnimator.addUpdateListener(new AnimatorUpdateListener() {
            //整形插值器的聲明
            private IntEvaluator mEvaluator = new IntEvaluator();
            @Override
            public void onAnimationUpdate(ValueAnimator anim) {
                // TODO Auto-generated method stub
                //獲取此時動畫的進度條
                int currentvalue = (Integer)anim.getAnimatedValue();
                Log.e("currentvalue", ""+currentvalue);
                //獲取此時進度條占總進度條的百分比
                float fraction = anim.getAnimatedFraction();
                //相應屬性的變化
                target.getLayoutParams().width = mEvaluator.evaluate(fraction, start, end);
                //刷新對象UI
                target.requestLayout();
            }
        });
        valueAnimator.setDuration(5000).start();
    }
到這裡就結束了,屬性動畫的全部內容,為了檢驗自己是否明白,自己模仿了知乎的目錄動畫,做了一個簡單的屬性動畫效果。下面是動畫的核心源碼:
public class MyFloatMenu extends RelativeLayout{

    private ImageView menu;
    private ImageView bell;
    private ImageView wallet;
    private ImageView shopping;
    private ImageView wait_use;
    private View bellView;
    private View waitView;
    private View walletView;
    private View shopView;
    private boolean isOpen = false;

    public MyFloatMenu(Context context){
        super(context);
        init(context);
    }

    public MyFloatMenu(Context context,AttributeSet attr){
        super(context,attr);
        init(context);
    }

    public MyFloatMenu(Context context,AttributeSet attr,int defStyle){
        super(context, attr, defStyle);
        init(context);
    }

    private void init(final Context context){
        LayoutInflater inflater = LayoutInflater.from(context);
        View view = inflater.inflate(R.layout.menu, this);
        menu = (ImageView)view.findViewById(R.id.plus_menu);
        bellView = inflater.inflate(R.layout.bell, null);
        waitView = inflater.inflate(R.layout.wait, null);
        walletView = inflater.inflate(R.layout.wallet, null);
        shopView = inflater.inflate(R.layout.shopping, null);
        this.addView(bellView);
        this.addView(waitView);
        this.addView(walletView);
        this.addView(shopView);
        bellView.setVisibility(View.GONE);
        waitView.setVisibility(View.GONE);
        walletView.setVisibility(View.GONE);
        shopView.setVisibility(View.GONE);
        menu.setOnClickListener(new OnClickListener() {

            @Override
            public void onClick(View v) {
                // TODO Auto-generated method stub
                setVisible();
                if(isOpen == false){
                    perform();
                    isOpen = true;
                }else if (isOpen == true) {
                    backperform();
                    isOpen = false;
                }

            }
        });

        bellView.setOnClickListener(new OnClickListener() {

            @Override
            public void onClick(View v) {
                // TODO Auto-generated method stub
                Intent intent = new Intent(context, testActivity.class);
                context.startActivity(intent);
            }
        });
    }


    private void setVisible(){
        bellView.setVisibility(View.VISIBLE);
        waitView.setVisibility(View.VISIBLE);
        walletView.setVisibility(View.VISIBLE);
        shopView.setVisibility(View.VISIBLE );
    }

    public void perform(){
        AnimatorSet set = new AnimatorSet();
        set.playTogether(
                ObjectAnimator.ofFloat(menu, "rotation", 45.0f),
                ObjectAnimator.ofFloat(bellView, "translationX", 300f),
                ObjectAnimator.ofFloat(waitView, "rotationZ", 30.0f),
                ObjectAnimator.ofFloat(waitView, "translationY", 150.0f),
                ObjectAnimator.ofFloat(waitView, "translationX", 259.8f),
                ObjectAnimator.ofFloat(walletView, "rotationZ", 60.0f),
                ObjectAnimator.ofFloat(walletView, "translationX", 150.0f),
                ObjectAnimator.ofFloat(walletView, "translationY", 259.8f),
                ObjectAnimator.ofFloat(shopView, "translationY", 300f));
        set.setDuration(500).start();
    }

    public void backperform(){
        AnimatorSet set = new AnimatorSet();
        set.playTogether(
                ObjectAnimator.ofFloat(menu, "rotation", 90.0f),
                ObjectAnimator.ofFloat(bellView, "translationX", -300f),
                ObjectAnimator.ofFloat(waitView, "rotationZ", -30.0f),
                ObjectAnimator.ofFloat(waitView, "translationY", -150.0f),
                ObjectAnimator.ofFloat(waitView, "translationX", -259.8f),
                ObjectAnimator.ofFloat(walletView, "rotationZ", -60.0f),
                ObjectAnimator.ofFloat(walletView, "translationX", -150.0f),
                ObjectAnimator.ofFloat(walletView, "translationY", -259.8f),
                ObjectAnimator.ofFloat(shopView, "translationY", -300f));
        set.setDuration(500).start();
    }

    @Override
    protected void onLayout(boolean change, int l, int t, int r, int b) {
        // TODO Auto-generated method stub
        super.onLayout(change, l, t, r, b);
    }

}
感謝任玉剛大神的android開發探索藝術以及郭霖大神的博客。
這裡附上Github工程的源碼:Github
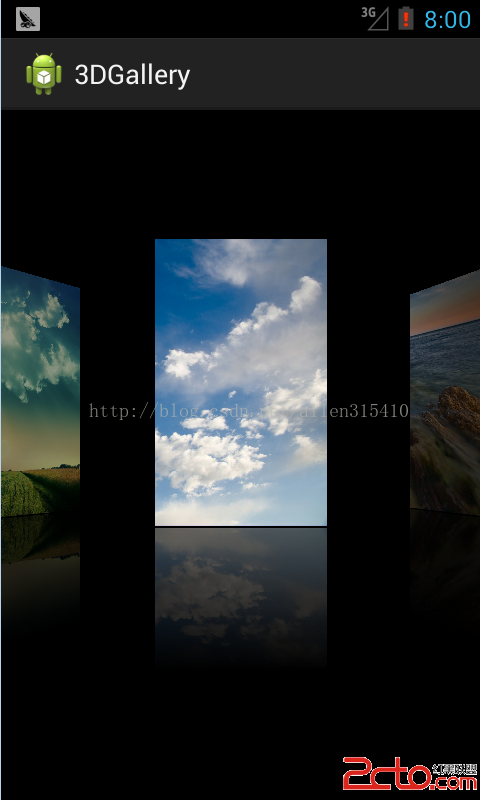 Android自定義控件——3D畫廊和圖像矩陣
1.3D畫廊的實現 我們知道android系統已經為我們提供好了一個展示圖片的“容器”——Gallery,但
 詳解android shape的使用總結
shape用於設定形狀,可以在selector,layout等裡面使用,有6個子標簽,各屬性如下: <?xml version=1.0 enco
 Android app應用多語言切換功能實現
本文實例為大家分享了Android app應用實現多語言切換功能,供大家參考,具體內容如下1.添加多語言文件 在不同的 value 文件夾下(例如 value 、valu
 Android 使用Vitamio打造自己的萬能播放器(10)—— 本地播放 (縮略圖、視頻信息、視頻掃描服務)
前言 Vitamio是我們團隊的誠意之作,除了要將VPlayer打造成Android最好的播放器,也要將Vitamio打造成Android最好的播放器組件。新版