編輯:關於Android編程
下面實現如何通過應用層支持多點觸控操作,對於常規的控件觸控操實現onTouchEvent()方法來處理。同時對onTouchEvent方法的參數MotionEvent進行一些了解。
下面會用兩個應用示例來初步學習一下Android中的多點觸控。
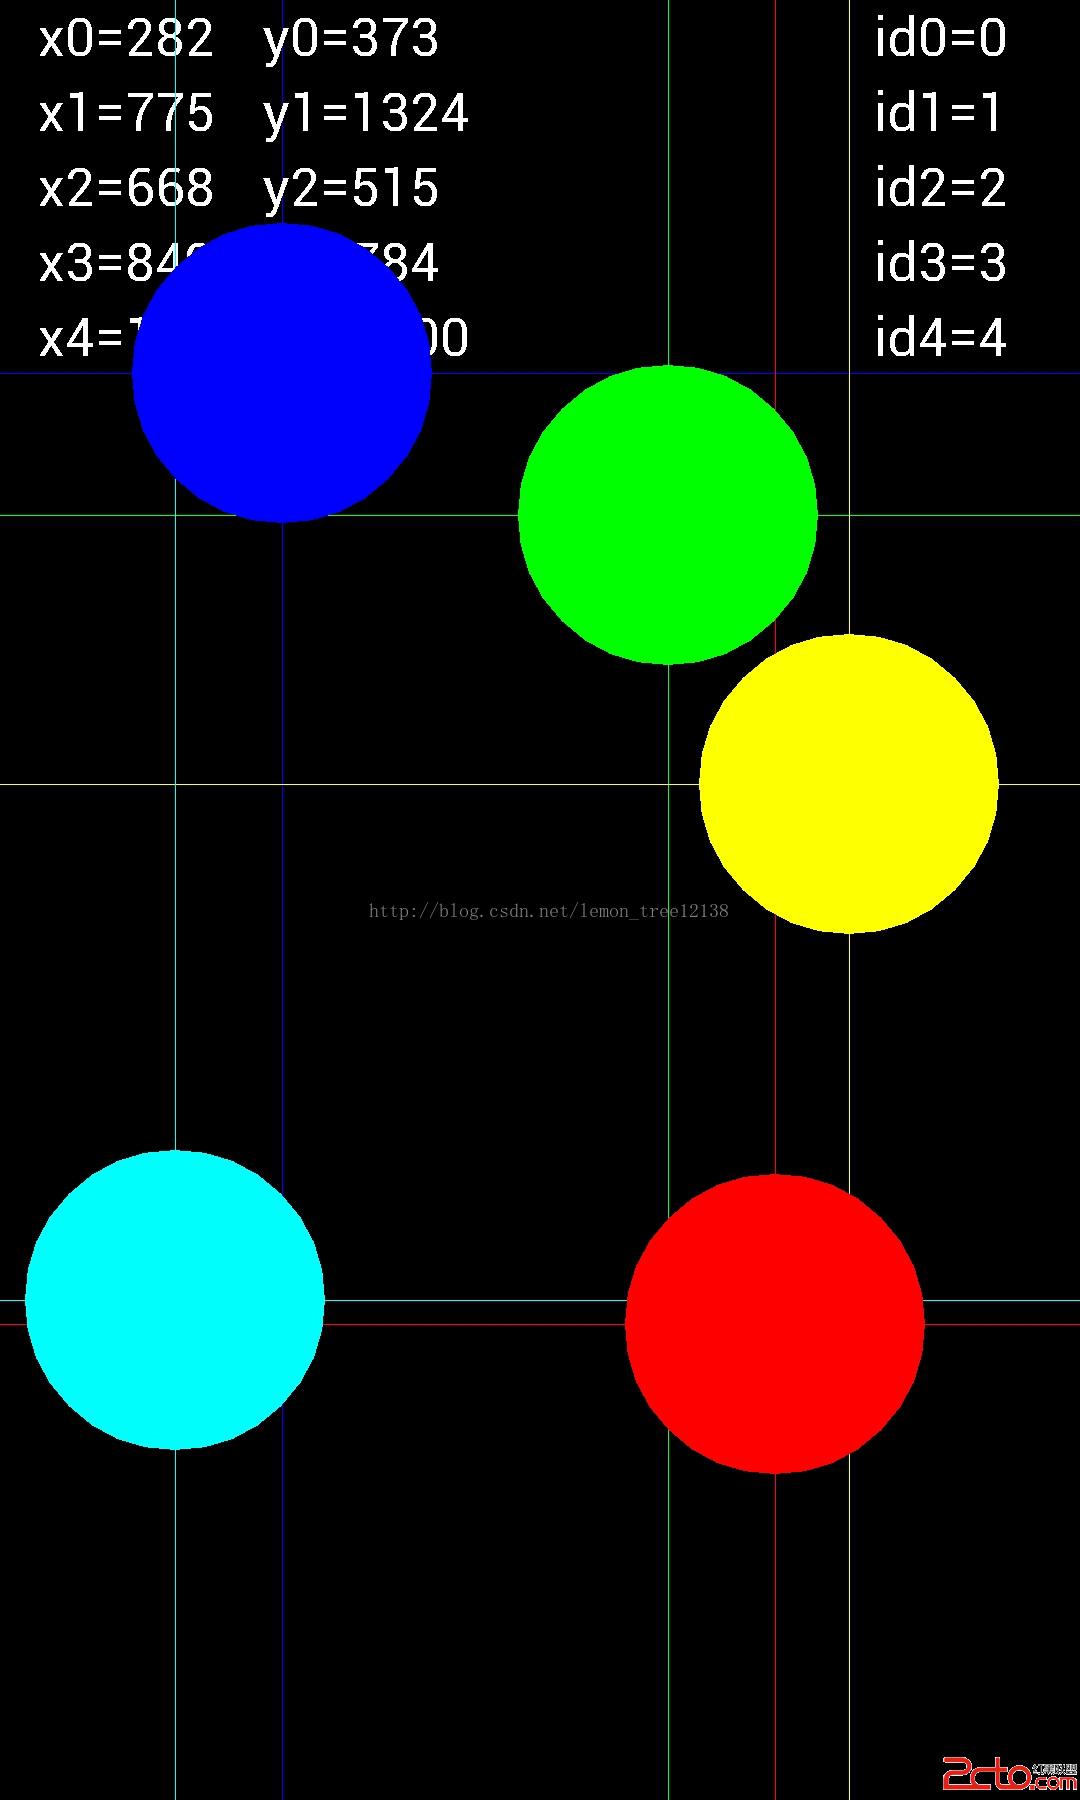
本示例是在SurfaceView中利用Canvas來展示用戶的多點觸控,不過核心技術還是一個常見的方法:onTouchEvent(MotionEvent event)
MotionEvent有以下幾個方法需要大家注意一下,不過了是一些常見的方法,如果你onTouchEvent使用得多的話。
event.getAction() // 獲取觸控動作比如ACTION_DOWN
event.getPointerCount(); // 獲取觸控點的數量,比如2則可能是兩個手指同時按壓屏幕
event.getPointerId(nID); // 對於每個觸控的點的細節,我們可以通過一個循環執行getPointerId方法獲取索引
event.getX(nID); // 獲取第nID個觸控點的x位置
event.getY(nID); // 獲取第nID個點觸控的y位置
event.getPressure(nID); // LCD可以感應出用戶的手指壓力,當然具體的級別由驅動和物理硬件決定的
event.getDownTime() // 按下開始時間
event.getEventTime() // 事件結束時間
event.getEventTime()-event.getDownTime()); // 總共按下時花費時間
public class MTView extends SurfaceView implements SurfaceHolder.Callback {

	private static final int MAX_TOUCHPOINTS = 10;
	private static final String START_TEXT = "請隨便觸摸屏幕進行測試";
	private Paint textPaint = new Paint();
	private Paint touchPaints[] = new Paint[MAX_TOUCHPOINTS];
	private int colors[] = new int[MAX_TOUCHPOINTS];

	private int width, height;
	private float scale = 1.0f;

	public MTView(Context context) {
		super(context);
		SurfaceHolder holder = getHolder();
		holder.addCallback(this);
		setFocusable(true); // 確保我們的View能獲得輸入焦點
		setFocusableInTouchMode(true); // 確保能接收到觸屏事件
		init();
	}

	private void init() {
		// 初始化10個不同顏色的畫筆
		textPaint.setColor(Color.WHITE);
		colors[0] = Color.BLUE;
		colors[1] = Color.RED;
		colors[2] = Color.GREEN;
		colors[3] = Color.YELLOW;
		colors[4] = Color.CYAN;
		colors[5] = Color.MAGENTA;
		colors[6] = Color.DKGRAY;
		colors[7] = Color.WHITE;
		colors[8] = Color.LTGRAY;
		colors[9] = Color.GRAY;
		for (int i = 0; i < MAX_TOUCHPOINTS; i++) {
			touchPaints[i] = new Paint();
			touchPaints[i].setColor(colors[i]);
		}
	}

	/**
	 * 處理觸屏事件
	 */
	@Override
	public boolean onTouchEvent(MotionEvent event) {
		// 獲得屏幕觸點數量
		int pointerCount = event.getPointerCount();
		if (pointerCount > MAX_TOUCHPOINTS) {
			pointerCount = MAX_TOUCHPOINTS;
		}

		// 鎖定Canvas,開始進行相應的界面處理
		Canvas c = getHolder().lockCanvas();
		if (c != null) {
			c.drawColor(Color.BLACK);
			if (event.getAction() == MotionEvent.ACTION_UP) {
				// 當手離開屏幕時,清屏
			} else {
				// 在每一個觸點上繪制一個十字和坐標信息
				for (int i = 0; i < pointerCount; i++) {
					int id = event.getPointerId(i);
					int x = (int) event.getX(i);
					int y = (int) event.getY(i);
					drawCrosshairsAndText(x, y, touchPaints[id], i, id, c);
				}

				// 在每一個觸點上繪制一個圓
				for (int i = 0; i < pointerCount; i++) {
					int id = event.getPointerId(i);
					int x = (int) event.getX(i);
					int y = (int) event.getY(i);
					drawCircle(x, y, touchPaints[id], c);
				}
			}

			// 畫完後,unlock
			getHolder().unlockCanvasAndPost(c);
		}
		return true;
	}

	/**
	 * 畫十字及坐標信息
	 *
	 * @param x
	 * @param y
	 * @param paint
	 * @param ptr
	 * @param id
	 * @param c
	 */
	private void drawCrosshairsAndText(int x, int y, Paint paint, int ptr,
			int id, Canvas c) {
		c.drawLine(0, y, width, y, paint);
		c.drawLine(x, 0, x, height, paint);
		int textY = (int) ((15 + 20 * ptr) * scale);
		c.drawText("x" + ptr + "=" + x, 10 * scale, textY, textPaint);
		c.drawText("y" + ptr + "=" + y, 70 * scale, textY, textPaint);
		c.drawText("id" + ptr + "=" + id, width - 55 * scale, textY, textPaint);
	}

	/**
	 * 畫圓
	 *
	 * @param x
	 * @param y
	 * @param paint
	 * @param c
	 */
	private void drawCircle(int x, int y, Paint paint, Canvas c) {
		c.drawCircle(x, y, 40 * scale, paint);
	}

	/**
	 * 進入程序時背景畫成黑色,然後把START_TEXT寫到屏幕
	 */
	public void surfaceChanged(SurfaceHolder holder, int format, int width, int height) {
		this.width = width;
		this.height = height;
		if (width > height) {
			this.scale = width / 480f;
		} else {
			this.scale = height / 480f;
		}
		textPaint.setTextSize(14 * scale);
		Canvas c = getHolder().lockCanvas();
		if (c != null) {
			c.drawColor(Color.BLACK);
			float tWidth = textPaint.measureText(START_TEXT);
			c.drawText(START_TEXT, width / 2 - tWidth / 2, height / 2, textPaint);
			getHolder().unlockCanvasAndPost(c);
		}
	}

	public void surfaceCreated(SurfaceHolder holder) {
	}

	public void surfaceDestroyed(SurfaceHolder holder) {
	}
}
使用上也是so easy:
setContentView(new MTView(this));
通過多點觸屏放大或縮小圖像 beforeLenght用來保存前一時間兩點之間的距離 afterLenght用來保存當前時間兩點之間的距離
public void scaleWithFinger(MotionEvent event) {
			float moveX = event.getX(1) - event.getX(0);
			float moveY = event.getY(1) - event.getY(0);

			switch (event.getAction()) {
			case MotionEvent.ACTION_DOWN:
				beforeLenght = (float) Math.sqrt((moveX * moveX)
						+ (moveY * moveY));
				break;
			case MotionEvent.ACTION_MOVE:
				// 得到兩個點之間的長度
				afterLenght = (float) Math.sqrt((moveX * moveX)
						+ (moveY * moveY));

				float gapLenght = afterLenght - beforeLenght;

				if (gapLenght == 0) {
					break;
				}

				// 如果當前時間兩點距離大於前一時間兩點距離,則傳0,否則傳1
				if (gapLenght > 0) {
					this.setScale(scale, 0);
				} else {
					this.setScale(scale, 1);
				}

				beforeLenght = afterLenght;
				break;
			}
		}
	}
讓圖片跟隨手指觸屏的位置移動 beforeX、Y是用來保存前一位置的坐標 afterX、Y是用來保存當前位置的坐標。它們的差值就是ImageView各坐標的增加或減少值。
public void moveWithFinger(MotionEvent event) {

			switch (event.getAction()) {

			case MotionEvent.ACTION_DOWN:
				beforeX = event.getX();
				beforeY = event.getY();
				break;
			case MotionEvent.ACTION_MOVE:
				afterX = event.getX();
				afterY = event.getY();

				this.setLocation((int) (afterX - beforeX),
						(int) (afterY - beforeY));

				beforeX = afterX;
				beforeY = afterY;
				break;

			case MotionEvent.ACTION_UP:
				break;
			}
		}
用來放大縮小ImageView 因為圖片是填充ImageView的,所以也就有放大縮小圖片的效果 flag為0是放大圖片,為1是縮小圖片
private void setScale(float temp, int flag) {

			if (flag == 0) {
				this.setFrame(this.getLeft() - (int) (temp * this.getWidth()),
						this.getTop() - (int) (temp * this.getHeight()),
						this.getRight() + (int) (temp * this.getWidth()),
						this.getBottom() + (int) (temp * this.getHeight()));
			} else {
				this.setFrame(this.getLeft() + (int) (temp * this.getWidth()),
						this.getTop() + (int) (temp * this.getHeight()),
						this.getRight() - (int) (temp * this.getWidth()),
						this.getBottom() - (int) (temp * this.getHeight()));
			}
		}
onTouchEvent事件則如下:
public boolean onTouchEvent(MotionEvent event) {
		if (inView(imageView, event)) {
			if (event.getPointerCount() == 2) {
				imageView.scaleWithFinger(event);
			} else if (event.getPointerCount() == 1) {
				imageView.moveWithFinger(event);
			}
		}
		return true;
	}
http://download.csdn.net/detail/u013761665/8719349
 [Android] SQLite數據庫之增刪改查基礎操作
在編程中經常會遇到數據庫的操作,而Android系統內置了SQLite,它是一款輕型數據庫,遵守事務ACID的關系型數據庫管理系統,它占用的資源非常低,能夠支持Windo
 android事件攔截處理機制詳解
前段時間剛接觸過android手機開發,對它的事件傳播機制不是很了解,雖然網上也查了相關的資料,但是總覺得理解模模糊糊,似是而非,於是自己就寫個小demo測試了一下。總算
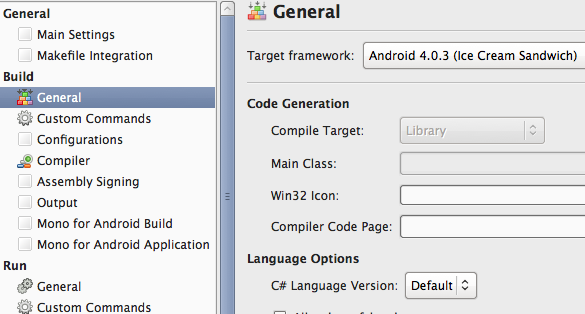 Mono for Android 實現高效的導航(Effective Navigation)
Android 4.0 系統定義了一系列的高效導航方式 (Effective Navigation), 主要包括標簽、下拉列表、以及向上和返回等, 本文介紹如何用 Mon
 Android Studio 1.4帶來的福利
前一段時間更新了Android Studio,目前最新的穩定版是1.4。更新之後沒看到什麼大的變化。今天去逛官方的更新日志,發現1.4版本著實增加了不少使用的