編輯:關於Android編程
二維碼:
是用某種特定的幾何圖形按一定規律在平面(二維方向上)分布的黑白相間的圖形記錄數據符號信息的;
在代碼編制上巧妙的利用構成計算機內部邏輯基礎的0和1比特流的概念,使用若干個與二進制相對應的幾何形體來表示文字數值信息,通過圖像輸入設備或光電掃描設備自動識讀以實現信息自動處理;
二維碼能夠在橫向和縱向兩個方位同時表達信息,因此能在很小的面積內表達大量的信息;
二維碼相對於條形碼的優勢就是省空間;
zxing簡介:
zxing是一個開放源碼的,用java實現的多種格式的1D/2D條碼圖像處理庫,它包含了聯系到其他語言的接口。
zxing可以實現使用手機的內置的攝像頭完成條形碼和二維碼的掃描與解碼。
zxing可以實現條形碼和二維碼的編碼與解碼。
zxing目前支持的的格式如下:
UPC-A,UPC-E
EAN-8,EAN-13
39碼
93碼
代碼128
QR碼
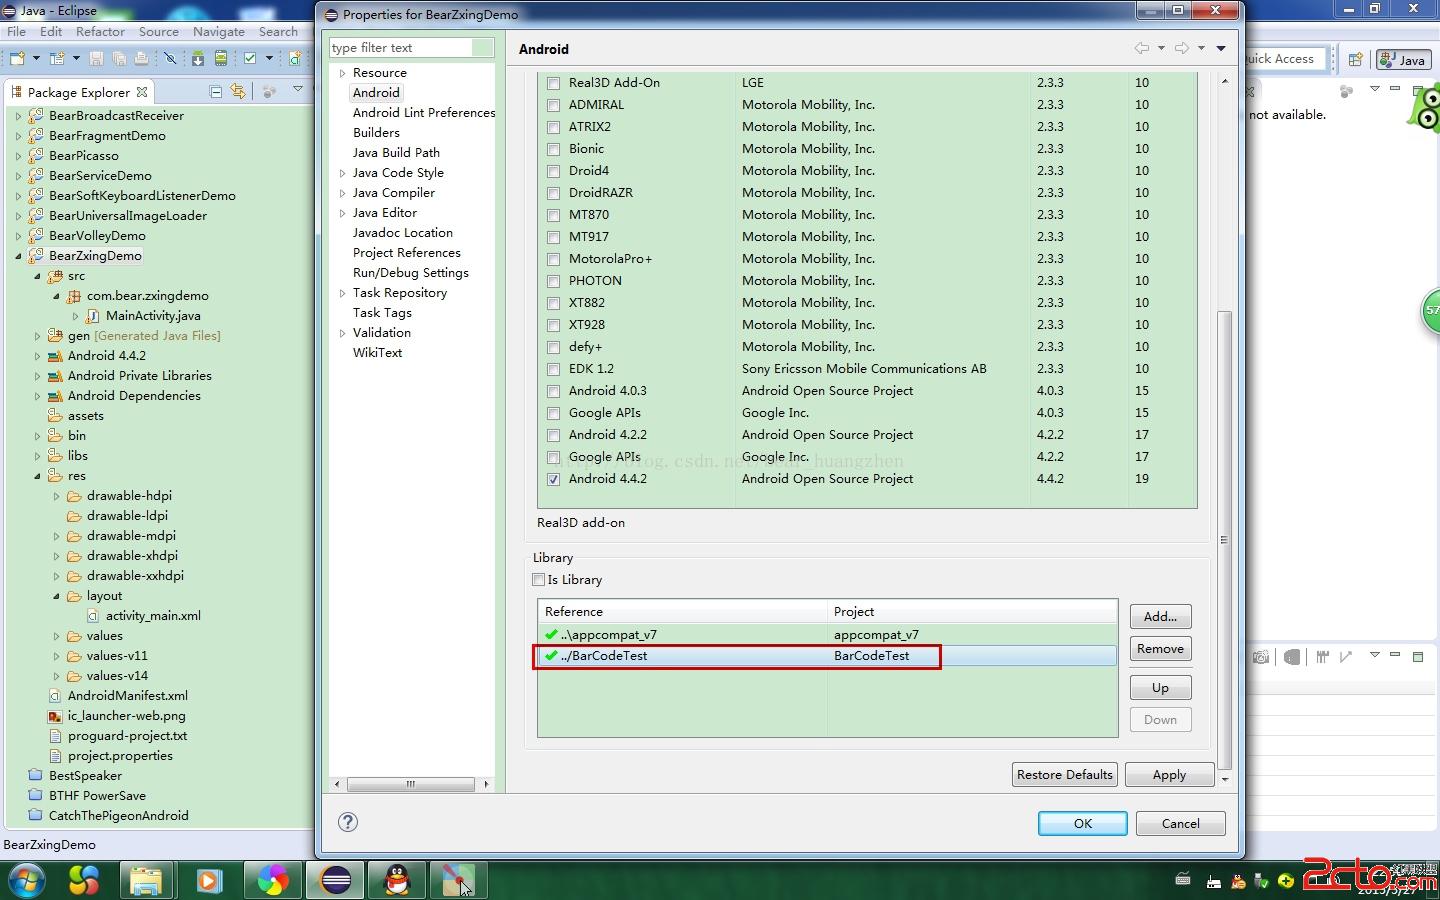
Android上zxing的使用:
這裡使用的時候可以有兩種形式:
1.將zxing的jar包放到工程的lib庫中,然後還要拷貝相應的類源碼到工程中去,整個文件夾拷貝過去也是很快的;
2.將已經弄好zxing的工程作為當前工程的依賴庫,然後直接使用就可以了;
如圖:
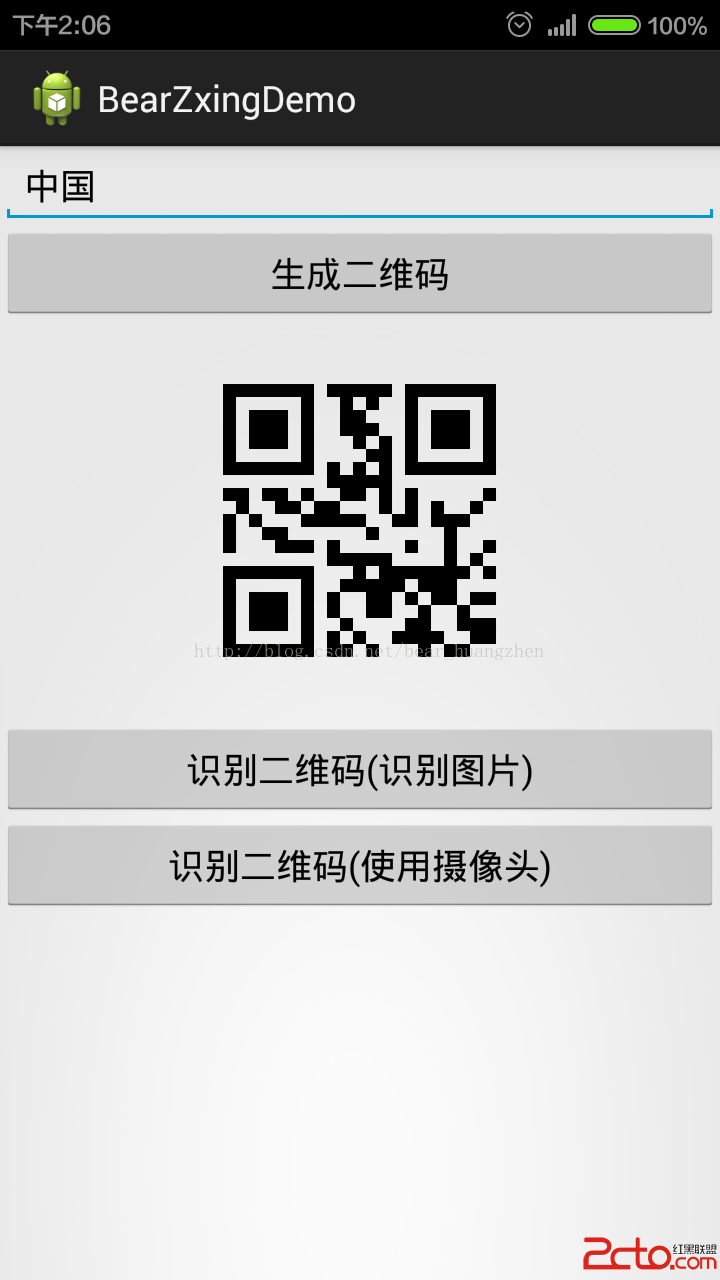
下面來通過一個實例來完成以下三個功能:
1.生成二維碼;
2.解析二維碼圖片;
3.掃描二維碼並解析;
最終效果是這樣的:
在我們新建工程之前,我們必須將依賴庫導入到Eclipse中,依賴庫的原工程文件夾我已經打包,文章最後面有鏈接可以下載。
識別二維碼(識別圖片)這個功能需要用到一個名叫RGBLuminanceSource的類,這個類的內容如下:
import java.io.FileNotFoundException;

import android.graphics.Bitmap;
import android.graphics.BitmapFactory;

import com.google.zxing.LuminanceSource;

public class RGBLuminanceSource extends LuminanceSource {
	private final byte[] luminances;

	public RGBLuminanceSource(Bitmap bitmap) {
		super(bitmap.getWidth(), bitmap.getHeight());
		//得到圖片的寬高
		int width = bitmap.getWidth();
		int height = bitmap.getHeight();
		//得到圖片的像素
		int[] pixels = new int[width * height];
		//
		bitmap.getPixels(pixels, 0, width, 0, 0, width, height);
		//為了測量純解碼速度,我們將整個圖像灰度陣列前面,這是一樣的通道
		// YUVLuminanceSource在現實應用。
		//得到像素大小的字節數
		luminances = new byte[width * height];
		//得到圖片每點像素顏色
		for (int y = 0; y < height; y++) {
			int offset = y * width;
			for (int x = 0; x < width; x++) {
				int pixel = pixels[offset + x];
				int r = (pixel >> 16) & 0xff;
				int g = (pixel >> 8) & 0xff;
				int b = pixel & 0xff;
				//當某一點三種顏色值相同時,相應字節對應空間賦值為其值
				if (r == g && g == b) {
					luminances[offset + x] = (byte) r;
				}
				//其它情況字節空間對應賦值為:
				else {
					luminances[offset + x] = (byte) ((r + g + g + b) >> 2);
				}
			}
		}
	}

	public RGBLuminanceSource(String path) throws FileNotFoundException {
		this(loadBitmap(path));
	}


	@Override
	public byte[] getMatrix() {
		return luminances;
	}

	@Override
	public byte[] getRow(int arg0, byte[] arg1) {
		if (arg0 < 0 || arg0 >= getHeight()) {
			throw new IllegalArgumentException(
					Requested row is outside the image:  + arg0);
		}
		int width = getWidth();
		if (arg1 == null || arg1.length < width) {
			arg1 = new byte[width];
		}
		System.arraycopy(luminances, arg0 * width, arg1, 0, width);
		return arg1;
	}

	private static Bitmap loadBitmap(String path) throws FileNotFoundException {
		Bitmap bitmap = BitmapFactory.decodeFile(path);
		if (bitmap == null) {
			throw new FileNotFoundException(Couldn't open  + path);
		}
		return bitmap;
	}
}
import java.util.Hashtable;

import com.google.zxing.BinaryBitmap;
import com.google.zxing.DecodeHintType;
import com.google.zxing.Result;
import com.google.zxing.common.HybridBinarizer;
import com.google.zxing.qrcode.QRCodeReader;
import com.zxing.activity.CaptureActivity;
import com.zxing.encoding.EncodingHandler;

import android.annotation.SuppressLint;
import android.app.Activity;
import android.content.Intent;
import android.database.Cursor;
import android.graphics.Bitmap;
import android.graphics.BitmapFactory;
import android.os.Bundle;
import android.provider.MediaStore;
import android.view.View;
import android.view.View.OnClickListener;
import android.widget.EditText;
import android.widget.ImageView;
import android.widget.Toast;

public class MainActivity extends Activity implements OnClickListener {

	private static final int CHOOSE_PIC = 0;
	private static final int PHOTO_PIC = 1;

	private EditText contentEditText = null;
	private ImageView qrcodeImageView = null;
	private String  imgPath = null;

	@Override
	protected void onCreate(Bundle savedInstanceState) {
		super.onCreate(savedInstanceState);
		setContentView(R.layout.activity_main);
		setupViews();
	}

	private void setupViews() {
		contentEditText = (EditText) findViewById(R.id.editText1);
		findViewById(R.id.button1).setOnClickListener(this);
		findViewById(R.id.button2).setOnClickListener(this);
		findViewById(R.id.button3).setOnClickListener(this);
		qrcodeImageView = (ImageView) findViewById(R.id.img1);
	}

	//解析二維碼圖片,返回結果封裝在Result對象中
	private com.google.zxing.Result  parseQRcodeBitmap(String bitmapPath){
		//解析轉換類型UTF-8
		Hashtable hints = new Hashtable();
		hints.put(DecodeHintType.CHARACTER_SET, utf-8);
		//獲取到待解析的圖片
		BitmapFactory.Options options = new BitmapFactory.Options();
		//如果我們把inJustDecodeBounds設為true,那麼BitmapFactory.decodeFile(String path, Options opt)
		//並不會真的返回一個Bitmap給你,它僅僅會把它的寬,高取回來給你
		options.inJustDecodeBounds = true;
		//此時的bitmap是null,這段代碼之後,options.outWidth 和 options.outHeight就是我們想要的寬和高了
		Bitmap bitmap = BitmapFactory.decodeFile(bitmapPath,options);
		//我們現在想取出來的圖片的邊長(二維碼圖片是正方形的)設置為400像素
		/**
			options.outHeight = 400;
			options.outWidth = 400;
			options.inJustDecodeBounds = false;
			bitmap = BitmapFactory.decodeFile(bitmapPath, options);
		*/
		//以上這種做法,雖然把bitmap限定到了我們要的大小,但是並沒有節約內存,如果要節約內存,我們還需要使用inSimpleSize這個屬性
		options.inSampleSize = options.outHeight / 400;
		if(options.inSampleSize <= 0){
			options.inSampleSize = 1; //防止其值小於或等於0
		}
		/**
		 * 輔助節約內存設置
		 *
		 * options.inPreferredConfig = Bitmap.Config.ARGB_4444;    // 默認是Bitmap.Config.ARGB_8888
		 * options.inPurgeable = true;
		 * options.inInputShareable = true;
		 */
		options.inJustDecodeBounds = false;
		bitmap = BitmapFactory.decodeFile(bitmapPath, options);
		//新建一個RGBLuminanceSource對象,將bitmap圖片傳給此對象
		RGBLuminanceSource rgbLuminanceSource = new RGBLuminanceSource(bitmap);
		//將圖片轉換成二進制圖片
		BinaryBitmap binaryBitmap = new BinaryBitmap(new HybridBinarizer(rgbLuminanceSource));
		//初始化解析對象
		QRCodeReader reader = new QRCodeReader();
		//開始解析
		Result result = null;
		try {
			result = reader.decode(binaryBitmap, hints);
		} catch (Exception e) {
			// TODO: handle exception
		}

		return result;
	}

	@Override
	protected void onActivityResult(int requestCode, int resultCode, Intent data) {
		super.onActivityResult(requestCode, resultCode, data);
		imgPath = null;
		if(resultCode == RESULT_OK){
			switch (requestCode) {
			case CHOOSE_PIC:
				String[] proj = new String[]{MediaStore.Images.Media.DATA};
				Cursor cursor = MainActivity.this.getContentResolver().query(data.getData(), proj, null, null, null);

				if(cursor.moveToFirst()){
					int columnIndex = cursor.getColumnIndex(MediaStore.Images.Media.DATA);
					System.out.println(columnIndex);
					//獲取到用戶選擇的二維碼圖片的絕對路徑
					imgPath = cursor.getString(columnIndex);
				}
				cursor.close();

				//獲取解析結果
				Result ret = parseQRcodeBitmap(imgPath);
				Toast.makeText(MainActivity.this,解析結果: + ret.toString(), Toast.LENGTH_LONG).show();
				break;
			case PHOTO_PIC:
				String result = data.getExtras().getString(result);
				Toast.makeText(MainActivity.this,解析結果: + result, Toast.LENGTH_LONG).show();
				break;

			default:
				break;
			}
		}

	}

	@SuppressLint(InlinedApi)
	@Override
	public void onClick(View v) {
		switch (v.getId()) {
		case R.id.button1:
			//獲取界面輸入的內容
			String content = contentEditText.getText().toString();
			//判斷內容是否為空
			if (null == content || .equals(content)) {
				Toast.makeText(MainActivity.this, 請輸入要寫入二維碼的內容...,
						Toast.LENGTH_SHORT).show();
				return;
			}

			try {
				//生成二維碼圖片,第一個參數是二維碼的內容,第二個參數是正方形圖片的邊長,單位是像素
				Bitmap qrcodeBitmap = EncodingHandler.createQRCode(content, 400);
				qrcodeImageView.setImageBitmap(qrcodeBitmap);
			} catch (Exception e) {
				// TODO Auto-generated catch block
				e.printStackTrace();
			}
			break;
		case R.id.button2:
			//跳轉到圖片選擇界面去選擇一張二維碼圖片
			Intent intent1 = new Intent();
//			if(android.os.Build.VERSION.SDK_INT < 19){
//				intent1.setAction(Intent.ACTION_GET_CONTENT);
//			}else{
//				intent1.setAction(Intent.ACTION_OPEN_DOCUMENT);
//			}
			intent1.setAction(Intent.ACTION_PICK);

			intent1.setType(image/*);

			Intent intent2 =  Intent.createChooser(intent1, 選擇二維碼圖片);
			startActivityForResult(intent2, CHOOSE_PIC);
			break;
		case R.id.button3:
			//跳轉到拍照界面掃描二維碼
			Intent intent3 = new Intent(MainActivity.this, CaptureActivity.class);
			startActivityForResult(intent3, PHOTO_PIC);
			break;

		default:
			break;
		}

	}
}
Android Zxing Demo
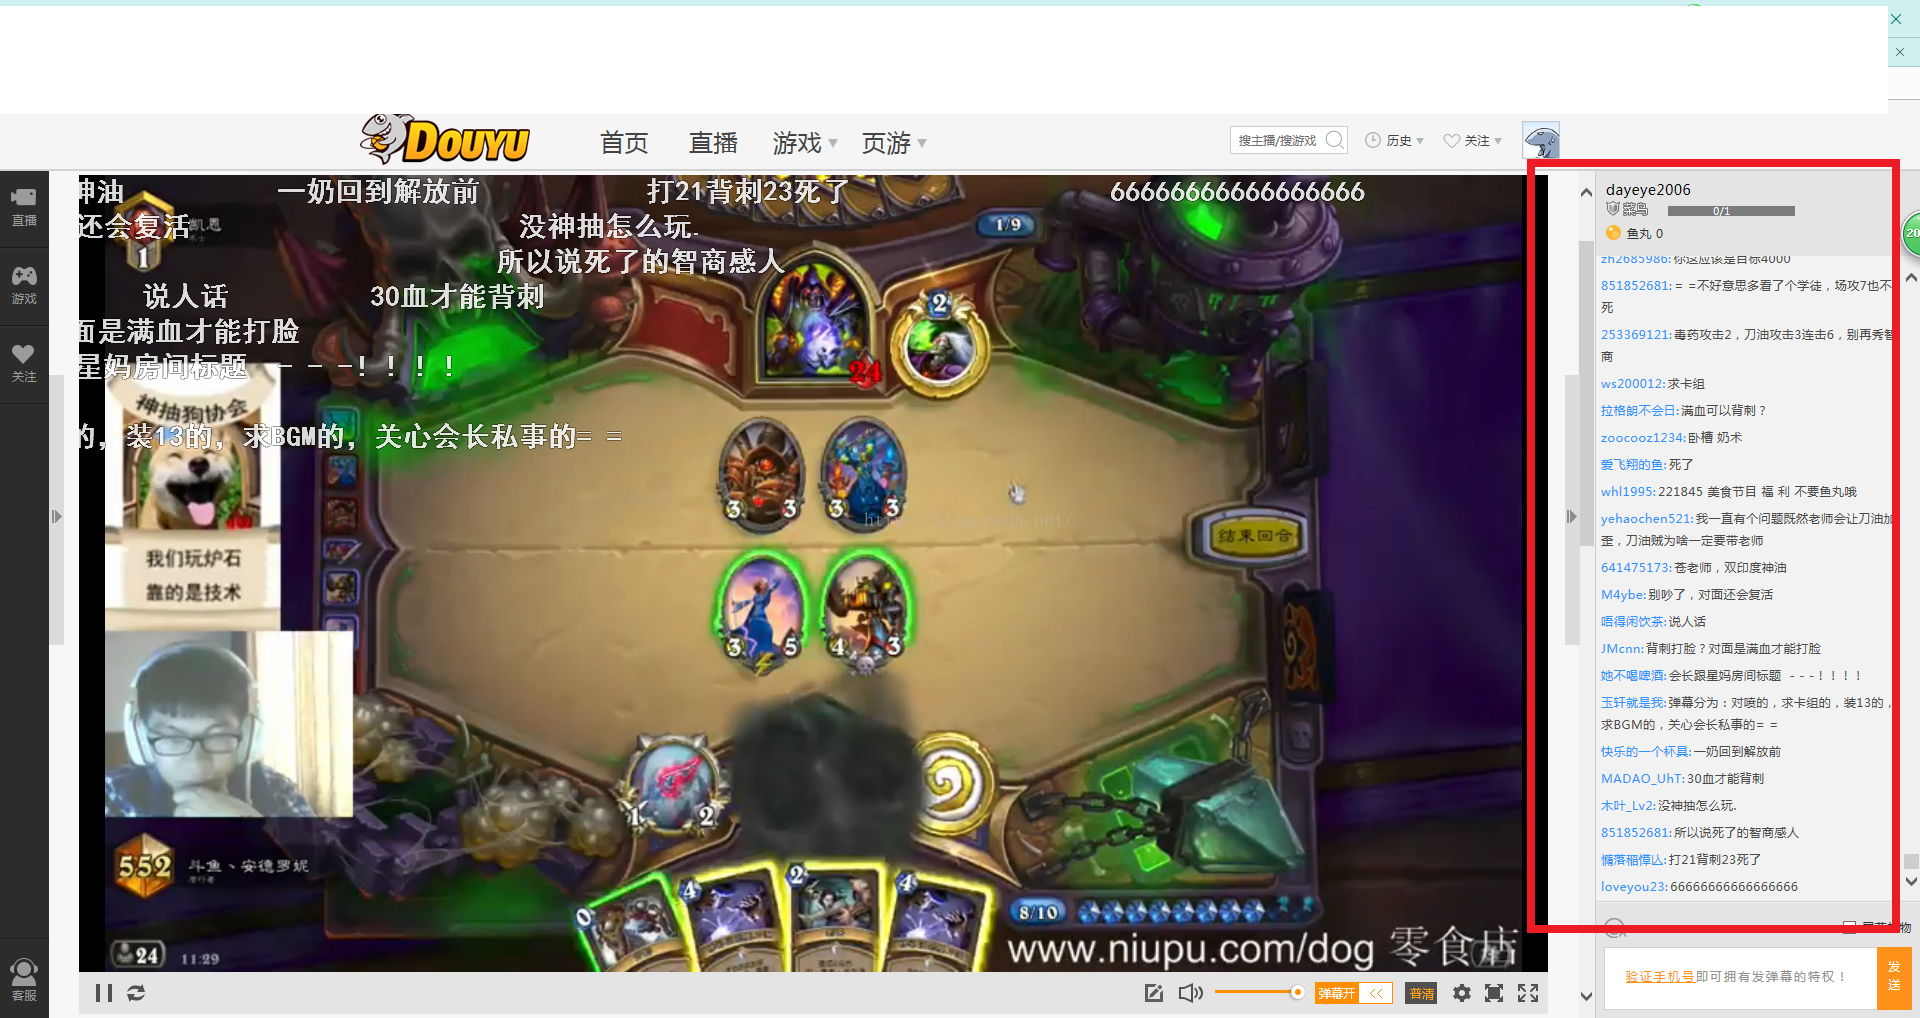 Android 實現仿網絡直播彈幕功能詳解及實例
Android 網絡直播彈幕
 Android官方文檔之App Components(Activities)
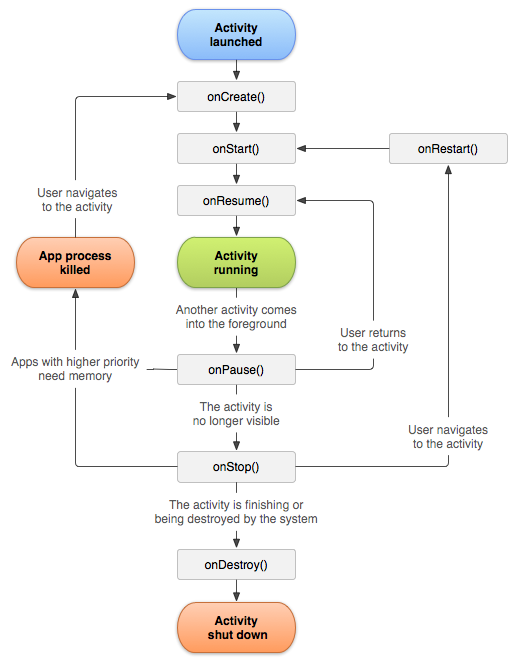
Activity是Android四大組件之首,本文將介紹Activity的含義、創建、啟動、銷毀、生命周期 等。如需訪問官方原文,您可以點擊這個鏈接:《Activitie
 Android Activity
Activity本質是什麼 Activity生命周期 Activity啟動模式 Activity直接的數據交互 如何啟動系統的Activity Activity啟動模
 android Spinner和數值選擇器使用demo
關鍵部分代碼如下 1、Spinnner 在布局文件中: 定義對象: private