編輯:關於Android編程
前言
前面兩篇博客分別介紹了Android進程間通信之AIDL的使用,以及使用AIDL傳遞復雜對象以及Bitmap對象。所謂AIDL:Android Interface Definition Language,是一種Android接口定義語言,用於編寫Android進程間通信代碼。也就是說AIDL只是一個實現進程間通信的一個工具,真正實現Android進程間通信機制的其實是幕後“主謀”Binder機制。所有有關AIDL實現進程間通信都是依賴於Android的Binder機制,那麼這個Binder機制到底是個什麼東西呢?在這篇博客中我只能說初始Binder機制,在下實在不敢造次,因為Android的Binder機制實在挺復雜的,要想深入了解Binder機制的實現原理的朋友們請繞道而走,出門左拐去看老羅的博客,我可不敢誤人子弟啊。
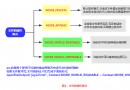
我們從整個抽象層面來理解Android的進程間通信Binder機制,在進程間通信有三個角色分別為:客戶端(Client),Binder驅動,服務端(Service)。客戶端通過Binder驅動向服務端發送請求,服務端又將請求的結果通過Binder驅動回送給客戶端,這就是一個簡單的進程間通信的描述。由此可以看到Binder驅動是兩者的中間橋梁,是客戶端和服務端的信使。
服務端:定義了一個Binder對象,並且重寫其中的onTransact方法來處理來自客戶端的請求,該Binder對象會注冊到系統中,以便客戶端綁定使用。 Binder驅動:設備文件驅動,提供相應的接口給客戶端和服務端,以便兩者通信。 客戶端:通過綁定指定的服務來獲取服務端的Binder對象,然後調用IBinder接口類中的transact方法進行遠程調用。IBinder是一個接口對象,其定義了一系列方法,其中一個方法transact至關重要,客戶端就通過該方法來進行遠程通信。而Binder對象繼承IBinder接口,並實現了裡面的方法。現在我們來看看Binder對象中的transact方法的實現:
/**
     * Default implementation rewinds the parcels and calls onTransact.  On
     * the remote side, transact calls into the binder to do the IPC.
     */
    public final boolean transact(int code, Parcel data, Parcel reply,
            int flags) throws RemoteException {
        if (false) Log.v("Binder", "Transact: " + code + " to " + this);
        if (data != null) {
            data.setDataPosition(0);
        }
        boolean r = onTransact(code, data, reply, flags);
        if (reply != null) {
            reply.setDataPosition(0);
        }
        return r;
    }
分析:該方法有四個參數,分別是 code,data,reply,flag。
code:整形的一個識別碼,客戶端傳入,用於區分服務端執行哪個方法。 data:客戶端傳入的Parcel類型的參數。 reply:服務端返回的結果值,也是Parcel類型數據。 flag:整形的一個標記,用於標記是否是否有返回值,0表示有返回值,1表示沒有。一般客戶端需要調用transact方法來將客戶端相應的參數傳遞給服務端。
我們知道transact方法是Binder類提供給客戶端來實現遠程調用的一個方法,而該方法中真正做事情的代碼卻是調用了Binder類中的onTransact方法。而該方法正是服務端用來實現客戶端請求的方法,那麼我們來看看onTransact方法:
 /**
     * Default implementation is a stub that returns false.  You will want
     * to override this to do the appropriate unmarshalling of transactions.
     *
     *
If you want to call this, call transact(). */ protected boolean onTransact(int code, Parcel data, Parcel reply, int flags) throws RemoteException { if (code == INTERFACE_TRANSACTION) { reply.writeString(getInterfaceDescriptor()); return true; } else if (code == DUMP_TRANSACTION) { ParcelFileDescriptor fd = data.readFileDescriptor(); String[] args = data.readStringArray(); if (fd != null) { try { dump(fd.getFileDescriptor(), args); } finally { try { fd.close(); } catch (IOException e) { // swallowed, not propagated back to the caller } } } // Write the StrictMode header. if (reply != null) { reply.writeNoException(); } else { StrictMode.clearGatheredViolations(); } return true; } return false; }
以上是onTransact方法的默認實現,其參數和transact方法一一對應。
一般服務端需要重寫該方法來實現客戶端的請求。
通過上一小節我們知道,基於Binder機制的Android進程間通信的一個簡易過程就是:服務端定義個Binder對象,並且重寫其中的onTransact方法來實現客戶端的請求,然後通過Service將該Binder注冊到系統中。客戶端通過綁定指定的服務來獲得遠程的IBinder對象,之後調用其中的transact方法來進行遠程調用。
而標准的AIDL編程其實很簡單,無須開發者自己主動去調用transact和實現onTransact方法,只需實現相應的一些功能即可。由此也方便了開發者,盡量避免讓開發者去關注Binder工作的一個過程,而僅僅在意其功能就好了。不過我們本著學習的心態了解一點進程間通信的原理還是有幫助的。接下來我們簡單分析一下一個aidl文件:
/*
 * This file is auto-generated.  DO NOT MODIFY.
 * Original file: G:\\WorkPlace\\ServiceAidl\\app\\src\\main\\aidl\\com\\xjp\\serviceaidl\\IMyAidlInterface.aidl
 */
package com.xjp.serviceaidl;
// Declare any non-default types here with import statements

public interface IMyAidlInterface extends android.os.IInterface {
    /**
     * Local-side IPC implementation stub class.
     */
    public static abstract class Stub extends android.os.Binder implements com.xjp.serviceaidl.IMyAidlInterface {
        private static final java.lang.String DESCRIPTOR = "com.xjp.serviceaidl.IMyAidlInterface";

        /**
         * Construct the stub at attach it to the interface.
         */
        public Stub() {
            this.attachInterface(this, DESCRIPTOR);
        }

        /**
         * Cast an IBinder object into an com.xjp.serviceaidl.IMyAidlInterface interface,
         * generating a proxy if needed.
         */
        public static com.xjp.serviceaidl.IMyAidlInterface asInterface(android.os.IBinder obj) {
            if ((obj == null)) {
                return null;
            }
            android.os.IInterface iin = obj.queryLocalInterface(DESCRIPTOR);
            if (((iin != null) && (iin instanceof com.xjp.serviceaidl.IMyAidlInterface))) {
                return ((com.xjp.serviceaidl.IMyAidlInterface) iin);
            }
            return new com.xjp.serviceaidl.IMyAidlInterface.Stub.Proxy(obj);
        }

        @Override
        public android.os.IBinder asBinder() {
            return this;
        }

        @Override
        public boolean onTransact(int code, android.os.Parcel data, android.os.Parcel reply, int flags) throws android.os.RemoteException {
            switch (code) {
                case INTERFACE_TRANSACTION: {
                    reply.writeString(DESCRIPTOR);
                    return true;
                }
                case TRANSACTION_basicTypes: {
                    data.enforceInterface(DESCRIPTOR);
                    int _arg0;
                    _arg0 = data.readInt();
                    long _arg1;
                    _arg1 = data.readLong();
                    boolean _arg2;
                    _arg2 = (0 != data.readInt());
                    float _arg3;
                    _arg3 = data.readFloat();
                    double _arg4;
                    _arg4 = data.readDouble();
                    java.lang.String _arg5;
                    _arg5 = data.readString();
                    int _result = this.basicTypes(_arg0, _arg1, _arg2, _arg3, _arg4, _arg5);
                    reply.writeNoException();
                    reply.writeInt(_result);
                    return true;
                }
            }
            return super.onTransact(code, data, reply, flags);
        }

        private static class Proxy implements com.xjp.serviceaidl.IMyAidlInterface {
            private android.os.IBinder mRemote;

            Proxy(android.os.IBinder remote) {
                mRemote = remote;
            }

            @Override
            public android.os.IBinder asBinder() {
                return mRemote;
            }

            public java.lang.String getInterfaceDescriptor() {
                return DESCRIPTOR;
            }

            /**
             * Demonstrates some basic types that you can use as parameters
             * and return values in AIDL.
             */
            @Override
            public int basicTypes(int anInt, long aLong, boolean aBoolean, float aFloat, double aDouble, java.lang.String aString) throws android.os.RemoteException {
                android.os.Parcel _data = android.os.Parcel.obtain();
                android.os.Parcel _reply = android.os.Parcel.obtain();
                int _result;
                try {
                    _data.writeInterfaceToken(DESCRIPTOR);
                    _data.writeInt(anInt);
                    _data.writeLong(aLong);
                    _data.writeInt(((aBoolean) ? (1) : (0)));
                    _data.writeFloat(aFloat);
                    _data.writeDouble(aDouble);
                    _data.writeString(aString);
                    mRemote.transact(Stub.TRANSACTION_basicTypes, _data, _reply, 0);
                    _reply.readException();
                    _result = _reply.readInt();
                } finally {
                    _reply.recycle();
                    _data.recycle();
                }
                return _result;
            }
        }

        static final int TRANSACTION_basicTypes = (android.os.IBinder.FIRST_CALL_TRANSACTION + 0);
    }

    /**
     * Demonstrates some basic types that you can use as parameters
     * and return values in AIDL.
     */
    public int basicTypes(int anInt, long aLong, boolean aBoolean, float aFloat, double aDouble, java.lang.String aString) throws android.os.RemoteException;
}
分析:
其中抽象類Stub是繼承自Binder對象,且繼承了開發者自己定義的接口IMyAidlInterface類,且該Stub類中實現了onTransact方法,也就是Stub類幫服務端實現了遠程調用方法,所以服務端只需要實現IMyAidlInterface類中的接口方法即可。
其中代理類Proxy也是繼承自Binder對象,且繼承了開發者自己定義的接口IMyAidlInterface類,並且Proxy類實現了IMyAidlInterface類中的接口方法,在該方法中調用了Binder類的transact方法,也就是Proxy代理類幫客戶端調用了transact方法,所以客戶端直接調用IMyAidlInterface接口類中的方法。
由此我們知道客戶端通過Binder調用IMyAidlInterface接口類中的方法,恰好服務端正好通過Binder來實現了IMyAidlInterface接口類中的方法,從而實現了客戶端遠程調用了服務端的接口方法來完成一次進程間的通信。
由此也看出上面的AIDL文件其實客戶端只是使用了其中的Proxy類代碼,服務端只是使用了其中的Stub類代碼,但是在客戶端和服務端都會生成相同的AIDL文件。那麼我們可不可以再客戶端把Stub類中代碼去掉,然後再服務端把Proxy類代碼去掉呢?答案是可以得。由於AIDL編程是idea自動生成的,它區分不了哪個是客戶端,哪個是服務端,故而自動生成的AIDL文件即包括了客戶端的代碼,也包括了服務端的代碼,看著有點冗余。既然我們知道了Android進程間通信Binder機制,那麼接下來不使用AIDL編程語言來實現進程間通信試試!!!!
其實上面幾個小節已經講解的很清楚了,只要服務端定義一個Binder對象並且實現其中的onTransact方法,客戶端獲取一個遠程服務的IBinder對象並且調用其中的transact方法即可實現不實用AIDL實現進程間的通信。
package com.xjp.serviceaidl;

import android.app.Service;
import android.content.Intent;
import android.os.Binder;
import android.os.IBinder;
import android.os.Parcel;
import android.os.RemoteException;
import android.support.annotation.Nullable;

/**
 * Created by xjp on 2016/5/14.
 */
public class CustomService extends Service {
    private static final String DESCRIPTOR = "com.xjp.serviceaidl.service";
    private static final int TRANSACTION_add = 0;

    private Binder mIBinder = new Binder(){
        @Override
        protected boolean onTransact(int code, Parcel data, Parcel reply, int flags) throws RemoteException {
            switch (code){
                case TRANSACTION_add://方法標識碼
                    data.enforceInterface(DESCRIPTOR);//讀取系列化令牌,和客戶端的data.writeInterfaceToken對應
                    int arg0 = data.readInt();//讀取參數
                    int arg1 = data.readInt();//讀取參數
                    int result = this.add(arg0,arg1);//本地方法
                    reply.writeNoException();
                    reply.writeInt(result);//回寫結果值
                    return true;
            }
            return super.onTransact(code, data, reply, flags);
        }
        //遠程調用的方法
        public int add(int arg0, int arg1){
            return arg0 + arg1;
        }
    };

    @Nullable
    @Override
    public IBinder onBind(Intent intent) {
        return mIBinder;
    }
}
分析:服務端只是定義了Binder對象並且重寫了onTransact方法,很簡單。記得在AndroidManifest.xml配置該服務。
package com.xjp.clientbinder;

import android.content.ComponentName;
import android.content.Context;
import android.content.Intent;
import android.content.ServiceConnection;
import android.os.Binder;
import android.os.IBinder;
import android.os.Parcel;
import android.os.RemoteException;
import android.support.v7.app.AppCompatActivity;
import android.os.Bundle;
import android.view.View;
import android.widget.TextView;
import android.widget.Toast;

public class MainActivity extends AppCompatActivity {

    private static final String SERVICE_ACTION = "com.xjp.serviceaidl_service";
    private static final String SERVICE_PKG_NAME = "com.xjp.serviceaidl";
    private static final String DESCRIPTOR = "com.xjp.serviceaidl.service";
    private static final int TRANSACTION_add = 0;
    private IBinder mBinder;

    private TextView txtResult;

    private ServiceConnection serviceConnection = new ServiceConnection() {
        @Override
        public void onServiceConnected(ComponentName name, IBinder service) {
            if (service != null) {
                mBinder = service;
            }
        }

        @Override
        public void onServiceDisconnected(ComponentName name) {
            serviceConnection = null;
        }
    };

    @Override
    protected void onCreate(Bundle savedInstanceState) {
        super.onCreate(savedInstanceState);
        setContentView(R.layout.activity_main);

        txtResult = (TextView) findViewById(R.id.result);
    }

    public void bindService(View v) {
        Intent intent = new Intent(SERVICE_ACTION);
        intent.setPackage(SERVICE_PKG_NAME);
        bindService(intent, serviceConnection, Context.BIND_AUTO_CREATE);
    }

    public void unbindService(View v) {
        unbindService(serviceConnection);
    }

    public void remoteAdd(View v) throws RemoteException {
        int result = remoteAdd(4, 9);
        txtResult.setText("遠程調用結果是:" + result);
    }

    private int remoteAdd(int arg0, int arg1) throws RemoteException {
        if (mBinder == null) {
            Toast.makeText(this, "請先綁定服務!", Toast.LENGTH_SHORT).show();
            return -1;
        }
        Parcel data = Parcel.obtain();
        Parcel reply = Parcel.obtain();
        int result;
        try {
            data.writeInterfaceToken(DESCRIPTOR);//往序列化中寫一個令牌,和服務端的data.enforceInterface對應,相當於接頭暗號。
            data.writeInt(arg0);//往序列化參數中寫值
            data.writeInt(arg1);//往序列化參數中寫值,值得注意是此處的寫順序必須和服務端的讀順序一致。
            mBinder.transact(TRANSACTION_add, data, reply, 0);//遠程調用方法
            reply.readException();
            result = reply.readInt();//讀取遠程調用的結果值
        } finally {
            data.recycle();
            reply.recycle();
        }
        return result;
    }

}
分析:

如果你對Android進程間通信Binder是一個小白,請自覺使用AIDL語言來編寫進程間通信,那麼即保證不出錯也簡單。如果你覺得利用AIDL編程閒代碼有點多余,那麼你可以自己實現Binder類相應的方法來實現進程間通信。總之通過這幾篇博客,總算對Android進程間通信之AIDL編程和Binder機制有個初步的了解。
 Android學習之文件存儲讀取
前言相信大家都知道知道,在AndroidOS中,提供了五中數據存儲方式,分別是:ContentProvider存儲、文件存儲、SharedPreference存儲、SQL
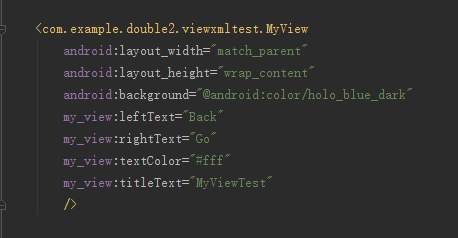 給自定義View添加xml屬性
筆者之前已經寫過了一些自定義View的文章,在此對其也就不從頭說起了,如有興趣的讀者可以看一下筆者的前兩篇文章。筆者之前的文章中僅僅介紹了如何使用自定義View以及為什麼
 Android發送驗證碼的倒計時按鈕
1 直接上圖2 原理原理很簡單,就是把相應的倒計時邏輯等封裝到一個控件中,並向外部提供接口。3 代碼 import java.util.Timer;import
 Android Listview多tab上滑懸浮效果
樣例 近期要做一個含有兩個tab切換頁面,兩個頁面有公共的描述信息區域,兩個tab都是listvi