編輯:關於Android編程
最近在看一本古董書《50 Android Hacks》,而書中開篇的第一個Hack就是”使用weight屬性實現視圖的居中現實“。
事實上weight是一個使用簡單,但卻又十分強大的屬性。但關於其的實現原理和使用細節我們卻不一定真正深入的進行過理解。
今天我們就來由淺入深,從源碼中去好好的研究研究這個東西。看看它有哪些可能被我們忽視的地方。
以上述書中的案例來說,它的需求很簡單,請實現“讓一個按鈕居中顯示,且占據屏幕一半的寬度”。
要實現這個需求也許有很多方式,但最簡單的肯定就是通過weight來實現,例如:
然後我們成功得到如下效果:

這裡就引出了最基本的使用知識點weightSum與layout_weight,正如weight最直觀的翻譯就可以理解為權重。
所以,實際上通過定義在LinearLayout中的weightSum與定義在子控件中的layout_weight屬性相互配合,
就完美的實現了子控件按照指定比重在父視圖中分配空間的效果,這通常也是我們對於weight屬性最常見的使用方式。
weightSum與layout_weight之間的關系如下(至於為什麼如此,我們稍後也將在源碼中得以驗證):
當我們明確的在LinearLayout指定了weightSum屬性的值的時候,系統將會使用我們指定的值。 而當我們沒有指定該屬性時,weightSum最終的值則將是該視圖中所有子控件設定的layout_weight的和。這一切看上去十分簡單清晰,所以很容易給我們造成這樣的錯覺,那就是:weight屬性就是用來按比例指定控件長度的。
實際上真的是這麼簡單嗎?當然不是這麼簡單。一定要避免這種誤區!!
我們都發現,在使用weight屬性的時候,通常我們都將width或者height屬性設置為了”0dp”。
其實稍微思考一下,我們就不難猜想到,雖然weight雖然通常被看做按比例分配控件寬高,但它很可能是配合寬高的屬性來使用的,否則沒必要多次一舉設置個0dp。
我們可以通過代碼來驗證一下,這也引出了我們第二個關注的地方“子控件的寬高最終究竟怎麼樣被確定?”。
關於這個問題,在《50 Android Hack》一書中,給出了如下一個計算公式:
Button’s width + Button’s weight * Layout’s width / weightSum。
但更加有趣的是,根據代碼進行測試,你會發現這個公式並不正確。
所以說啊,很多時候我們在看書或者文章、博客的時候,也不能盲從,如果有疑問,還得自己多思考和驗證。
造成錯誤的情況實際也很正常,畢竟任何東西的作者也同樣是人,只要是人,犯錯在所難免;
而更常見的情況是,IT技術的更新日新月異,很可能在你看到某個東西的時候,它已經不適用最新的情況了。
我們對上述的計算公式,通過代碼來進行驗證:
public class MainActivity extends AppCompatActivity {

    private Button button;

    @Override
    protected void onCreate(Bundle savedInstanceState) {
        super.onCreate(savedInstanceState);
        setContentView(R.layout.activity_main);

        final int screenWidth = getResources().getDisplayMetrics().widthPixels;
        button = (Button) this.findViewById(R.id.button);
        button.setOnClickListener(new View.OnClickListener() {
            @Override
            public void onClick(View v) {
            Toast.makeText(MainActivity.this,screenWidth + "//" + button.getWidth(),Toast.LENGTH_LONG).show();
            }
        });

    }
}
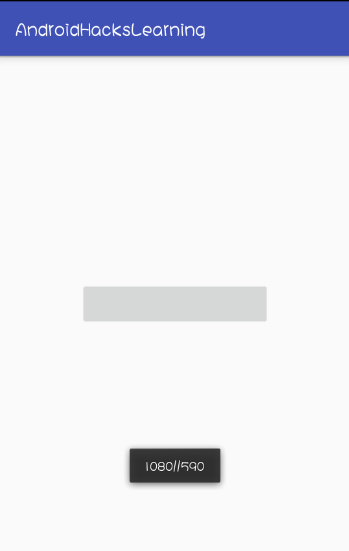
運行程序,點擊屏幕正中的按鈕,得到如下的吐司:
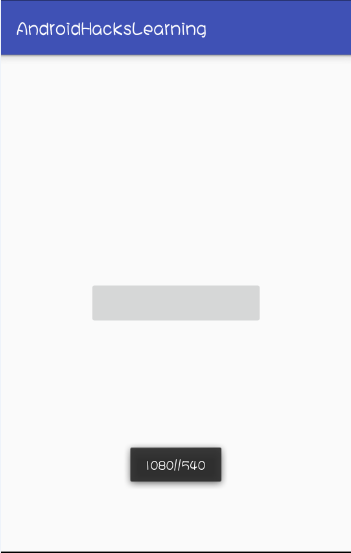
我們發現輸出的屏幕寬度是1080px,而button的寬度是540px。OK,我們套入公式:0dp(px) + 0.5 * 1080px / 1 = 540px;
這時候,你可能有話要說了。怎麼不對了?怎麼不對了?這不和公式完全匹配嗎?
好吧,那麼我們試著將布局文件中button的width值設置為100px。再次運行程序,得到如下結果:
這個時候,就出現差異了,因為套用公式的話:100px + 0.5 * 1080px / 1 = 640px;才對。
而根據打印的結果,如果我們去推測,可能會想:是不是button的width也被乘以權重了呢?
因為如果是:(100px * 0.5) + (0.5 * 1080px) / 1,那麼就和輸出結果對的上號了。
別急著下結論,我們繼續驗證,假設我們現在仍然將button的width保持在100px,但將weight值從0.5改為0.6:

這個時候,我們發現這與我們之前的推斷的計算公式也出現偏差了?
沒辦法,繼續接著驗證,因為畢竟我們要推斷一個所謂的公式,實際就是通過足夠數量的條件來總結出一個規律而已。
接著驗證,我們發現將控件width恆定為100px,而改變layout_weight屬性的值:
當weight為0.7時,最終button的寬度為786。 當weight為0.8時,最終button的寬度為884。 當weight為0.9時,最終button的寬度為982。這個時候,我們好像發現了一個計算規律,那就是button的最終實際寬度為:
(Button’s weight * Layout’s width / weightSum) + Button’s width * (weightSum - Button’s weight)。
對應於我們上面的三種測試情況,我們來套用這個計算式加以驗證:
為了加大測試范圍,而假設我們將weightSum改為2,button的width設置為50px,weight設置為0.4。
那麼:(0.4 * 1080 / 2) + 50 * (1 - 0.4) = 246px;
但是通過實際的測試我們會發現實際上得到的button的寬度是256px,出現了10px的偏差。
反思我們總結的公式,不難發現出現的偏差多半是因為button的width“50px”沒有和weightSum產生聯系。
如果是:(0.4 * 1080 / 2) + 50 * (1 - 0.4 / weightSum(這裡就是2)) ,結果就正確了。
所以我們推斷出最終正確的公式實際上應該是:
(Button’s weight * Layout’s width / weightSum) + Button’s width * (weightSum - Button’s weight / weightSum)。
這時候,根據這個公式,再進行各種類似的測試,就基本都能吻合了。
但這所謂的公式並不是我們最終所關心的,我們感興趣的是:在源碼中,weight究竟是怎麼被計算的?
究竟是怎麼樣的實現原理,讓我們最終總結得到了體現上述規律的一個公式。
不知道大家有沒有注意到,即使我們在上一段中,經過各種測試,推斷出了一個最終的計算公式。
但對於這個公式,我們加上了例如“應該”,“類似”,”基本”這樣的修飾詞。這樣詞通常表達的一層含義就是:底氣不足。
事實上確實是這樣的,因為緊接著下面的一種情況就將打破我們之前的“幻想”。
假設,我們將布局文件修改如下:
會得到的如下的運行結果:

而如果布局文件是下面這種情況的話:
你會發現我們的button會更誇張的直接消失了:

這又帶給了我們的新的疑問?連同之前的問題一起,我們帶著這些疑問走進源碼。
在源碼中尋找答案,但起碼我們首先得找到目的地。因為layout_weight屬性在任何view控件裡都能設置。
所以我們如果稍微一犯迷糊,很可能下意識的去View類中查看源碼,然後結果當然是一無所獲。
很明顯的一點是,weight這個東西是配合LinearLayout作為父視圖來使用的,所以它更應該屬於LinearLayout類。
於是,我們打開LinearLayout類的源碼進行研究,這裡以最新的Android 6.0(即API 23)的源碼為例。
如果我們對於自定義View或者View的繪制機制有些許的了解,就不難想象到,因為涉及view的測量,所以我們要找的代碼多半存在於onMeasure方法當中。
打開LinearLayout類的onMeasure方法:
    protected void onMeasure(int widthMeasureSpec, int heightMeasureSpec) {
        if (mOrientation == VERTICAL) {
            measureVertical(widthMeasureSpec, heightMeasureSpec);
        } else {
            measureHorizontal(widthMeasureSpec, heightMeasureSpec);
        }
    }
代碼很簡單,根據LinearLayout設置的排列方式,有兩種不同的測量方法。
因為我們之前的用例,都是在水平排列的方式下進行的,所以我們這裡就以measureHorizontal()為例來看看其原理。
打開measureHorizontal()方法,首先會看到一系列局部變量的定義。
當然這裡涉及到的變量比較多,我們只挑我們這裡關心的幾個重要的變量記憶就OK了(加以注釋)。
        // 測量得到的LinearLayout的總長度
        mTotalLength = 0;
        int maxHeight = 0;
        int childState = 0;
        int alternativeMaxHeight = 0;
        int weightedMaxHeight = 0;
        boolean allFillParent = true;
        float totalWeight = 0;
        // 子控件的個數
        final int count = getVirtualChildCount();
        // 寬高的測量模式
        final int widthMode = MeasureSpec.getMode(widthMeasureSpec);
        final int heightMode = MeasureSpec.getMode(heightMeasureSpec);

        boolean matchHeight = false;
        boolean skippedMeasure = false;

        if (mMaxAscent == null || mMaxDescent == null) {
            mMaxAscent = new int[VERTICAL_GRAVITY_COUNT];
            mMaxDescent = new int[VERTICAL_GRAVITY_COUNT];
        }

        final int[] maxAscent = mMaxAscent;
        final int[] maxDescent = mMaxDescent;

        maxAscent[0] = maxAscent[1] = maxAscent[2] = maxAscent[3] = -1;
        maxDescent[0] = maxDescent[1] = maxDescent[2] = maxDescent[3] = -1;

        final boolean baselineAligned = mBaselineAligned;
        final boolean useLargestChild = mUseLargestChild;
        // 寬度的測量模式是否為MeasureSpec.EXACTLY(即精確測量)
        final boolean isExactly = widthMode == MeasureSpec.EXACTLY;

        int largestChildWidth = Integer.MIN_VALUE;
在一系列局部變量的定義之後,首先會進入如下的一個for循環:
(PS:下面這部分代碼,個人理解為第一次測量過程。所謂的第一次測量,就是指所有的子控件都會參加,無論它是否設置了weight屬性)
       // See how wide everyone is. Also remember max height.
        for (int i = 0; i < count; ++i) {
            //獲取子控件
            final View child = getVirtualChildAt(i);
            //measureNullChild方法的返回值是0,所以這裡的實際工作就是如果控件為null,那麼layout的總長度不變
            if (child == null) {
                mTotalLength += measureNullChild(i);
                continue;
            }
            //道理類似,也就是如果子控件的可見性為gone,則跳過測量
            if (child.getVisibility() == GONE) {
                i += getChildrenSkipCount(child, i);
                continue;
            }
            //這個也很好理解,如果設置了分隔線,layout的長度需要加上divider-width
            if (hasDividerBeforeChildAt(i)) {
                mTotalLength += mDividerWidth;
            }
            // 獲取子控件的layout params
            final LinearLayout.LayoutParams lp = (LinearLayout.LayoutParams)
                    child.getLayoutParams();
            // 累加weight
            totalWeight += lp.weight;
            // 如果layout的測量模式為EXACTLY;子控件的寬度為0,且weight設置大於0
            if (widthMode == MeasureSpec.EXACTLY && lp.width == 0 && lp.weight > 0) {
                // Optimization: don't bother measuring children who are going to use
                // leftover space. These views will get measured again down below if
                // there is any leftover space.
                // 就是測量layout的長度,加上子控件的左、右外邊距
                if (isExactly) {
                    mTotalLength += lp.leftMargin + lp.rightMargin;
                } else {
                    final int totalLength = mTotalLength;
                    mTotalLength = Math.max(totalLength, totalLength +
                            lp.leftMargin + lp.rightMargin);
                }

                // Baseline alignment requires to measure widgets to obtain the
                // baseline offset (in particular for TextViews). The following
                // defeats the optimization mentioned above. Allow the child to
                // use as much space as it wants because we can shrink things
                // later (and re-measure).
                if (baselineAligned) {
                    final int freeWidthSpec = MeasureSpec.makeSafeMeasureSpec(
                            MeasureSpec.getSize(widthMeasureSpec), MeasureSpec.UNSPECIFIED);
                    final int freeHeightSpec = MeasureSpec.makeSafeMeasureSpec(
                            MeasureSpec.getSize(heightMeasureSpec), MeasureSpec.UNSPECIFIED);
                    child.measure(freeWidthSpec, freeHeightSpec);
                } else {
                    skippedMeasure = true;
                }
            } else {
                int oldWidth = Integer.MIN_VALUE;

                if (lp.width == 0 && lp.weight > 0) {
                    // widthMode is either UNSPECIFIED or AT_MOST, and this
                    // child
                    // wanted to stretch to fill available space. Translate that to
                    // WRAP_CONTENT so that it does not end up with a width of 0

                    // 簡單的理解就是如果測量模式是UNSPECIFIED或者AT_MOST
                    // 而且子控件的width值設置為0,而weight值設置大於0
                    // 則將width的值先設定為WRAP_CONTENT
                    oldWidth = 0;
                    lp.width = LayoutParams.WRAP_CONTENT;
                }

                // Determine how big this child would like to be. If this or
                // previous children have given a weight, then we allow it to
                // use all available space (and we will shrink things later
                // if needed).

                // 這裡是很關鍵的一個方法,顧名思義,在執行onLayout之前,先完成子控件的測量。
                measureChildBeforeLayout(child, i, widthMeasureSpec,
                        totalWeight == 0 ? mTotalLength : 0,
                        heightMeasureSpec, 0);

                if (oldWidth != Integer.MIN_VALUE) {
                    lp.width = oldWidth;
                }
                // 獲取子控件的測量寬度
                final int childWidth = child.getMeasuredWidth();
                // 改變layout的總長度(控件寬度+左右外邊距)
                if (isExactly) {
                    mTotalLength += childWidth + lp.leftMargin + lp.rightMargin +
                            getNextLocationOffset(child);
                } else {
                    final int totalLength = mTotalLength;
                    mTotalLength = Math.max(totalLength, totalLength + childWidth + lp.leftMargin +
                           lp.rightMargin + getNextLocationOffset(child));
                }

                if (useLargestChild) {
                    largestChildWidth = Math.max(childWidth, largestChildWidth);
                }
            }

            boolean matchHeightLocally = false;
            if (heightMode != MeasureSpec.EXACTLY && lp.height == LayoutParams.MATCH_PARENT) {
                // The height of the linear layout will scale, and at least one
                // child said it wanted to match our height. Set a flag indicating that
                // we need to remeasure at least that view when we know our height.
                matchHeight = true;
                matchHeightLocally = true;
            }

            final int margin = lp.topMargin + lp.bottomMargin;
            final int childHeight = child.getMeasuredHeight() + margin;
            childState = combineMeasuredStates(childState, child.getMeasuredState());

            if (baselineAligned) {
                final int childBaseline = child.getBaseline();
                if (childBaseline != -1) {
                    // Translates the child's vertical gravity into an index
                    // in the range 0..VERTICAL_GRAVITY_COUNT
                    final int gravity = (lp.gravity < 0 ? mGravity : lp.gravity)
                            & Gravity.VERTICAL_GRAVITY_MASK;
                    final int index = ((gravity >> Gravity.AXIS_Y_SHIFT)
                            & ~Gravity.AXIS_SPECIFIED) >> 1;

                    maxAscent[index] = Math.max(maxAscent[index], childBaseline);
                    maxDescent[index] = Math.max(maxDescent[index], childHeight - childBaseline);
                }
            }

            maxHeight = Math.max(maxHeight, childHeight);

            allFillParent = allFillParent && lp.height == LayoutParams.MATCH_PARENT;
            if (lp.weight > 0) {
                /*
                 * Heights of weighted Views are bogus if we end up
                 * remeasuring, so keep them separate.
                 */
                weightedMaxHeight = Math.max(weightedMaxHeight,
                        matchHeightLocally ? margin : childHeight);
            } else {
                alternativeMaxHeight = Math.max(alternativeMaxHeight,
                        matchHeightLocally ? margin : childHeight);
            }

            i += getChildrenSkipCount(child, i);
        }
同理,代碼仍然比較復雜也比較多,所以我們只針對關鍵的部分加以注釋和理解。
而我們對涉及到解答我們之前提出的幾點疑問的幾行關鍵代碼再單獨提出來加強印象:
首先是第20 - 23行的代碼:
            // 獲取子控件的layout params
            final LinearLayout.LayoutParams lp = (LinearLayout.LayoutParams)
                    child.getLayoutParams();
            // 累加weight
            totalWeight += lp.weight;
我們看到,這裡會循環遍歷得到所有子控件的weight值,並進行累加計算賦值給totalWeight變量。
OK,還記得嗎?我們之前說的,如果沒有設置weightSum的值,weightSum就等於所有子控件設置的weight的和。
接下來,需要注意的是一個if-else判斷:
 if (widthMode == MeasureSpec.EXACTLY && lp.width == 0 && lp.weight > 0) {
  //..................
 }else{
  //..................
 }
也就是說,只有當“Layout的寬度測量模式為EXACTLY;子控件寬度為0,且weight設置大於0”三個條件都滿足時,才會執行if代碼塊。比如:
而這種情況,需要做的工作很簡單,if代碼塊會先忽視button的測量。因為現在系統也不清楚button最終的寬度為是多少。
它只是根據button的左、右外邊距來修改layout的內容寬度“mTotalLength += lp.leftMargin + lp.rightMargin;”。
但實際上這樣說也些虎斷,因為在水平排列模式下,我們也而不能說是跳過了子控件的測量。
因為我們還需要到注意到,第43行到51行的一段代碼,在這段代碼中我們發現:
當滿足baselineAligned為true,實際就是LinearLayout的baselineAligned屬性為true時,其實還是進行了子控件的測量。
但我們發現,這裡為其設定的測量模式是“MeasureSpec.UNSPECIFIED”。同時通過注釋我們也可以明白,簡單來說:
這裡之所以進行一次測量,是因為基線對齊需要測量子部件以獲得基線偏移。但實際上這個測量影響還好,因為我們之後還可以進行仔細的測量。
當以上任意條件不能夠被滿足,就會進入到else代碼塊,這個時候,特別需要我們注意的一個方法調用的代碼就出現了:
                measureChildBeforeLayout(child, i, widthMeasureSpec,
                        totalWeight == 0 ? mTotalLength : 0,
                        heightMeasureSpec, 0);
通過這裡,我們可以看到,如果說我們實際上已經為控件指定了一個具體的”width”的話,那麼系統會進行一次該子控件的測量工作。
好了,在上面的測量過程之後。接下來我們看下一段關鍵部分的代碼:
(PS:有一就有二,所以對應來說,個人理解這一部分的代碼是第二次測量過程,與之前最大的不同在於,這次測量只有那些weight被設置為大於0的子控件參加)
       // layout的最終測量長度需要加上layout的內邊距
        mTotalLength += mPaddingLeft + mPaddingRight;
        int widthSize = mTotalLength;

        // Check against our minimum width
        widthSize = Math.max(widthSize, getSuggestedMinimumWidth());

        // Reconcile our calculated size with the widthMeasureSpec
        int widthSizeAndState = resolveSizeAndState(widthSize, widthMeasureSpec, 0);
        widthSize = widthSizeAndState & MEASURED_SIZE_MASK;

        // Either expand children with weight to take up available space or
        // shrink them if they extend beyond our current bounds. If we skipped
        // measurement on any children, we need to measure them now.
        // 獲取delta
        int delta = widthSize - mTotalLength;
        if (skippedMeasure || delta != 0 && totalWeight > 0.0f) {
            float weightSum = mWeightSum > 0.0f ? mWeightSum : totalWeight;

            maxAscent[0] = maxAscent[1] = maxAscent[2] = maxAscent[3] = -1;
            maxDescent[0] = maxDescent[1] = maxDescent[2] = maxDescent[3] = -1;
            maxHeight = -1;

            mTotalLength = 0;

            for (int i = 0; i < count; ++i) {
                final View child = getVirtualChildAt(i);

                if (child == null || child.getVisibility() == View.GONE) {
                    continue;
                }

                final LinearLayout.LayoutParams lp =
                        (LinearLayout.LayoutParams) child.getLayoutParams();

                float childExtra = lp.weight;
                if (childExtra > 0) {
                    // Child said it could absorb extra space -- give him his share
                    int share = (int) (childExtra * delta / weightSum);
                    weightSum -= childExtra;
                    delta -= share;

                    final int childHeightMeasureSpec = getChildMeasureSpec(
                            heightMeasureSpec,
                            mPaddingTop + mPaddingBottom + lp.topMargin + lp.bottomMargin,
                            lp.height);

                    // TODO: Use a field like lp.isMeasured to figure out if this
                    // child has been previously measured
                    if ((lp.width != 0) || (widthMode != MeasureSpec.EXACTLY)) {
                        // child was measured once already above ... base new measurement
                        // on stored values
                        int childWidth = child.getMeasuredWidth() + share;
                        if (childWidth < 0) {
                            childWidth = 0;
                        }

                        child.measure(
                            MeasureSpec.makeMeasureSpec(childWidth, MeasureSpec.EXACTLY),
                            childHeightMeasureSpec);
                    } else {
                        // child was skipped in the loop above. Measure for this first time here
                        child.measure(MeasureSpec.makeMeasureSpec(
                                share > 0 ? share : 0, MeasureSpec.EXACTLY),
                                childHeightMeasureSpec);
                    }

                    // Child may now not fit in horizontal dimension.
                    childState = combineMeasuredStates(childState,
                            child.getMeasuredState() & MEASURED_STATE_MASK);
                }

                if (isExactly) {
                    mTotalLength += child.getMeasuredWidth() + lp.leftMargin + lp.rightMargin +
                            getNextLocationOffset(child);
                } else {
                    final int totalLength = mTotalLength;
                    mTotalLength = Math.max(totalLength, totalLength + child.getMeasuredWidth() +
                            lp.leftMargin + lp.rightMargin + getNextLocationOffset(child));
                }

                boolean matchHeightLocally = heightMode != MeasureSpec.EXACTLY &&
                        lp.height == LayoutParams.MATCH_PARENT;

                final int margin = lp.topMargin + lp .bottomMargin;
                int childHeight = child.getMeasuredHeight() + margin;
                maxHeight = Math.max(maxHeight, childHeight);
                alternativeMaxHeight = Math.max(alternativeMaxHeight,
                        matchHeightLocally ? margin : childHeight);

                allFillParent = allFillParent && lp.height == LayoutParams.MATCH_PARENT;

                if (baselineAligned) {
                    final int childBaseline = child.getBaseline();
                    if (childBaseline != -1) {
                        // Translates the child's vertical gravity into an index in the range 0..2
                        final int gravity = (lp.gravity < 0 ? mGravity : lp.gravity)
                                & Gravity.VERTICAL_GRAVITY_MASK;
                        final int index = ((gravity >> Gravity.AXIS_Y_SHIFT)
                                & ~Gravity.AXIS_SPECIFIED) >> 1;

                        maxAscent[index] = Math.max(maxAscent[index], childBaseline);
                        maxDescent[index] = Math.max(maxDescent[index],
                                childHeight - childBaseline);
                    }
                }
            }

            // Add in our padding
            mTotalLength += mPaddingLeft + mPaddingRight;
            // TODO: Should we update widthSize with the new total length?

            // Check mMaxAscent[INDEX_TOP] first because it maps to Gravity.TOP,
            // the most common case
            if (maxAscent[INDEX_TOP] != -1 ||
                    maxAscent[INDEX_CENTER_VERTICAL] != -1 ||
                    maxAscent[INDEX_BOTTOM] != -1 ||
                    maxAscent[INDEX_FILL] != -1) {
                final int ascent = Math.max(maxAscent[INDEX_FILL],
                        Math.max(maxAscent[INDEX_CENTER_VERTICAL],
                        Math.max(maxAscent[INDEX_TOP], maxAscent[INDEX_BOTTOM])));
                final int descent = Math.max(maxDescent[INDEX_FILL],
                        Math.max(maxDescent[INDEX_CENTER_VERTICAL],
                        Math.max(maxDescent[INDEX_TOP], maxDescent[INDEX_BOTTOM])));
                maxHeight = Math.max(maxHeight, ascent + descent);
            }
        } else {
            alternativeMaxHeight = Math.max(alternativeMaxHeight, weightedMaxHeight);

            // We have no limit, so make all weighted views as wide as the largest child.
            // Children will have already been measured once.
            if (useLargestChild && widthMode != MeasureSpec.EXACTLY) {
                for (int i = 0; i < count; i++) {
                    final View child = getVirtualChildAt(i);

                    if (child == null || child.getVisibility() == View.GONE) {
                        continue;
                    }

                    final LinearLayout.LayoutParams lp =
                            (LinearLayout.LayoutParams) child.getLayoutParams();

                    float childExtra = lp.weight;
                    if (childExtra > 0) {
                        child.measure(
                                MeasureSpec.makeMeasureSpec(largestChildWidth, MeasureSpec.EXACTLY),
                                MeasureSpec.makeMeasureSpec(child.getMeasuredHeight(),
                                        MeasureSpec.EXACTLY));
                    }
                }
            }
        }
在上述代碼中,我們首先要關心的是第16行的代碼:
int delta = widthSize - mTotalLength;
這裡是獲取了一個差值delta,這個差值我們可以理解為是LinearLayout的寬度減去第一次測量工作完成後得到的內容寬度(mTotalLength)。
這個差值實際上是很關鍵的,因為關於weight的實際運算工作就和這個值緊密相關。
我們看到在上面這行代碼之後,緊接著就是一行if判斷:
if (skippedMeasure || delta != 0 && totalWeight > 0.0f) {
也就是說:如果skippedMeasure為true(這種情況發生在LinearLayout的baselineAligned屬性為false) ;
或者滿足delta!=0並且之前計算得到的totalWeight的值大於0時,才會進行子控件的weight的計算工作。
delta小於0,實際代表現有的內容寬度已經超過了layout自身的寬度;而大於0則代表還有空余的空間。
當delta等於0,則代表現在測量過後,內容的寬度恰恰填滿layout,所以不進行多余的計算了。
在這個if語句塊裡的第一行代碼就是:
float weightSum = mWeightSum > 0.0f ? mWeightSum : totalWeight;
你看到了,weightSum的計算,熟悉的家伙。
而關於針對於weight計算控件最終寬度的原理,實際發生在第36行到66行代碼之間,即:
 float childExtra = lp.weight;
                // 只有當子控件的weight設置大於0,才需要根據weight計算寬度(這也是為什麼前面說這次測量過程只有weight設置為大於0的控件參加)
                if (childExtra > 0) {
                    // Child said it could absorb extra space -- give him his share
                    // 計算共享區域的寬度
                    int share = (int) (childExtra * delta / weightSum);
                    weightSum -= childExtra;
                    delta -= share;

                    final int childHeightMeasureSpec = getChildMeasureSpec(
                            heightMeasureSpec,
                            mPaddingTop + mPaddingBottom + lp.topMargin + lp.bottomMargin,
                            lp.height);

                    // TODO: Use a field like lp.isMeasured to figure out if this
                    // 如果width不等於0,或者不是EXACTLY測量模式(實際上就是對應之前的測量過程中,已經執行過measureChildBeforeLayout的控件)
                    if ((lp.width != 0) || (widthMode != MeasureSpec.EXACTLY)) {
                        // child was measured once already above ... base new measurement
                        // 最紅它的實際寬度將是指定的width加上share的和
                        int childWidth = child.getMeasuredWidth() + share;
                        if (childWidth < 0) {
                            childWidth = 0;
                        }

                        child.measure(
                            MeasureSpec.makeMeasureSpec(childWidth, MeasureSpec.EXACTLY),
                            childHeightMeasureSpec);
                    } else {
                        // 如果是首次測量(其實就是針對那些width = 0,weight>0的控件,寬度就是計算得到的share)
                        child.measure(MeasureSpec.makeMeasureSpec(
                                share > 0 ? share : 0, MeasureSpec.EXACTLY),
                                childHeightMeasureSpec);
                    }
到了這裡,我們實際上就對weight屬性有了一個不錯的理解了。
不知道你總結出沒有,我們之前提出的疑問,其實都都已經一一在源碼中找到了答案。我們再對應來看一下。
形成我們所說的關系的原因很簡單,就兩句關鍵的代碼:
totalWeight += lp.weight;
//以及
float weightSum = mWeightSum > 0.0f ? mWeightSum : totalWeight;
接著,是子控件的寬高最終究竟怎麼樣被確定?
你還記得我們之前自作聰明的根據測試結果進行推斷計算公式嗎?實際上子控件的寬高最終的決定方式很簡單:
1、那些滿足widthMode == MeasureSpec.EXACTLY && lp.width == 0 && lp.weight > 0的控件,在第一次測量過程中可以視為並沒有被真正測量寬高。
2、對於明確指定了寬、高的值的控件,在第一次測量過程中也會先進行一次測量,這個時候測量的值就是我們明確指定的值。
3、在第一次測量過程之後,第二次測量過程開始之前,會計算得到一個layout的現有內容占據的寬度mTotalLength,這個寬度是:所有子控件的左、右(上、下)外邊距 + 被明確賦值的控件的寬、高 + layout的內邊距。
4、對於weight的計算,如果控件的寬高設置的是0,它們所分配到的實際的范圍其實是變量share的值,即”子控件的weight * layout剩余的空間 / weightSum;如果不為0,則是share+明確設定的寬、高值”。
這個時候,我們再以“layout寬為1080px,weightSum為1,button的width為100px,weight為0.5”來說,
其實我們就不用再去套什麼所謂的公式了,通過源碼的理解,我們能夠輕松描述它的計算過程。
因為明確的設置了width為100px,所以在第一次測量過程中,button就被設置為了100px。
當第一次測量完成,得到的mTotalLength實際上也就是100px,因為我們的layout裡就只有一個button,
並且button並沒有設置外邊距(margin),layout也沒有設置內邊距(padding)。
所以這個時候對於進行第二次測量過程,delta計算後得到的值實際上是:1080px - 100px = 980px。
而share的計算則是:0.5 * 980px / 1 = 490px;而因為該button明確指定了不為0的width值,所以其最終的實際寬度是:
share + button.getMeasureWidth = 490 + 100 =590px。
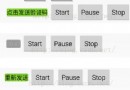
同理來說,有button1,button2,button3三個按鈕的例子當中,出現那樣的情況,也是因為button2首先占據了600px的實際寬度。
所以button1,button3所謂的0.5的權重分享的,就只是剩下的480px的實際空間了。
而在最後一個例子裡,我們看到的button1根本不在屏幕出現,很容易想到是因為在第一次測量後。
delta的計算結果將會是0,所以根本不會再進行額外的運算去為button1分配空間了。
 Android自定義Chronometer實現短信驗證碼秒表倒計時功能
本文實例為大家分享了Chronometer實現倒計時功能,Android提供了實現按照秒計時的API,供大家參考,具體內容如下一、自定義ChronometerView 繼
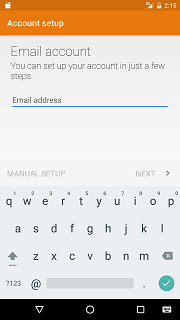 (Android 基礎(二十四)) EditText
介紹A text field allows the user to type text into your app. It can be either single li
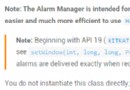 Android基礎入門教程——10.5 AlarmManager(鬧鐘服務)
Android基礎入門教程——10.5 AlarmManager(鬧鐘服務)標簽(空格分隔): Android基礎入門教程本節引言: 本節帶來的A
 Android AssetManager (1)
AssetManager是android的資源管理器,負責管理android系統所有的資源.資源可以分系統級別和應用級別.系統級別主要是f