編輯:關於Android編程
Activity在android開發中作為顯示的組件,它在整個Acndroid開發中占有著重要的地位。已經開發了Android一段時間的我對Activity七大生命周期以及如何啟動產生了興趣。然而,我的水平不高,為此我補了不少的知識,也花了不少的時間,為研讀Activity啟動的做准備。
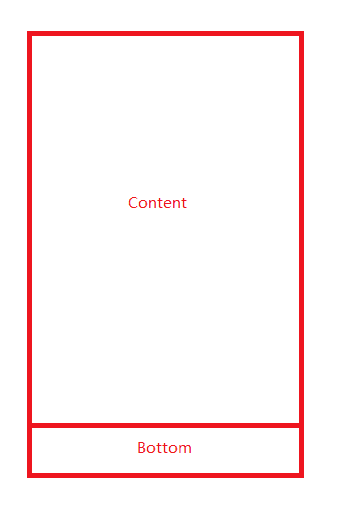
在上一篇關於Window創建的源碼閱讀中,畫下自己對Activity啟動的理解圖:

在這個Activity啟動過程中涉及了不少的類:
我們平常啟動Activity一般是如下寫法:
                Intent i = new Intent(preActivity.this,MainActivity.class);
                startActivity(i);
可以說startActivity()方法就是啟動活動的入口。
讓我們看看在android5.0下,startActivity是如何工作的:
 public void startActivity(Intent intent) {
        this.startActivity(intent, null);
    }
在這裡又會調用輸入參數不同的startActivity()方法,最後你會發現在Activity中,所有startActivity的方法中都調用了startActivityForResult()方法:
@Override
    public void startActivity(Intent intent, @Nullable Bundle options) {
        if (options != null) {
            startActivityForResult(intent, -1, options);
        } else {
            // Note we want to go through this call for compatibility with
            // applications that may have overridden the method.
            startActivityForResult(intent, -1);
        }
    }
實際上在整個流程中起作用的也就是startActivityForResult這個方法。
public void startActivityForResult(Intent intent, int requestCode, @Nullable Bundle options) {
        if (mParent == null) {
            Instrumentation.ActivityResult ar =
                mInstrumentation.execStartActivity(
                    this, mMainThread.getApplicationThread(), mToken, this,
                    intent, requestCode, options);
            if (ar != null) {
                mMainThread.sendActivityResult(
                    mToken, mEmbeddedID, requestCode, ar.getResultCode(),
                    ar.getResultData());
            }
            if (requestCode >= 0) {
                // If this start is requesting a result, we can avoid making
                // the activity visible until the result is received.  Setting
                // this code during onCreate(Bundle savedInstanceState) or onResume() will keep the
                // activity hidden during this time, to avoid flickering.
                // This can only be done when a result is requested because
                // that guarantees we will get information back when the
                // activity is finished, no matter what happens to it.
                mStartedActivity = true;
            }

            final View decor = mWindow != null ? mWindow.peekDecorView() : null;
            if (decor != null) {
                decor.cancelPendingInputEvents();
            }
            // TODO Consider clearing/flushing other event sources and events for child windows.
        } else {
            if (options != null) {
                mParent.startActivityFromChild(this, intent, requestCode, options);
            } else {
                // Note we want to go through this method for compatibility with
                // existing applications that may have overridden it.
                mParent.startActivityFromChild(this, intent, requestCode);
            }
        }
        if (options != null && !isTopOfTask()) {
            mActivityTransitionState.startExitOutTransition(this, options);
        }
    }
上面的代碼完成的事情有:
1.假如父Activity為空,則創建一個Instrumentation.ActivityResult,此時調用的
mInstrumentation.execStartActivity(
                this, mMainThread.getApplicationThread(), mToken, this,
                intent, requestCode, options);
則是啟動Activity的工作交給工具類Instrumentation的execStartActivity中完成。
2.mMainThread在這裡是指ActivityThread這個類,這個類其實就是我們運行App時所在的進程(個人認為)。mMainThread將會發送請求碼到Handler中進行處理,最後又會回到Activity中的dispatch ActivityResult()方法中處理活動之間的傳遞數據。
    void dispatchActivityResult(String who, int requestCode,
        int resultCode, Intent data) {
        if (false) Log.v(
            TAG, "Dispatching result: who=" + who + ", reqCode=" + requestCode
            + ", resCode=" + resultCode + ", data=" + data);
        mFragments.noteStateNotSaved();
        if (who == null) {
            onActivityResult(requestCode, resultCode, data);
        } else {
            Fragment frag = mFragments.findFragmentByWho(who);
            if (frag != null) {
                frag.onActivityResult(requestCode, resultCode, data);
            }
        }
    }
這裡就回到onActivityResult()空函數中進行處理。到這裡我們會是否會記起來onActivityResult這個函數就是我們經常使用的一個方法。

當我們要返回函數到上一個Activity中時候,不也是規定好requestCode以及重寫onActivityResult()這個函數嗎?從這幾段我們可以得出的信息:我們設定requestCode的時候,最好不要設定為-1,這與系統內部的code重復可能造成不必要的錯誤。接著就是我們處理的動作要放在onActivityResult中完成。
下面是一個簡單的Demo:

第一個Activity中設定好requestCode以及Intent,重寫onActivityResult()方法:
public class MainActivity extends Activity {

    private Button button;
    private static final int RESULT_CODE= 2;
    private static final int RESULT_OK = 1;

    @Override
    protected void onCreate(Bundle savedInstanceState) {
        super.onCreate(savedInstanceState);
        setContentView(R.layout.activity_main);
        button = (Button)findViewById(R.id.opennext);
        button.setOnClickListener(new OnClickListener() {

            @Override
            public void onClick(View arg0) {
                // TODO Auto-generated method stub
                Intent i = new Intent(MainActivity.this,NextActivity.class);
                startActivityForResult(i, RESULT_CODE);
            }
        });
    }

    @Override
    protected void onActivityResult(int requestCode,int resultCode,Intent data){
        switch (requestCode) {
        case RESULT_CODE:
            if(resultCode == RESULT_OK){
                String returnString = data.getStringExtra("data");
                Log.e("data of return",returnString);
            }
            break;

        default:
            break;
        }
    }
}
第二個Activity通過setResult()方法設定好resultCode以及intent,最後通過finish()方法,將這個Activiy出棧,返回上一個Activity:
public class NextActivity extends Activity{

    private Button button;
    private static final int RESULT_OK = 1;

    @Override
    protected void onCreate(Bundle savedInstanceState){
        super.onCreate(savedInstanceState);
        setContentView(R.layout.next);
        button = (Button)findViewById(R.id.goback);
        button.setOnClickListener(new OnClickListener() {

            @Override
            public void onClick(View arg0) {
                // TODO Auto-generated method stub
                Intent i = new Intent();
                i.putExtra("data", "data of goback");
                setResult(RESULT_OK, i);
                finish();
            }
        });
    }

}
通過閱讀源碼,我們對這個過程更加的清晰了。
3.假如沒有頂層DecorView,則創建。並且啟動子Activity,如果有Activity的加載動畫,則加載。
Instrumentation中的工作流程在Android中,這個類是作為Activity 和ActivityManagerService(AMS)的中轉站,為什麼做一個中轉站呢?如果寫過Android單元測試的朋友們一定清楚,Instrumentation是作為一個測試工具時的類,主要是因為Instrumentation裡面有許多Activity的生命周期,行為等回調函數,我們可以通過這個中介來檢測其中的項目中是否實現了我們需要的結果。
這裡不討論Android的自動化測試,我們討論Activity在Instrumentation中的工作。
接下來Activity就會調用Instrumentation中的execStartActivity:
public ActivityResult execStartActivity(
            Context who, IBinder contextThread, IBinder token, Activity target,
            Intent intent, int requestCode, Bundle options) {
        IApplicationThread whoThread = (IApplicationThread) contextThread;
        if (mActivityMonitors != null) {
            synchronized (mSync) {
                final int N = mActivityMonitors.size();
                for (int i=0; i= 0 ? am.getResult() : null;
                        }
                        break;
                    }
                }
            }
        }
        try {
            intent.migrateExtraStreamToClipData();
            intent.prepareToLeaveProcess();
            int result = ActivityManagerNative.getDefault()
                .startActivity(whoThread, who.getBasePackageName(), intent,
                        intent.resolveTypeIfNeeded(who.getContentResolver()),
                        token, target != null ? target.mEmbeddedID : null,
                        requestCode, 0, null, options);
            checkStartActivityResult(result, intent);
        } catch (RemoteException e) {
        }
        return null;
    }
首先判斷ActivityMonitor是否為空,不為空則處理 mActivityMonitors這個list。在這裡我們不需要過多的注意,因為這個類是作為監聽Activity是否啟動成功(通過addMonitor方法)。

實際上它會進一步將工作遞交給AMS中完成,調用
ActivityManagerNative.getDefault()
            .startActivity(whoThread, who.getBasePackageName(), intent,
                    intent.resolveTypeIfNeeded(who.getContentResolver()),
                    token, target != null ? target.mEmbeddedID : null,
                    requestCode, 0, null, options);
同時 checkStartActivityResult方法則是檢查xml配置文件中是否注冊好。
為什麼如此麻煩呢?這主要是Android框架上一些考慮。(以下為個人見解)

我們的Android系統是一個單用戶系統,和傳統的Linux系統不一樣。傳統的Linux系統是多用戶系統,意思是Linux系統中有三種用戶(系統用戶,根用戶,普通用戶),每一種用戶都有自己對文件操作的權限。
而Android系統則是一個應用對應一個UID和PID這就產生了根本上的不同。值得一提的是一個應用可以對應一個UID,對應多個PID。UID雖然可以作為認識應用的標識,但是有這麼一種情況:在兩個應用中配置文件中的activity標簽中設置 android:sharedUserId該屬性就可以通過共享同一個UID的形式,來共享數據。
然而UID,PID這些數據結構都會存儲在SystemServer中的UserManagerService,ProcessRecord,Package-ManangerService等等進行控制。此時我們通過IPC通信(Binder通信),可以跨進程通信到AMS中(SystemServer)進行訪問,這樣就能減少頻繁的進行IPC通信,減少Android資源的消耗。當然這僅僅只是其中一個方面,另一方面是Android強化對四大組件的概念這個原因也是密不可分的。(android4.2之後就加入多用戶系統)
那麼我們看看AMS中究竟完成了什麼工作吧。
在AMS中完成的工作ActivityManagerNative.getDefault()這個函數其實就是在調用AMS。我們看看這類怎麼定義的:
public abstract class ActivityManagerNative extends Binder implements IActivityManager
這是一個繼承了Binder的抽象類,而IActivityManager則是繼承了IInterface的接口,而AMS則是繼承了ActivityManagerNative,這不就是我之前分析的Binder並且自己實現過的一樣嗎?
    private static final Singleton gDefault = new Singleton() {
        protected IActivityManager create() {
            IBinder b = ServiceManager.getService("activity");
            if (false) {
                Log.v("ActivityManager", "default service binder = " + b);
            }
            IActivityManager am = asInterface(b);
            if (false) {
                Log.v("ActivityManager", "default service = " + am);
            }
            return am;
        }
    };
}
Singleton是一個單例模式的封裝,如果已經初始化了,則直接調用。

同過上面的分析,我們可以清楚的知道,接下來將會跨進程的通信,將工作轉移到AMS的startActivity中:
@Override
    public final int startActivity(IApplicationThread caller, String callingPackage,
            Intent intent, String resolvedType, IBinder resultTo, String resultWho, int requestCode,
            int startFlags, ProfilerInfo profilerInfo, Bundle options) {
        return startActivityAsUser(caller, callingPackage, intent, resolvedType, resultTo,
            resultWho, requestCode, startFlags, profilerInfo, options,
            UserHandle.getCallingUserId());
    }

    @Override
    public final int startActivityAsUser(IApplicationThread caller, String callingPackage,
            Intent intent, String resolvedType, IBinder resultTo, String resultWho, int requestCode,
            int startFlags, ProfilerInfo profilerInfo, Bundle options, int userId) {
        enforceNotIsolatedCaller("startActivity");
        userId = handleIncomingUser(Binder.getCallingPid(), Binder.getCallingUid(), userId,
                false, ALLOW_FULL_ONLY, "startActivity", null);
        // TODO: Switch to user app stacks here.
        return mStackSupervisor.startActivityMayWait(caller, -1, callingPackage, intent,
                resolvedType, null, null, resultTo, resultWho, requestCode, startFlags,
                profilerInfo, null, null, options, userId, null, null);
    }
我們初步的可以知道在上面兩個函數中將會傳到Binder類中native方法getCallingUid來獲取相應userId(這裡是指對應的開發者id)。

接著通過將工作交給ActivityStackSupervisor中。
ActivityStackSupervisor中的工作這個類直接翻譯就是活動棧的監聽者。顧名思義,就是指對Activity棧進行監聽並且做出適當的處理。我們看看mStackSupervisor.startActivityMayWait這個函數:
final int startActivityMayWait(IApplicationThread caller, int callingUid,
            String callingPackage, Intent intent, String resolvedType,
            IVoiceInteractionSession voiceSession, IVoiceInteractor voiceInteractor,
            IBinder resultTo, String resultWho, int requestCode, int startFlags,
            ProfilerInfo profilerInfo, WaitResult outResult, Configuration config,
            Bundle options, int userId, IActivityContainer iContainer, TaskRecord inTask) {
        // Refuse possible leaked file descriptors
        if (intent != null && intent.hasFileDescriptors()) {
            throw new IllegalArgumentException("File descriptors passed in Intent");
        }
        boolean componentSpecified = intent.getComponent() != null;

        // Don't modify the client's object!
        intent = new Intent(intent);

        // Collect information about the target of the Intent.
        ActivityInfo aInfo = resolveActivity(intent, resolvedType, startFlags,
                profilerInfo, userId);

        ActivityContainer container = (ActivityContainer)iContainer;
        synchronized (mService) {
            final int realCallingPid = Binder.getCallingPid();
            final int realCallingUid = Binder.getCallingUid();
            int callingPid;
            if (callingUid >= 0) {
                callingPid = -1;
            } else if (caller == null) {
                callingPid = realCallingPid;
                callingUid = realCallingUid;
            } else {
                callingPid = callingUid = -1;
            }

            final ActivityStack stack;
            if (container == null || container.mStack.isOnHomeDisplay()) {
                stack = getFocusedStack();
            } else {
                stack = container.mStack;
            }
            stack.mConfigWillChange = config != null
                    && mService.mConfiguration.diff(config) != 0;
            if (DEBUG_CONFIGURATION) Slog.v(TAG,
                    "Starting activity when config will change = " + stack.mConfigWillChange);

            final long origId = Binder.clearCallingIdentity();
           //此時的activity可能是桌面這種重量級進程時,我們要檢測是否存在第二個桌面進程
           //沒有則運行下面這個if裡面默認的桌面進程
            if (aInfo != null &&
                    (aInfo.applicationInfo.flags&ApplicationInfo.FLAG_CANT_SAVE_STATE) != 0) {
                    ...
                    }
             int res = startActivityLocked(caller, intent, resolvedType, aInfo,
                    voiceSession, voiceInteractor, resultTo, resultWho,
                    requestCode, callingPid, callingUid, callingPackage,
                    realCallingPid, realCallingUid, startFlags, options,
                    componentSpecified, null, container, inTask);

                     Binder.restoreCallingIdentity(origId);


                    if (stack.mConfigWillChange) {
                // If the caller also wants to switch to a new configuration,
                // do so now.  This allows a clean switch, as we are waiting
                // for the current activity to pause (so we will not destroy
                // it), and have not yet started the next activity.
                mService.enforceCallingPermission(android.Manifest.permission.CHANGE_CONFIGURATION,
                        "updateConfiguration()");
                stack.mConfigWillChange = false;
                if (DEBUG_CONFIGURATION) Slog.v(TAG,
                        "Updating to new configuration after starting activity.");
                mService.updateConfigurationLocked(config, null, false, false);
            }
            if (outResult != null) {
            ...
            }
            return res;
}
startActivityMayWait方法有點長,做出了適當的裁剪,但是不影響理解。上面開始一段獲取真正的PID以及UID。接著檢查此時ActivityContainer是否為空或者ActivityContiner中存儲的棧頂是否是桌面。接著檢查棧中的configChanges標志位,在ActivityStack中做出相應的處理。而實際上,我們會將記下來的工作交給startActivityLocked完成。
我們來看看startActivityLocked究竟做了什麼,大致上說說我的理解:
 final int startActivityLocked(IApplicationThread caller,
            Intent intent, String resolvedType, ActivityInfo aInfo,
            IVoiceInteractionSession voiceSession, IVoiceInteractor voiceInteractor,
            IBinder resultTo, String resultWho, int requestCode,
            int callingPid, int callingUid, String callingPackage,
            int realCallingPid, int realCallingUid, int startFlags, Bundle options,
            boolean componentSpecified, ActivityRecord[] outActivity, ActivityContainer container,
            TaskRecord inTask) {
        int err = ActivityManager.START_SUCCESS;

        ProcessRecord callerApp = null;
        if (caller != null) {
            callerApp = mService.getRecordForAppLocked(caller);
            if (callerApp != null) {
                callingPid = callerApp.pid;
                callingUid = callerApp.info.uid;
            } else {
                Slog.w(TAG, "Unable to find app for caller " + caller
                      + " (pid=" + callingPid + ") when starting: "
                      + intent.toString());
                err = ActivityManager.START_PERMISSION_DENIED;
            }
        }
        if (err == ActivityManager.START_SUCCESS) {
            final int userId = aInfo != null ? UserHandle.getUserId(aInfo.applicationInfo.uid) : 0;
            Slog.i(TAG, "START u" + userId + " {" + intent.toShortString(true, true, true, false)
                    + "} from uid " + callingUid
                    + " on display " + (container == null ? (mFocusedStack == null ?
                            Display.DEFAULT_DISPLAY : mFocusedStack.mDisplayId) :
                            (container.mActivityDisplay == null ? Display.DEFAULT_DISPLAY :
                                    container.mActivityDisplay.mDisplayId)));
        }
         ActivityRecord sourceRecord = null;
        ActivityRecord resultRecord = null;
        if (resultTo != null) {
            sourceRecord = isInAnyStackLocked(resultTo);
            if (DEBUG_RESULTS) Slog.v(
                TAG, "Will send result to " + resultTo + " " + sourceRecord);
            if (sourceRecord != null) {
                if (requestCode >= 0 && !sourceRecord.finishing) {
                    resultRecord = sourceRecord;
                }
            }
        }
        ActivityStack resultStack = resultRecord == null ? null : resultRecord.task.stack;

        final int launchFlags = intent.getFlags();
        if ((launchFlags&Intent.FLAG_ACTIVITY_FORWARD_RESULT) != 0 && sourceRecord != null) {
            // Transfer the result target from the source activity to the new
            // one being started, including any failures.
            if (requestCode >= 0) {
                ActivityOptions.abort(options);
                return ActivityManager.START_FORWARD_AND_REQUEST_CONFLICT;
            }
            resultRecord = sourceRecord.resultTo;
            resultWho = sourceRecord.resultWho;
            requestCode = sourceRecord.requestCode;
            sourceRecord.resultTo = null;
            if (resultRecord != null) {
                resultRecord.removeResultsLocked(sourceRecord, resultWho, requestCode);
            }
            if (sourceRecord.launchedFromUid == callingUid) {
                // The new activity is being launched from the same uid as the previous
                // activity in the flow, and asking to forward its result back to the
                // previous.  In this case the activity is serving as a trampoline between
                // the two, so we also want to update its launchedFromPackage to be the
                // same as the previous activity.  Note that this is safe, since we know
                // these two packages come from the same uid; the caller could just as
                // well have supplied that same package name itself.  This specifially
                // deals with the case of an intent picker/chooser being launched in the app
                // flow to redirect to an activity picked by the user, where we want the final
                // activity to consider it to have been launched by the previous app activity.
                callingPackage = sourceRecord.launchedFromPackage;
            }
        }
final ActivityStack stack = getFocusedStack();
        if (voiceSession == null && (stack.mResumedActivity == null
                || stack.mResumedActivity.info.applicationInfo.uid != callingUid)) {
            if (!mService.checkAppSwitchAllowedLocked(callingPid, callingUid,
                    realCallingPid, realCallingUid, "Activity start")) {
                PendingActivityLaunch pal =
                        new PendingActivityLaunch(r, sourceRecord, startFlags, stack);
                mPendingActivityLaunches.add(pal);
                ActivityOptions.abort(options);
                return ActivityManager.START_SWITCHES_CANCELED;
            }
        }

        if (mService.mDidAppSwitch) {
            // This is the second allowed switch since we stopped switches,
            // so now just generally allow switches.  Use case: user presses
            // home (switches disabled, switch to home, mDidAppSwitch now true);
            // user taps a home icon (coming from home so allowed, we hit here
            // and now allow anyone to switch again).
            mService.mAppSwitchesAllowedTime = 0;
        } else {
            mService.mDidAppSwitch = true;
        }

        doPendingActivityLaunchesLocked(false);

        err = startActivityUncheckedLocked(r, sourceRecord, voiceSession, voiceInteractor,
                startFlags, true, options, inTask);
        if (err < 0) {
            // If someone asked to have the keyguard dismissed on the next
            // activity start, but we are not actually doing an activity
            // switch...  just dismiss the keyguard now, because we
            // probably want to see whatever is behind it.
            notifyActivityDrawnForKeyguard();
        }
        return err;

}
在上面源碼中這一次通過ActivityThread獲取它的pid以及通過在xml中注冊過的ActivityInfo中獲取相應的uid。這我們上面說的uid能夠共享相關,不過和之前的獲取的uid和pid有什麼區別,為什麼又一次獲取,我還沒有明白,等哪天明白了再總結一下。

這個函數主要作用是確定好哪個Activity開啟到哪個Actvity。因此在上面你會發現上面獲取 IBinder resultTo, String resultWho這兩者確定誰是源誰是結果存儲到ActivityRecord。
ActivityRecord sourceRecord = null;
        ActivityRecord resultRecord = null;
        if (resultTo != null) {
            sourceRecord = isInAnyStackLocked(resultTo);
            if (DEBUG_RESULTS) Slog.v(
                TAG, "Will send result to " + resultTo + " " + sourceRecord);
            if (sourceRecord != null) {
                if (requestCode >= 0 && !sourceRecord.finishing) {
                    resultRecord = sourceRecord;
                }
            }
        }
        ActivityRecord r = new ActivityRecord(mService, callerApp, callingUid, callingPackage,
                intent, resolvedType, aInfo, mService.mConfiguration, resultRecord, resultWho,
                requestCode, componentSpecified, this, container, options);
上面我們就能明白resultTo這個IBinder類不為空則獲取在顯示屏幕的ActivityStack的頂部作為來源Activity。接著在下面這個邏輯中確定要開啟的Activity是哪個。
if ((launchFlags&Intent.FLAG_ACTIVITY_FORWARD_RESULT) != 0 && sourceRecord != null) {
            // Transfer the result target from the source activity to the new
            // one being started, including any failures.
            if (requestCode >= 0) {
                ActivityOptions.abort(options);
                return ActivityManager.START_FORWARD_AND_REQUEST_CONFLICT;
            }
            resultRecord = sourceRecord.resultTo;
            resultWho = sourceRecord.resultWho;
            requestCode = sourceRecord.requestCode;
            sourceRecord.resultTo = null;
            if (resultRecord != null) {
                resultRecord.removeResultsLocked(sourceRecord, resultWho, requestCode);
            }
            if (sourceRecord.launchedFromUid == callingUid) {
                // The new activity is being launched from the same uid as the previous
                // activity in the flow, and asking to forward its result back to the
                // previous.  In this case the activity is serving as a trampoline between
                // the two, so we also want to update its launchedFromPackage to be the
                // same as the previous activity.  Note that this is safe, since we know
                // these two packages come from the same uid; the caller could just as
                // well have supplied that same package name itself.  This specifially
                // deals with the case of an intent picker/chooser being launched in the app
                // flow to redirect to an activity picked by the user, where we want the final
                // activity to consider it to have been launched by the previous app activity.
                callingPackage = sourceRecord.launchedFromPackage;
            }
        }
最後我們將工作提交給startActivityUncheckedLocked(r, sourceRecord, voiceSession, voiceInteractor,

startFlags, true, options, inTask);完成。
我們繼續看看startActivityUncheckedLocked這個方法,這個方法主要的目的就是處理啟動時候,我們設定給Activity中四種啟動模式的初步處理,將啟動flag添加到目標Activity中,由於這一段過長,就截取最為關鍵的一部分,我這裡截取的是正常啟動而不是singtop,singleInstance,創建第一個Activity的啟動:
else if (sourceRecord != null) {
...
if (!addingToTask && (launchFlags&Intent.FLAG_ACTIVITY_CLEAR_TOP) != 0) {
                // In this case, we are adding the activity to an existing
                // task, but the caller has asked to clear that task if the
                // activity is already running.
                ActivityRecord top = sourceTask.performClearTaskLocked(r, launchFlags);
                keepCurTransition = true;
                if (top != null) {
                    ActivityStack.logStartActivity(EventLogTags.AM_NEW_INTENT, r, top.task);
                    top.deliverNewIntentLocked(callingUid, r.intent);
                    // For paranoia, make sure we have correctly
                    // resumed the top activity.
                    targetStack.mLastPausedActivity = null;
                    if (doResume) {
                        targetStack.resumeTopActivityLocked(null);
                    }
                    ActivityOptions.abort(options);
                    return ActivityManager.START_DELIVERED_TO_TOP;
                }
            } else if (!addingToTask &&
                    (launchFlags&Intent.FLAG_ACTIVITY_REORDER_TO_FRONT) != 0) {
                // In this case, we are launching an activity in our own task
                // that may already be running somewhere in the history, and
                // we want to shuffle it to the front of the stack if so.
                final ActivityRecord top = sourceTask.findActivityInHistoryLocked(r);
                if (top != null) {
                    final TaskRecord task = top.task;
                    task.moveActivityToFrontLocked(top);
                    ActivityStack.logStartActivity(EventLogTags.AM_NEW_INTENT, r, task);
                    top.updateOptionsLocked(options);
                    top.deliverNewIntentLocked(callingUid, r.intent);
                    targetStack.mLastPausedActivity = null;
                    if (doResume) {
                        targetStack.resumeTopActivityLocked(null);
                    }
                    return ActivityManager.START_DELIVERED_TO_TOP;
                }
            }
}
上面則是由兩個Intent中標志位判斷,可以從解釋上知道這個標志位Intent.FLAG_ACTIVITY_CLEAR_TOP是指從一個存在Activity開啟一個新的Activity時,默認的標志位,另一個標志位是指啟動一個在歷史已經存在的Activity。

最後將會調用目標ActivityStack中的resumeTopActivityLocked(null)方法,進一步的處理。如果對其他三種啟動模式感興趣,請讀者自行查看。
ActivityStack中的工作
final boolean resumeTopActivityLocked(ActivityRecord prev) {
        return resumeTopActivityLocked(prev, null);
    }

    final boolean resumeTopActivityLocked(ActivityRecord prev, Bundle options) {
        if (inResumeTopActivity) {
            // Don't even start recursing.
            return false;
        }

        boolean result = false;
        try {
            // Protect against recursion.
            inResumeTopActivity = true;
            result = resumeTopActivityInnerLocked(prev, options);
        } finally {
            inResumeTopActivity = false;
        }
        return result;
    }
從上面的代碼,就可以清楚接下來會將工作交給resumeTopActivityInnerLocked,同樣過於長,這裡只需要關注主要的流程:
final boolean resumeTopActivityInnerLocked(ActivityRecord prev, Bundle options) {
...
    //獲取已經存在的棧頂Activity的ActivityRecord(從mTaskHistory的list中獲取,這是一個記錄當前stack的TaskRecord的list)
        ActivityRecord next = topRunningActivityLocked(null);
        ...
        if (next.app != null && next.app.thread != null) {
            if (DEBUG_SWITCH) Slog.v(TAG, "Resume running: " + next);

            // This activity is now becoming visible.
            mWindowManager.setAppVisibility(next.appToken, true);

            // schedule launch ticks to collect information about slow apps.
            next.startLaunchTickingLocked();

            ActivityRecord lastResumedActivity =
                    lastStack == null ? null :lastStack.mResumedActivity;
            ActivityState lastState = next.state;

            mService.updateCpuStats();

            if (DEBUG_STATES) Slog.v(TAG, "Moving to RESUMED: " + next + " (in existing)");
            next.state = ActivityState.RESUMED;
            mResumedActivity = next;
            next.task.touchActiveTime();
            mService.addRecentTaskLocked(next.task);
            mService.updateLruProcessLocked(next.app, true, null);
            updateLRUListLocked(next);
            mService.updateOomAdjLocked();

            // Have the window manager re-evaluate the orientation of
            // the screen based on the new activity order.
            boolean notUpdated = true;
            if (mStackSupervisor.isFrontStack(this)) {
                Configuration config = mWindowManager.updateOrientationFromAppTokens(
                        mService.mConfiguration,
                        next.mayFreezeScreenLocked(next.app) ? next.appToken : null);
                if (config != null) {
                    next.frozenBeforeDestroy = true;
                }
                notUpdated = !mService.updateConfigurationLocked(config, next, false, false);
            }

            if (notUpdated) {
                // The configuration update wasn't able to keep the existing
                // instance of the activity, and instead started a new one.
                // We should be all done, but let's just make sure our activity
                // is still at the top and schedule another run if something
                // weird happened.
                ActivityRecord nextNext = topRunningActivityLocked(null);
                if (DEBUG_SWITCH || DEBUG_STATES) Slog.i(TAG,
                        "Activity config changed during resume: " + next
                        + ", new next: " + nextNext);
                if (nextNext != next) {
                    // Do over!
                    mStackSupervisor.scheduleResumeTopActivities();
                }
                if (mStackSupervisor.reportResumedActivityLocked(next)) {
                    mNoAnimActivities.clear();
                    if (DEBUG_STACK) mStackSupervisor.validateTopActivitiesLocked();
                    return true;
                }
                if (DEBUG_STACK) mStackSupervisor.validateTopActivitiesLocked();
                return false;
            }

            try {
                // Deliver all pending results.
                ArrayList a = next.results;
                if (a != null) {
                    final int N = a.size();
                    if (!next.finishing && N > 0) {
                        if (DEBUG_RESULTS) Slog.v(
                                TAG, "Delivering results to " + next
                                + ": " + a);
                        next.app.thread.scheduleSendResult(next.appToken, a);
                    }
                }

                if (next.newIntents != null) {
                    next.app.thread.scheduleNewIntent(next.newIntents, next.appToken);
                }

                EventLog.writeEvent(EventLogTags.AM_RESUME_ACTIVITY,
                        next.userId, System.identityHashCode(next),
                        next.task.taskId, next.shortComponentName);

                next.sleeping = false;
                mService.showAskCompatModeDialogLocked(next);
                next.app.pendingUiClean = true;
                next.app.forceProcessStateUpTo(ActivityManager.PROCESS_STATE_TOP);
                next.clearOptionsLocked();
                next.app.thread.scheduleResumeActivity(next.appToken, next.app.repProcState,
                        mService.isNextTransitionForward(), resumeAnimOptions);

                mStackSupervisor.checkReadyForSleepLocked();

                if (DEBUG_STATES) Slog.d(TAG, "resumeTopActivityLocked: Resumed " + next);
            } catch (Exception e) {
                // Whoops, need to restart this activity!
                if (DEBUG_STATES) Slog.v(TAG, "Resume failed; resetting state to "
                        + lastState + ": " + next);
                next.state = lastState;
                if (lastStack != null) {
                    lastStack.mResumedActivity = lastResumedActivity;
                }
                Slog.i(TAG, "Restarting because process died: " + next);
                if (!next.hasBeenLaunched) {
                    next.hasBeenLaunched = true;
                } else  if (SHOW_APP_STARTING_PREVIEW && lastStack != null &&
                        mStackSupervisor.isFrontStack(lastStack)) {
                    mWindowManager.setAppStartingWindow(
                            next.appToken, next.packageName, next.theme,
                            mService.compatibilityInfoForPackageLocked(next.info.applicationInfo),
                            next.nonLocalizedLabel, next.labelRes, next.icon, next.logo,
                            next.windowFlags, null, true);
                }
                mStackSupervisor.startSpecificActivityLocked(next, true, false);
                if (DEBUG_STACK) mStackSupervisor.validateTopActivitiesLocked();
                return true;
            }
            ...

}
這裡的工作:獲取mTaskHistory這個list的尾部,獲取到下一個Activity的TaskRecord之後,嘗試著resume下一個Activity,此時肯定會爆出異常,並將實際的工作交給 mStackSupervisor.startSpecificActivityLocked完成。
返回ActivityStackSupervistor工作我們看看startSpecificActivityLocked方法是如何完成的:
void startSpecificActivityLocked(ActivityRecord r,
            boolean andResume, boolean checkConfig) {
        // Is this activity's application already running?
        ProcessRecord app = mService.getProcessRecordLocked(r.processName,
                r.info.applicationInfo.uid, true);

        r.task.stack.setLaunchTime(r);

        if (app != null && app.thread != null) {
            try {
                if ((r.info.flags&ActivityInfo.FLAG_MULTIPROCESS) == 0
                        || !"android".equals(r.info.packageName)) {
                    // Don't add this if it is a platform component that is marked
                    // to run in multiple processes, because this is actually
                    // part of the framework so doesn't make sense to track as a
                    // separate apk in the process.
                    app.addPackage(r.info.packageName, r.info.applicationInfo.versionCode,
                            mService.mProcessStats);
                }
                realStartActivityLocked(r, app, andResume, checkConfig);
                return;
            } catch (RemoteException e) {
                Slog.w(TAG, "Exception when starting activity "
                        + r.intent.getComponent().flattenToShortString(), e);
            }

            // If a dead object exception was thrown -- fall through to
            // restart the application.
        }

        mService.startProcessLocked(r.processName, r.info.applicationInfo, true, 0,
                "activity", r.intent.getComponent(), false, false, true);
    }
它會進行對ActivityThread是否為空進行判斷,接著交給 realStartActivityLocked去完成。

realStartActivityLocked中則是對參數進行了處理之後,將參數交給一下處理
 app.thread.scheduleLaunchActivity(new Intent(r.intent), r.appToken,
                    System.identityHashCode(r), r.info, new Configuration(mService.mConfiguration),
                    r.compat, r.task.voiceInteractor, app.repProcState, r.icicle, r.persistentState,
                    results, newIntents, !andResume, mService.isNextTransitionForward(),
                    profilerInfo);
app.thread在這裡指的是IApplicationThread,你會發現這裡再一次調用了IPC通信,將參數交給了ActivityThread進程去完成。
ActivityStack與ActivityStackSupervisor的小結我們總結一下ActivityStack與ActivityStackSupervisor這兩個類在整個流程中做什麼的。顧名思義,這兩個類是對Activity任務棧進行處理,即將最新或者即將啟動的Activity放到了棧頂。但是只是過著上面的流程還是會雲裡霧裡,我這裡小結一下。(請勿怪我沒放出所有源碼,是在有點多)
通過名字我們可以知道ActivityStackSupervisor是對ActivityStack進行監控。而在其中處理三個類之間的關系:TaskRecord,ActivityStack,ActivityRecord。(當然還有ProcessRecord)
我們查看源碼會發現,其實在ActivityStack中並沒有做一個Stack這個數據結構,而是創建了:
/**
     * The back history of all previous (and possibly still
     * running) activities.  It contains #TaskRecord objects.
     */
    private ArrayList mTaskHistory = new ArrayList();
通過操作這個arraylist中的TaskRecord的list,來達到操作任務棧的效果。這個list在注釋中寫的十分清楚,就是指所有在回退歷史中前面所有的活動(包括正在運行的Activity)。
我們再看看TaskRecord中也有一個類似的list:
/** List of all activities in the task arranged in history order */
    final ArrayList mActivities;
這裡是指在任務記錄中所有的活動。這就不難推測實際上這個就是指任務棧中的活動。
我們倒回去看看他們究竟是怎麼操作整個流程的:

首先我們去ActivityStackSupervisor的startActivityLocked中如何處理的:

在這個方法中有兩個參數,我們值得去注意的:IBinder resultTo, String resultWho。這兩個參數指定了從哪個Activity啟動(源Activity)到實際上哪個Activity啟動(目標Activity)
ActivityRecord sourceRecord = null;
        ActivityRecord resultRecord = null;
        if (resultTo != null) {
            sourceRecord = isInAnyStackLocked(resultTo);
            if (DEBUG_RESULTS) Slog.v(
                TAG, "Will send result to " + resultTo + " " + sourceRecord);
            if (sourceRecord != null) {
                if (requestCode >= 0 && !sourceRecord.finishing) {
                    resultRecord = sourceRecord;
                }
            }
        }
        ActivityRecord r = new ActivityRecord(mService, callerApp, callingUid, callingPackage,
                intent, resolvedType, aInfo, mService.mConfiguration, resultRecord, resultWho,
                requestCode, componentSpecified, this, container, options);
還是這一段我們清晰的知道了將resultTo這個IBinder參數交給isInAnyStackLocked完成從在顯示的Stack中獲取,此時位於棧頂的源活動:
ActivityRecord isInAnyStackLocked(IBinder token) {
        int numDisplays = mActivityDisplays.size();
        for (int displayNdx = 0; displayNdx < numDisplays; ++displayNdx) {
            ArrayList stacks = mActivityDisplays.valueAt(displayNdx).mStacks;
            for (int stackNdx = stacks.size() - 1; stackNdx >= 0; --stackNdx) {
                final ActivityRecord r = stacks.get(stackNdx).isInStackLocked(token);
                if (r != null) {
                    return r;
                }
            }
        }
        return null;
    }
接著我們再聲明一個resultActivity的ActivityRecord,這樣就確定好了兩個Activity中的信息。在整個過程中,ActivityRecord又扮演一個什麼角色呢?

我們翻開源碼可以看到,它扮演的角色存儲Activity運行中的信息,比如誰啟動了他,他啟動了誰,屬於哪個pid,登錄時間,對應的taskrecord是多少等等。這裡要區分開Activity在xml標簽中存儲倒ActivityInfo類。

在這裡我們將返回一個mTaskHistory和mActivities同時存在的ActivityRecord。
2.我們確定來從哪裡來,到哪裡去之後。我們繼續向下看,startActivityUncheckedLocked方法中,從一個活動正常啟動到另一個活動的代碼塊:
final TaskRecord sourceTask = sourceRecord.task;
            if (isLockTaskModeViolation(sourceTask)) {
                Slog.e(TAG, "Attempted Lock Task Mode violation r=" + r);
                return ActivityManager.START_RETURN_LOCK_TASK_MODE_VIOLATION;
            }
            targetStack = sourceTask.stack;
            targetStack.moveToFront();
            final TaskRecord topTask = targetStack.topTask();
            if (topTask != sourceTask) {
                targetStack.moveTaskToFrontLocked(sourceTask, r, options);
            } else {
                mWindowManager.moveTaskToTop(topTask.taskId);
            }
if (!addingToTask && (launchFlags&Intent.FLAG_ACTIVITY_CLEAR_TOP) != 0) {
                // In this case, we are adding the activity to an existing
                // task, but the caller has asked to clear that task if the
                // activity is already running.
                ActivityRecord top = sourceTask.performClearTaskLocked(r, launchFlags);
                keepCurTransition = true;
                if (top != null) {
                    ActivityStack.logStartActivity(EventLogTags.AM_NEW_INTENT, r, top.task);
                    top.deliverNewIntentLocked(callingUid, r.intent);
                    // For paranoia, make sure we have correctly
                    // resumed the top activity.
                    targetStack.mLastPausedActivity = null;
                    if (doResume) {
                        targetStack.resumeTopActivityLocked(null);
                    }
                    ActivityOptions.abort(options);
                    return ActivityManager.START_DELIVERED_TO_TOP;
                }
            }
在這裡將會獲取mTaskHistory的頂部:
 targetStack.moveToFront();
 //獲取mTaskHistory的頂部(list的尾巴)
 final TaskRecord topTask = targetStack.topTask();
它最後會運行:
mStackSupervisor.moveHomeStack(isHomeStack());
//確定是顯示的Stack
void moveHomeStack(boolean toFront) {
        ArrayList stacks = mHomeStack.mStacks;
        int topNdx = stacks.size() - 1;
        if (topNdx <= 0) {
            return;
        }
        ActivityStack topStack = stacks.get(topNdx);
        final boolean homeInFront = topStack == mHomeStack;
        if (homeInFront != toFront) {
            mLastFocusedStack = topStack;
            stacks.remove(mHomeStack);
            stacks.add(toFront ? topNdx : 0, mHomeStack);
            mFocusedStack = stacks.get(topNdx);
            if (DEBUG_STACK) Slog.d(TAG, "moveHomeTask: topStack old=" + topStack + " new="
                    + mFocusedStack);
        }
    }
接著sourceTask.performClearTaskLocked(r, launchFlags):
final ActivityRecord performClearTaskLocked(ActivityRecord newR, int launchFlags) {
        int numActivities = mActivities.size();
        for (int activityNdx = numActivities - 1; activityNdx >= 0; --activityNdx) {
            ActivityRecord r = mActivities.get(activityNdx);
            if (r.finishing) {
                continue;
            }
            if (r.realActivity.equals(newR.realActivity)) {
                // Here it is!  Now finish everything in front...
                final ActivityRecord ret = r;

                for (++activityNdx; activityNdx < numActivities; ++activityNdx) {
                    r = mActivities.get(activityNdx);
                    if (r.finishing) {
                        continue;
                    }
                    ActivityOptions opts = r.takeOptionsLocked();
                    if (opts != null) {
                        ret.updateOptionsLocked(opts);
                    }
                    if (stack.finishActivityLocked(r, Activity.RESULT_CANCELED, null, "clear",
                            false)) {
                        --activityNdx;
                        --numActivities;
                    }
                }

                // Finally, if this is a normal launch mode (that is, not
                // expecting onNewIntent()), then we will finish the current
                // instance of the activity so a new fresh one can be started.
                if (ret.launchMode == ActivityInfo.LAUNCH_MULTIPLE
                        && (launchFlags & Intent.FLAG_ACTIVITY_SINGLE_TOP) == 0) {
                    if (!ret.finishing) {
                        stack.finishActivityLocked(ret, Activity.RESULT_CANCELED, null,
                                "clear", false);
                        return null;
                    }
                }

                return ret;
            }
        }

        return null;
    }
上面這一段邏輯則是控制對應的TaskRecord,我們此時可以把它看成我們熟知的任務棧。此時獲取任務棧中所有的Activity再和其中的realActivity參數做對比,來返回擁有一樣realActivity的ActivityRecord,也就是作為准備啟動的ActivityRecord。
這裡結束之後,我們繼續看ActivityStack中resumeTopActivityInnerLocked的方法:
 catch (Exception e) {
                // Whoops, need to restart this activity!
                if (DEBUG_STATES) Slog.v(TAG, "Resume failed; resetting state to "
                        + lastState + ": " + next);
                next.state = lastState;
                if (lastStack != null) {
                    lastStack.mResumedActivity = lastResumedActivity;
                }
                Slog.i(TAG, "Restarting because process died: " + next);
                if (!next.hasBeenLaunched) {
                    next.hasBeenLaunched = true;
                } else  if (SHOW_APP_STARTING_PREVIEW && lastStack != null &&
                        mStackSupervisor.isFrontStack(lastStack)) {
                    mWindowManager.setAppStartingWindow(
                            next.appToken, next.packageName, next.theme,
                            mService.compatibilityInfoForPackageLocked(next.info.applicationInfo),
                            next.nonLocalizedLabel, next.labelRes, next.icon, next.logo,
                            next.windowFlags, null, true);
                }
                mStackSupervisor.startSpecificActivityLocked(next, true, false);
                if (DEBUG_STACK) mStackSupervisor.validateTopActivitiesLocked();
                return true;
            }
mWindowManager.setAppStartingWindow這一行代碼則是准備好我們之後attch Window時候的參數。

這樣大致就完成了一個流程:尋找棧中啟動時的源Activity,聲明准備啟動Activity的ActivityRecord,接下來就是在ActivityThread中完成呢Activity的創建了。


從上圖,我們也可以發現其實啟動與被啟動的Activity之間是一個單鏈表的數據模型。
ActivityThread中的工作啟動主要的工作將會回歸原來的進程完成,此時我們調用的是Application這個內部類的scheduleLaunchActivity方法。
public final void scheduleLaunchActivity(Intent intent, IBinder token, int ident,
                ActivityInfo info, Configuration curConfig, CompatibilityInfo compatInfo,
                IVoiceInteractor voiceInteractor, int procState, Bundle state,
                PersistableBundle persistentState, List pendingResults,
                List pendingNewIntents, boolean notResumed, boolean isForward,
                ProfilerInfo profilerInfo) {

            updateProcessState(procState, false);

            ActivityClientRecord r = new ActivityClientRecord();

            r.token = token;
            r.ident = ident;
            r.intent = intent;
            r.voiceInteractor = voiceInteractor;
            r.activityInfo = info;
            r.compatInfo = compatInfo;
            r.state = state;
            r.persistentState = persistentState;

            r.pendingResults = pendingResults;
            r.pendingIntents = pendingNewIntents;

            r.startsNotResumed = notResumed;
            r.isForward = isForward;

            r.profilerInfo = profilerInfo;

            updatePendingConfiguration(curConfig);

            sendMessage(H.LAUNCH_ACTIVITY, r);
        }
你將會發現接下來會丟給Handler中的handleLaunchActivity集中處理的啟動工作,你會發現Activity七大生命周期都將會在此完成。
private void handleLaunchActivity(ActivityClientRecord r, Intent customIntent) {
        // If we are getting ready to gc after going to the background, well
        // we are back active so skip it.
        unscheduleGcIdler();
        mSomeActivitiesChanged = true;

        if (r.profilerInfo != null) {
            mProfiler.setProfiler(r.profilerInfo);
            mProfiler.startProfiling();
        }

        // Make sure we are running with the most recent config.
        handleConfigurationChanged(null, null);

        if (localLOGV) Slog.v(
            TAG, "Handling launch of " + r);

        Activity a = performLaunchActivity(r, customIntent);

        if (a != null) {
            r.createdConfig = new Configuration(mConfiguration);
            Bundle oldState = r.state;
            handleResumeActivity(r.token, false, r.isForward,
                    !r.activity.mFinished && !r.startsNotResumed);

            if (!r.activity.mFinished && r.startsNotResumed) {
                // The activity manager actually wants this one to start out
                // paused, because it needs to be visible but isn't in the
                // foreground.  We accomplish this by going through the
                // normal startup (because activities expect to go through
                // onResume() the first time they run, before their window
                // is displayed), and then pausing it.  However, in this case
                // we do -not- need to do the full pause cycle (of freezing
                // and such) because the activity manager assumes it can just
                // retain the current state it has.
                try {
                    r.activity.mCalled = false;
                    mInstrumentation.callActivityOnPause(r.activity);
                    // We need to keep around the original state, in case
                    // we need to be created again.  But we only do this
                    // for pre-Honeycomb apps, which always save their state
                    // when pausing, so we can not have them save their state
                    // when restarting from a paused state.  For HC and later,
                    // we want to (and can) let the state be saved as the normal
                    // part of stopping the activity.
                    if (r.isPreHoneycomb()) {
                        r.state = oldState;
                    }
                    if (!r.activity.mCalled) {
                        throw new SuperNotCalledException(
                            "Activity " + r.intent.getComponent().toShortString() +
                            " did not call through to super.onPause()");
                    }

                } catch (SuperNotCalledException e) {
                    throw e;

                } catch (Exception e) {
                    if (!mInstrumentation.onException(r.activity, e)) {
                        throw new RuntimeException(
                                "Unable to pause activity "
                                + r.intent.getComponent().toShortString()
                                + ": " + e.toString(), e);
                    }
                }
                r.paused = true;
            }
        } else {
            // If there was an error, for any reason, tell the activity
            // manager to stop us.
            try {
                ActivityManagerNative.getDefault()
                    .finishActivity(r.token, Activity.RESULT_CANCELED, null, false);
            } catch (RemoteException ex) {
                // Ignore
            }
        }
    }
而這裡performLaunchActivity和 handleResumeActivity正是處理onCreate,onStart,onResume三個方法。onResume和Activity如何附屬上Window上一篇已經講過,這裡只繼續了解Activity是如何創建的。
在ActivityThread的performLaunchActivity中大致分四個步驟:

1.從ActivityRecord中獲取啟動Actitvity時需要的組件信息:
 ActivityInfo aInfo = r.activityInfo;
        if (r.packageInfo == null) {
            r.packageInfo = getPackageInfo(aInfo.applicationInfo, r.compatInfo,
                    Context.CONTEXT_INCLUDE_CODE);
        }

        ComponentName component = r.intent.getComponent();
        if (component == null) {
            component = r.intent.resolveActivity(
                mInitialApplication.getPackageManager());
            r.intent.setComponent(component);
        }

        if (r.activityInfo.targetActivity != null) {
            component = new ComponentName(r.activityInfo.packageName,
                    r.activityInfo.targetActivity);
        }
2.通過Instrumentation的newActivity方法中使用類加載器創建新的Activity
Activity activity = null;
        try {
            java.lang.ClassLoader cl = r.packageInfo.getClassLoader();
            activity = mInstrumentation.newActivity(
                    cl, component.getClassName(), r.intent);
            StrictMode.incrementExpectedActivityCount(activity.getClass());
            r.intent.setExtrasClassLoader(cl);
            r.intent.prepareToEnterProcess();
            if (r.state != null) {
                r.state.setClassLoader(cl);
            }
        } catch (Exception e) {
            if (!mInstrumentation.onException(activity, e)) {
                throw new RuntimeException(
                    "Unable to instantiate activity " + component
                    + ": " + e.toString(), e);
            }
        }
3.通過LoadedApk的makeApplication方法嘗試創建Application:
    public Application makeApplication(boolean forceDefaultAppClass,
            Instrumentation instrumentation) {
        if (mApplication != null) {
            return mApplication;
        }

        Application app = null;

        String appClass = mApplicationInfo.className;
        if (forceDefaultAppClass || (appClass == null)) {
            appClass = "android.app.Application";
        }

        try {
            java.lang.ClassLoader cl = getClassLoader();
            if (!mPackageName.equals("android")) {
                initializeJavaContextClassLoader();
            }
            ContextImpl appContext = ContextImpl.createAppContext(mActivityThread, this);
            app = mActivityThread.mInstrumentation.newApplication(
                    cl, appClass, appContext);
            appContext.setOuterContext(app);
        } catch (Exception e) {
            if (!mActivityThread.mInstrumentation.onException(app, e)) {
                throw new RuntimeException(
                    "Unable to instantiate application " + appClass
                    + ": " + e.toString(), e);
            }
        }
        mActivityThread.mAllApplications.add(app);
        mApplication = app;

        if (instrumentation != null) {
            try {
                instrumentation.callApplicationOnCreate(app);
            } catch (Exception e) {
                if (!instrumentation.onException(app, e)) {
                    throw new RuntimeException(
                        "Unable to create application " + app.getClass().getName()
                        + ": " + e.toString(), e);
                }
            }
        }

        // Rewrite the R 'constants' for all library apks.
        SparseArray packageIdentifiers = getAssets(mActivityThread)
                .getAssignedPackageIdentifiers();
        final int N = packageIdentifiers.size();
        for (int i = 0; i < N; i++) {
            final int id = packageIdentifiers.keyAt(i);
            if (id == 0x01 || id == 0x7f) {
                continue;
            }

            rewriteRValues(getClassLoader(), packageIdentifiers.valueAt(i), id);
        }

        return app;
    }
如果已經創建過了Application則返回原來的的。這裡一樣是通過類加載器來實現。如果沒有,最後系統會通過instrumentation.callApplicationOnCreate(app)創建。
4.創建ContextImpl對象並通過attch方法來完成一些重要數據的初始化:如Window的附屬等:
Context appContext = createBaseContextForActivity(r, activity);
                CharSequence title = r.activityInfo.loadLabel(appContext.getPackageManager());
                Configuration config = new Configuration(mCompatConfiguration);
                if (DEBUG_CONFIGURATION) Slog.v(TAG, "Launching activity "
                        + r.activityInfo.name + " with config " + config);
                activity.attach(appContext, this, getInstrumentation(), r.token,
                        r.ident, app, r.intent, r.activityInfo, title, r.parent,
                        r.embeddedID, r.lastNonConfigurationInstances, config,
                        r.voiceInteractor);
5.在 mInstrumentation.callActivityOnCreate中調用performCreate方法:
final void performCreate(Bundle icicle) {
        onCreate(icicle);
        mActivityTransitionState.readState(icicle);
        performCreateCommon();
    }
6.到onCreate方法中完成生命周期第一步:
protected void onCreate(@Nullable Bundle savedInstanceState) {
        if (DEBUG_LIFECYCLE) Slog.v(TAG, "onCreate " + this + ": " + savedInstanceState);
        if (mLastNonConfigurationInstances != null) {
            mAllLoaderManagers = mLastNonConfigurationInstances.loaders;
        }
        if (mActivityInfo.parentActivityName != null) {
            if (mActionBar == null) {
                mEnableDefaultActionBarUp = true;
            } else {
                mActionBar.setDefaultDisplayHomeAsUpEnabled(true);
            }
        }
        if (savedInstanceState != null) {
            Parcelable p = savedInstanceState.getParcelable(FRAGMENTS_TAG);
            mFragments.restoreAllState(p, mLastNonConfigurationInstances != null
                    ? mLastNonConfigurationInstances.fragments : null);
        }
        mFragments.dispatchCreate();
        getApplication().dispatchActivityCreated(this, savedInstanceState);
        if (mVoiceInteractor != null) {
            mVoiceInteractor.attachActivity(this);
        }
        mCalled = true;
    }
在這裡創建了ActionBar,獲取ConfigChanges標志位,獲取之前存儲好的savedInstanceState,綁定Fragment,調用Application中ActivityLifecycleCallbacks

的回調函數,對啟動時聲音的綁定。
到這裡就完成了Activity所有的啟動流程了。
在這裡我要感謝任玉剛大神的android開發探索藝術中給予我思路以及糾正我錯誤的思考方式。

在這裡我要提醒看客一句,這裡面的內容我不保證百分百正確,這是作為我學習android時候的思路,可能哪天回頭發現錯誤了也說不定。
 Android 仿淘寶、京東商品詳情頁向上拖動查看圖文詳情控件DEMO詳解
一、淘寶商品詳情頁效果我們的效果二、實現思路 使用兩個scrollView,兩個scrollView 豎直排列,通過自定義
 Android的onLayout、layout方法講解
onLayout方法是ViewGroup中子View的布局方法,用於放置子View的位置。放置子View很簡單,只需在重寫onLayout方法,然後獲取子View的實例,
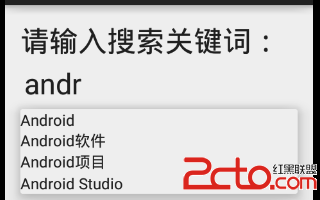 Android Studio開發基礎之AutoCompleteTextView控件的使用
在輸入框中輸入我們想要輸入的信息就會出現其他與其相關的提示信息,這種效果在Android中是用AutoCompleteTextView實現的。AutoCompleteTe
 Android 自定義陰影效果詳解及實例
Android 自定義陰影效果詳解及實例Android5.X中,Google為其增加了兩個屬性 android:elevation=” ” 與 android:trans