編輯:關於Android編程
在前面,我介紹了使用 Volley 傳輸網絡數據。戳這裡Volley是一個很好用的網絡框架,但是Volley 不適合用來下載大的數據文件。因為 Volley 會保持在解析的過程中所有的響應。對於下載大量的數據操作,Google建議我們使用 DownloadManager。
官方文檔上對DownloadManager是這樣介紹的:
The download manager is a system service that handles long-running HTTP downloads. Clients may request that a URI be downloaded to a particular destination file. The download manager will conduct the download in the background, taking care of HTTP interactions and retrying downloads after failures or across connectivity changes and system reboots. Instances of this class should be obtained through getSystemService(String) by passing DOWNLOAD_SERVICE. Apps that request downloads through this API should register a broadcast receiver for ACTION_NOTIFICATION_CLICKED to appropriately handle when the user clicks on a running download in a notification or from the downloads UI. Note that the application must have the INTERNET permission to use this class.
簡而言之:
DownloadManager是一個為了處理長時間下載Http網絡任務的系統下載管理器
客戶端可以通過URI(下載地址)下載相應的文件。DownloadManager是運行在後台,並負責http交互和重新下載(在失敗或者鏈接改變和系統重啟)。
DownLoadManager mDownloadManager =(DownloadManager) getSystemService(Context.DOWNLOAD_SERVICE);
請求下載完成時應當注冊一個Broadcast Receiver(action為 ACTION_NOTIFICATION_CLICKED)來適當處理當用戶點擊運行下載的通知或下載界面;
使用網絡權限:
相關類DownLoadManager包含兩個內部類:

DownloadManager.Request(主要用於發起一個下載請求):
addRequestHeader(String header, String value):添加http的header
setAllowedNetworkTypes(int flags):設置允許的網絡類型
setDestinationUri(Uri uri):自定義下載目錄
setNotificationVisibility(int visibility):設置Notification的顯示情況
setTitle(CharSequence title):設置notification中顯示的標題
DownloadManager.Query(主要用於查詢下載信息):
setFilterById(long… ids):添加下載的id,便於查詢對應的下載情況
應用下載更新實例實現後台更新Step 1:在Activity中通過startService啟動service,並傳遞參數。
不了解IntentService可以戳這裡
MainActivity.java:
Intent serviceIntent = new Intent(MainActivity.this,DownloadService.class);
//將下載地址url放入intent中
 serviceIntent.setData(Uri.parse(url));
 startService(serviceIntent);
Step 2:在IntentService中獲得url,通過DownloadManager下載應用
DownloadService.java:
public class DownloadService extends IntentService {
private String TAG = "DownloadService";
public static final String BROADCAST_ACTION =
"com.example.android.threadsample.BROADCAST";
public static final String EXTENDED_DATA_STATUS =
"com.example.android.threadsample.STATUS";
private LocalBroadcastManager mLocalBroadcastManager;
public DownloadService() {
super("DownloadService");
}
@Override
protected void onHandleIntent(Intent intent) {
//獲取下載地址
String url = intent.getDataString();
Log.i(TAG,url);
//獲取DownloadManager對象
DownloadManager downloadManager = (DownloadManager) getSystemService(Context.DOWNLOAD_SERVICE);
DownloadManager.Request request = new DownloadManager.Request(Uri.parse(url));
//指定APK緩存路徑和應用名稱,可在SD卡/Android/data/包名/file/Download文件夾中查看
request.setDestinationInExternalFilesDir(this, Environment.DIRECTORY_DOWNLOADS, "mydown.app");
//設置網絡下載環境為wifi
request.setAllowedNetworkTypes(DownloadManager.Request.NETWORK_WIFI);
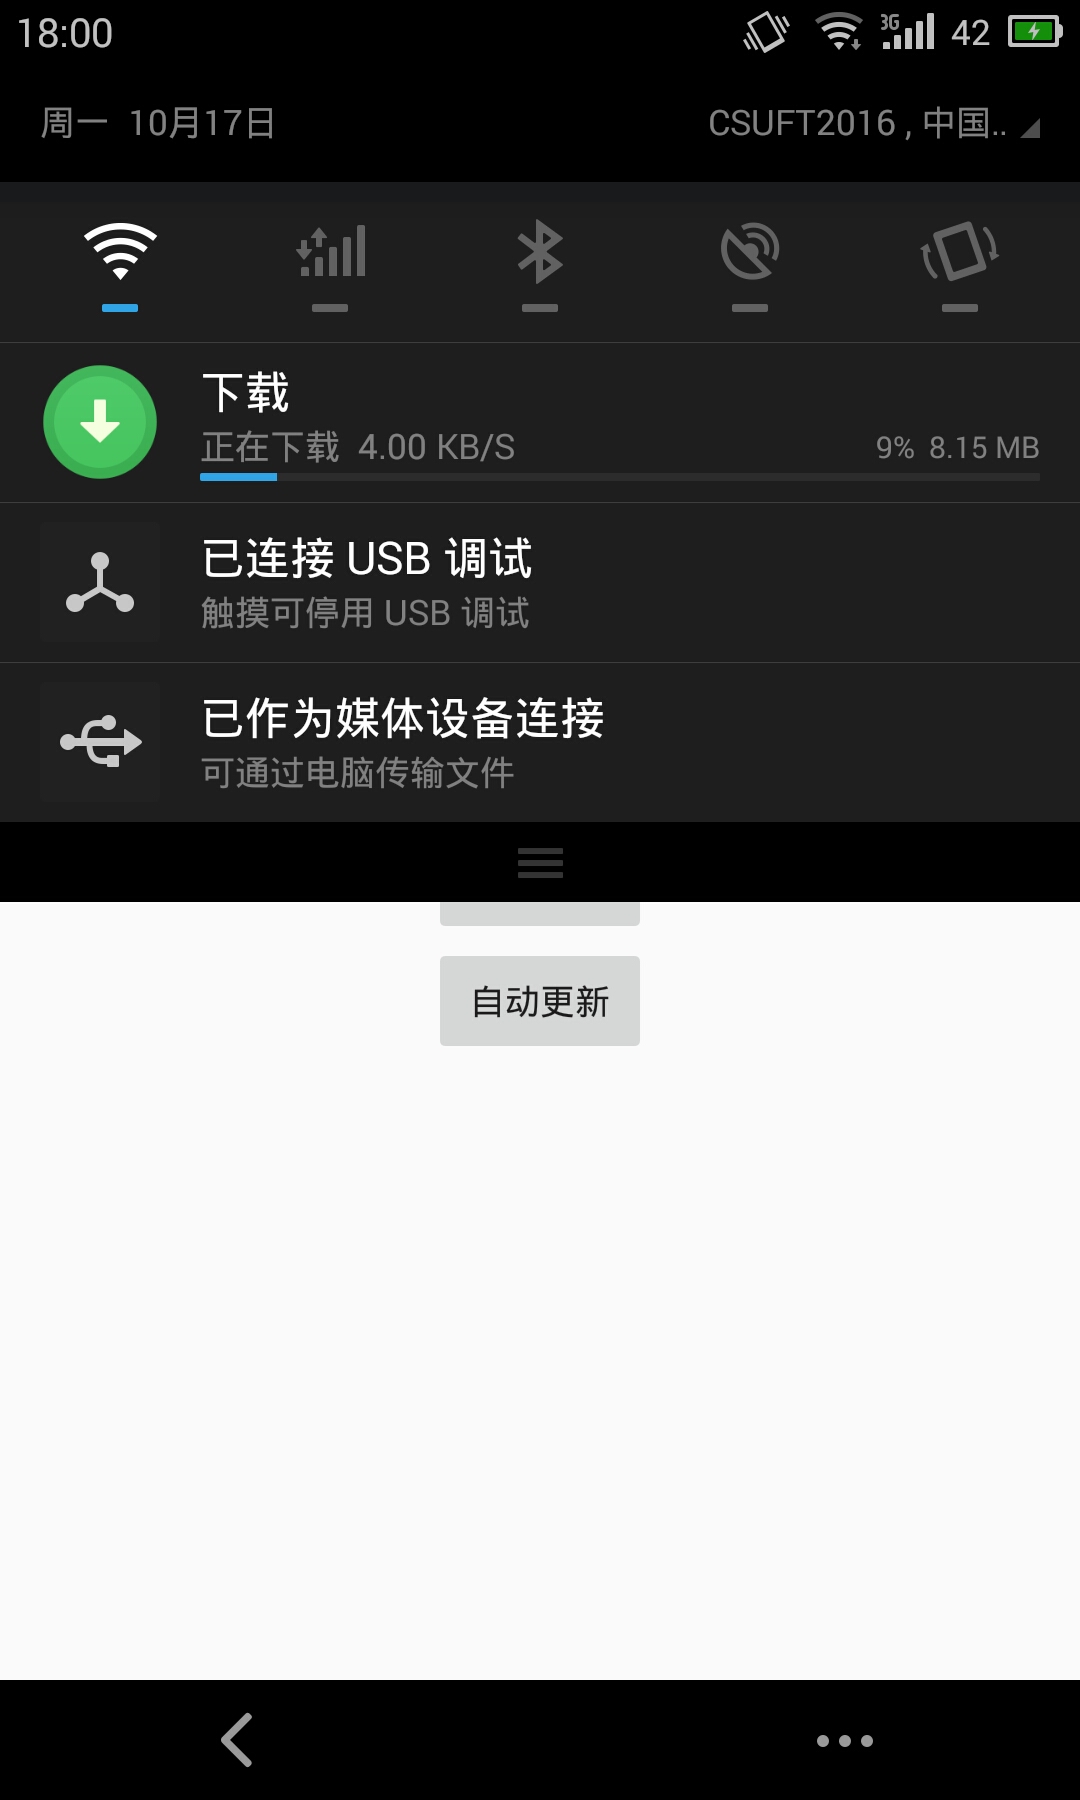
//設置顯示通知欄,下載完成後通知欄自動消失
request.setNotificationVisibility(DownloadManager.Request.VISIBILITY_VISIBLE);
//設置通知欄標題
request.setTitle("下載");
request.setDescription("應用正在下載");
request.setAllowedOverRoaming(false);
//獲得唯一下載id
long requestId = downloadManager.enqueue(request);
//將id放進Intent
Intent localIntent = new Intent(BROADCAST_ACTION);
localIntent.putExtra(EXTENDED_DATA_STATUS,requestId);
//查詢下載信息
DownloadManager.Query query=new DownloadManager.Query();
query.setFilterById(requestId);
try{
boolean isGoging=true;
while(isGoging){
Cursor cursor = downloadManager.query(query);
if (cursor != null && cursor.moveToFirst()) {
int status = cursor.getInt(cursor.getColumnIndex(DownloadManager.COLUMN_STATUS));
switch(status){
//如果下載狀態為成功
case DownloadManager.STATUS_SUCCESSFUL:
isGoging=false;
//調用LocalBroadcastManager.sendBroadcast將intent傳遞回去
mLocalBroadcastManager = LocalBroadcastManager.getInstance(this);
mLocalBroadcastManager.sendBroadcast(localIntent);
break;
}
}
if(cursor!=null){
cursor.close();
}
}
}catch(Exception e){
e.printStackTrace();
}
}
}
Step 3:Activity中注冊BroadcastReceiver,監聽廣播,更新UI。
MainActivity.java:
注冊廣播的方法(動態注冊):
private void regist() {

        IntentFilter intentFilter = new IntentFilter(DownloadService.BROADCAST_ACTION);
        intentFilter.addCategory(Intent.CATEGORY_DEFAULT);
        LocalBroadcastManager.getInstance(this).registerReceiver(receiver, intentFilter);
    }
接受到廣播,處理傳遞過來的數據,下載完成,自動安裝應用:
private class MyReceiver extends BroadcastReceiver {
        @Override
        public void onReceive(Context context, Intent intent) {
            String data = intent.getStringExtra(DownloadService.EXTENDED_DATA_STATUS);
            Log.i("test", data);

            long id = intent.getLongExtra(DownloadManager.EXTRA_DOWNLOAD_ID, -1);
            Toast.makeText(MainActivity.this, "編號:"+id+"的下載任務已經完成!", Toast.LENGTH_SHORT).show();
            intent = new Intent(Intent.ACTION_VIEW);
            intent.setFlags(Intent.FLAG_ACTIVITY_NEW_TASK);
           intent.setDataAndType(Uri.fromFile(new File(Environment.getExternalStorageDirectory() + "/myApp.apk")),
                   "application/vnd.android.package-archive");
            startActivity(intent);

              }
    }
最後取消注冊廣播:
protected void onDestroy() {
        super.onDestroy();
        cancel();
        LocalBroadcastManager.getInstance(this).unregisterReceiver(receiver);
    }
最後別忘了加上權限:
最終效果圖如下:
放上MainActivity.java的完整代碼:
public class MainActivity extends AppCompatActivity implements View.OnClickListener{
    MyReceiver receiver = new MyReceiver();
    private Button myselfButton;
    private String url = "http://172.30.18.222:8080/com.android36kr.app_16101017.apk";
    private DownloadDialog downloadDialog;

    @Override
    protected void onCreate(Bundle savedInstanceState) {
        super.onCreate(savedInstanceState);
        setContentView(R.layout.activity_main);
        regist();
        initView();

    }

    private void initView() {

        myselfButton = (Button)this.findViewById(R.id.myself_update);

        myselfButton.setOnClickListener(this);
    }

    private void regist() {

        IntentFilter intentFilter = new IntentFilter(DownloadService.BROADCAST_ACTION);
        intentFilter.addCategory(Intent.CATEGORY_DEFAULT);
        LocalBroadcastManager.getInstance(this).registerReceiver(receiver, intentFilter);
    }

    public void download(){
            showDialog();
        Intent myserviceIntent = new Intent(MainActivity.this,MyDownloadService.class);
        myserviceIntent.setData(Uri.parse(url));
        startService(myserviceIntent);
    }

    @Override
    public void onClick(View v) {
        switch(v.getId()){
            case R.id.myself_update:
                Intent serviceIntent = new Intent(MainActivity.this,DownloadService.class);
                serviceIntent.setData(Uri.parse(url));
                startService(serviceIntent);
                break;
        }
    }

    private class MyReceiver extends BroadcastReceiver {
        @Override
        public void onReceive(Context context, Intent intent) {
            String data = intent.getStringExtra(DownloadService.EXTENDED_DATA_STATUS);
            Log.i("test", data);

            long id = intent.getLongExtra(DownloadManager.EXTRA_DOWNLOAD_ID, -1);
            Toast.makeText(MainActivity.this, "編號:"+id+"的下載任務已經完成!", Toast.LENGTH_SHORT).show();
            intent = new Intent(Intent.ACTION_VIEW);
            intent.setFlags(Intent.FLAG_ACTIVITY_NEW_TASK);
           intent.setDataAndType(Uri.fromFile(new File(Environment.getExternalStorageDirectory() + "/myApp.apk")),
                   "application/vnd.android.package-archive");
            startActivity(intent);

              }
    }

    protected void onDestroy() {
        super.onDestroy();
        cancel();
        LocalBroadcastManager.getInstance(this).unregisterReceiver(receiver);
    }
}
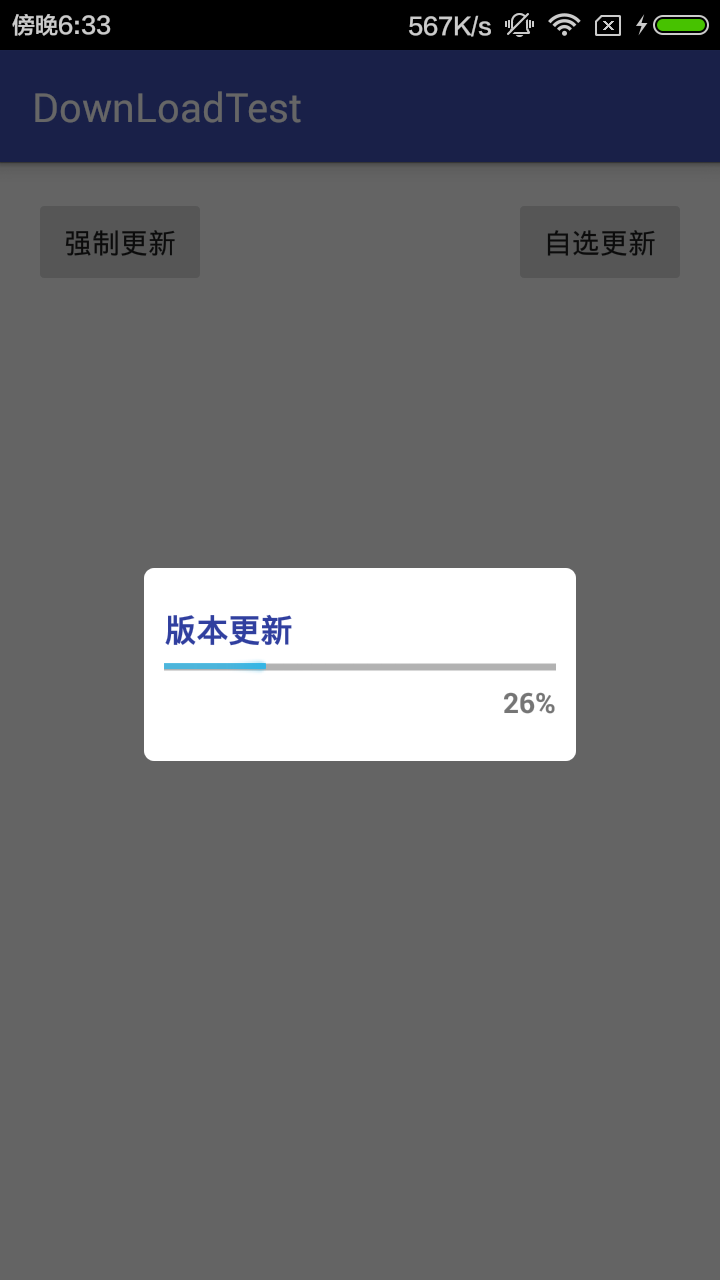
實例實現強制更新:Step 1:創建一個不可取消的dialog(按back鍵不能取消,按彈窗外不可取消)
首先我們設置Dialog的 布局文件,download_dialog.xml:
進度條顯示下載進度,TextView顯示下載百分比。
然後自定義一個AlertDialog,將布局文件設置進去,DownloadDialog.java :
public class DownloadDialog extends AlertDialog {
    private Context mContext;
    private TextView mTextView;
    private ProgressBar mProgressBar;
    private View view;
    protected DownloadDialog(Context context) {
        super(context);
        this.mContext = context;

    }

    @Override
    protected void onCreate(Bundle savedInstanceState) {
        super.onCreate(savedInstanceState);
        //設置對話框樣式
        setStyle();
        //初始化控件
        initView();
    }

    private void initView() {
        view = View.inflate(mContext,R.layout.dwonlaod_dialog,null);
        mTextView = (TextView)view.findViewById(R.id.mTextView);
        mProgressBar = (ProgressBar)view.findViewById(R.id.mProgressBar);
        setContentView(view);
    }

    private void setStyle() {
        //設置對話框不可取消
        this.setCancelable(false);
        //設置觸摸對話框外面不可取消
        this.setCanceledOnTouchOutside(false);
        DisplayMetrics displaymetrics = new DisplayMetrics();
        getWindow().getWindowManager().getDefaultDisplay().getMetrics(displaymetrics);
        //獲得應用窗口大小
        WindowManager.LayoutParams layoutParams = this.getWindow().getAttributes();
        //設置對話框居中顯示
        layoutParams.gravity = Gravity.CENTER;
        //設置對話框寬度為屏幕的3/5
        layoutParams.width = (displaymetrics.widthPixels/5)*3;
    }

    //設置進度條
    public void setProgress(int progress){
        mTextView.setText(progress+"%");
        mProgressBar.setProgress(progress);
    }
}
創建顯示對話框,取消對話框的方法,MainActivity :
 private void showDialog() {
        if(downloadDialog==null){
            downloadDialog = new DownloadDialog(this);
        }

        if(!downloadDialog.isShowing()){
            downloadDialog.show();
        }
    }
 private void canceledDialog() {
        if(downloadDialog!=null&&downloadDialog.isShowing()){
            downloadDialog.dismiss();
        }
    }
Step 2:通過DownloadManager開始下載
創建一個download方法用於下載應用:
 private void download() {
        showDialog();
        //最好是用單線程池,或者intentService
        new Thread(new DownLoadRunnable(this,url, handler)).start();
    }
接下來看看在DownloadRunnable中的具體處理方法:
public class DownLoadRunnable implements Runnable {
    private String url;
    private Handler handler;
    private Context mContext;

    public DownLoadRunnable(Context context, String url, Handler handler) {
        this.mContext = context;
        this.url = url;
        this.handler = handler;
    }

    @Override
    public void run() {
     //設置線程優先級為後台,這樣當多個線程並發後很多無關緊要的線程分配的CPU時間將會減少,有利於主線程的處理
     Process.setThreadPriority(Process.THREAD_PRIORITY_BACKGROUND);
     //具體下載方法
        startDownload();
    }

    private long startDownload() {
        //獲得DownloadManager對象
        DownloadManager downloadManager=(DownloadManager) mContext.getSystemService(Context.DOWNLOAD_SERVICE);
        //獲得下載id,這是下載任務生成時的唯一id,可通過此id獲得下載信息
        long requestId= downloadManager.enqueue(CreateRequest(url));
        //查詢下載信息方法
        queryDownloadProgress(requestId,downloadManager);
        return  requestId;
    }

    private void queryDownloadProgress(long requestId, DownloadManager downloadManager) {


        DownloadManager.Query query=new DownloadManager.Query();
        //根據任務編號id查詢下載任務信息
        query.setFilterById(requestId);
        try {
            boolean isGoging=true;
            while (isGoging) {
                Cursor cursor = downloadManager.query(query);
                if (cursor != null && cursor.moveToFirst()) {

                    //獲得下載狀態
                    int state = cursor.getInt(cursor.getColumnIndex(DownloadManager.COLUMN_STATUS));
                    switch (state) {
                        case DownloadManager.STATUS_SUCCESSFUL://下載成功
                            isGoging=false;
                            handler.obtainMessage(downloadManager.STATUS_SUCCESSFUL).sendToTarget();//發送到主線程,更新ui
                            break;
                        case DownloadManager.STATUS_FAILED://下載失敗
                            isGoging=false;
                            handler.obtainMessage(downloadManager.STATUS_FAILED).sendToTarget();//發送到主線程,更新ui
                            break;

                        case DownloadManager.STATUS_RUNNING://下載中
                            /**
                             * 計算下載下載率;
                             */
                            int totalSize = cursor.getInt(cursor.getColumnIndex(DownloadManager.COLUMN_TOTAL_SIZE_BYTES));
                            int currentSize = cursor.getInt(cursor.getColumnIndex(DownloadManager.COLUMN_BYTES_DOWNLOADED_SO_FAR));
                            int progress = (int) (((float) currentSize) / ((float) totalSize) * 100);
                            handler.obtainMessage(downloadManager.STATUS_RUNNING, progress).sendToTarget();//發送到主線程,更新ui
                            break;

                        case DownloadManager.STATUS_PAUSED://下載停止
                            handler.obtainMessage(DownloadManager.STATUS_PAUSED).sendToTarget();
                            break;

                        case DownloadManager.STATUS_PENDING://准備下載
                            handler.obtainMessage(DownloadManager.STATUS_PENDING).sendToTarget();
                            break;
                    }
                }
                if(cursor!=null){
                    cursor.close();
                }
            }

        }catch (Exception e){
            e.printStackTrace();
        }
    }

    private DownloadManager.Request CreateRequest(String url) {

        DownloadManager.Request  request=new DownloadManager.Request(Uri.parse(url));
        request.setNotificationVisibility(DownloadManager.Request.VISIBILITY_HIDDEN);// 隱藏notification

        request.setAllowedNetworkTypes(request.NETWORK_WIFI);//設置下載網絡環境為wifi

        request.setDestinationInExternalFilesDir(mContext, Environment.DIRECTORY_DOWNLOADS,"MyApp.app");//指定apk緩存路徑,默認是在SD卡中的Download文件夾

        return  request;
    }
}
Step 3:在dialog裡中更新下載狀態(handler回調主線程中,更新UI)
在主線程中通過Handler獲取Message,並回調handleMessage方法處理信息,更新UI,MainActivity.java:
Handler handler = new Handler(){
        @Override
        public void handleMessage(Message msg) {
            switch (msg.what){
                case DownloadManager.STATUS_SUCCESSFUL:
                    downloadDialog.setProgress(100);
                    canceledDialog();
                    Toast.makeText(MainActivity.this, "下載任務已經完成!", Toast.LENGTH_SHORT).show();
                    break;

                case DownloadManager.STATUS_RUNNING:
                    //int progress = (int) msg.obj;
                    downloadDialog.setProgress((int) msg.obj);
                    //canceledDialog();
                    break;

                case DownloadManager.STATUS_FAILED:
                    canceledDialog();
                    break;

                case DownloadManager.STATUS_PENDING:
                    showDialog();
                    break;
            }
        }
    };
Step 4:下載完成後進行安裝(靜態注冊廣播接收器,實現安裝功能)
AndroidManifest.xml:
接受廣播並自行安裝應用,InstallApkBroadcast.java:
public class InstallApkBroadcast extends BroadcastReceiver {
    @Override
    public void onReceive(Context context, Intent intent) {
        install(context);
    }

    private void install(Context context) {
        Intent installintent = new Intent();
        installintent.setAction(Intent.ACTION_VIEW);
        // 在Boradcast中啟動活動需要添加Intent.FLAG_ACTIVITY_NEW_TASK
        installintent.setFlags(Intent.FLAG_ACTIVITY_NEW_TASK);
        installintent.setDataAndType(Uri.fromFile(new File(Environment.getExternalStorageDirectory() + "/myApp.apk")),
                "application/vnd.android.package-archive");//存儲位置為Android/data/包名/file/Download文件夾
        context.startActivity(installintent);
    }
}
最後別忘了加上權限:
最終效果為:
這裡放上MainActivity的完整代碼:
MainActivity.java:
public class MainActivity extends AppCompatActivity {
    private Button force_button;
    private DownloadDialog downloadDialog;
    private DownloadManager mDownloadManager;
    private String url = "http://172.30.18.222:8080/lanota.apk";

    Handler handler = new Handler(){
        @Override
        public void handleMessage(Message msg) {
            switch (msg.what){
                case DownloadManager.STATUS_SUCCESSFUL:
                    downloadDialog.setProgress(100);
                    canceledDialog();
                    Toast.makeText(MainActivity.this, "下載任務已經完成!", Toast.LENGTH_SHORT).show();
                    break;

                case DownloadManager.STATUS_RUNNING:
                    //int progress = (int) msg.obj;
                    downloadDialog.setProgress((int) msg.obj);
                    //canceledDialog();
                    break;

                case DownloadManager.STATUS_FAILED:
                    canceledDialog();
                    break;

                case DownloadManager.STATUS_PENDING:
                    showDialog();
                    break;
            }
        }
    };

    @Override

    protected void onCreate(Bundle savedInstanceState) {
        super.onCreate(savedInstanceState);
        setContentView(R.layout.activity_main);
        force_button = (Button)this.findViewById(R.id.force_button);
        force_button.setOnClickListener(new View.OnClickListener() {
            @Override
            public void onClick(View v) {
                download();
            }
        });
    }

    private void download() {
        showDialog();
        //最好是用單線程池,或者intentService取代
        new Thread(new DownLoadRunnable(this,url, handler)).start();
    }


    private void showDialog() {
        if(downloadDialog==null){
            downloadDialog = new DownloadDialog(this);
        }

        if(!downloadDialog.isShowing()){
            downloadDialog.show();
        }
    }

    private void canceledDialog() {
        if(downloadDialog!=null&&downloadDialog.isShowing()){
            downloadDialog.dismiss();
        }
    }
}
 .Net程序員玩轉Android開發---(17)Handler用法
在android開發中,如果在一個線程中想更新主界面中控件顯示的數據,直接給主界面控件賦值就會出現異常,android中為了安全起見,是不允許在線程中更新界面控件的數據,
 Android點9圖的運用
在Android UI設計開發中,我們經常會用到一些圖標、圖片來做背景等。相信很多同學都會遇到一個問題,就是我們讓美工做好一張圖,一個圖標,呃,看起來挺好看的,但是放進a
 Android中微信小程序支付倒計時功能
看效果由於web 經驗弱爆- - 一開始我的思路是找事件,但是看了半天API 基本都是點擊觸摸,通過物理觸發- -我居然忽略了生命周期,生命周期+線程不就完全
 Andrew Stankevich's Contest #補題
ACdream 1210 Chinese Girls' Amusement (規律+數學)【題意】: 求最大的k<=n/2使得gcd(n,k)=1。&nbs