編輯:關於Android編程
service和activity很相識,只是service在後台運行,activity在前台運行,他們都屬於同一個同一個線程裡,都屬於UI線程,所以service和Thread是完全不一樣的東西。一些耗時的操作在Service裡運行也要開辟新的線程。
新建一個自己的service,只需要繼承系統Service就行了,看下面代碼:
public class AIDLService extends Service {
    private static final String TAG = "AIDLService";
    @Override
    public void onCreate() {
        super.onCreate();
        Log.i(TAG, "onCreate() called");
    }

    @Override
    public int onStartCommand(Intent intent, int flags, int startId) {
        Log.i(TAG, "onStartCommand() called");
        return super.onStartCommand(intent, flags, startId);

    }

    @Override
    public IBinder onBind(Intent intent) {
        Log.i(TAG, "onBind() called");
        return stub;
    }

    @Override
    public boolean onUnbind(Intent intent) {
        Log.i(TAG, "onUnbind() called");
        return true;
    }

    @Override
    public void onDestroy() {
        super.onDestroy();
        Log.i(TAG, "onDestroy() called");
    }
這樣就建好了一個service,service建好了了,現在也並不能直接啟動,也要像activity一樣注冊進AndroidManifest.xml中才能,運行它。
現在我們建好了service,也注冊進AndroidManifest.xml中怎麼才能運行他呢。
有兩種方式可以運行:startService 和 bindService
這兩種方式的區別:
執行startService時,Service會經歷onCreate->onStartCommand。當執行stopService時,直接調用onDestroy方法。調用者如果沒有stopService,Service會一直在後台運行,下次調用者再起來仍然可以stopService。
執行bindService時,Service會經歷onCreate->onBind。這個時候調用者和Service綁定在一起。調用者調用unbindService方法或者調用者Context不存在了(如Activity被finish了),Service就會調用onUnbind->onDestroy。這裡所謂的綁定在一起就是說兩者共存亡了。
多次調用startService,該Service只能被創建一次,即該Service的onCreate方法只會被調用一次。但是每次調用startService,onStartCommand方法都會被調用。Service的onStart方法在API 5時被廢棄,替代它的是onStartCommand方法。
第一次執行bindService時,onCreate和onBind方法會被調用,但是多次執行bindService時,onCreate和onBind方法並不會被多次調用,即並不會多次創建服務和綁定服務。
和startActivity一樣使用就行了,停止的時候直接調用stopService 就行了。
  @Override
    public void onClick(View view) {
        Intent startIntent = new Intent(this, AIDLService.class);
        switch (view.getId()){
            case R.id.btn_start:
                startService(startIntent);
                break;
            case R.id.btn_stop:
                stopService(startIntent);
                break;
            case R.id.btn_bind:

                break;
            case R.id.btn_unbind:

                break;

        }
    }
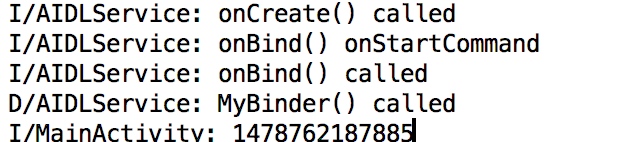
多次點擊start時,看打印日志

證明了
多次調用startService,該Service只能被創建一次,即該Service的onCreate方法只會被調用一次。但是每次調用startService,onStartCommand方法都會被調用。
1.這時候綁定的service會和該activity共存亡。不會單獨存在。
2.利用該種方法綁定的service可以和activity交互,不單單只是啟動。
看代碼:
package mangues.com.aidl_service;

import android.app.Service;
import android.content.Intent;
import android.os.Binder;
import android.os.IBinder;
import android.os.RemoteException;
import android.util.Log;

import java.util.Date;

import mangues.com.aidl.IPerson;

public class AIDLService extends Service {
   private static final String TAG = "AIDLService";
private MyBinder mBinder = new MyBinder();
    @Override
    public void onCreate() {
        super.onCreate();
        Log.i(TAG, "onCreate() called");
    }

    @Override
    public int onStartCommand(Intent intent, int flags, int startId) {
        Log.i(TAG, "onBind() onStartCommand");
        return super.onStartCommand(intent, flags, startId);

    }

    @Override
    public IBinder onBind(Intent intent) {
        Log.i(TAG, "onBind() called");
        return mBinder;
    }

    @Override
    public boolean onUnbind(Intent intent) {
        Log.i(TAG, "onUnbind() called");
        return true;
    }

    @Override
    public void onDestroy() {
        super.onDestroy();
        Log.i(TAG, "onDestroy() called");
    }

    class MyBinder extends Binder {

        public String getMyBinder() {
            Log.d(TAG, "MyBinder() called");
            return new Date().getTime()+"";  //獲取時間
        }

    }
}
利用binder 把數據傳出service給activity獲取到,只要寫個內部類 繼承Binder,通過binder寫個方法 在利用onBind把這個binder return出去,activity就可以獲得這個binder進而得到方法getMyBinder,獲得service中數據
Activity代碼:
public class MainActivity extends AppCompatActivity implements View.OnClickListener{


    private Button mBtnBind;
    private Button mBtnUnBind;

    private AIDLService.MyBinder myBinder;

    private ServiceConnection connection = new ServiceConnection() {

        @Override
        public void onServiceDisconnected(ComponentName name) {
        }

        @Override
        public void onServiceConnected(ComponentName name, IBinder service) {
            myBinder = (AIDLService.MyBinder) service;
            String  time = myBinder.getMyBinder();
            Log.i("MainActivity",time);
        }
    };


    @Override
    protected void onCreate(Bundle savedInstanceState) {
        super.onCreate(savedInstanceState);
        setContentView(R.layout.activity_main);
        init();

    }

    private void init(){

        mBtnBind = (Button)findViewById(R.id.btn_bind);
        mBtnUnBind = (Button)findViewById(R.id.btn_unbind);


        mBtnBind.setOnClickListener(this);
        mBtnUnBind.setOnClickListener(this);
    }


    @Override
    public void onClick(View view) {
        Intent startIntent = new Intent(this, AIDLService.class);
        switch (view.getId()){
            case R.id.btn_bind:
                Intent bindIntent = new Intent(this, AIDLService.class);
                //這裡傳入BIND_AUTO_CREATE表示在Activity和
                //Service建立關聯後自動創建Service,這會使得
                //MyService中的onCreate()方法得到執行,但
                //onStartCommand()方法不會執行。
                bindService(bindIntent, connection, BIND_AUTO_CREATE);
                break;
            case R.id.btn_unbind:
                unbindService(connection);
                break;

        }
    }
}
點擊開始和結束 日志如下:
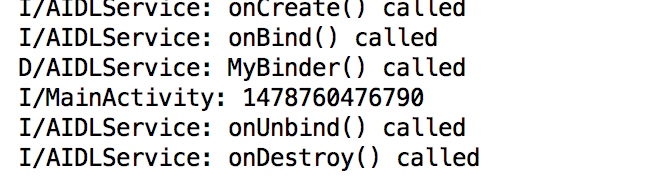
看第四行:activity 獲取到了service中數據
第一種、startService stopService
第二種、bindService unBindService
上面都好理解,那麼如果我們既點擊了startService按鈕,又點擊了bindService按鈕會怎麼樣呢?
這個時候你會發現,不管你是單獨點擊stopService按鈕還是unbindService按鈕,Service都不會被銷毀,必要將兩個按鈕都點擊一下,Service才會被銷毀。也就是說,點擊Stop Service按鈕只會讓Service停止,點擊Unbind Service按鈕只會讓Service和Activity解除關聯,一個Service必須要在既沒有和任何Activity關聯又處理停止狀態的時候才會被銷毀。
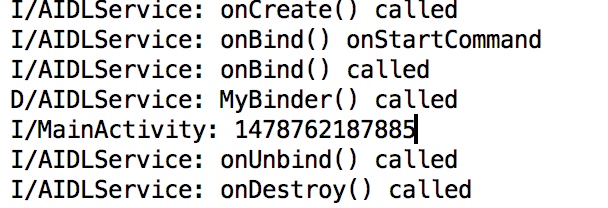
看日志:
只執行stopService 或者 unbindService 根本沒有注銷
只有全部執行才會 注銷
只要在service中注冊信息中加上 android:process=”:remote” 就行了
遠程service有什麼用呢?
遠程service的作用只是重新建立一個新進程執行,可以獨立出去。其他app可以調用這個service。因為是一個新的進程,所以也不能用bind來建立關聯了。
可以用新的方式來建立關系就是下面要講的aidl技術。
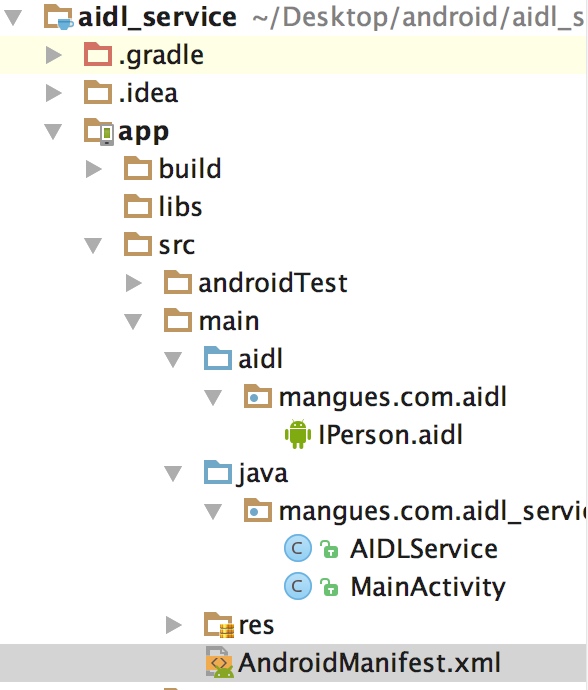
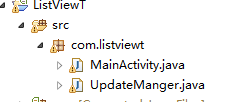
目錄結構如下:
service提供端app
利用aidl調用service的app
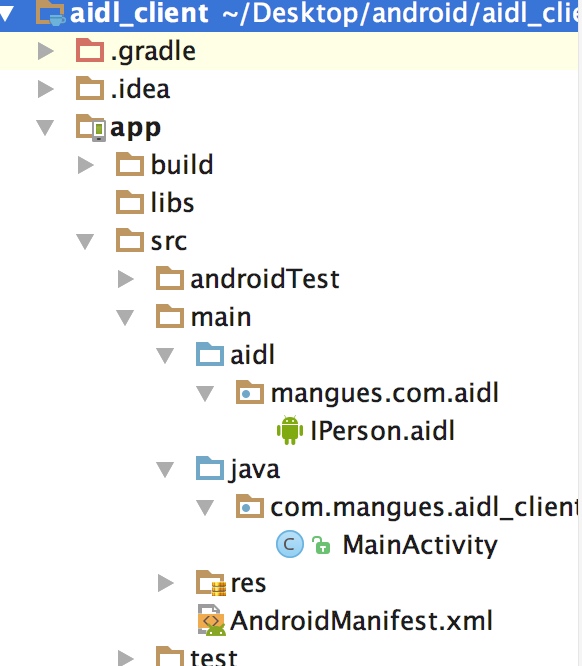
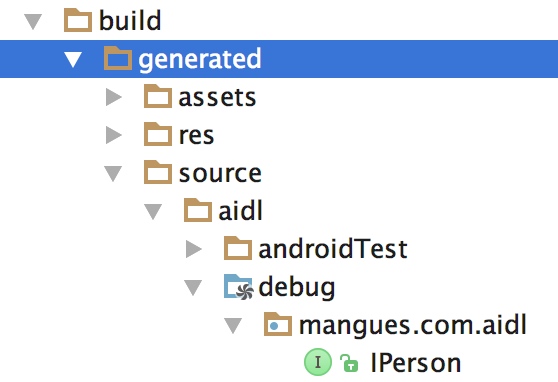
IPerson.aidl只是一個接口文件,用來aidl交互的,建立好之後gradle一下就行了,studio會自動創建需要的文件,具體什麼文件你不用管,我們用不到,你在代碼裡可以看到
IPerson.aidl代碼
package mangues.com.aidl;
interface IPerson {
    String greet(String someone);
}
這個IPerson.Stub 就是通過IPerson.aidl 自動生成的binder 文件,你實現下,然後onBind return出去就好了,就和Android Service實現和activity交互一樣。
代碼:
public class AIDLService extends Service {
    private static final String TAG = "AIDLService";

    IPerson.Stub stub = new IPerson.Stub() {
        @Override
        public String greet(String someone) throws RemoteException {
            Log.i(TAG, "greet() called");
            return "hello, " + someone;
        }
    };

    @Override
    public void onCreate() {
        super.onCreate();
        Log.i(TAG, "onCreate() called");
    }

    @Override
    public int onStartCommand(Intent intent, int flags, int startId) {
        Log.i(TAG, "onBind() onStartCommand");
        return super.onStartCommand(intent, flags, startId);

    }

    @Override
    public IBinder onBind(Intent intent) {
        Log.i(TAG, "onBind() called");
        return stub;
    }

    @Override
    public boolean onUnbind(Intent intent) {
        Log.i(TAG, "onUnbind() called");
        return true;
    }

    @Override
    public void onDestroy() {
        super.onDestroy();
        Log.i(TAG, "onDestroy() called");
    }
}
簡單點就不寫關閉什麼的了;
  @Override
    protected void onCreate(Bundle savedInstanceState) {
        super.onCreate(savedInstanceState);
        setContentView(R.layout.activity_main);
        Intent startIntent = new Intent(this, AIDLService.class);
        startService(startIntent);

    }
在AndroidManifest.xml注冊
作用就是把這個service暴露出去,讓別的APP可以利用
android.intent.action.AIDLService 字段隱形綁定這個service,獲取數據。
代碼:
public class MainActivity extends AppCompatActivity {
private IPerson person;
private ServiceConnection conn = new ServiceConnection() {
@Override
public void onServiceConnected(ComponentName name, IBinder service) {
Log.i("ServiceConnection", "onServiceConnected() called");
person = IPerson.Stub.asInterface(service);
String retVal = null;
try {
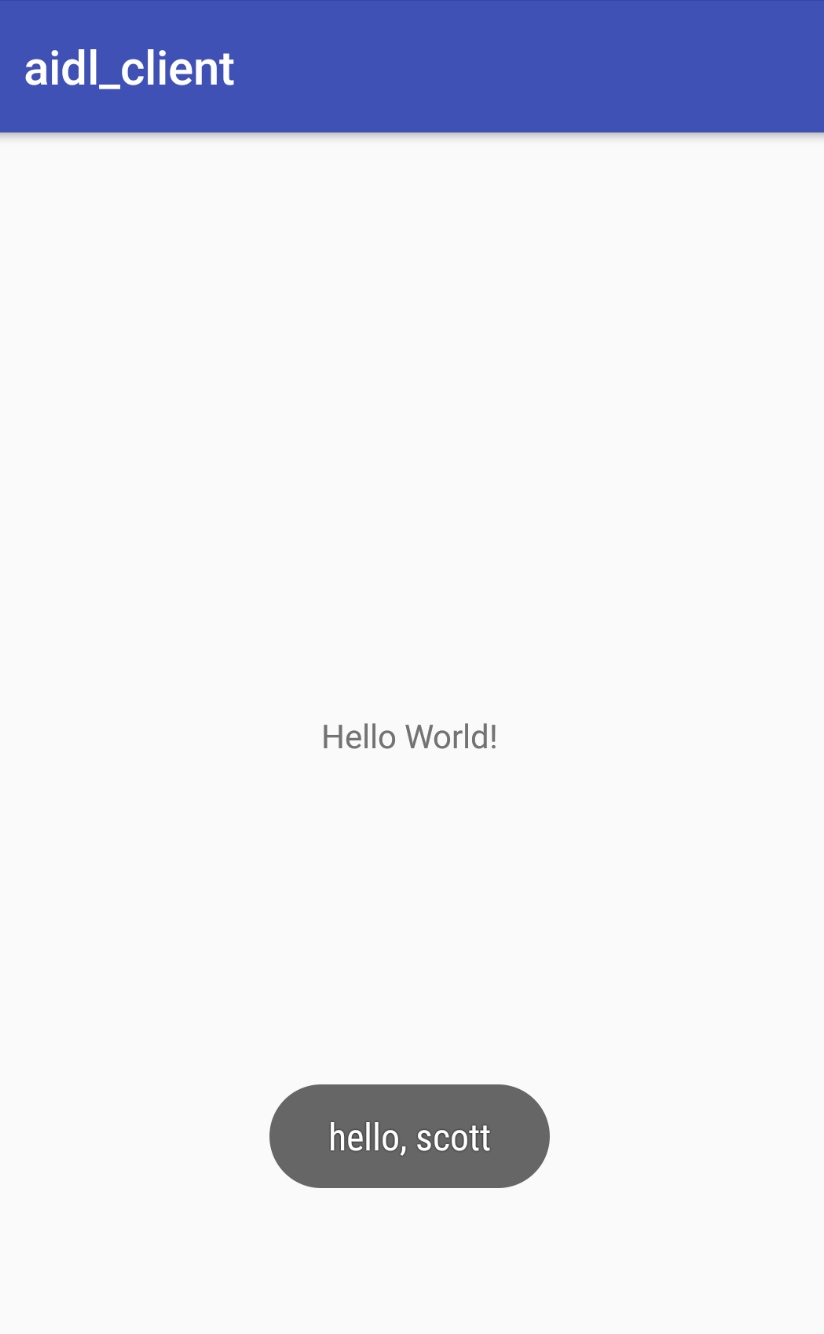
retVal = person.greet("scott");
} catch (RemoteException e) {
e.printStackTrace();
}
Toast.makeText(MainActivity.this, retVal, Toast.LENGTH_SHORT).show();
}
@Override
public void onServiceDisconnected(ComponentName name) {
//This is called when the connection with the service has been unexpectedly disconnected,
//that is, its process crashed. Because it is running in our same process, we should never see this happen.
Log.i("ServiceConnection", "onServiceDisconnected() called");
}
};
@Override
protected void onCreate(Bundle savedInstanceState) {
super.onCreate(savedInstanceState);
setContentView(R.layout.activity_main);
Intent mIntent = new Intent();
mIntent.setAction("android.intent.action.AIDLService");
Intent eintent = new Intent(getExplicitIntent(this,mIntent));
bindService(eintent, conn, Context.BIND_AUTO_CREATE);
}
public static Intent getExplicitIntent(Context context, Intent implicitIntent) {
// Retrieve all services that can match the given intent
PackageManager pm = context.getPackageManager();
List resolveInfo = pm.queryIntentServices(implicitIntent, 0);
// Make sure only one match was found
if (resolveInfo == null || resolveInfo.size() != 1) {
return null;
}
// Get component info and create ComponentName
ResolveInfo serviceInfo = resolveInfo.get(0);
String packageName = serviceInfo.serviceInfo.packageName;
String className = serviceInfo.serviceInfo.name;
ComponentName component = new ComponentName(packageName, className);
// Create a new intent. Use the old one for extras and such reuse
Intent explicitIntent = new Intent(implicitIntent);
// Set the component to be explicit
explicitIntent.setComponent(component);
return explicitIntent;
}
}
和Android Service 中學習的調用MyBinder獲取service中數據一樣,這邊只是吧MyBinder 改成了aidl定義的接口IPerson 本質上還是一個Binder
因為android 5.0 不允許隱形啟用service 所有用getExplicitIntent轉一下
好了現在看下效果:
 Android 軟件自動更新功能實現的方法
相信所有的用戶都遇到過軟件提醒更新的情況,下面就將實現此功能首先看一下程序目錄結構 步驟:1、新建一個類UpdateManger,用於顯示提示更新復
 Android 常用 adb 命令總結
針對移動端 Android 的測試, adb 命令是很重要的一個點,必須將常用的 adb 命令熟記於心, 將會為 Android 測試帶來很大的方便,其中很多命令將會用
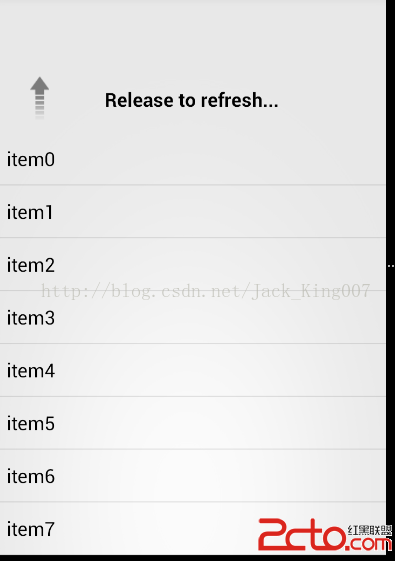 安卓 (1)教你怎麼使用下拉刷新
很久沒用開源項目,重新復習一下下拉刷新 也是想總結下一個項目,應該需要那些東西, 為自己打下基礎, 你也可以自己去下 library,關於源碼我會在後面放在 效果圖 p
 Android實現空心圓角矩形按鈕的實例代碼
頁面上有時會用到背景為空心圓角矩形的Button,可以通過xml繪制出來。drawrable文件夾下bg_red_hollow_rectangle.xml<?