編輯:關於Android編程
1.定義:
(1)後台運行,不可見,沒有界面
(2)優先級高於Activity
2.用途:
播放音樂、記錄地理信息位置的改變、監聽某種動作
3.注意:
運行在主線程,不能用於耗時的請求或者動作
可以在服務中開一個線程,在線程中做耗時動作
類型:
1.本地服務(Local Service)應用程序內部
( 1 ) startService / stopService / stopSelf / stopSelfResult
( 2 ) bindService / unbindService
Start方式的特點:
服務跟啟動源沒有任何聯系
無法得到服務對象
Bind方式特點:
通過IBinder接口實例,返回一個ServiceConnection對象給啟動源
通過ServiceConnection對象的相關方法可以得到Service對象
2.遠程服務(Remote Service)Android系統內部的應用程序之間
定義IBinder接口
服務分兩種:本地服務和遠程服務
本地服務是程序內的服務有兩套啟動機制(startService、stopService、stopSelf、stopSelfResult)和(bindService、unbindService)
遠程服務是同一個Android系統中的應用程序間的服務。有IBinder接口
startService
1.創建myStartService繼承Service並實現onCreate()onStartCommand()onDestory()方法
2.在AndroidManifest文件中注冊這個service
3.在主線程Activit中通過startService(intent)啟動服務
通過stopService(intent)停止
啟動方式是通過啟動intent方式實現
@Service啟動與停止

public void doClick(View v){
    switch (v.getId()) {
    case R.id.start:
        intent1=new Intent(MainActivity.this, MyStartService.class);
        startService(intent1);
        break;

    case R.id.stop:
        stopService(intent1);
        break;
    }
}
//另類
public class MyStartService extends Service {

    @Override
    public void onCreate() {
        Log.i("TAG", "Service_onCreate");
        super.onCreate();
    }

    @Override
    public int onStartCommand(Intent intent, int flags, int startId) {
    Log.i("TAG", "Service_onStartCommand");
    return super.onStartCommand(intent, flags, startId);
    }

    @Override
    public void onDestroy() {
        Log.i("TAG", "Service_onDestroy");
        super.onDestroy();
    }

    @Override
    public IBinder onBind(Intent intent) {
        return null;
    }
}

//Ps:開啟後onCreate只會調用一次,再點擊StartService不會再調用,直接調用onStartCommand。
StartService
1. 使用方法:
(1)寫一個MyStartService繼承自Service,重寫它的各種方法onCreate()、onStartCommand()、onDestory()
(2)在AndroidManifest.xml中注冊這個Service
(3)在主線程Activity中通過startSerice(intent)方式啟動
(4)通過stopService(intent)方式停止
2. 關於StartService
(1)啟動方式是通過啟動intent方式實現
(2)啟動之後該Service和啟動源沒有關系,即使主線程退出了,service還會繼續運行
public void doClick(View v){
    switch (v.getId()) {
    case R.id.start:
        intent1=new Intent(MainActivity.this, MyStartService.class);
        startService(intent1);
        break;

    case R.id.stop:
        stopService(intent1);
        break;

    case R.id.bind:
        intent2=new Intent(MainActivity.this,MyBindService.class);
        startService(intent2);//有必要時推薦:結合使用
        //↓↓↓第三個參數:自動創建↓↓↓
        bindService(intent2, conn, BIND_AUTO_CREATE);
        break;

    case R.id.play:
        bindservice.play();
        break;

...//其他三個類似

    case R.id.unbind:
        unbindService(conn);
        break;
    }
}

//Ps1:StartService開啟後onCreate只會調用一次,再點擊StartService不會再調用,直接調用onStartCommand;而BindService開啟後onCreate和onBind都只調用一次,再點擊也不會調用。

//Ps2:StopService點擊多次,只調用一次,但是不會報錯;而UnBindService點擊多次,雖只調用一次,但是會報錯。

@啟動源(個人理解:Activity):
Start方式:可以不需要界面(UI),但是服務還存在,但是數據不能返回。
Bind方式:與界面共存亡。
-有必要推薦Start與Bind一起結合使用。
public class MainActivity extends Activity {
    Intent intent1;
    Intent intent2;
    MyBindService bindservice;
    ServiceConnection conn=new ServiceConnection() {

    @Override
    //當啟動源跟Service的連接意外丟失的時候會調用這個方法
    //,但是當Service取消綁定是不會調用這個方法的。
    //如:當Service崩潰了或被強行殺死了。
    public void onServiceDisconnected(ComponentName name) {

    }

    @Override//當啟動源跟Service成功連接之後將會自動調用這個方法
    public void onServiceConnected(ComponentName name, IBinder binder) {
    bindservice=((MyBinder)binder).getService();
    }
};
@Override
protected void onCreate(...) {
...
}

@Override
//如果結合使用startService(Intent intent),一定要調用這個重寫這個方法。
protected void onDestroy() {
    super.onDestroy();
    stopService(intent2);
    unbindService(conn);
}
public class MyBindService extends Service {

    @Override
    public void onCreate() {
        Log.i("TAG", "BindService_onCreate");
        super.onCreate();
    }

    @Override
    public void unbindService(ServiceConnection conn) {
        Log.i("TAG", "BindService_unbindService");
        super.unbindService(conn);
    }

    public class MyBinder extends Binder{
        public MyBindService getService(){
            return MyBindService.this;//返回當前服務對象
        }
    }

    @Override
    public IBinder onBind(Intent intent) {
        Log.i("TAG", "BindService_onBind");
        return new MyBinder();//返回一個數據類
    }

    @Override
    public void onDestroy() {
        Log.i("TAG", "BindService_onDestroy");
        super.onDestroy();
    }

    public void play(){
        Log.i("TAG", "播放");
    }
    //其他三個類似
}
服務的兩種啟動方式:
1.通過startService(Intent intent)啟動,stopService(Intent intent)停止,比較簡單。服務啟動後與啟動源無關,也無返回服務本身。需注意要在配置文件中注冊服務。
2.通過bindService(Intent intent,ServiceConnection conn,int flags)綁定服務啟動,unbindService(ServiceConnection conn)去綁定停止,該方式可以返回服務本身,與啟動源相關。
//具體步驟:1)
Intent intent = new Intent(上下文, 目標服務名.class);//連接
bindService(intent, conn, Service.BIND_AUTO_CREATE);//綁定

//2)在自定義的服務類中通過自定義一個內部類:來返回服務本身
public class MyBinder extends Binder {
    public MyBindService getService() {
        return MyBindService.this;// 獲取服務
    }
}
//同時在自定義服務類重寫父類Service的方法:該方法可返回服務本身.
public IBinder onBind(Intent intent) {
    return new MyBinder();
}

//3)初始化ServiceConnection接口,在接口方法中重寫方法
public void onServiceConnected(ComponentName name, IBinder service) {
    //大類轉化為自身的小類,獲取內部類中的方法,從而獲得服務本身
    myBindService = ((MyBinder)service).getService();
}

//4)在自定義的繼承於Servic類的類中,添加需要的方法,在啟動Service的Activity中可以直接調用服務中的方法。
 Android Handler之消息循環的深入解析
Handler是用於操作線程內部的消息隊列的類。這有點繞,沒關系,我們慢慢的來講。前面Looper一篇講到了Looper是用於給線程創建消息隊列用的,也就是說Looper
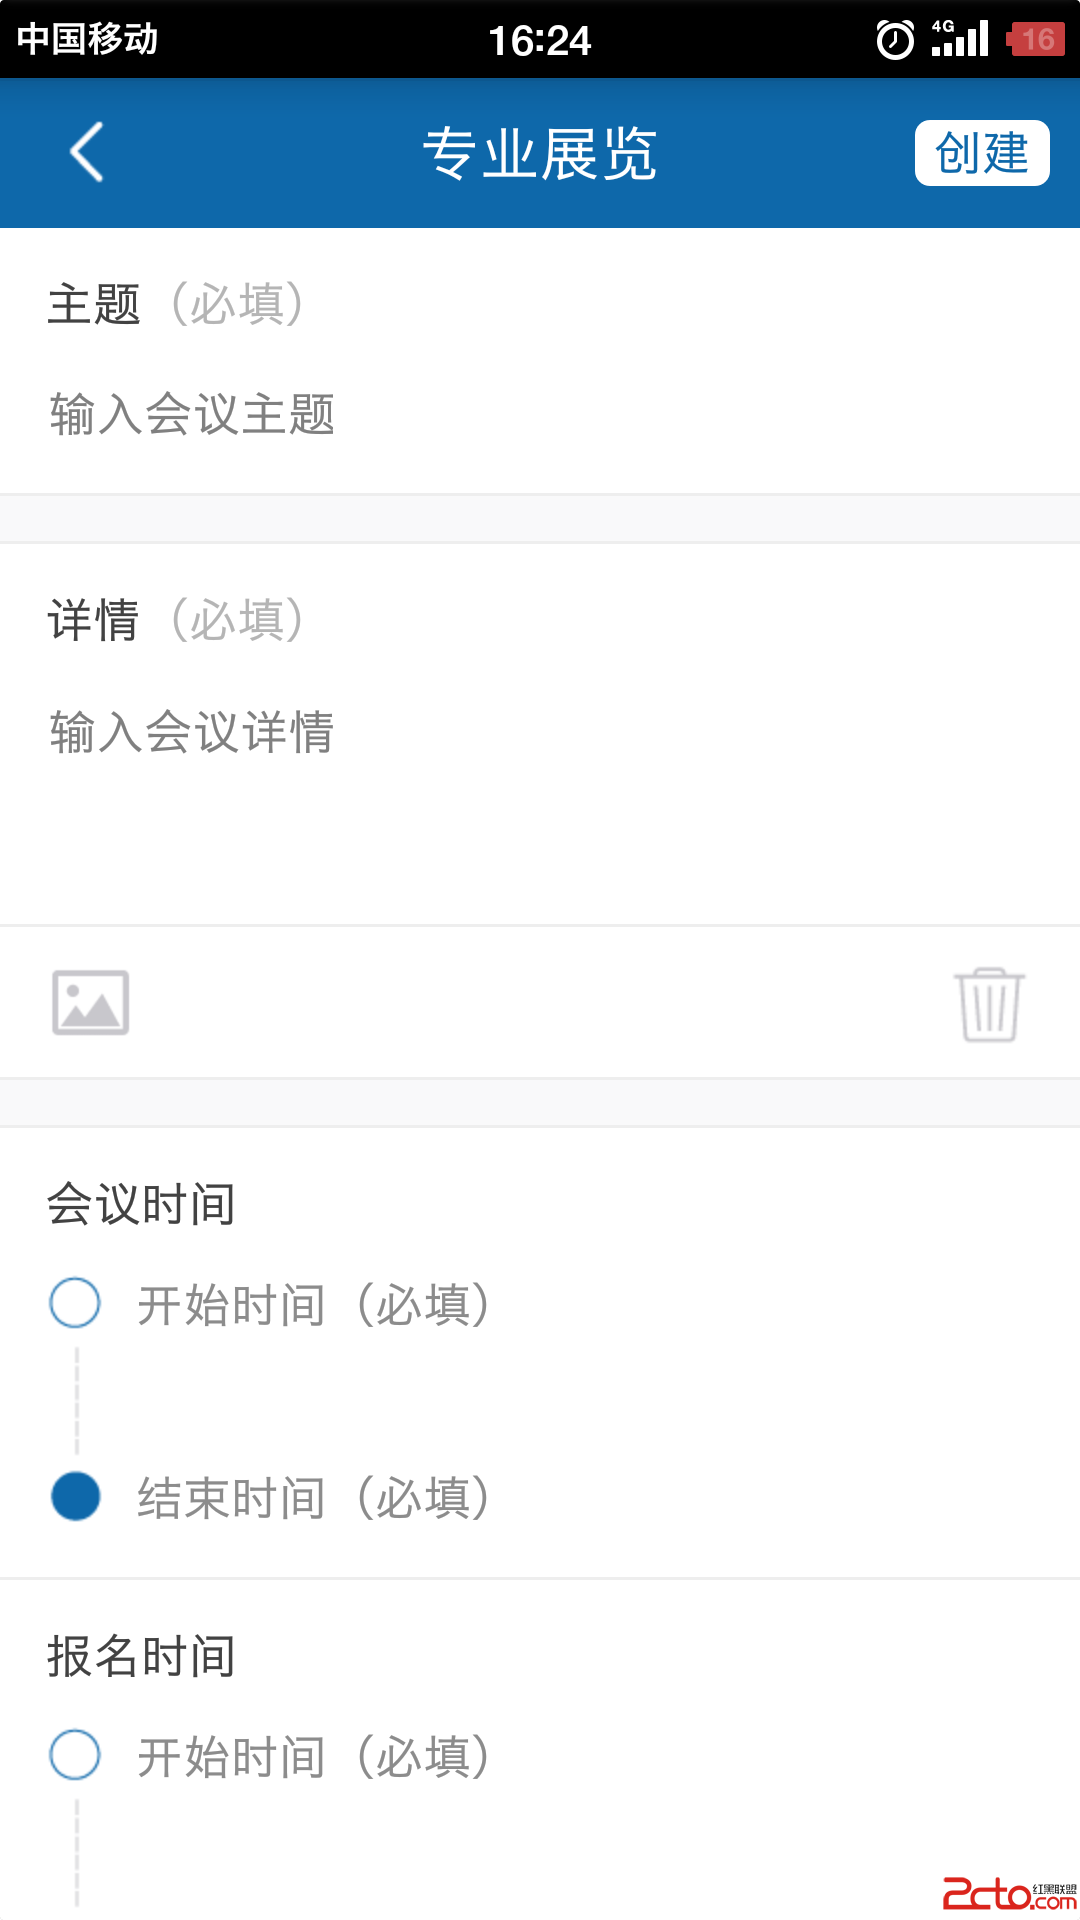 Android圖文混排(一)-實現EditText圖文混合插入上傳
前段時間做了一個Android會議管理系統,項目需求涉及到EditText的圖文混排,如圖:在上圖的”會議詳情”中,需要支持文本和圖片的混合插入,
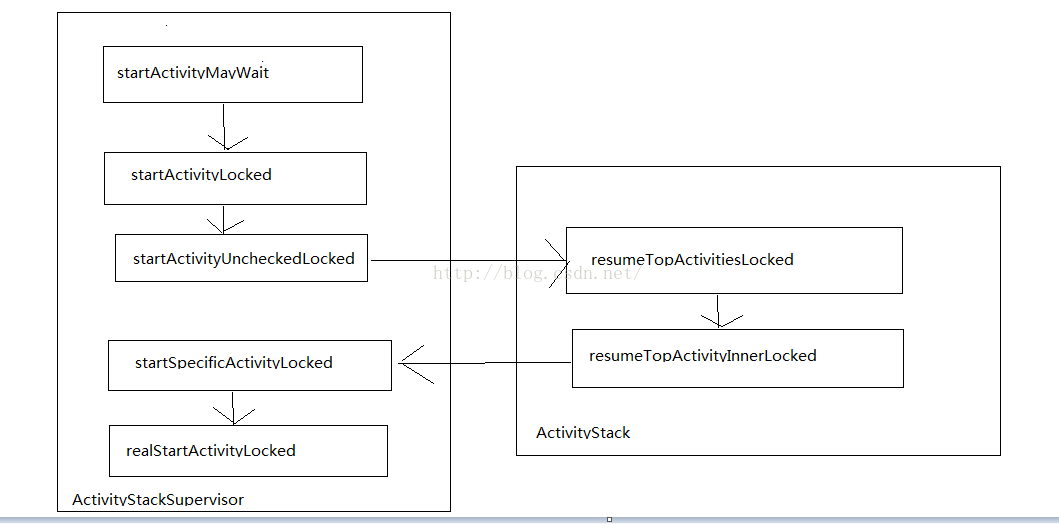 四大組件的工作過程探索(一)
四大組件的運行狀態: Android中的四大組件中除了BroadcastReceiver以外,其他三種組件都必須在Android Mainfrst中注冊。對於,Bro
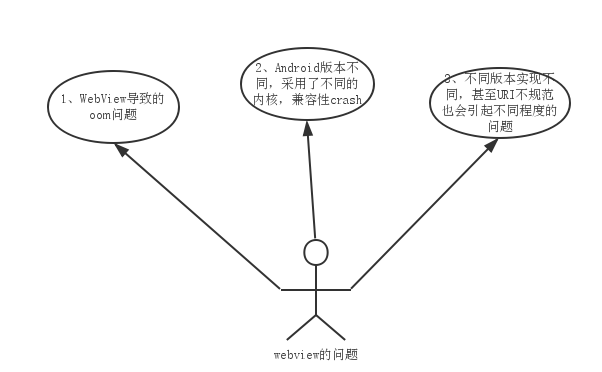 Android WebView 優化之路
隨著app的迭代,嵌入的html5界面越來越多了,Webview這個強大組件引起的問題越發的多起來,例如: 1、WebView導致的oom問題 2、Android版本