編輯:關於Android編程
一、終於到最後一個組件了。首先運行一個Demo吧,這個Demo是在網上找的,自己修改了點:
1.ContentproviderDemoActivity演示類,用戶獲取ContentResolver,對ContentProvider進行操作
public class ContentproviderDemoActivity extends AppCompatActivity implements View.OnClickListener {
    private Button bt1, bt2, bt3, bt4;
    private EditText ed1, ed2;
    private ListView list1;

    @Override
    protected void onCreate(Bundle savedInstanceState) {
        super.onCreate(savedInstanceState);
        setContentView(R.layout.activity_contentprovider);
        bt1 = (Button) findViewById(R.id.bt1);
        bt2 = (Button) findViewById(R.id.bt2);
        bt3 = (Button) findViewById(R.id.bt3);
        bt4 = (Button) findViewById(R.id.bt4);
        ed1 = (EditText) findViewById(R.id.ed1);
        ed2 = (EditText) findViewById(R.id.ed2);
        list1 = (ListView) findViewById(R.id.list);

        // 顯示所有數據
        list1.setAdapter(adapter(0));

        bt1.setOnClickListener(this);
        bt2.setOnClickListener(this);
        bt3.setOnClickListener(this);
        bt4.setOnClickListener(this);
    }

    @Override
    public void onClick(View v) {
        switch (v.getId()){
            case R.id.bt1:
                String eds1 = ed1.getText().toString();
                String eds2 = ed2.getText().toString();
                ContentValues content = new ContentValues();
                if (!eds1.equals("") && !eds2.equals("")) {
                    content.put(UserInfo.User.NAME, eds1);
                    content.put(UserInfo.User.AGE, eds2);
                    ContentproviderDemoActivity.this.getContentResolver().insert(
                            Uri.parse(UserInfo.User.uri), content);
                    Toast.makeText(ContentproviderDemoActivity.this, "數據插入成功",
                            Toast.LENGTH_LONG).show();
                    // 刷新ListView界面
                    list1.setAdapter(adapter(0));
                } else {
                    Toast.makeText(ContentproviderDemoActivity.this, "name和age不能為空",
                            Toast.LENGTH_LONG).show();
                }
                break;
            case R.id.bt2:
                String eds3 = ed1.getText().toString();
                String eds4 = ed2.getText().toString();
                if (!eds3.equals("") || !eds4.equals("")) {
                    HashMap wheres = wheres(eds3, eds4);
                    String sql = wheres.get("sql")[0];
                    String[] selectags = wheres.get("selectages");
                    ContentproviderDemoActivity.this.getContentResolver().delete(
                            Uri.parse(UserInfo.User.uri), sql, selectags);

                } else {
                    Toast.makeText(ContentproviderDemoActivity.this, "請輸入刪除條件",
                            Toast.LENGTH_LONG).show();
                }
                // 刷新ListView界面
                list1.setAdapter(adapter(0));
                break;
            case R.id.bt3:
                String eds5 = ed1.getText().toString();
                String eds6 = ed2.getText().toString();
                ContentValues values = new ContentValues();
                // 根據條件將列修改為xiong,23
                values.put(UserInfo.User.NAME, "王安東");
                values.put(UserInfo.User.AGE, "18");
                if (!eds5.equals("") || !eds6.equals("")) {
                    HashMap wheres = wheres(eds5, eds6);
                    String sql = wheres.get("sql")[0];
                    String[] selectags = wheres.get("selectages");
                    int i=ContentproviderDemoActivity.this.getContentResolver().update(
                            Uri.parse(UserInfo.User.uri), values, sql,
                            selectags);

                } else {
                    Toast.makeText(ContentproviderDemoActivity.this, "請輸入刪除條件",
                            Toast.LENGTH_LONG).show();
                }
                // 刷新ListView界面
                list1.setAdapter(adapter(0));
                break;
            case R.id.bt4:
                if (!ed1.getText().toString().equals("")
                        || !ed2.getText().toString().equals(""))
                    list1.setAdapter(adapter(1));
                else
                    list1.setAdapter(adapter(0));
                break;
            default:
                break;
        }
    }

    // 用來顯示數據
    public SimpleAdapter adapter(int i) {
        Cursor cs = ContentproviderDemoActivity.this.getContentResolver().query(
                Uri.parse(UserInfo.User.uriall), null, null, null, null);
        String eds1 = ed1.getText().toString();
        String eds2 = ed2.getText().toString();
        if (i == 1) {
            if (!eds1.equals("") || !eds2.equals("")) {
                HashMap wheres = wheres(eds1, eds2);
                String sql = wheres.get("sql")[0];
                String[] selectags = wheres.get("selectages");
                cs = ContentproviderDemoActivity.this.getContentResolver().query(
                        Uri.parse(UserInfo.User.uri), null, sql, selectags,
                        null);
            }

        }

        List> lists = new ArrayList>();
        while (cs!=null&&cs.moveToNext()) {
            Map map = new HashMap();
            map.put("name", cs.getString(0));
            map.put("age", cs.getString(1));
            lists.add(map);
        }
        SimpleAdapter simepl = new SimpleAdapter(ContentproviderDemoActivity.this, lists,
                R.layout.item, new String[] { "name", "age" }, new int[] {
                R.id.item_txt1, R.id.item_txt2 });
        return simepl;
    }

    // 用來判別條件
    public HashMap wheres(String eds1, String eds2) {
        HashMap where = new HashMap();
        if (!eds1.equals("") && !eds2.equals("")) {
            String[] sql = { UserInfo.User.NAME + "=? and " + UserInfo.User.AGE
                    + " =?" };
            String[] selectages = { eds1, eds2 };
            where.put("sql", sql);
            where.put("selectages", selectages);

        }
        if (!eds1.equals("") && eds2.equals("")) {
            String[] sql = { UserInfo.User.NAME + "=? " };
            String[] selectages = { eds1 };
            where.put("sql", sql);
            where.put("selectages", selectages);

        }
        if (eds1.equals("") && !eds2.equals("")) {
            String[] sql = { UserInfo.User.AGE + " =?" };
            String[] selectages = { eds2 };
            where.put("sql", sql);
            where.put("selectages", selectages);

        }
        return where;
    }
}
2.ContentProvider類,對數據庫進行的CRUD操作
public class FirstContentProvider extends ContentProvider {

    // UriMatcher類主要用來匹配Uri
    private static final UriMatcher uriMatcher = new UriMatcher(
            UriMatcher.NO_MATCH);
    private MySqlite mysqlite;
    static {
        // 注冊向外部程序提供的Uri
        uriMatcher.addURI(UserInfo.AUTOR, "userinfo", 1);
        uriMatcher.addURI(UserInfo.AUTOR, "userinfoall", 2);
    }
    //刪除數據
    @Override
    public int delete(Uri uri, String selection, String[] selectionArgs) {
        int number = 0;
        if (uriMatcher.match(uri) == 1) {
            // 根據條件刪除數據,並獲取刪除的行數
            number = mysqlite.getReadableDatabase().delete("user_info",
                    selection, selectionArgs);
        }
        // 通知數據已經改變
        getContext().getContentResolver().notifyChange(uri, null);
        return number;
    }

    @Override
    public String getType(Uri uri) {

        return null;
    }
    //插入數據
    @Override
    public Uri insert(Uri uri, ContentValues values) {
        String name = values.getAsString(UserInfo.User.NAME).toString();
        String age = values.getAsInteger(UserInfo.User.AGE).toString();
        String maxId = "select max(id) id from user_info";
        Cursor cursor = mysqlite.getReadableDatabase().rawQuery(maxId, null);
        cursor.moveToFirst();
        int userid = cursor.getInt(0) + 1;
        if (uriMatcher.match(uri) == 1) {

            mysqlite.getWritableDatabase().execSQL(
                    "insert into user_info values(?,?,?)",
                    new String[] { String.valueOf(userid), name, age });
        }
        return uri;
    }

    // 連接數據庫
    @Override
    public boolean onCreate() {
        mysqlite = new MySqlite(getContext(), "userinfo.db", null, 1);
        return true;
    }
    //查詢數據
    @Override
    public Cursor query(Uri uri, String[] projection, String selection,
                        String[] selectionArgs, String sortOrder) {
        SQLiteDatabase sqlite = mysqlite.getReadableDatabase();
        String str = "select name,age from user_info";
        if (uriMatcher.match(uri) == 1) {
            str += " where " + selection;
        }
        Cursor cursor = sqlite.rawQuery(str, selectionArgs);
        return cursor;
    }
    //修改數據
    @Override
    public int update(Uri uri, ContentValues values, String selection,
                      String[] selectionArgs) {
        SQLiteDatabase sqlite = mysqlite.getReadableDatabase();
        int number = 0;
        if (uriMatcher.match(uri) == 1) {
            number = sqlite.update("user_info", values, selection,
                    selectionArgs);
        }
        return number;
    }

}
3.數據庫表格的建立和更新
public class MySqlite extends SQLiteOpenHelper {

    static final String sql = "create table user_info(id int,name varchar(30),age int)";

    public MySqlite(Context context, String name, SQLiteDatabase.CursorFactory factory,
                    int version) {
        super(context, name, factory, version);
        // TODO Auto-generated constructor stub
    }

    @Override
    public void onCreate(SQLiteDatabase db) {
        //創建數據表
        db.execSQL(sql);

    }

    @Override
    public void onUpgrade(SQLiteDatabase db, int oldVersion, int newVersion) {
        // TODO Auto-generated method stub

    }

}
4.內部封裝了訪問數據庫的uri,字段等內容
public class UserInfo {

    // 獲取ContentProvider的“域名”
    public static final String AUTOR = "com.android.xiong.ConentProviderTestA.firstContentProvider";

    //定義一個靜態內部類,提供ContentProvider可操作的列
    public static final class User  {

        public  static final  String ID="id";
        public static final String NAME="name";
        public static final String AGE="age";
        //定義該content提供服務的一個Uri
        public static final String uri="content://"+AUTOR+"/userinfo";
        public static final String uriall="content://"+AUTOR+"/userinfoall";

    }

}
5.activity_contentprovider.xml代碼
6.item.xml代碼
7.AndroidManifest.xml需要增加的代碼
二、下面詳細介紹下ContentProvider:
1.ContentProvider在Android中的作用是對外提供數據,除了可以為所在應用提供數據外,還可以共享數據給其他應用,這是Android中解決應用之間數據共享的機制。通過ContentProvider我們可以對數據進行增刪改查的操作。但要處理好數據的安全性。
2.繼承ContentProvider需要重寫它的幾個方法,在代碼都有體現,都是在這裡對數據庫進行CRUD的。
3.在AndroidManifest注冊我們的ContentProvider:
介紹:
android:authorities
標識內容提供器范圍內的數據URI的授權列表,有多個授權時,要用分號來分離每個授權。為了避免沖突,授權名應該使用Java樣式的命名規則(如:com.example.provider.cartoonprovider)。通常,用ContentProvider子類名稱來設定這個屬性。
這個屬性沒有默認值,至少要指定一個授權。
android:enabled這個屬性用於指定這個內容提供器是否能夠被系統安裝。設置為true,則可以安裝;否則不能安裝。默認值是true。元素有它自己的enabled屬性,這個屬性會應用給所有的應用程序組件,包括內容提供器。和
android:exported
這個屬性用於指定該內容提供器是否能夠被其他的應用程序組件使用。如果設置為true,則可以被使用,否則不能被使用。如果設置為false,該提供器只對同名的應用程序或有相同用戶ID的應用程序有效。默認值是true。雖然能夠使用這個屬性來公開內容提供器,但是依然還要用permission屬性來限制對它的訪問。
android:grantUriPermission
這個屬性用於設定那些對內容提供的數據沒有訪問權限的訪問者,是否能夠被授予訪問的權限,這個權限是臨時性的,它會克服由readPermission、writePermission和permission屬性的設置限制。如果這個屬性設置為true,那麼權限就可以授予訪問者,否則不會授予沒有訪問權限的訪問者。如果設置為true,則權限可以臨時被授予內容提供器的任何數據。如果設置為false,則權限只能被授予
這種授權是應用程序提供了一種一次性訪問被權限所保護的數據的方法。例如,當一個e-mail包含了一個附件時,mail應用程序就可以調用適當的浏覽器來打開附件,即使這個浏覽器沒有查看所有內容提供器數據的權限。
在這樣的場景中,權限是通過激活組件的Intent對象中的FLAG_GRANT_READ_URI_PERMISSION和FLAG_GRANT_WRITE_URI_PERMISSION標記來授予的。例如,mail應用程序可以把FLAG_GRANT_READ_URI_PERMISSION標記放到傳遞給Context.startActivity()方法的Intent參數中。這樣權限就被授予了Intent對象中所指定的URI。
如果要啟用這個功能,既可以通過把這個屬性設置為true來完成,也可以通過定義
這個屬性用於定義一個代表內容提供器的圖標。它必須要引用一個包含圖片定義的可繪制資源。如果這個屬性沒有設置,那麼就會使用應用程序的元素的icon屬性值來代替。
android:initOrder
這個屬性用於定義內容提供器應該被實例化的順序,這個順序是相對與相同進程所擁有的其他內容提供器的。當內容提供器間有相互的依賴時,就需要設置這個屬性,以確保它們能夠按照其依賴的順序被創建。這個屬性值是一個簡單的整數,大的數字要被優先初始化。
Android:label
這個屬性用於給內容提供器定義一個用戶可讀的標簽。如果這個屬性沒有設置,那麼它會使用元素的label屬性值來代替。這個標簽應該引用一個字符串資源來設置,以便它能夠像其他的用戶界面中的字符串一樣被本地化。但是為了方便應用程序的開發,也能夠使用原生的字符串來設置這個屬性,但正式發布時一定要引用字符串資源。
android:multiprocess
這個屬性用於設定是否能夠在每個使用該內容提供器的客戶端進程中都創建一個內容提供器的實例,如果設置為true,這個能夠在其每個客戶端進程中創建一個實例,否則不可以。默認值是false。通常,內容提供器是在定義它的應用程序的進程中被實例化的。但是,如果這個屬性被設置為true,系統就能夠在每個要與該內容提供器進行交互的客戶端進程中創建一個內容提供器的實例,這樣就避免了進程間通信的開銷。
android:name
這個屬性用於定義內容提供器的實現類的名稱,它是ContentProvider類的一個子類。這個屬性應該使用完整的Java類名來設定(如:com.example.project.TransportationProvider)。但是也可以使用簡寫(如:.TransporttationProvider),這時系統會使用
android:permission
這個屬性用於設定客戶端在讀寫內容提供器的數據時必須要有的權限的名稱。這個屬性為同時設置讀寫權限提供了一種便利的方法。但是readPermission和writePermission屬性的優先級要比這個屬性高。如果readPermission屬性也被設置了,那麼它就會控制對內容提供器的查詢訪問。如果writePermission屬性被設置,它就會控制對內容提供器數據的修改訪問。
android:process
這個屬性用於定義內容提供器應該運行在那個進程中的進程名稱。通常,應用程序的所有組件都運行在給應用程序創建的默認進程中。它有與應用程序包相同的名稱。元素的process屬性能夠給其所有的組件設置一個不同的默認進程。但是每個組件都能夠用它們自己的process屬性來覆蓋這個默認設置,從而允許把應用程序分離到不同的多個進程中。
如果這個屬性值是用“:”開頭的,那麼在需要這個提供器的時候,系統就會給這個應用程序創建一個新的私有進程,並且對應的Activity也要運行在那個私有進程中。如果用小寫字母開頭,那麼Activity則會運行在一個用這個屬性值命名的全局進程中,它提供了對內容提供器的訪問權限。這樣就允許不同應用程序的組件能夠共享這個進程,從而減少對系統資源的使用。
android:readPermission
這個屬性用於設置查詢內容提供器的數據時,客戶端所必須要有的權限。
android:syncable
這個屬性用於設定內容提供器控制下的數據是否要與服務器上的數據進行同步,如果設置為true,則要同步,否則不需要同步。
android:writePermission
這個屬性用於設置修改內容提供器的數據時,客戶端所必須要有的權限。
有關注冊詳解參考:http://blog.csdn.net/winson_jason/article/details/81158464.Uri介紹Uri 代表了要操作的數據,Uri 主要包含了兩部分信息:1、需要操作的ContentProvider;2、對ContentProvider中的什麼數據進行操作。一個Uri由以下幾部分組成:
ContentProvider的scheme已經由Android所規定,scheme為content://。
主機名(authorities)用於唯一標識這個ContentProvider,外部調用者可以根據它找到對應的內容提供者(ContentProvider)。
路徑(Path)可以用來表示我們要操作的數據,路徑的構建應該根據業務而定,
5.UriMatcher類介紹
因為Uri代表了要操作的數據,所以我們經常需要解析Uri,並從Uri中獲取數據。對輸入的uri進匹配,如果匹配正確就返回匹配碼,匹配碼是addUri()方法傳入的第三個數。
6.ContentUris介紹
ContentUris用於操作Uri後面的ID 部分,它有兩個實用的方法
//在uri後面加上id
Uri resultUri = ContentUris.withAppendedId(uri, 10);
//返回uri的id
long personid = ContentUris.parseId(resultUri);
7.我們還可以監聽ContentProvider數據的變化
如果ContentProvider的訪問者需要知道ContentProvider中數據發生變化,可以在ContentProvider中數據發生變化時調用getContentResovler().notifyChange(uri,null)來通知注冊在此uri上的訪問者,如下:
public class PersonContentProvider extends ContentProvider {
   public Uri insert(Uri uri, ContentValues values) {
      db.insert("person", "personid", values);
      getContext().getContentResolver().notifyChange(uri, null);
   }
}
如果ContentProvider 的訪問者需要得到數據變化通知,必須使用ContentObserver對數據(數據采用Uri描述)進行監聽,當監聽到數據變化通知時,系統就會調用ContentObserver的onChange()方法,如下:
getContentResolver().registerContentObserver(Uri.parse("content://com.android.xiong.ConentProviderTestA.firstContentProvider"),
       true, new PersonObserver(new Handler()));
public class PersonObserver extends ContentObserver{
   public PersonObserver(Handler handler) {
      super(handler);
   }
   public void onChange(boolean selfChange) {
      //此處可以進行相應的業務處理
   }
}
ContentProvider的工作過程:
1.ContentProvider是一種內容共享型組件,它通過Binder向其他組件和其他應用提供數據;當ContentProvider所在的進程啟動時,ContentProvider會同時啟動並被發布到AMS中。需要說明一下,這個時候ContentProvider的onCreat要先於Application的onCreat執行,這是其他三大組件所不能的。
當應用啟動時入口是ActivityThread的main方法,然後通過binder與AMS進行通信,注意它們屬於不同的進程,最後在handleBindApplication方法中會創建ActivityThread會創建Application對象並加載ContentProvider。這個地方會先加載ContentProvider,然後再調用Application的onCreat方法。
2.訪問ContentProvider需要通過ContentResolver,ContentResolver是一個抽象類,通過Context的getContentResolver方法獲取的實際上ApplicationContentResolver
ContextWrapper的調用
@Override
    public ContentResolver getContentResolver() {
        return mBase.getContentResolver();
    }
ContextImpl的調用
@Override
    public ContentResolver getContentResolver() {
        return mContentResolver;
    }
mContentResolver就是ApplicationContentResolver,它繼承了ContentResolver,並實現了裡面的抽象方法
public final @Nullable Cursor query(@NonNull Uri uri, @Nullable String[] projection,
            @Nullable String selection, @Nullable String[] selectionArgs,
            @Nullable String sortOrder) {
        return query(uri, projection, selection, selectionArgs, sortOrder, null);
    }
public final @Nullable Cursor query(final @NonNull Uri uri, @Nullable String[] projection,
            @Nullable String selection, @Nullable String[] selectionArgs,
            @Nullable String sortOrder, @Nullable CancellationSignal cancellationSignal) {
        ......
        IContentProvider unstableProvider = acquireUnstableProvider(uri);
        ......
        IContentProvider stableProvider = null;
        Cursor qCursor = null;
        try {
            ......
            try {
                .....
            } catch (DeadObjectException e) {
                ......
                stableProvider = acquireProvider(uri);
                ......
            }
            ......
        } catch (RemoteException e) {
            ......
        } finally {
            ......
        }
    }
@Override
        protected IContentProvider acquireProvider(Context context, String auth) {
            return mMainThread.acquireProvider(context,
                    ContentProvider.getAuthorityWithoutUserId(auth),
                    resolveUserIdFromAuthority(auth), true);
        }
public final IContentProvider acquireProvider(
            Context c, String auth, int userId, boolean stable) {
        final IContentProvider provider = acquireExistingProvider(c, auth, userId, stable);
        if (provider != null) {
            return provider;
        }

        // There is a possible race here.  Another thread may try to acquire
        // the same provider at the same time.  When this happens, we want to ensure
        // that the first one wins.
        // Note that we cannot hold the lock while acquiring and installing the
        // provider since it might take a long time to run and it could also potentially
        // be re-entrant in the case where the provider is in the same process.
        IActivityManager.ContentProviderHolder holder = null;
        try {
            holder = ActivityManagerNative.getDefault().getContentProvider(
                    getApplicationThread(), auth, userId, stable);
        } catch (RemoteException ex) {
        }
        if (holder == null) {
            Slog.e(TAG, "Failed to find provider info for " + auth);
            return null;
        }

        // Install provider will increment the reference count for us, and break
        // any ties in the race.
        holder = installProvider(c, holder, holder.info,
                true /*noisy*/, holder.noReleaseNeeded, stable);
        return holder.provider;
    }
上面的代碼首先會從ActivityThread中查找是否已經存在目標ContentProvider了,如果有就直接返回,ActivityThread中通過mProviderMap來存儲已經啟動的ContentProvider對象;如果沒有啟動ContentProvider,那麼就會通過AMS啟動目標ContentProvider。
public static void main(String[] args) {
        Trace.traceBegin(Trace.TRACE_TAG_ACTIVITY_MANAGER, "ActivityThreadMain");
        SamplingProfilerIntegration.start();

        // CloseGuard defaults to true and can be quite spammy.  We
        // disable it here, but selectively enable it later (via
        // StrictMode) on debug builds, but using DropBox, not logs.
        CloseGuard.setEnabled(false);

        Environment.initForCurrentUser();

        // Set the reporter for event logging in libcore
        EventLogger.setReporter(new EventLoggingReporter());

        AndroidKeyStoreProvider.install();

        // Make sure TrustedCertificateStore looks in the right place for CA certificates
        final File configDir = Environment.getUserConfigDirectory(UserHandle.myUserId());
        TrustedCertificateStore.setDefaultUserDirectory(configDir);

        Process.setArgV0("");

        Looper.prepareMainLooper();

        ActivityThread thread = new ActivityThread();
        thread.attach(false);

        if (sMainThreadHandler == null) {
            sMainThreadHandler = thread.getHandler();
        }

        if (false) {
            Looper.myLooper().setMessageLogging(new
                    LogPrinter(Log.DEBUG, "ActivityThread"));
        }

        // End of event ActivityThreadMain.
        Trace.traceEnd(Trace.TRACE_TAG_ACTIVITY_MANAGER);
        Looper.loop();

        throw new RuntimeException("Main thread loop unexpectedly exited");
    }
attach的方法實現如下:
private void attach(boolean system) {
        ......
        if (!system) {
            ......
            final IActivityManager mgr = ActivityManagerNative.getDefault();
            try {
                mgr.attachApplication(mAppThread);
            } catch (RemoteException ex) {
                // Ignore
            }
            .......
        } else {
            ......
            }
        }
        ......
    }
這裡調用了AMS的attachApplication,並且將ApplicationThread傳遞過去
@Override
    public final void attachApplication(IApplicationThread thread) {
        synchronized (this) {
            int callingPid = Binder.getCallingPid();
            final long origId = Binder.clearCallingIdentity();
            attachApplicationLocked(thread, callingPid);
            Binder.restoreCallingIdentity(origId);
        }
    }
然後又調用了attachApplicationLocked,在attachApplicationLocked裡面又調用了ApplicationThread的bindApplication方法,這個過程是進程間的調用。
thread.bindApplication(processName, appInfo, providers, app.instrumentationClass,
                    profilerInfo, app.instrumentationArguments, app.instrumentationWatcher,
                    app.instrumentationUiAutomationConnection, testMode, enableOpenGlTrace,
                    isRestrictedBackupMode || !normalMode, app.persistent,
                    new Configuration(mConfiguration), app.compat,
                    getCommonServicesLocked(app.isolated),
                    mCoreSettingsObserver.getCoreSettingsLocked());
在bindApplication方法中,會發送一個消息給handler,如下:
public final void bindApplication(String processName, ApplicationInfo appInfo,
                List providers, ComponentName instrumentationName,
                ProfilerInfo profilerInfo, Bundle instrumentationArgs,
                IInstrumentationWatcher instrumentationWatcher,
                IUiAutomationConnection instrumentationUiConnection, int debugMode,
                boolean enableOpenGlTrace, boolean isRestrictedBackupMode, boolean persistent,
                Configuration config, CompatibilityInfo compatInfo, Map services,
                Bundle coreSettings) {

            if (services != null) {
                // Setup the service cache in the ServiceManager
                ServiceManager.initServiceCache(services);
            }

            setCoreSettings(coreSettings);

            /*
             * Two possible indications that this package could be
             * sharing its runtime with other packages:
             *
             * 1.) the sharedUserId attribute is set in the manifest,
             *     indicating a request to share a VM with other
             *     packages with the same sharedUserId.
             *
             * 2.) the application element of the manifest has an
             *     attribute specifying a non-default process name,
             *     indicating the desire to run in another packages VM.
             *
             * If sharing is enabled we do not have a unique application
             * in a process and therefore cannot rely on the package
             * name inside the runtime.
             */
            IPackageManager pm = getPackageManager();
            android.content.pm.PackageInfo pi = null;
            try {
                pi = pm.getPackageInfo(appInfo.packageName, 0, UserHandle.myUserId());
            } catch (RemoteException e) {
            }
            if (pi != null) {
                boolean sharedUserIdSet = (pi.sharedUserId != null);
                boolean processNameNotDefault =
                (pi.applicationInfo != null &&
                 !appInfo.packageName.equals(pi.applicationInfo.processName));
                boolean sharable = (sharedUserIdSet || processNameNotDefault);

                // Tell the VMRuntime about the application, unless it is shared
                // inside a process.
                if (!sharable) {
                    VMRuntime.registerAppInfo(appInfo.packageName, appInfo.dataDir,
                                            appInfo.processName);
                }
            }

            AppBindData data = new AppBindData();
            data.processName = processName;
            data.appInfo = appInfo;
            data.providers = providers;
            data.instrumentationName = instrumentationName;
            data.instrumentationArgs = instrumentationArgs;
            data.instrumentationWatcher = instrumentationWatcher;
            data.instrumentationUiAutomationConnection = instrumentationUiConnection;
            data.debugMode = debugMode;
            data.enableOpenGlTrace = enableOpenGlTrace;
            data.restrictedBackupMode = isRestrictedBackupMode;
            data.persistent = persistent;
            data.config = config;
            data.compatInfo = compatInfo;
            data.initProfilerInfo = profilerInfo;
            sendMessage(H.BIND_APPLICATION, data);
        }
收到消息後通過handleBindApplication方法進行處理:
case BIND_APPLICATION:
                    Trace.traceBegin(Trace.TRACE_TAG_ACTIVITY_MANAGER, "bindApplication");
                    AppBindData data = (AppBindData)msg.obj;
                    handleBindApplication(data);
                    Trace.traceEnd(Trace.TRACE_TAG_ACTIVITY_MANAGER);
                    break;
5.創建ContextImpl和Instrumentation
ContextImpl instrContext = ContextImpl.createAppContext(this, pi);

            try {
                java.lang.ClassLoader cl = instrContext.getClassLoader();
                mInstrumentation = (Instrumentation)
                    cl.loadClass(data.instrumentationName.getClassName()).newInstance();
            } catch (Exception e) {
                throw new RuntimeException(
                    "Unable to instantiate instrumentation "
                    + data.instrumentationName + ": " + e.toString(), e);
            }

            mInstrumentation.init(this, instrContext, appContext,
                   new ComponentName(ii.packageName, ii.name), data.instrumentationWatcher,
                   data.instrumentationUiAutomationConnection);
Application app = data.info.makeApplication(data.restrictedBackupMode, null);
            mInitialApplication = app;
7.啟動當前進程的ContentProvider並調用onCreate方法
ListinstallContentProviders方法完成了ContentProvider的啟動工作,首先遍歷ProviderInfo的列表,並且由installProvider的啟動他們,然後將已經啟動的ContentProvider發布到AMS中,AMS會把他們存儲在ProviderMap中,這樣外部調用者就可以通過AMS中獲取ContentProvider了。providers = data.providers; if (providers != null) { installContentProviders(app, providers); // For process that contains content providers, we want to // ensure that the JIT is enabled "at some point". mH.sendEmptyMessageDelayed(H.ENABLE_JIT, 10*1000); }
private void installContentProviders(
            Context context, List providers) {
        final ArrayList results =
            new ArrayList();

        for (ProviderInfo cpi : providers) {
            if (DEBUG_PROVIDER) {
                StringBuilder buf = new StringBuilder(128);
                buf.append("Pub ");
                buf.append(cpi.authority);
                buf.append(": ");
                buf.append(cpi.name);
                Log.i(TAG, buf.toString());
            }
            IActivityManager.ContentProviderHolder cph = installProvider(context, null, cpi,
                    false /*noisy*/, true /*noReleaseNeeded*/, true /*stable*/);
            if (cph != null) {
                cph.noReleaseNeeded = true;
                results.add(cph);
            }
        }

        try {
            ActivityManagerNative.getDefault().publishContentProviders(
                getApplicationThread(), results);
        } catch (RemoteException ex) {
        }
    }
下面看一下installProvider是如何啟動一個ContentProvider的。
private IActivityManager.ContentProviderHolder installProvider(Context context,
            IActivityManager.ContentProviderHolder holder, ProviderInfo info,
            boolean noisy, boolean noReleaseNeeded, boolean stable) {
        ContentProvider localProvider = null;
        IContentProvider provider;
        if (holder == null || holder.provider == null) {
            if (DEBUG_PROVIDER || noisy) {
                Slog.d(TAG, "Loading provider " + info.authority + ": "
                        + info.name);
            }
            Context c = null;
            ApplicationInfo ai = info.applicationInfo;
            if (context.getPackageName().equals(ai.packageName)) {
                c = context;
            } else if (mInitialApplication != null &&
                    mInitialApplication.getPackageName().equals(ai.packageName)) {
                c = mInitialApplication;
            } else {
                try {
                    c = context.createPackageContext(ai.packageName,
                            Context.CONTEXT_INCLUDE_CODE);
                } catch (PackageManager.NameNotFoundException e) {
                    // Ignore
                }
            }
            if (c == null) {
                Slog.w(TAG, "Unable to get context for package " +
                      ai.packageName +
                      " while loading content provider " +
                      info.name);
                return null;
            }
            try {
                final java.lang.ClassLoader cl = c.getClassLoader();
                localProvider = (ContentProvider)cl.
                    loadClass(info.name).newInstance();
                provider = localProvider.getIContentProvider();
                if (provider == null) {
                    Slog.e(TAG, "Failed to instantiate class " +
                          info.name + " from sourceDir " +
                          info.applicationInfo.sourceDir);
                    return null;
                }
                if (DEBUG_PROVIDER) Slog.v(
                    TAG, "Instantiating local provider " + info.name);
                // XXX Need to create the correct context for this provider.
                localProvider.attachInfo(c, info);
            } catch (java.lang.Exception e) {
                if (!mInstrumentation.onException(null, e)) {
                    throw new RuntimeException(
                            "Unable to get provider " + info.name
                            + ": " + e.toString(), e);
                }
                return null;
            }
        } else {
            provider = holder.provider;
            if (DEBUG_PROVIDER) Slog.v(TAG, "Installing external provider " + info.authority + ": "
                    + info.name);
        }

        IActivityManager.ContentProviderHolder retHolder;

        synchronized (mProviderMap) {
            if (DEBUG_PROVIDER) Slog.v(TAG, "Checking to add " + provider
                    + " / " + info.name);
            IBinder jBinder = provider.asBinder();
            if (localProvider != null) {
                ComponentName cname = new ComponentName(info.packageName, info.name);
                ProviderClientRecord pr = mLocalProvidersByName.get(cname);
                if (pr != null) {
                    if (DEBUG_PROVIDER) {
                        Slog.v(TAG, "installProvider: lost the race, "
                                + "using existing local provider");
                    }
                    provider = pr.mProvider;
                } else {
                    holder = new IActivityManager.ContentProviderHolder(info);
                    holder.provider = provider;
                    holder.noReleaseNeeded = true;
                    pr = installProviderAuthoritiesLocked(provider, localProvider, holder);
                    mLocalProviders.put(jBinder, pr);
                    mLocalProvidersByName.put(cname, pr);
                }
                retHolder = pr.mHolder;
            } else {
                ProviderRefCount prc = mProviderRefCountMap.get(jBinder);
                if (prc != null) {
                    if (DEBUG_PROVIDER) {
                        Slog.v(TAG, "installProvider: lost the race, updating ref count");
                    }
                    // We need to transfer our new reference to the existing
                    // ref count, releasing the old one...  but only if
                    // release is needed (that is, it is not running in the
                    // system process).
                    if (!noReleaseNeeded) {
                        incProviderRefLocked(prc, stable);
                        try {
                            ActivityManagerNative.getDefault().removeContentProvider(
                                    holder.connection, stable);
                        } catch (RemoteException e) {
                            //do nothing content provider object is dead any way
                        }
                    }
                } else {
                    ProviderClientRecord client = installProviderAuthoritiesLocked(
                            provider, localProvider, holder);
                    if (noReleaseNeeded) {
                        prc = new ProviderRefCount(holder, client, 1000, 1000);
                    } else {
                        prc = stable
                                ? new ProviderRefCount(holder, client, 1, 0)
                                : new ProviderRefCount(holder, client, 0, 1);
                    }
                    mProviderRefCountMap.put(jBinder, prc);
                }
                retHolder = prc.holder;
            }
        }

        return retHolder;
    }
private void attachInfo(Context context, ProviderInfo info, boolean testing) {
        mNoPerms = testing;

        /*
         * Only allow it to be set once, so after the content service gives
         * this to us clients can't change it.
         */
        if (mContext == null) {
            mContext = context;
            if (context != null) {
                mTransport.mAppOpsManager = (AppOpsManager) context.getSystemService(
                        Context.APP_OPS_SERVICE);
            }
            mMyUid = Process.myUid();
            if (info != null) {
                setReadPermission(info.readPermission);
                setWritePermission(info.writePermission);
                setPathPermissions(info.pathPermissions);
                mExported = info.exported;
                mSingleUser = (info.flags & ProviderInfo.FLAG_SINGLE_USER) != 0;
                setAuthorities(info.authority);
            }
            ContentProvider.this.onCreate();
        }
    }
try {
                mInstrumentation.callApplicationOnCreate(app);
            } catch (Exception e) {
                if (!mInstrumentation.onException(app, e)) {
                    throw new RuntimeException(
                        "Unable to create application " + app.getClass().getName()
                        + ": " + e.toString(), e);
                }
            }
這時,ContentProvider已經啟動成功,並且其所在進程的Application也已經啟動。然後其他應用就可以通過AMS來訪問這個ContentProvider了;這拿到的是ContentProvider的Binder類型的對象IContentProvider,因為這裡是進程間通信。
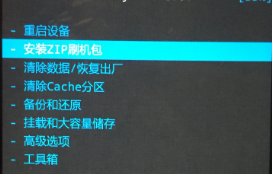 Android在linux下刷機教程
只需要下載相應的zip包,不需裝什麼手機助手。1、下載相應zip包(ROM)http://download.mokeedev.com/比如我在上述網站下的魔趣的對應機型的
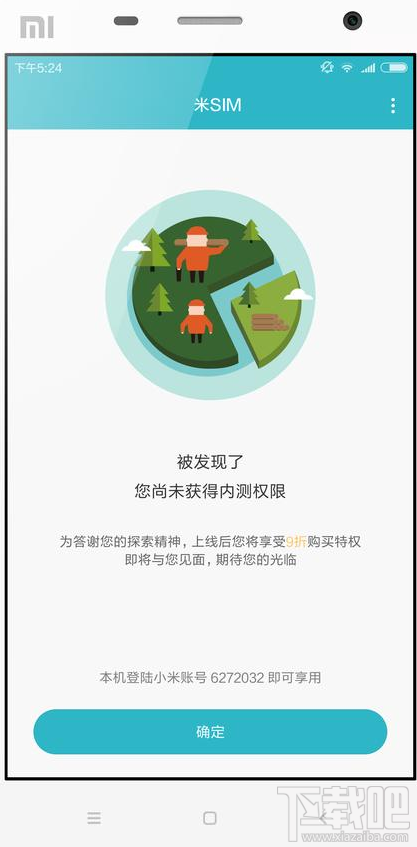 米SIM是什麼?米SIM怎麼開通?
米SIM是小米推出的一款數據流量上網的服務,只要接通了米SIM,不需要用電話卡,就能夠實現數據流量的上網,能夠讓用戶體會到一個上網的樂趣,並且還不用花費其他
 android 軟鍵盤的顯示與隱藏問題的研究
在android中,經常會和輸入法的軟件鍵盤交互。在Manifest文件裡,系統給activity的一個屬性-windowSoftInputMode來控制輸入法的顯示方式
 Android學習筆記 - BitmapFun解析
如果圖片資源是靜態的,當我們要在View上顯示圖片時,只需要簡單的將圖片賦值給ImageView就可以了,但如果需要浏覽網絡上的圖片時該如何做呢?有可能圖片很大,有可能網