編輯:關於Android編程
掃一掃這個功能我們並不陌生,微信QQ加好友掃一掃,路邊搞推廣的掃一掃,吃飯付錢掃一掃。看來這個掃一掃應用的地方還真不少啊!打開手機看了看安裝的APP,社交類APP有掃一掃,支付類的APP有掃一掃,連浏覽器都有掃一掃。看來這個掃一掃不可小視!說不定哪天在你的項目中你的boss就要你給他加個掃一掃的功能呢!對於iOS開發要想做掃一掃這個功能,並不是很難,我們需要做的就是處理二維碼(QRCode)而已。在iOS7之前需要借助第三方庫ZBar和ZXing。在iOS7以後用自帶API就能輕松搞定。不用在項目中導入臃腫的第三方庫和擔心編譯出問題了。
二維條碼是指在一維條碼的基礎上擴展出另一維具有可讀性的條碼,使用黑白矩形圖案表示二進制數據,被設備掃描後可獲取其中所包含的信息。----維基百科
首先我們來想一想具體的步驟,大概流程應該是:1.打開設備的攝像頭-->2.進行二維碼圖像捕獲-->3.獲取捕獲的圖像進行解析-->4.取得解析結果進行後續處理。這些流程需要用到AVFoundation這個庫,注意導入。
//獲取一個AVCaptureDevice對象,可以理解為打開攝像頭這樣的動作
AVCaptureDevice *device = [AVCaptureDevice defaultDeviceWithMediaType:AVMediaTypeVideo];
//獲取一個AVCaptureDeviceInput對象,將上面的'攝像頭'作為輸入設備
AVCaptureDeviceInput *input = [AVCaptureDeviceInput deviceInputWithDevice:_device error:nil];
//拍完照片以後,需要一個AVCaptureMetadataOutput對象將獲取的'圖像'輸出,以便進行對其解析
AVCaptureMetadataOutput *output = [[AVCaptureMetadataOutput alloc]init];
//獲取輸出需要設置代理,在代理方法中獲取
[output setMetadataObjectsDelegate:self queue:dispatch_get_main_queue()];
//設置輸出類型,如AVMetadataObjectTypeQRCode是二維碼類型,下面還增加了條形碼。如果掃描的是條形碼也能識別
output.metadataObjectTypes = @[AVMetadataObjectTypeEAN13Code,
                                    AVMetadataObjectTypeEAN8Code,
                                    AVMetadataObjectTypeCode128Code,
                                    AVMetadataObjectTypeQRCode];
上面完成了捕獲的設置,但是並未正在開始'掃描',要完成一次掃描的過程,需要用到AVCaptureSession這個類,這個session類把一次掃描看做一次會話,會話開始後才是正在的'掃描'開始,具體代碼如下。
AVCaptureSession *session = [[AVCaptureSession alloc]init];
[session setSessionPreset:AVCaptureSessionPresetHigh];//掃描的質量
if ([session canAddInput:input]){
   [session addInput:input];//將輸入添加到會話中
}
if ([session canAddOutput:output]){
   [session addOutput:output];//將輸出添加到會話中
}
接下來我們要做的不是立即開始會話(開始掃描),如果你現在調用會話的startRunning方法的話,你會發現屏幕是一片黑,這時由於我們還沒有設置相機的取景器的大小。設置取景器需要用到AVCaptureVideoPreviewLayer這個類。具體代碼如下:
AVCaptureVideoPreviewLayer *preview =[AVCaptureVideoPreviewLayer layerWithSession:session];
preview.videoGravity = AVLayerVideoGravityResize;
[preview setFrame:self.view.bounds];//設置取景器的frame
[self.view.layer insertSublayer:preview atIndex:0];
接下來我們就可以調用session的startRunning方法了,這時我們的掃描就真正開始了。想要獲得掃描的結果,需要實現session的代理方法- (void)captureOutput:(AVCaptureOutput *)captureOutput didOutputMetadataObjects:(NSArray *)metadataObjects fromConnection:(AVCaptureConnection *)connection,代碼如下:
- (void)captureOutput:(AVCaptureOutput *)captureOutput didOutputMetadataObjects:(NSArray *)metadataObjects fromConnection:(AVCaptureConnection *)connection
{
    [self.session stopRunning];//停止會話
    [self.preview removeFromSuperlayer];//移除取景器

    if (metadataObjects.count > 0) {
        AVMetadataMachineReadableCodeObject *obj = metadataObjects[0];
        NSString *result = obj.stringValue;//這就是掃描的結果啦
        //對結果進行處理...
    }
}
如果要做到為用戶考慮的話,還得加入照明的功能或者設置興趣區域。
設設置興趣區域使用過微信中的掃一掃的話,你應該發現在掃描界面中間有一個矩形限定框,這個框就是興趣區域了。這個興趣區域是AVCaptureMetadataOutput的rectOfInterest屬性。rectOfInterest的值的范圍都是0-1,是按比例取值而不是實際尺寸,所以設置的時候要注意的一點。還要注意rectOfInterest都是按照橫屏來計算的,所以當豎屏的情況下x軸和y軸要交換一下。代碼如下:
CGSize size = self.view.bounds.size;
CGSize transparentAreaSize = CGSizeMake(200,200);
CGRect cropRect = CGRectMake((size.width - transparentAreaSize.width)/2, (size.height - transparentAreaSize.height)/2, transparentAreaSize.width, transparentAreaSize.height);
output.rectOfInterest = CGRectMake(cropRect.origin.y/size.width,
                                              cropRect.origin.x/size.height,
                                              cropRect.size.height/size.height,
                                              cropRect.size.width/size.width);
加入照明功能
加入照明功能能讓用戶在光照條件不好的情況下順利的進行進行掃描操作,代碼如下:
AVCaptureDevice *device = [AVCaptureDevice defaultDeviceWithMediaType:AVMediaTypeVideo];
NSError *error;
if (device.hasTorch) {  // 判斷設備是否有閃光燈
    BOOL b = [device lockForConfiguration:&error];
    if (!b) {
       if (error) {
          NSLog(@"lock torch configuration error:%@", error.localizedDescription);
       }
       return;
    }
    device.torchMode = (device.torchMode == AVCaptureTorchModeOff ? AVCaptureTorchModeOn : AVCaptureTorchModeOff);
    [device unlockForConfiguration];
    }
從圖片中直接讀取二維碼的功能在iOS7上面蘋果沒有實現,不過在iOS上已經填補了這一功能。主要用到的是讀取主要用到CoreImage。
廢話不多說,直接上代碼。
+ (NSString *)scQRReaderForImage:(UIImage *)qrimage{
    CIContext *context = [CIContext contextWithOptions:nil];
    CIDetector *detector = [CIDetector detectorOfType:CIDetectorTypeQRCode context:context options:@{CIDetectorAccuracy:CIDetectorAccuracyHigh}];
    CIImage *image = [CIImage imageWithCGImage:qrimage.CGImage];
    NSArray *features = [detector featuresInImage:image];
    CIQRCodeFeature *feature = [features firstObject];
    NSString *result = feature.messageString;
    return result;
}
既然講到要從相冊獲取照片,那麼順便把從相冊獲取照片也講一下吧。
從相冊獲取照片主要用到的是UIImagePickerController,這是蘋果給我們分裝好的一個相冊選取的控制器。實現起來也是很簡單的。
- (void)readerImage{
    UIImagePickerController *photoPicker = [[UIImagePickerController alloc] init];
    photoPicker.delegate = self;
    photoPicker.sourceType = UIImagePickerControllerSourceTypePhotoLibrary;
    photoPicker.view.backgroundColor = [UIColor whiteColor];
    [self presentViewController:photoPicker animated:YES completion:NULL];
}
當我們從照片庫選擇取了照片後要帶調用UIImagePickerController的代理方法獲取選擇的照片。
- (void)imagePickerController:(UIImagePickerController *)picker didFinishPickingMediaWithInfo:(NSDictionary *)info{
    [self dismissViewControllerAnimated:YES completion:^{
      //code is here ...
    }];

    UIImage *srcImage = [info objectForKey:UIImagePickerControllerOriginalImage];
    NSString *result = [QRCScanner scQRReaderForImage:srcImage];//調用上面講過的方法對圖片中的二維碼進行處理
    [self.navigationController popViewControllerAnimated:YES];
}
生成二維碼和從圖片中讀取二維碼一樣要用到CoreImage,具體步驟如下:
- (UIImage *)makeQRCodeForString(NSString *)string{
    NSString *text = string;
    NSData *stringData = [text dataUsingEncoding: NSUTF8StringEncoding];
    //生成
    CIFilter *qrFilter = [CIFilter filterWithName:@"CIQRCodeGenerator"];
    [qrFilter setValue:stringData forKey:@"inputMessage"];
    [qrFilter setValue:@"M" forKey:@"inputCorrectionLevel"];
    //二維碼顏色
    UIColor *onColor = [UIColor redColor];
    UIColor *offColor = [UIColor blueColor];
    //上色,如果只要白底黑塊的QRCode可以跳過這一步
    CIFilter *colorFilter = [CIFilter filterWithName:@"CIFalseColor"
                                          keysAndValues:
                             @"inputImage",qrFilter.outputImage,
                             @"inputColor0",[CIColor colorWithCGColor:onColor.CGColor],
                             @"inputColor1",[CIColor colorWithCGColor:offColor.CGColor],
                             nil];
    //繪制
    CIImage *qrImage = colorFilter.outputImage;
    CGSize size = CGSizeMake(300, 300);
    CGImageRef cgImage = [[CIContext contextWithOptions:nil] createCGImage:qrImage     fromRect:qrImage.extent];
    UIGraphicsBeginImageContext(size);
    CGContextRef context = UIGraphicsGetCurrentContext();
    CGContextSetInterpolationQuality(context, kCGInterpolationNone);
    CGContextScaleCTM(context, 1.0, -1.0);//生成的QRCode就是上下顛倒的,需要翻轉一下
    CGContextDrawImage(context, CGContextGetClipBoundingBox(context), cgImage);
    UIImage *codeImage = UIGraphicsGetImageFromCurrentImageContext();
    UIGraphicsEndImageContext();
    CGImageRelease(cgImage);

    return [UIImage imageWithCIImage:qrImage];
}
當然如果你不想寫這個代碼的話,你也可以使用一個輕量級的開源代碼libqrencode來幫你實現。它的使用非常簡單,導入UIImage+MDQRCode這個擴展後,使用UIImage的類方法就可以調用了。
+ (UIImage *)mdQRCodeForString:(NSString *)qrString size:(CGFloat)size;
+ (UIImage *)mdQRCodeForString:(NSString *)qrString size:(CGFloat)size fillColor:(UIColor *)fillColor;
 Android 多線程之IntentService 完全詳解
IntentService一、IntentService概述??上一篇我們聊到了HandlerThread,本篇我們就來看看HandlerThread在IntentSer
 Android studio出現Error:Unable to tunnel through proxy. Proxy returns HTTP/1.1 400 Bad Reques的解決辦法
最近更新了一下Android Studio,在導入新項目之後出現Error:Unable to tunnel through proxy. Proxy returns &
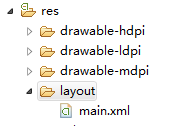 為移植到Android平台上的Cocos2d-x項目添加xml布局文件[圖文]
1.添加布局文件main.xml
