編輯:關於Android編程
??上一篇我們聊到了HandlerThread,本篇我們就來看看HandlerThread在IntentService中的應用,看本篇前建議先看看上篇的HandlerThread,有助於我們更好掌握IntentService。同樣地,我們先來看看IntentService的特點:
它本質是一種特殊的Service,繼承自Service並且本身就是一個抽象類 它可以用於在後台執行耗時的異步任務,當任務完成後會自動停止 它擁有較高的優先級,不易被系統殺死(繼承自Service的緣故),因此比較適合執行一些高優先級的異步任務 它內部通過HandlerThread和Handler實現異步操作 創建IntentService時,只需實現onHandleIntent和構造方法,onHandleIntent為異步方法,可以執行耗時操作??大概了解了IntentService的特點後,我們就來了解一下它的使用方式,先看個案例:
IntentService實現類如下:
package com.zejian.handlerlooper;

import android.app.IntentService;
import android.content.Intent;
import android.graphics.Bitmap;
import android.graphics.BitmapFactory;
import android.os.IBinder;
import android.os.Message;

import com.zejian.handlerlooper.util.LogUtils;

import java.io.BufferedInputStream;
import java.io.IOException;
import java.net.HttpURLConnection;
import java.net.URL;

/**
 * Created by zejian
 * Time 16/9/3.
 * Description:
 */
public  class MyIntentService extends IntentService {
    public static final String DOWNLOAD_URL="download_url";
    public static final String INDEX_FLAG="index_flag";
    public static UpdateUI updateUI;


    public static void setUpdateUI(UpdateUI updateUIInterface){
        updateUI=updateUIInterface;
    }

    public MyIntentService(){
        super("MyIntentService");
    }

    /**
     * 實現異步任務的方法
     * @param intent Activity傳遞過來的Intent,數據封裝在intent中
     */
    @Override
    protected void onHandleIntent(Intent intent) {

        //在子線程中進行網絡請求
        Bitmap bitmap=downloadUrlBitmap(intent.getStringExtra(DOWNLOAD_URL));
        Message msg1 = new Message();
        msg1.what = intent.getIntExtra(INDEX_FLAG,0);
        msg1.obj =bitmap;
        //通知主線程去更新UI
        if(updateUI!=null){
            updateUI.updateUI(msg1);
        }
        //mUIHandler.sendMessageDelayed(msg1,1000);

        LogUtils.e("onHandleIntent");
    }
    //----------------------重寫一下方法僅為測試------------------------------------------
    @Override
    public void onCreate() {
        LogUtils.e("onCreate");
        super.onCreate();
    }

    @Override
    public void onStart(Intent intent, int startId) {
        super.onStart(intent, startId);
        LogUtils.e("onStart");
    }

    @Override
    public int onStartCommand(Intent intent, int flags, int startId) {
        LogUtils.e("onStartCommand");
        return super.onStartCommand(intent, flags, startId);

    }

    @Override
    public void onDestroy() {
        LogUtils.e("onDestroy");
        super.onDestroy();
    }

    @Override
    public IBinder onBind(Intent intent) {
        LogUtils.e("onBind");
        return super.onBind(intent);
    }


    public interface UpdateUI{
        void updateUI(Message message);
    }


    private Bitmap downloadUrlBitmap(String urlString) {
        HttpURLConnection urlConnection = null;
        BufferedInputStream in = null;
        Bitmap bitmap=null;
        try {
            final URL url = new URL(urlString);
            urlConnection = (HttpURLConnection) url.openConnection();
            in = new BufferedInputStream(urlConnection.getInputStream(), 8 * 1024);
            bitmap= BitmapFactory.decodeStream(in);
        } catch (final IOException e) {
            e.printStackTrace();
        } finally {
            if (urlConnection != null) {
                urlConnection.disconnect();
            }
            try {
                if (in != null) {
                    in.close();
                }
            } catch (final IOException e) {
                e.printStackTrace();
            }
        }
        return bitmap;
    }

}
??通過代碼可以看出,我們繼承了IntentService,這裡有兩個方法是必須實現的,一個是構造方法,必須傳遞一個線程名稱的字符串,另外一個就是進行異步處理的方法onHandleIntent(Intent intent) 方法,其參數intent可以附帶從activity傳遞過來的數據。這裡我們的案例主要利用onHandleIntent實現異步下載圖片,然後通過回調監聽的方法把下載完的bitmap放在message中回調給Activity(當然也可以使用廣播完成),最後通過Handler去更新UI。下面再來看看Acitvity的代碼:
activity_intent_service.xml
IntentServiceActivity.java
package com.zejian.handlerlooper.util;

import android.app.Activity;
import android.content.Intent;
import android.graphics.Bitmap;
import android.os.Bundle;
import android.os.Handler;
import android.os.Message;
import android.widget.ImageView;

import com.zejian.handlerlooper.MyIntentService;
import com.zejian.handlerlooper.R;

/**
 * Created by zejian
 * Time 16/9/3.
 * Description:
 */
public class IntentServiceActivity extends Activity implements MyIntentService.UpdateUI{
    /**
     * 圖片地址集合
     */
    private String url[] = {
            "http://img.blog.csdn.net/20160903083245762",
            "http://img.blog.csdn.net/20160903083252184",
            "http://img.blog.csdn.net/20160903083257871",
            "http://img.blog.csdn.net/20160903083257871",
            "http://img.blog.csdn.net/20160903083311972",
            "http://img.blog.csdn.net/20160903083319668",
            "http://img.blog.csdn.net/20160903083326871"
    };

    private static ImageView imageView;
    private static final Handler mUIHandler = new Handler() {
        @Override
        public void handleMessage(Message msg) {
            imageView.setImageBitmap((Bitmap) msg.obj);
        }
    };

    @Override
    protected void onCreate(Bundle savedInstanceState) {
        super.onCreate(savedInstanceState);
        setContentView(R.layout.activity_intent_service);
        imageView = (ImageView) findViewById(R.id.image);

        Intent intent = new Intent(this,MyIntentService.class);
        for (int i=0;i<7;i++) {//循環啟動任務
            intent.putExtra(MyIntentService.DOWNLOAD_URL,url[i]);
            intent.putExtra(MyIntentService.INDEX_FLAG,i);
            startService(intent);
        }
        MyIntentService.setUpdateUI(this);
    }

    //必須通過Handler去更新,該方法為異步方法,不可更新UI
    @Override
    public void updateUI(Message message) {
        mUIHandler.sendMessageDelayed(message,message.what * 1000);
    }
}
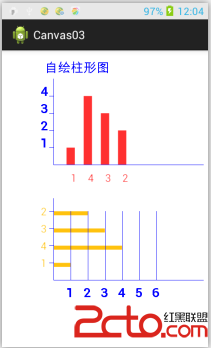
??代碼比較簡單,通過for循環多次去啟動IntentService,然後去下載圖片,注意即使我們多次啟動IntentService,但IntentService的實例只有一個,這跟傳統的Service是一樣的,最終IntentService會去調用onHandleIntent執行異步任務。這裡可能我們還會擔心for循環去啟動任務,而實例又只有一個,那麼任務會不會被覆蓋掉呢?其實是不會的,因為IntentService真正執行異步任務的是HandlerThread+Handler,每次啟動都會把下載圖片的任務添加到依附的消息隊列中,最後由HandlerThread+Handler去執行。好~,我們運行一下代碼:

每間隔一秒去更新圖片,接著我們看一組log:

??從Log可以看出onCreate只啟動了一次,而onStartCommand和onStart多次啟動,這就證實了之前所說的,啟動多次,但IntentService的實例只有一個,這跟傳統的Service是一樣的,最後任務都執行完成後,IntentService自動銷毀。以上便是IntentService德使用方式,怎麼樣,比較簡單吧。接著我們就來分析一下IntentService的源碼,其實也比較簡單只有100多行代碼。
我們先來看看IntentService的onCreate方法:
@Override
public void onCreate() {
   // TODO: It would be nice to have an option to hold a partial wakelock
   // during processing, and to have a static startService(Context, Intent)
   // method that would launch the service & hand off a wakelock.

   super.onCreate();
   HandlerThread thread = new HandlerThread("IntentService[" + mName + "]");
   thread.start();

   mServiceLooper = thread.getLooper();
   mServiceHandler = new ServiceHandler(mServiceLooper);
}
??當第一啟動IntentService時,它的onCreate方法將會被調用,其內部會去創建一個HandlerThread並啟動它,接著創建一個ServiceHandler(繼承Handler),傳入HandlerThread的Looper對象,這樣ServiceHandler就變成可以處理異步線程的執行類了(因為Looper對象與HandlerThread綁定,而HandlerThread又是一個異步線程,我們把HandlerThread持有的Looper對象傳遞給Handler後,ServiceHandler內部就持有異步線程的Looper,自然就可以執行異步任務了),那麼IntentService是怎麼啟動異步任務的呢?其實IntentService啟動後還會去調用onStartCommand方法,而onStartCommand方法又會去調用onStart方法,我們看看它們的源碼:
@Override
public void onStart(Intent intent, int startId) {
    Message msg = mServiceHandler.obtainMessage();
    msg.arg1 = startId;
    msg.obj = intent;
    mServiceHandler.sendMessage(msg);
}

/**
 * You should not override this method for your IntentService. Instead,
 * override {@link #onHandleIntent}, which the system calls when the IntentService
 * receives a start request.
 * @see android.app.Service#onStartCommand
 */
@Override
public int onStartCommand(Intent intent, int flags, int startId) {
    onStart(intent, startId);
    return mRedelivery ? START_REDELIVER_INTENT : START_NOT_STICKY;
}
??從源碼我們可以看出,在onStart方法中,IntentService通過mServiceHandler的sendMessage方法發送了一個消息,這個消息將會發送到HandlerThread中進行處理(因為HandlerThread持有Looper對象,所以其實是Looper從消息隊列中取出消息進行處理,然後調用mServiceHandler的handleMessage方法),我們看看ServiceHandler的源碼:
private final class ServiceHandler extends Handler {
   public ServiceHandler(Looper looper) {
       super(looper);
   }

   @Override
   public void handleMessage(Message msg) {
       onHandleIntent((Intent)msg.obj);
       stopSelf(msg.arg1);
   }
}
??這裡其實也說明onHandleIntent確實是一個異步處理方法(ServiceHandler本身就是一個異步處理的handler類),在onHandleIntent方法執行結束後,IntentService會通過 stopSelf(int startId)方法來嘗試停止服務。這裡采用stopSelf(int startId)而不是stopSelf()來停止服務,是因為stopSelf()會立即停止服務,而stopSelf(int startId)會等待所有消息都處理完後才終止服務。最後看看onHandleIntent方法的聲明:
protected abstract void onHandleIntent(Intent intent);
??到此我們就知道了IntentService的onHandleIntent方法是一個抽象方法,所以我們在創建IntentService時必須實現該方法,通過上面一系列的分析可知,onHandleIntent方法也是一個異步方法。這裡要注意的是如果後台任務只有一個的話,onHandleIntent執行完,服務就會銷毀,但如果後台任務有多個的話,onHandleIntent執行完最後一個任務時,服務才銷毀。最後我們要知道每次執行一個後台任務就必須啟動一次IntentService,而IntentService內部則是通過消息的方式發送給HandlerThread的,然後由Handler中的Looper來處理消息,而Looper是按順序從消息隊列中取任務的,也就是說IntentService的後台任務時順序執行的,當有多個後台任務同時存在時,這些後台任務會按外部調用的順序排隊執行,我們前面的使用案例也很好說明了這點。最後貼一下到IntentService的全部源碼,大家再次感受一下:
/*
 * Copyright (C) 2008 The Android Open Source Project
 *
 * Licensed under the Apache License, Version 2.0 (the "License");
 * you may not use this file except in compliance with the License.
 * You may obtain a copy of the License at
 *
 *      http://www.apache.org/licenses/LICENSE-2.0
 *
 * Unless required by applicable law or agreed to in writing, software
 * distributed under the License is distributed on an "AS IS" BASIS,
 * WITHOUT WARRANTIES OR CONDITIONS OF ANY KIND, either express or implied.
 * See the License for the specific language governing permissions and
 * limitations under the License.
 */

package android.app;

import android.annotation.WorkerThread;
import android.content.Intent;
import android.os.Handler;
import android.os.HandlerThread;
import android.os.IBinder;
import android.os.Looper;
import android.os.Message;

/**
 * IntentService is a base class for {@link Service}s that handle asynchronous
 * requests (expressed as {@link Intent}s) on demand.  Clients send requests
 * through {@link android.content.Context#startService(Intent)} calls; the
 * service is started as needed, handles each Intent in turn using a worker
 * thread, and stops itself when it runs out of work.
 *
 *
This "work queue processor" pattern is commonly used to offload tasks * from an application's main thread. The IntentService class exists to * simplify this pattern and take care of the mechanics. To use it, extend * IntentService and implement {@link #onHandleIntent(Intent)}. IntentService * will receive the Intents, launch a worker thread, and stop the service as * appropriate. * *

All requests are handled on a single worker thread -- they may take as * long as necessary (and will not block the application's main loop), but * only one request will be processed at a time. * * *
*
For a detailed discussion about how to create services, read the * Services developer guide.

* * * @see android.os.AsyncTask */ public abstract class IntentService extends Service { private volatile Looper mServiceLooper; private volatile ServiceHandler mServiceHandler; private String mName; private boolean mRedelivery; private final class ServiceHandler extends Handler { public ServiceHandler(Looper looper) { super(looper); } @Override public void handleMessage(Message msg) { onHandleIntent((Intent)msg.obj); stopSelf(msg.arg1); } } /** * Creates an IntentService. Invoked by your subclass's constructor. * * @param name Used to name the worker thread, important only for debugging. */ public IntentService(String name) { super(); mName = name; } /** * Sets intent redelivery preferences. Usually called from the constructor * with your preferred semantics. * *
If enabled is true, * {@link #onStartCommand(Intent, int, int)} will return * {@link Service#START_REDELIVER_INTENT}, so if this process dies before * {@link #onHandleIntent(Intent)} returns, the process will be restarted * and the intent redelivered. If multiple Intents have been sent, only * the most recent one is guaranteed to be redelivered. * *

If enabled is false (the default), * {@link #onStartCommand(Intent, int, int)} will return * {@link Service#START_NOT_STICKY}, and if the process dies, the Intent * dies along with it. */ public void setIntentRedelivery(boolean enabled) { mRedelivery = enabled; } @Override public void onCreate() { // TODO: It would be nice to have an option to hold a partial wakelock // during processing, and to have a static startService(Context, Intent) // method that would launch the service & hand off a wakelock. super.onCreate(); HandlerThread thread = new HandlerThread("IntentService[" + mName + "]"); thread.start(); mServiceLooper = thread.getLooper(); mServiceHandler = new ServiceHandler(mServiceLooper); } @Override public void onStart(Intent intent, int startId) { Message msg = mServiceHandler.obtainMessage(); msg.arg1 = startId; msg.obj = intent; mServiceHandler.sendMessage(msg); } /** * You should not override this method for your IntentService. Instead, * override {@link #onHandleIntent}, which the system calls when the IntentService * receives a start request. * @see android.app.Service#onStartCommand */ @Override public int onStartCommand(Intent intent, int flags, int startId) { onStart(intent, startId); return mRedelivery ? START_REDELIVER_INTENT : START_NOT_STICKY; } @Override public void onDestroy() { mServiceLooper.quit(); } /** * Unless you provide binding for your service, you don't need to implement this * method, because the default implementation returns null. * @see android.app.Service#onBind */ @Override public IBinder onBind(Intent intent) { return null; } /** * This method is invoked on the worker thread with a request to process. * Only one Intent is processed at a time, but the processing happens on a * worker thread that runs independently from other application logic. * So, if this code takes a long time, it will hold up other requests to * the same IntentService, but it will not hold up anything else. * When all requests have been handled, the IntentService stops itself, * so you should not call {@link #stopSelf}. * * @param intent The value passed to {@link * android.content.Context#startService(Intent)}. */ @WorkerThread protected abstract void onHandleIntent(Intent intent); }
此IntentService的源碼就分析完了,嗯,本篇完結。
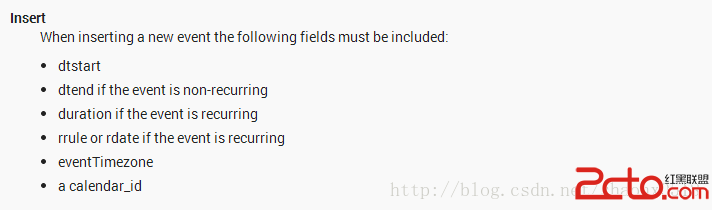 獲取與修改android自帶日歷日程
Android中的日歷,只有真機才有,模擬上是沒有的,所以測試環境一定要真機!! 因為日歷是系統自帶的,所以我們讀寫它一定要申請權限,也就是在AndroidManife
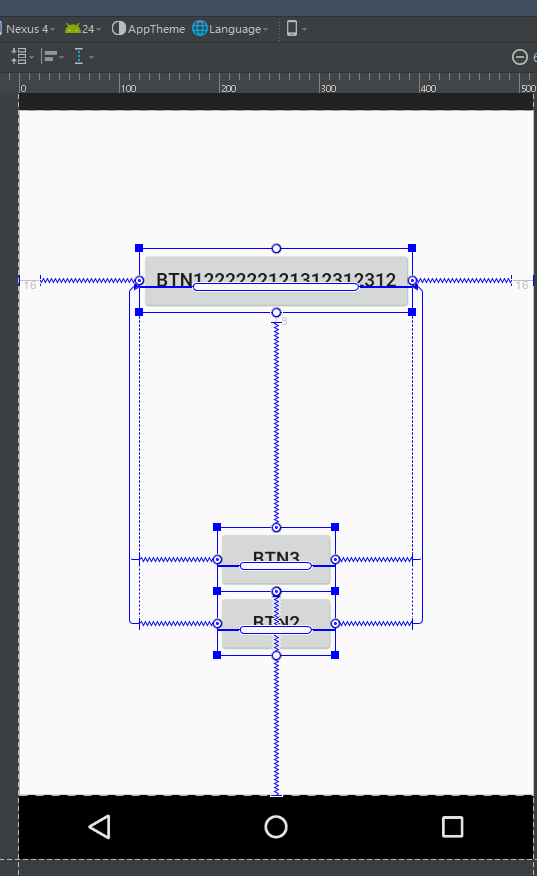 ConstraintLayout
android studio升級到stable 2.2之後,發現還有了個ConstraintLayout。看名字就是約束布局,用各種約束來確定widget的展示。該Con
 android項目之通訊錄數據庫
Android通訊錄的制作有很多種方式,網上大部分也都有了,但是用數據庫制作通訊錄的卻少之又少,這裡我就制作一個簡單的app供大家學習先看一下效果圖,在下面有提供項目源碼
 [深入剖析React Native]React 初探
認識ReactReact是一個用於構建用戶界面的JavaScript庫。 React主要用於構建UI,很多人認為React是MVC中的V,即視圖。 React起源於Fac