編輯:關於Android編程
先看一個小實現,這樣是最常見的Handler消息接收的實現方式:
主線程中:
        mHandler = new Handler() {
        @Override
        public void handleMessage(Message msg) {
            ...
        }
而子線程的實現中:
        new Thread(new Runnable() {
            @Override
            public void run() {
                Looper.prepare();
		        mHandler = new Handler() {
		        @Override
		        public void handleMessage(Message msg) {
		            ...
		        }
		        Looper.loop();
            }
        }).start();
個人更建議下面這種實現方式,只有Handler的初始化的時候有一點區別,我認為可讀性更強,原因後面我也會詳細講述的:
        new Thread(new Runnable() {
            @Override
            public void run() {
                	Looper.prepare();
		        mHandler = new Handler(Looper.myLooper()) {
		        @Override
		        public void handleMessage(Message msg) {
		            ...
		        }
		        Looper.loop();
            }
        }).start();
肯定有讀者有疑問了,為什麼在主線程的實現和在子線程的實現不太一樣呢?這個啊,說來話長,也會在後面我將慢慢道來。
了解Handler的機制前,我們得先了解Message,MessageQueue,Looper。
Message
1,這裡Message是包含消息的類,實現了Parcelable接口,可用來作為跨進稱傳輸的信息載體。
2,注意Message有一個字段next也是Message,很明顯Message肯定是用來表示一個單鏈表的其中一個節點。他也可以表示一個單鏈表隊列的頭節點,後面要講的MessageQueue是繼承的Message,MessageQueue就是作為一個隊列的頭結點,通過next一層一層把下一個Message節點取出來實現遍歷。
注意:雖然MessageQueue大家習慣交做消息隊列,它內部結構同Message,並不是真正的隊列,而是單鏈表的數據結構來存儲消息列表。
關於Message我們一定要了解obtain()和recycle()這兩個很重要的方法
obtain():
public static Message obtain() {
        synchronized (sPoolSync) {
            if (sPool != null) {
                Message m = sPool;
                sPool = m.next;
                m.next = null;
                m.flags = 0; // clear in-use flag
                sPoolSize--;
                return m;
            }
        }
        return new Message();
    }
sPool也是一個Message類,表示的是一個單鏈表隊列的頭結點,該隊列是用來存儲所有需要回收的message的地址。每次的存儲都是在recycle方法中設置。
每次我們調用obtain()來獲取一個Message的時候,會先從sPool隊列中拿出頭節點返回,並把頭結點從sPool中刪除。若sPool為null,意思是還沒有設置過任何一次Message地址作為可回收地址,這就要新初始化一個Message。設置地址可回收的好處自然也是不言而喻的,在有大量消息請求的時候,可節省的內存空間是非常可觀的。
總之呢,Message.obtain()就是一個初始化Message的過程。
另外呢,Handler在調用obtainMessage()的時候,最後也是調用了Message.obtain()來初始化一個Message,並返回實例的。
recycle()正是解釋了如何把一個廢棄的Message地址做為可回收地址。
  public void recycle() {
        if (isInUse()) {
            if (gCheckRecycle) {
                throw new IllegalStateException("This message cannot be recycled because it "
                        + "is still in use.");
            }
            return;
        }
        recycleUnchecked();
    }

    /**
     * Recycles a Message that may be in-use.
     * Used internally by the MessageQueue and Looper when disposing of queued Messages.
     */
    void recycleUnchecked() {
        // Mark the message as in use while it remains in the recycled object pool.
        // Clear out all other details.
        flags = FLAG_IN_USE;
        what = 0;
        arg1 = 0;
        arg2 = 0;
        obj = null;
        replyTo = null;
        sendingUid = -1;
        when = 0;
        target = null;
        callback = null;
        data = null;

        synchronized (sPoolSync) {
            if (sPoolSize < MAX_POOL_SIZE) {
                next = sPool;
                sPool = this;
                sPoolSize++;
            }
        }
    }
每次message.recycle()後,都會把該message添加到sPool的之前作為頭結點。不過啊,雖然說recycle是個很好的功能,但是呢,我們平時開發並不需要主動去設置message的recycle去回收利用內存空間,因為Looper.loop()檢測messageQueue的時候,每從queue中取出一個message,雖然從queue隊列中刪掉了這個message節點,但是並沒有在處理完該節點後完全放棄他,而是把他recycle了,資源回收利用的效果。
MessageQueue
MessageQueue可以理解為對Message隊列的一個管理類,它擁有一個mMessages。雖然這看來像一個數組,然而並不是,它是一個Message類,不是List。
原因是因為這個隊列並不是一個數組,是一個單鏈表的結構,每一個Message都有一個next的Message對象,用來指向下一個Message的地址。
而mMessages只是代表第一個message的地址,這樣通過mMessages就可以把所有message都一個一個取出來。
MessageQueue主要的兩個方法,一個是入隊enqueueMessage();一個是next(),next()返回下一條message,也會完成該message出隊的工作。
入隊enqueueMessage():
boolean enqueueMessage(Message msg, long when) {

        synchronized (this) {
            msg.when = when;
            Message p = mMessages;
            boolean needWake;
            if (p == null || when == 0 || when < p.when) {
                // New head, wake up the event queue if blocked.
                msg.next = p;
                mMessages = msg;
                needWake = mBlocked;
            } else {
                // Inserted within the middle of the queue.  Usually we don't have to wake
                // up the event queue unless there is a barrier at the head of the queue
                // and the message is the earliest asynchronous message in the queue.
                needWake = mBlocked && p.target == null && msg.isAsynchronous();
                Message prev;
                for (;;) {
                    prev = p;
                    p = p.next;
                    if (p == null || when < p.when) {
                        break;
                    }
                }
                msg.next = p;
                prev.next = msg;
            }
        }
        return true;
    }
這裡,msg.next=p; prev.next=msg;是個典型的入隊過程,跟下面的next是個相反的操作.
next():
Message next() {

        for (;;) {
            synchronized (this) {
                // Try to retrieve the next message.  Return if found.
                Message prevMsg = null;
                Message msg = mMessages;
                if (msg != null && msg.target == null) {
                    // Stalled by a barrier.  Find the next asynchronous message in the queue.
                    do {
                        prevMsg = msg;
                        msg = msg.next;
                    } while (msg != null && !msg.isAsynchronous());
                }
                if (msg != null) {
                    if (now < msg.when) {
                        // Next message is not ready.  Set a timeout to wake up when it is ready.
                        nextPollTimeoutMillis = (int) Math.min(msg.when - now, Integer.MAX_VALUE);
                    } else {
                        // Got a message.
                        mBlocked = false;
                        if (prevMsg != null) {
                            prevMsg.next = msg.next;
                        } else {
                            mMessages = msg.next;
                        }
                        msg.next = null;
                        if (false) Log.v("MessageQueue", "Returning message: " + msg);
                        msg.markInUse();
                        return msg;
                    }
                }
               ...
        }
    }
上述代碼中
1,在獲取到msg=msg.next,並最後把msg返回
2,prevMsg.next=msg.next,這就是刪除了msg所在節點。按道理這個時候應該回收msg這段內存的,但是這裡並沒有釋放掉這段內存,會造成內存洩漏。但是這是android源碼呀,怎麼會犯這麼低級的錯誤呢。這是因為msg被處理後,最後被設置為可回收空間了。所以,待會兒請注意看Looper中的loop()中有解釋這一現象。
Looper
looper的主要作用
1,prepare()初始化messageQueue用來存儲message隊列
2,loop()持續檢測messageQueue隊列中是否有新的message需要處理。在handler初始化的時候會綁定looper,每次loop()後發現有新的message需要處理都會發給handler的handleMessage()處理。
prepare():
    public static void prepare() {
        prepare(true);
    }

    private static void prepare(boolean quitAllowed) {
        if (sThreadLocal.get() != null) {
            throw new RuntimeException("Only one Looper may be created per thread");
        }
        sThreadLocal.set(new Looper(quitAllowed));
    }
    private Looper(boolean quitAllowed) {
        mQueue = new MessageQueue(quitAllowed);
        mRun = true;
        mThread = Thread.currentThread();
    }
Looper在prepare()時主要做了3件事:
1,初始化一個MessageQueue,這是後面用來作為一個鏈表來存儲Message隊列的。
2,設置當前線程給mThread
3,把當前Looper初始化,並通過sThreadLocal.set()設置給了sThreadLocal。後面會通過sThreadLocal.get()來獲取當前looper。這個實現其實就是在myLooper()方法中:
    public static Looper myLooper() {
        return sThreadLocal.get();
    }
ThreadLocal並不是線程,它的作用是可以在每個線程中存儲數據,這裡就是用來存儲looper的。一般來說,當某些數據是以線程為作用域並且不同線程具有不同的數據副本的時候,就可以考慮采用ThreadLocal。
不知道你有沒有注意到,Looper的構造方法在這裡是private來修飾的,換言之,你不能在其他類中以一般構造方法的形式初始化Looper,你只能通過Looper.prepare()來初始化一個looper。這裡一個線程中綁定一個looper,一個線程中也只能使用一次prepare()。如果你企圖使用或者不小心使用了2次prepare,就會拋一個RuntimeException("Only one Looper may be created per thread")。
只要你在一個線程中使用過Looper.prepare(),looper就一直綁定著這個線程,系統也未提供給開發者主動銷毀looper的操作,也就是說系統本身設計上也是不建議你主動去銷毀looper,應該是沒有這個必要,所以一般looper是伴隨著線程的生命周期存在和銷毀。那麼這個looper在這個線程中就是全局存在的,你隨時可以通過Looper.myLooper()來獲取,並且調用其一些可用的操作。
loop():
    /**
     * Run the message queue in this thread. Be sure to call
     * {@link #quit()} to end the loop.
     */
    public static void loop() {
        final Looper me = myLooper();
        if (me == null) {
            throw new RuntimeException("No Looper; Looper.prepare() wasn't called on this thread.");
        }
        final MessageQueue queue = me.mQueue;

        for (;;) {
            Message msg = queue.next(); // might block
            if (msg == null) {
                // No message indicates that the message queue is quitting.
                return;
            }
            ...
            msg.target.dispatchMessage(msg);
           ...
            msg.recycle();
        }
    }
不知道你有沒有注意到loop這裡是一個無限循環(只有在調用了Looper.quit()才可退出循環)。每一次的循環都在做以下幾個事情:
1,從MessageQueue中獲取新的Message
2,調用msg.target.dispatchMessage,而dispatchMessage()中就是調用了我們熟悉的Handler::handleMessage():
    /**
     * Handle system messages here.
     */
    public void dispatchMessage(Message msg) {
        if (msg.callback != null) {
            handleCallback(msg);
        } else {
            if (mCallback != null) {
                if (mCallback.handleMessage(msg)) {
                    return;
                }
            }
            handleMessage(msg);
        }
    }
3,msg.recycle()正是把這個已經處理過的msg從內存中置null,但是並未收回該內存空間,而是把這段已分配的內存作為可重復使用的空間。上面Message的recycle()已經詳細講述過,這裡不再累述。
Handler:
handler的主要作用:
1,發送消息sendMessage,往mLooper的messageQueue隊列中添加一條消息。Looper的loop()會檢測到新的消息,然後
2,然後到這裡了,handleMessage(Message msg)接收並處理消息
Handler使用的內部流程:
1,Looper.prepare():初始化一個Looper在LocalThread本地線程,後面可以通過Looper.myLooper()獲取該looper,其實也是從LocalThread中獲取的。
2,初始化Handler():在你指定的線程中初始化一個Handler,這裡把當前線程的looper賦給了Handler的mLooper,這裡會把剛才初始化的Looper的消息隊列屬性mQueue綁定給Handler。
    public Handler() {
        this(null, false);
    }
    public Handler(Callback callback, boolean async) {
...
        mLooper = Looper.myLooper();
...
        mQueue = mLooper.mQueue;
        mCallback = callback;
        mAsynchronous = async;
    }
因為looper在當前線程中是全局的,所以這也就解釋了為什麼Hanlder在初始化的時候命名沒有指定looper,當時他們卻用的同一個looper。如果你覺得這種代碼實現方案可讀性不好,Hanlder也提供了另外一種可讀性更好的構造函數:
    public Handler(Looper looper) {
        this(looper, null, false);
    }
    public Handler(Looper looper, Callback callback, boolean async) {
        mLooper = looper;
        mQueue = looper.mQueue;
        mCallback = callback;
        mAsynchronous = async;
    }
把looper作為輸入參數來構建Handler,如下
        new Thread(new Runnable() {
            @Override
            public void run() {
                	Looper.prepare();
		        mHandler = new Handler(Looper.myLooper()) {
		        @Override
		        public void handleMessage(Message msg) {
		            ...
		        }
		        Looper.loop();
            }
        }).start();
本質上,兩種實現方式是完全一樣的。這種看起來可讀性更好一些。這也回應了一開始我為什麼會建議使用這種方案的原因。
3,Handler::sendMessage():每次sendMessage()就會調用mQueue.enqueueMessage(msg),把新的消息加入到消息隊列mQueue。
4,Looper::loop():loop()中在處理mQueue的消息,每次處理一條message並調用handleMessage(msg)返回到Handler處理,並刪除已處理msg節點。而且loop()是一個無限循環的遍歷mQueue的過程,只有調用Looper.quit()才會停止。
5,handleMessage(Message msg):這裡是每次有接收到消息後的處理邏輯。
6,loop()一直在查找mQueue有沒有消息,所以,步驟3和步驟5一定是成對出現的,一一對應。
網上有很多文章說Handler有兩個功能,處理Message和Runnable,因為Handler提供了sendMessage(Message msg)和post(Runnable r)。關於這個觀點,我也不多說,反正不能這麼理解。
sendMessage(msg)相信大家應該很熟悉了,sendMessage被觸發後,最後會通過handleMessage(msg)回調過來,這裡不多講了。
而post(Runnable r):
    public final boolean post(Runnable r)
    {
       return  sendMessageDelayed(getPostMessage(r), 0);
    }
    private static Message getPostMessage(Runnable r) {
        Message m = Message.obtain();
        m.callback = r;
        return m;
    }
這很明顯,還是個sendMessage()。只是回調過來有一點區別,這裡你應該注意到了message的callback是不為null的吧。那麼請看回調:
    public void dispatchMessage(Message msg) {
        if (msg.callback != null) {
            handleCallback(msg);
        } else {
            if (mCallback != null) {
                if (mCallback.handleMessage(msg)) {
                    return;
                }
            }
            handleMessage(msg);
        }
    }
    private static void handleCallback(Message message) {
        message.callback.run();
    }
在callback==null的時候,是回到了我們常見了handleMessage(msg)進行回調。
但是這裡callback!=null呀,這裡就是觸發了callback.run()。
handler.post(new Runnable(){

@Override
public void run() {
//do something
});
post(Runnable r)不需要做區分,每條消息都在自己的run()裡面進行接收並處理。這裡對比起sendMessage()發送消息,到handleMessage()接收並處理消息顯得看起來好像更簡潔一些。其實不然,這種處理會導致程序中你要實現很多很多個run(),這顯然並不好看。而handleMessage()來處理消息,並通過message.what來去消息進行區分,這樣實現看起來就只有一個。
也就是看個人習慣了,個人還是推薦sendMessage()發送消息,handleMessage()處理消息。
注意:
1,一個線程只需要開啟一個looper,和一個MessageQueue。也就是說在同一個線程中,只需要執行一次prepare(),和loop()。那為什麼主線程不需要呢?
首先,拓展一下知識。很多人不知道,我們主線程其實是有一個Looper的,叫做sMainLooper,可以通過Looper.getMainLooper()獲取。所以如果你在主線程中企圖使用調用Looper.prepare()初始化一個looper就是錯誤的操作。mainLooper是在ActivityThread啟動的:
public final class ActivityThread {
    ......
    public static final void main(String[] args) {
    ......
    Looper.prepareMainLooper();
    ......
    ActivityThread thread = new ActivityThread();
    thread.attach(false);
    ......
    Looper.loop();
    ......
    thread.detach();
    ......
    }
}
2,Handler的應用場景
There are two main uses for a Handler:
(1) to schedule messages andrunnables to be executed as some point in the future; and
(2) to enqueuean action to be performed on a different thread than your own.
1),通過sendMessageDelayed()設計一個定時器,比如說:時間的表盤的開發。
    mHandler.sendMessageDelayed(msg,1000);
    Handler mHandler = new Handler() {
        @Override
        public void handleMessage(Message msg) {
            super.handleMessage(msg);
            sendMessageDelayed(msg,1000);
        }
    };
2),Handler在子線程中處理耗時操作,耗時操作處理完了後拿到數據,通過sendMessage(msg)把數據綁定到msg,並把消息發送出去,之後會在handleMessage(msg)處理,一般會在這裡更新UI。
本質上來說,Handler並不是專門用來更新UI的,它只是常被開發者用來更新UI。
        mHandler = new Handler(Looper.getMainLooper()){
            @Override
            public void handleMessage(Message msg) {
                super.handleMessage(msg);
                //...處理msg
            }
        };
        new Thread(new Runnable() {
            @Override
            public void run() {
                //耗時操作,比如說網絡數據請求
                ...
                mHandler.sendMessage(msg);
            }
        }).start();
也可以這麼理解,Handler可以供不同線程之間進行通訊,發送行為。其實這裡有一點我也是不明白的,我在子線程把調用主線程的方法,把數據作為輸入,這樣就很直觀啊,用Handler有什麼好處嗎,還要了解這麼多知識,寫這麼多代碼,請高手指教。
問題:
1,為什麼子線程不被允許訪問UI?
答:這是因為android的UI控件不是線程安全的,如果在多線程中並發訪問可能會導致UI控件處於不可預期的狀態。
2,那為什麼不對UI控件加鎖保證線程安全呢?
答:加鎖會讓UI訪問變得復雜,而且效率會降低。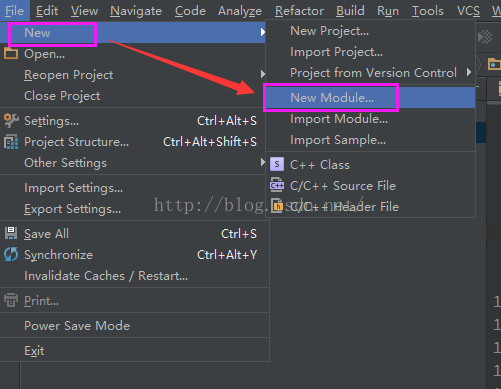 AndroidStudio新建Java項目
在運行Java測試Demo的時候,我感覺eclipse比as方便而且速度快。在AS上新建Java項目步驟如下(可能有更簡單的方法,由於是新手,見諒):1、新建一個Andr
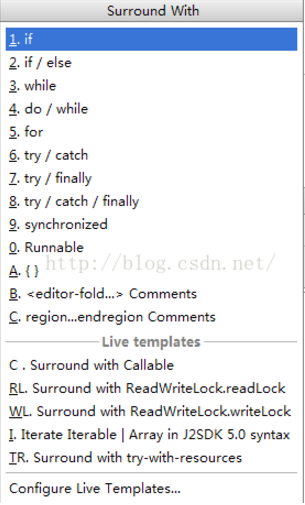 Android studio中快速try catch的快捷鍵
選擇要包裹的代碼塊,然後按下ctrl + alt + t
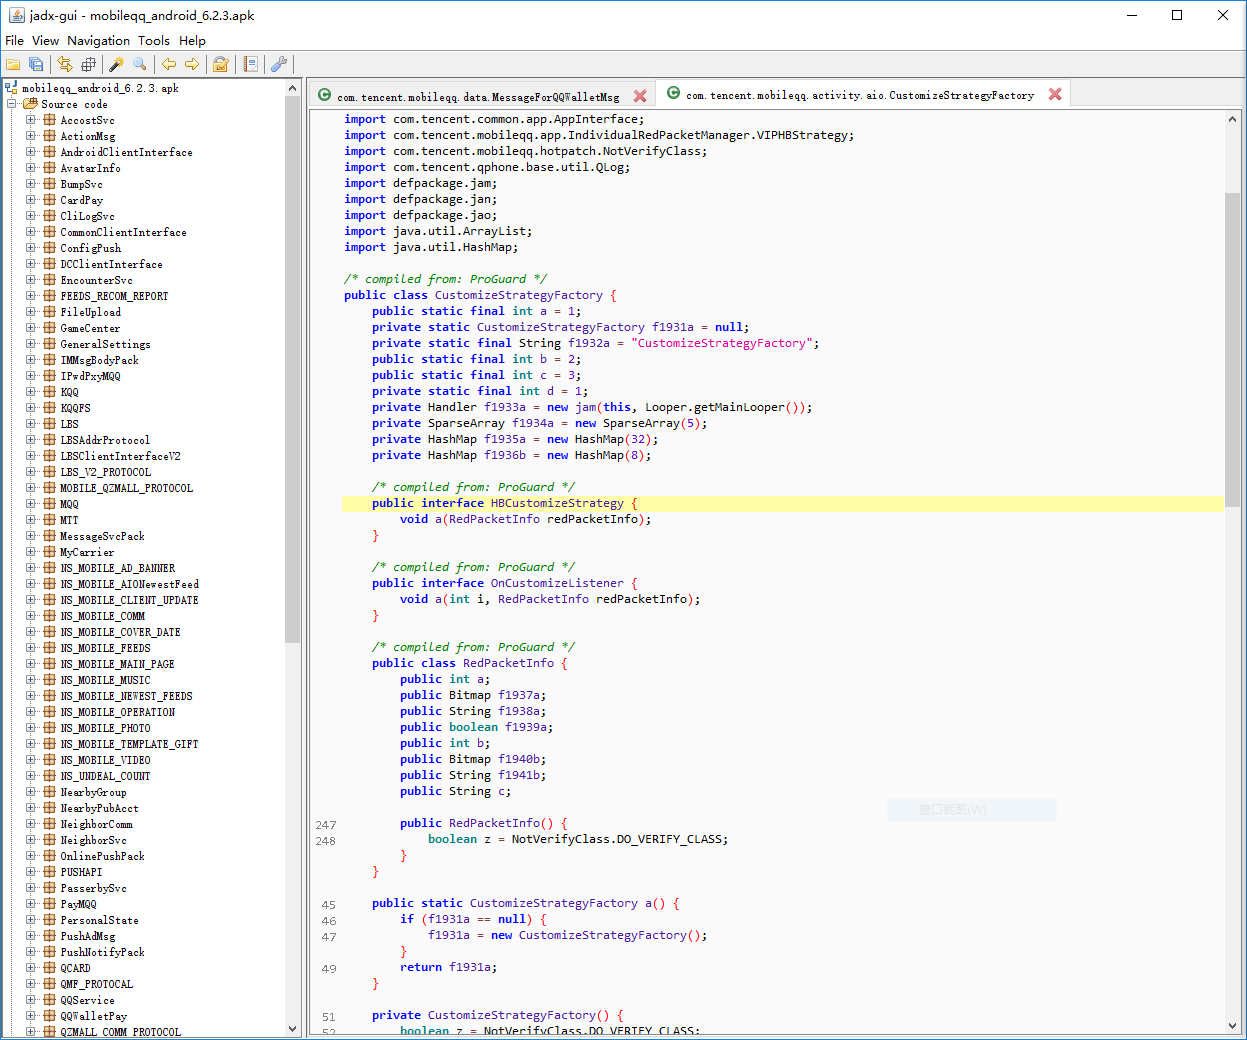 Android反編譯看看手Q口令紅包的實現原理
首篇作為開始,先講講簡單的反編譯。反編譯通常有幾種目的:互相學習、借來用用、嘿嘿(干你,又分為小干干類似微信紅包,和大干干改別人的apk幫他上架)。因為沒帶kvm回來,m
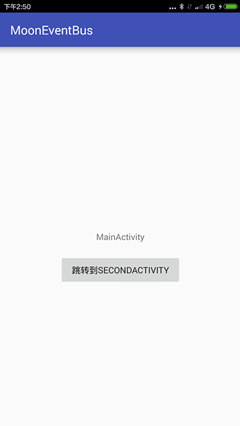 Android事件總線(一)EventBus3.0用法全解析
前言EventBus是一款針對Android優化的發布/訂閱事件總線。簡化了應用程序內各組件間、組件與後台線程間的通信。優點是開銷小,代碼更優雅,以及將發送者和接收者解耦