編輯:關於Android編程
Android應用開發中離不開Handler,而Handler實際上最終是將Message交給MessageQueue。MessageQueue是Android消息機制的核心,熟悉MessageQueue能夠幫助我們更清楚詳細地理解Android的消息機制。這篇文章會介紹MessageQueue消息的插入(enqueueMessage)和讀取(next),native層的消息機制,以及IdleHandler和SyncBarrier的邏輯原理。源碼是基於6.0。
每次使用Handler發送一個Message的時候,最終會先調用MessageQueue的enqueueMessage方法將Message方法放入到MessageQueue裡面。先看Handler的sendMessage方法,其他發送Message的內容也是一樣的:
public final boolean sendMessage(Message msg)
{
   return sendMessageDelayed(msg, 0); // 調用下面這個方法
}

public final boolean sendMessageDelayed(Message msg, long delayMillis)
{
   if (delayMillis < 0) {
       delayMillis = 0;
   }
   return sendMessageAtTime(msg, SystemClock.uptimeMillis() + delayMillis); // 調用下面方法
}

public boolean sendMessageAtTime(Message msg, long uptimeMillis) {
   MessageQueue queue = mQueue; //Handler中的mQueue
   if (queue == null) {
       RuntimeException e = new RuntimeException(
               this + " sendMessageAtTime() called with no mQueue");
       Log.w("Looper", e.getMessage(), e);
       return false;
   }
   return enqueueMessage(queue, msg, uptimeMillis); // 下面方法
}

private boolean enqueueMessage(MessageQueue queue, Message msg, long uptimeMillis) {
   msg.target = this;
   if (mAsynchronous) {
       msg.setAsynchronous(true);
   }
   return queue.enqueueMessage(msg, uptimeMillis); //調用MessageQueue的enqueueMessage
}
最後會調用Handler的mQueue的enqueueMessage方法,而Handler的mQueue是從哪裡來的呢?在Handler的構造函數中設置的,看默認的情況:
public Handler() {
   this(null, false);
}
public Handler(Callback callback, boolean async) {
   if (FIND_POTENTIAL_LEAKS) {
       final Class klass = getClass();
       if ((klass.isAnonymousClass() || klass.isMemberClass() || klass.isLocalClass()) &&
               (klass.getModifiers() & Modifier.STATIC) == 0) {
           Log.w(TAG, "The following Handler class should be static or leaks might occur: " +
               klass.getCanonicalName());
       }
   }

   mLooper = Looper.myLooper();
   if (mLooper == null) {
       throw new RuntimeException(
           "Can't create handler inside thread that has not called Looper.prepare()");
   }
   mQueue = mLooper.mQueue;
   mCallback = callback;
   mAsynchronous = async;
}
無參Handler構造函數對應的是當前調用無參Handler構造函數線程的Looper,Looper是一個ThreadLocal變量,也就是說但是每個線程獨有的,每個線程調用了Looper.prepare方法後,就會給當前線程設置一個Looper:
public static void prepare() {
   prepare(true);
}

private static void prepare(boolean quitAllowed) {
   if (sThreadLocal.get() != null) {
       throw new RuntimeException("Only one Looper may be created per thread");
   }
   sThreadLocal.set(new Looper(quitAllowed));
}
Looper裡面包含了一個MessageQueue, 在Handler的構造函數中,會將當前關聯的Looper的MessageQueue賦值給Handler的成員變量mQueue,enqueueMessage的時候就是調用該mQueue的enqueueMessage。關於Handler與Looper可以理解為每個Handler會關聯一個Looper,每個線程最多只有一個Looper。Looper創建的時候會創建一個MessageQueue,而發送消息的時候,Handler就會通過調用mQueue.enqueueMessage方法將Message放入它關聯的Looper的MessageQueue裡面。介紹了Handler與Looper,然後繼續看看MessageQueue的enqueueMessage方法:
boolean enqueueMessage(Message msg, long when) {
   if (msg.target == null) {
       throw new IllegalArgumentException("Message must have a target.");
   }
   if (msg.isInUse()) {
       throw new IllegalStateException(msg + " This message is already in use.");
   }

   synchronized (this) {
       if (mQuitting) {
           IllegalStateException e = new IllegalStateException(
                   msg.target + " sending message to a Handler on a dead thread");
           Log.w(TAG, e.getMessage(), e);
           msg.recycle();
           return false;
       }

       msg.markInUse();
       msg.when = when;
       Message p = mMessages;
       boolean needWake;
       if (p == null || when == 0 || when < p.when) {
           // New head, wake up the event queue if blocked.
           msg.next = p;
           mMessages = msg;
           needWake = mBlocked;
       } else {
           // Inserted within the middle of the queue.  Usually we don't have to wake
           // up the event queue unless there is a barrier at the head of the queue
           // and the message is the earliest asynchronous message in the queue.
           needWake = mBlocked && p.target == null && msg.isAsynchronous();
           Message prev;
           for (;;) {
               prev = p;
               p = p.next;
               if (p == null || when < p.when) {
                   break;
               }
               if (needWake && p.isAsynchronous()) {
                   needWake = false;
               }
           }
           msg.next = p; // invariant: p == prev.next
           prev.next = msg;
       }

       // We can assume mPtr != 0 because mQuitting is false.
       if (needWake) {
           nativeWake(mPtr);
       }
   }
   return true;
}
整個enqueueMessage方法的過程就是先持有MessageQueue.this鎖,然後將Message放入隊列中,放入隊列的過程是:
1. 如果隊列為空,或者當前處理的時間點為0(when的數值,when表示Message將要執行的時間點),或者當前Message需要處理的時間點先於隊列中的首節點,那麼就將Message放入隊列首部,否則進行第2步。
2. 遍歷隊列中Message,找到when比當前Message的when大的Message,將Message插入到該Message之前,如果沒找到則將Message插入到隊列最後。
3. 判斷是否需要喚醒,一般是當前隊列為空的情況下,next那邊會進入睡眠,需要enqueue這邊喚醒next函數。後面會詳細介紹
執行完後,會釋放持有的MessageQueue.this的鎖。這樣整個enqueueMessage方法算是完了,然後看看讀取Message的MessageQueue的next方法。
MessageQueue的next方法是從哪裡調用的呢?先看一個線程對Looper的標准用法是:
class LoopThread extends Thread{
public Handler mHandler;
    public void run(){
        Looper.prepare();
        mHandler = new Handler() {
              public void handleMessage(Message msg) {
                  // process incoming messages here
              }
          };
        Looper.loop();
    }
}
prepare方法我們前面已經看過了,就是初始化ThreadLocal變量Looper。loop()方法就是循環讀取MessageQueue中Message,然後處理每一個Message。我們看看Looper.loop方法源碼:
public static void loop() {
   final Looper me = myLooper();
   if (me == null) {
       throw new RuntimeException("No Looper; Looper.prepare() wasn't called on this thread.");
   }
   final MessageQueue queue = me.mQueue;

   // Make sure the identity of this thread is that of the local process,
   // and keep track of what that identity token actually is.
   Binder.clearCallingIdentity();
   final long ident = Binder.clearCallingIdentity();

   for (;;) {
       Message msg = queue.next(); // might block 此處就是next方法調用的地方
       if (msg == null) {
           // No message indicates that the message queue is quitting.
           return;
       }

       // This must be in a local variable, in case a UI event sets the logger
       Printer logging = me.mLogging;
       if (logging != null) {
           logging.println(">>>>> Dispatching to " + msg.target + " " +
                   msg.callback + ": " + msg.what);
       }

       msg.target.dispatchMessage(msg);

       if (logging != null) {
           logging.println("<<<<< Finished to " + msg.target + " " + msg.callback);
       }

       // Make sure that during the course of dispatching the
       // identity of the thread wasn't corrupted.
       final long newIdent = Binder.clearCallingIdentity();
       if (ident != newIdent) {
           Log.wtf(TAG, "Thread identity changed from 0x"
                   + Long.toHexString(ident) + " to 0x"
                   + Long.toHexString(newIdent) + " while dispatching to "
                   + msg.target.getClass().getName() + " "
                   + msg.callback + " what=" + msg.what);
       }

       msg.recycleUnchecked();
   }
}
整個loop函數大概的過程就是先調用MessageQueue.next方法獲取一個Message,然後調用Message的target的dispatchMessage方法來處理Message,Message的target就是發送這個Message的Handler。處理的過程是先看Message的callback有沒有實現,如果有,則使用調用callback的run方法,如果沒有則看Handler的callback是否為空,如果非空,則使用handler的callback的handleMessage方法來處理Message,如果為空,則調用Handler的handleMessage方法處理。
我們主要看next,從注釋來看,next方法可能會阻塞,先看next方法的源碼:
Message next() {
   // Return here if the message loop has already quit and been disposed.
   // This can happen if the application tries to restart a looper after quit
   // which is not supported.
   final long ptr = mPtr;  //mPrt是native層的MessageQueue的指針
   if (ptr == 0) {
       return null;
   }

   int pendingIdleHandlerCount = -1; // -1 only during first iteration
   int nextPollTimeoutMillis = 0;
   for (;;) {
       if (nextPollTimeoutMillis != 0) {
           Binder.flushPendingCommands();
       }

       nativePollOnce(ptr, nextPollTimeoutMillis); // jni函數

       synchronized (this) {
           // Try to retrieve the next message.  Return if found.
           final long now = SystemClock.uptimeMillis();
           Message prevMsg = null;
           Message msg = mMessages;
           if (msg != null && msg.target == null) { //target 正常情況下都不會為null,在postBarrier會出現target為null的Message
               // Stalled by a barrier.  Find the next asynchronous message in the queue.
               do {
                   prevMsg = msg;
                   msg = msg.next;
               } while (msg != null && !msg.isAsynchronous());
           }
           if (msg != null) {
               if (now < msg.when) {
                   // Next message is not ready.  Set a timeout to wake up when it is ready.
                   nextPollTimeoutMillis = (int) Math.min(msg.when - now, Integer.MAX_VALUE);
               } else {
                   // Got a message.
                   mBlocked = false;
                   if (prevMsg != null) {
                       prevMsg.next = msg.next;
                   } else {
                       mMessages = msg.next;
                   }
                   msg.next = null;
                   if (DEBUG) Log.v(TAG, "Returning message: " + msg);
                   msg.markInUse();
                   return msg;
               }
           } else {
               // No more messages.
               nextPollTimeoutMillis = -1; // 等待時間無限長
           }

           // Process the quit message now that all pending messages have been handled.
           if (mQuitting) {
               dispose();
               return null;
           }

           // If first time idle, then get the number of idlers to run.
           // Idle handles only run if the queue is empty or if the first message
           // in the queue (possibly a barrier) is due to be handled in the future.
           if (pendingIdleHandlerCount < 0
                   && (mMessages == null || now < mMessages.when)) {
               pendingIdleHandlerCount = mIdleHandlers.size();
           }
           if (pendingIdleHandlerCount <= 0) {
               // No idle handlers to run.  Loop and wait some more.
               mBlocked = true;
               continue;
           }

           if (mPendingIdleHandlers == null) {
               mPendingIdleHandlers = new IdleHandler[Math.max(pendingIdleHandlerCount, 4)];
           }
           mPendingIdleHandlers = mIdleHandlers.toArray(mPendingIdleHandlers);
       }

       // Run the idle handlers.
       // We only ever reach this code block during the first iteration.
       for (int i = 0; i < pendingIdleHandlerCount; i++) { //運行idle
           final IdleHandler idler = mPendingIdleHandlers[i];
           mPendingIdleHandlers[i] = null; // release the reference to the handler

           boolean keep = false;
           try {
               keep = idler.queueIdle();
           } catch (Throwable t) {
               Log.wtf(TAG, "IdleHandler threw exception", t);
           }

           if (!keep) {
               synchronized (this) {
                   mIdleHandlers.remove(idler);
               }
           }
       }

       // Reset the idle handler count to 0 so we do not run them again.
       pendingIdleHandlerCount = 0;

       // While calling an idle handler, a new message could have been delivered
       // so go back and look again for a pending message without waiting.
       nextPollTimeoutMillis = 0;
   }
}
整個next函數的主要是執行步驟是:
step1: 初始化操作,如果mPtr為null,則直接返回null,設置nextPollTimeoutMillis為0,進入下一步。 step2: 調用nativePollOnce, nativePollOnce有兩個參數,第一個為mPtr表示native層MessageQueue的指針,nextPollTimeoutMillis表示超時返回時間,調用這個nativePollOnce會等待wake,如果超過nextPollTimeoutMillis時間,則不管有沒有被喚醒都會返回。-1表示一直等待,0表示立刻返回。下一小節單獨介紹這個函數。 step3: 獲取隊列的頭Message(msg),如果頭Message的target為null,則查找一個異步Message來進行下一步處理。當隊列中添加了同步Barrier的時候target會為null。 step4: 判斷上一步獲取的msg是否為null,為null說明當前隊列中沒有msg,設置等待時間nextPollTimeoutMillis為-1。實際上是等待enqueueMessage的nativeWake來喚醒,執行step4。如果非null,則下一步 step5: 判斷msg的執行時間(when)是否比當前時間(now)的大,如果小,則將msg從隊列中移除,並且返回msg,結束。如果大則設置等待時間nextPollTimeoutMillis為(int) Math.min(msg.when - now, Integer.MAX_VALUE),執行時間與當前時間的差與MAX_VALUE的較小值。執行下一步 step6: 判斷是否MessageQueue是否已經取消,如果取消的話則返回null,否則下一步 step7: 運行idle Handle,idle表示當前有空閒時間的時候執行,而運行到這一步的時候,表示消息隊列處理已經是出於空閒時間了(隊列中沒有Message,或者頭部Message的執行時間(when)在當前時間之後)。如果沒有idle,則繼續step2,如果有則執行idleHandler的queueIdle方法,我們可以自己添加IdleHandler到MessageQueue裡面(addIdleHandler方法),執行完後,回到step2。需要說的時候,我們平常只是使用Message,但是實際上IdleHandler如果使用的好,應該會達到意想不到的效果,它表示MessageQueue有空閒時間的時候執行一下。然後介紹一下nativePollOnce與nativeWake方法
nativePollOnce與nativeWake是兩個jni方法,這兩個方法jni實現方法在frameworks/base/core/jni/android_os_MessageQueue.cpp。這個是MessageQueue的native層內容。native層的NativeMessageQueue初始化是在nativeInit方法:
static jlong android_os_MessageQueue_nativeInit(JNIEnv* env, jclass clazz) {
   NativeMessageQueue* nativeMessageQueue = new NativeMessageQueue();
   if (!nativeMessageQueue) {
       jniThrowRuntimeException(env, "Unable to allocate native queue");
       return 0;
   }

   nativeMessageQueue->incStrong(env);
   return reinterpret_cast(nativeMessageQueue);
}
對應的java層方法是nativeInit,在MessageQueue構造函數的時候調用:
MessageQueue(boolean quitAllowed) {
   mQuitAllowed = quitAllowed;
   mPtr = nativeInit();
}
而NativeMessageQueue的構造函數是:
NativeMessageQueue::NativeMessageQueue() :
       mPollEnv(NULL), mPollObj(NULL), mExceptionObj(NULL) {
   mLooper = Looper::getForThread();
   if (mLooper == NULL) {
       mLooper = new Looper(false);
       Looper::setForThread(mLooper);
   }
}
創建了一個native層的Looper。Looper的源碼在system/core/libutils/Looper.cpp。Looper通過epoll_create創建了一個mEpollFd作為epoll的fd,並且創建了一個mWakeEventFd,用來監聽java層的wake,同時可以通過Looper的addFd方法來添加新的fd監聽。
nativePollOnce是每次調用next方法獲取消息的時候調用的:
static void android_os_MessageQueue_nativePollOnce(JNIEnv* env, jobject obj,
       jlong ptr, jint timeoutMillis) {
   NativeMessageQueue* nativeMessageQueue = reinterpret_cast(ptr);
   nativeMessageQueue->pollOnce(env, obj, timeoutMillis);
}

void NativeMessageQueue::pollOnce(JNIEnv* env, jobject pollObj, int timeoutMillis) {
   mPollEnv = env;
   mPollObj = pollObj;
   mLooper->pollOnce(timeoutMillis);
   mPollObj = NULL;
   mPollEnv = NULL;

   if (mExceptionObj) {
       env->Throw(mExceptionObj);
       env->DeleteLocalRef(mExceptionObj);
       mExceptionObj = NULL;
   }
}
這個方法的native層方法最終會調用Looper的pollOnce:
int Looper::pollOnce(int timeoutMillis, int* outFd, int* outEvents, void** outData) {
   int result = 0;
   for (;;) {
       while (mResponseIndex < mResponses.size()) {
           const Response& response = mResponses.itemAt(mResponseIndex++);
           int ident = response.request.ident;
           if (ident >= 0) {
               int fd = response.request.fd;
               int events = response.events;
               void* data = response.request.data;
#if DEBUG_POLL_AND_WAKE
               ALOGD("%p ~ pollOnce - returning signalled identifier %d: "
                       "fd=%d, events=0x%x, data=%p",
                       this, ident, fd, events, data);
#endif
               if (outFd != NULL) *outFd = fd;
               if (outEvents != NULL) *outEvents = events;
               if (outData != NULL) *outData = data;
               return ident;
           }
       }

       if (result != 0) {
#if DEBUG_POLL_AND_WAKE
           ALOGD("%p ~ pollOnce - returning result %d", this, result);
#endif
           if (outFd != NULL) *outFd = 0;
           if (outEvents != NULL) *outEvents = 0;
           if (outData != NULL) *outData = NULL;
           return result;
       }

       result = pollInner(timeoutMillis);
   }
}

int Looper::pollInner(int timeoutMillis) {
#if DEBUG_POLL_AND_WAKE
   ALOGD("%p ~ pollOnce - waiting: timeoutMillis=%d", this, timeoutMillis);
#endif

   // Adjust the timeout based on when the next message is due.
   if (timeoutMillis != 0 && mNextMessageUptime != LLONG_MAX) {
       nsecs_t now = systemTime(SYSTEM_TIME_MONOTONIC);
       int messageTimeoutMillis = toMillisecondTimeoutDelay(now, mNextMessageUptime);
       if (messageTimeoutMillis >= 0
               && (timeoutMillis < 0 || messageTimeoutMillis < timeoutMillis)) {
           timeoutMillis = messageTimeoutMillis;
       }
#if DEBUG_POLL_AND_WAKE
       ALOGD("%p ~ pollOnce - next message in %" PRId64 "ns, adjusted timeout: timeoutMillis=%d",
               this, mNextMessageUptime - now, timeoutMillis);
#endif
   }

   // Poll.
   int result = POLL_WAKE;
   mResponses.clear();
   mResponseIndex = 0;

   // We are about to idle.
   mPolling = true;

   struct epoll_event eventItems[EPOLL_MAX_EVENTS];
   int eventCount = epoll_wait(mEpollFd, eventItems, EPOLL_MAX_EVENTS, timeoutMillis);

   // No longer idling.
   mPolling = false;

   // Acquire lock.
   mLock.lock();

   // Rebuild epoll set if needed.
   if (mEpollRebuildRequired) {
       mEpollRebuildRequired = false;
       rebuildEpollLocked();
       goto Done;
   }

   // Check for poll error.
   if (eventCount < 0) {
       if (errno == EINTR) {
           goto Done;
       }
       ALOGW("Poll failed with an unexpected error, errno=%d", errno);
       result = POLL_ERROR;
       goto Done;
   }

   // Check for poll timeout.
   if (eventCount == 0) {
#if DEBUG_POLL_AND_WAKE
       ALOGD("%p ~ pollOnce - timeout", this);
#endif
       result = POLL_TIMEOUT;
       goto Done;
   }

   // Handle all events.
#if DEBUG_POLL_AND_WAKE
   ALOGD("%p ~ pollOnce - handling events from %d fds", this, eventCount);
#endif

   for (int i = 0; i < eventCount; i++) {
       int fd = eventItems[i].data.fd;
       uint32_t epollEvents = eventItems[i].events;
       if (fd == mWakeEventFd) {
           if (epollEvents & EPOLLIN) {
               awoken();
           } else {
               ALOGW("Ignoring unexpected epoll events 0x%x on wake event fd.", epollEvents);
           }
       } else {
           ssize_t requestIndex = mRequests.indexOfKey(fd);
           if (requestIndex >= 0) {
               int events = 0;
               if (epollEvents & EPOLLIN) events |= EVENT_INPUT;
               if (epollEvents & EPOLLOUT) events |= EVENT_OUTPUT;
               if (epollEvents & EPOLLERR) events |= EVENT_ERROR;
               if (epollEvents & EPOLLHUP) events |= EVENT_HANGUP;
               pushResponse(events, mRequests.valueAt(requestIndex));
           } else {
               ALOGW("Ignoring unexpected epoll events 0x%x on fd %d that is "
                       "no longer registered.", epollEvents, fd);
           }
       }
   }
Done: ;

   // Invoke pending message callbacks.
   mNextMessageUptime = LLONG_MAX;
   while (mMessageEnvelopes.size() != 0) {
       nsecs_t now = systemTime(SYSTEM_TIME_MONOTONIC);
       const MessageEnvelope& messageEnvelope = mMessageEnvelopes.itemAt(0);
       if (messageEnvelope.uptime <= now) {
           // Remove the envelope from the list.
           // We keep a strong reference to the handler until the call to handleMessage
           // finishes.  Then we drop it so that the handler can be deleted *before*
           // we reacquire our lock.
           { // obtain handler
               sp handler = messageEnvelope.handler;
               Message message = messageEnvelope.message;
               mMessageEnvelopes.removeAt(0);
               mSendingMessage = true;
               mLock.unlock();

#if DEBUG_POLL_AND_WAKE || DEBUG_CALLBACKS
               ALOGD("%p ~ pollOnce - sending message: handler=%p, what=%d",
                       this, handler.get(), message.what);
#endif
               handler->handleMessage(message);
           } // release handler

           mLock.lock();
           mSendingMessage = false;
           result = POLL_CALLBACK;
       } else {
           // The last message left at the head of the queue determines the next wakeup time.
           mNextMessageUptime = messageEnvelope.uptime;
           break;
       }
   }

   // Release lock.
   mLock.unlock();

   // Invoke all response callbacks.
   for (size_t i = 0; i < mResponses.size(); i++) {
       Response& response = mResponses.editItemAt(i);
       if (response.request.ident == POLL_CALLBACK) {
           int fd = response.request.fd;
           int events = response.events;
           void* data = response.request.data;
#if DEBUG_POLL_AND_WAKE || DEBUG_CALLBACKS
           ALOGD("%p ~ pollOnce - invoking fd event callback %p: fd=%d, events=0x%x, data=%p",
                   this, response.request.callback.get(), fd, events, data);
#endif
           // Invoke the callback.  Note that the file descriptor may be closed by
           // the callback (and potentially even reused) before the function returns so
           // we need to be a little careful when removing the file descriptor afterwards.
           int callbackResult = response.request.callback->handleEvent(fd, events, data);
           if (callbackResult == 0) {
               removeFd(fd, response.request.seq);
           }

           // Clear the callback reference in the response structure promptly because we
           // will not clear the response vector itself until the next poll.
           response.request.callback.clear();
           result = POLL_CALLBACK;
       }
   }
   return result;
}
這個方法超長,但實際上Looper的pollOnce方法主要有5步:
調用epoll_wait方法等待所監聽的fd的寫入,其方法原型如下:int epoll_wait(int epfd, struct epoll_event * events, intmaxevents, int timeout)
調用的方法參數為:
int eventCount = epoll_wait(mEpollFd, eventItems, EPOLL_MAX_EVENTS, timeoutMillis);
eventItems裡面就包含了mWakeEvent和通過addFd添加fd時加入的Event。該方法會阻塞,當timeoutMillis(對應java層的nextPollTimeoutMillis)到了時間,該方法會返回,或者eventItems有事件來了,該方法會返回。返回之後就是干下一件事
2. 判斷有沒有event,因為可能是timeoutMillis到了返回的,如果沒有直接進行4.
3. 讀取eventItems的內容,如果eventItem的fd是mWakeEventFd,則調用awoken方法,讀取Looper.wake寫入的內容,如果是其他的fd,則使用pushResponse來讀取,並且將內容放入Response當中。
4. 處理NativeMessageQueue的消息,這些消息是native層的消息
5. 處理pushResponse寫入的內容。
裡面主要是干了三件事處理wakeEventFd的輸入內容,其他fd的輸入內容,以及NativeMessageQueue裡面的Message。
實際上最後就是調用了Looper的wake方法:
//android_os_MessageQueue.cpp
static void android_os_MessageQueue_nativeWake(JNIEnv* env, jclass clazz, jlong ptr) {
   NativeMessageQueue* nativeMessageQueue = reinterpret_cast(ptr);
   nativeMessageQueue->wake();
}
void NativeMessageQueue::wake() {
   mLooper->wake();
}

//Looper.cpp
void Looper::wake() {
#if DEBUG_POLL_AND_WAKE
   ALOGD("%p ~ wake", this);
#endif

   uint64_t inc = 1;
   ssize_t nWrite = TEMP_FAILURE_RETRY(write(mWakeEventFd, &inc, sizeof(uint64_t)));
   if (nWrite != sizeof(uint64_t)) {
       if (errno != EAGAIN) {
           ALOGW("Could not write wake signal, errno=%d", errno);
       }
   }
}
這樣native層的消息隊列就算是完了。
我們在next方法裡面看到有這麼一段代碼
if (msg != null && msg.target == null) { //target 正常情況下都不會為null,在postBarrier會出現target為null的Message
               // Stalled by a barrier.  Find the next asynchronous message in the queue.
               do {
                   prevMsg = msg;
                   msg = msg.next;
               } while (msg != null && !msg.isAsynchronous());
           }
什麼時候msg.target會為null呢?有sync barrier消息的時候,實際上msg.target為null表示sync barrier(同步消息屏障)。MessageQueue有一個postSyncBarrier方法:
public int postSyncBarrier() {
   return postSyncBarrier(SystemClock.uptimeMillis());
}

private int postSyncBarrier(long when) {
   // Enqueue a new sync barrier token.
   // We don't need to wake the queue because the purpose of a barrier is to stall it.
   synchronized (this) {
       final int token = mNextBarrierToken++;
       final Message msg = Message.obtain();
       msg.markInUse();
       msg.when = when;
       msg.arg1 = token;

       Message prev = null;
       Message p = mMessages;
       if (when != 0) {
           while (p != null && p.when <= when) {
               prev = p;
               p = p.next;
           }
       }
       if (prev != null) { // invariant: p == prev.next
           msg.next = p;
           prev.next = msg;
       } else {
           msg.next = p;
           mMessages = msg;
       }
       return token;
   }
}
對應有removeSyncBarrier方法:
public void removeSyncBarrier(int token) {
   // Remove a sync barrier token from the queue.
   // If the queue is no longer stalled by a barrier then wake it.
   synchronized (this) {
       Message prev = null;
       Message p = mMessages;
       while (p != null && (p.target != null || p.arg1 != token)) {
           prev = p;
           p = p.next;
       }
       if (p == null) {
           throw new IllegalStateException("The specified message queue synchronization "
                   + " barrier token has not been posted or has already been removed.");
       }
       final boolean needWake;
       if (prev != null) {
           prev.next = p.next;
           needWake = false;
       } else {
           mMessages = p.next;
           needWake = mMessages == null || mMessages.target != null;
       }
       p.recycleUnchecked();

       // If the loop is quitting then it is already awake.
       // We can assume mPtr != 0 when mQuitting is false.
       if (needWake && !mQuitting) {
           nativeWake(mPtr);  // 需要喚醒,因為隊首元素是SyncBarrier,隊列中有消息但是沒有異步消息的時候,next方法同樣會阻塞等待。
       }
   }
}
看next方法的源碼,每次消息隊列中有barrier的時候,next會尋找隊列中的異步消息來處理。如果沒有異步消息,設置nextPollTimeoutMillis = -1,進入阻塞等待新消息的到來。異步消息主要是系統發送的,而系統中的異步消息主要有觸摸事件,按鍵事件的消息。系統中調用postSyncBarrier和removeSyncBarrier主要實在ViewRootImpl的scheduleTraversals和unscheduleTraversals,以及doTraversals方法中。從源碼可以猜到每次調用postSyncBarrier後都會調用removeSyncBarrier,不然同步消息就沒法執行了(看next源碼理解這一點)。可以看一下scheduleTraversal方法:
//ViewRootImpl.java
void scheduleTraversals() {
   if (!mTraversalScheduled) {
       mTraversalScheduled = true;
       mTraversalBarrier = mHandler.getLooper().getQueue().postSyncBarrier();
       mChoreographer.postCallback(
               Choreographer.CALLBACK_TRAVERSAL, mTraversalRunnable, null);
       if (!mUnbufferedInputDispatch) {
           scheduleConsumeBatchedInput();
       }
       notifyRendererOfFramePending();
       pokeDrawLockIfNeeded();
   }
}
實際上MessageQueue的源碼一直在變化的,2.3才加入了native層的Message,在4.0.1還沒有SyncBarrier,4.1才開始加入SyncBarrier的,而且MessageQueue沒有postSyncBarrier方法,只有enqueueSyncBarrier方法,Looper裡面有個postSyncBarrier方法。
前面介紹了一下每個版本的特點,我想介紹一種SyncBarrier的意義,我們介紹了使用SyncBarrier主要是ViewRootImpl中的scheduleTraversal的時候,那是跟UI事件相關的,像派發消息會通過發送Message發到主線程:
public void dispatchInputEvent(InputEvent event, InputEventReceiver receiver) {
   SomeArgs args = SomeArgs.obtain();
   args.arg1 = event;
   args.arg2 = receiver;
   Message msg = mHandler.obtainMessage(MSG_DISPATCH_INPUT_EVENT, args);
   msg.setAsynchronous(true);
   mHandler.sendMessage(msg);
}
注意它這裡就是使用的異步Message,使用了msg.setAsyncronous(true)。 而SyncBarrier有什麼用處呢?我們剛剛介紹的時候,當消息隊列的第一個Message的target的時候,表示它是一個SyncBarrier,它會阻攔同步消息,而選擇隊列中第一個異步消息處理,如果沒有則會阻塞。這表示什麼呢?這是表示第一個Message是SyncBarrier的時候,會只處理異步消息。而我們前面介紹了InputEvent的時候,它就是異步消息,在有SyncBarrier的時候就會被優先處理。所以在調用了scheduleTraversal的時候,就會只處理觸摸事件這些消息了,保證用戶體驗。保證了觸摸事件及時處理,實際上這也能減少ANR。如果這個時候MessageQueue中有很多Message,也能夠及時處理那些觸摸事件的Message了。
總結MessageQueue是Android消息消息機制的內部核心,理解好MessageQueue更能理解好Android應用層的消息邏輯。另外MessageQueue的代碼一直在不斷地變化,對照不同版本的代碼,真的能領略代碼改變時的目的,從演變中學習。
 【android】仿360手機衛士的簡易設計思路及源碼
筆者最近一直忙於滿廣州的跑,實習好難找好難找,博客也是有點久沒去更新。仿360手機衛士的實現的目的更多的是出於對常用知識點的一個鞏固吧,比較適合像我這種接觸沒多久的學習者
 Android 簡易手勢密碼開源庫詳解
簡介本文介紹一個Android手勢密碼開源庫的使用及實現的詳細過程,該開源庫主要實現以下幾個功能: 支持手勢密碼的繪制,並支持密碼保存功能,解鎖時自動比對密碼給出結果
 AndroidStudio的debug功能詳解
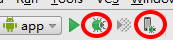
運行debug模式 1. 進入debug- 點擊圖中紅色圓圈圈起的左邊綠色按鈕,運行app的debug模式,快捷鍵Shift+F9- 點擊圖中紅色圓圈圈起的右邊按鈕,可以
 Android通過json向MySQL中讀寫數據的方法詳解【寫入篇】
本文實例講述了Android通過json向MySQL中寫入數據的方法。分享給大家供大家參考,具體如下:先說一下如何通過json將Android程序中的數據上傳到MySQL