相關的鏈接:
Android 底部菜單欄實現
最近剛看完ViewPager,就想到做這樣一個Demo,當然也參考了高手們的實例裡邊的網格菜單,開始我打算用自定義的imgBtn,但是發現放在pager選項卡中不好排版,所以最好選了GridView,簡單實用
一、先主界面xml activity_main.xml
復制代碼 代碼如下:
<RelativeLayout xmlns:android="http://schemas.android.com/apk/res/android"
xmlns:tools="http://schemas.android.com/tools"
android:layout_width="match_parent"
android:layout_height="match_parent"
android:background="@drawable/bg"
tools:context=".MainActivity" >
<Button
android:id="@+id/btn_menu"
android:layout_width="wrap_content"
android:layout_height="wrap_content"
android:layout_alignParentTop="true"
android:layout_centerHorizontal="true"
android:text="show/hide Menu" />
<LinearLayout
android:layout_width="match_parent"
android:layout_height="wrap_content"
android:layout_below="@+id/btn_menu"
android:gravity="center"
android:orientation="horizontal" >
<com.example.myMenu.MyImgBtn
android:id="@+id/main_btn1"
android:layout_width="0dp"
android:layout_height="wrap_content"
android:layout_margin="15dp"
android:layout_weight="1" />
<com.example.myMenu.MyImgBtn
android:id="@+id/main_btn2"
android:layout_width="0dp"
android:layout_height="wrap_content"
android:layout_margin="15dp"
android:layout_weight="1" />
<com.example.myMenu.MyImgBtn
android:id="@+id/main_btn3"
android:layout_width="0dp"
android:layout_height="wrap_content"
android:layout_margin="15dp"
android:layout_weight="1" />
<com.example.myMenu.MyImgBtn
android:id="@+id/main_btn4"
android:layout_width="0dp"
android:layout_height="wrap_content"
android:layout_margin="15dp"
android:layout_weight="1" />
</LinearLayout>
<RelativeLayout
android:id="@+id/layout_menu"
android:layout_width="match_parent"
android:layout_height="200dp"
android:layout_alignParentBottom="true" >
<LinearLayout
android:id="@+id/menu"
android:layout_width="match_parent"
android:layout_height="40dp"
android:background="#dd000000"
android:gravity="center" >
<TextView
android:id="@+id/tv_main"
android:layout_width="0dp"
android:layout_height="wrap_content"
android:layout_weight="1"
android:gravity="center"
android:text="常用"
android:textColor="#ffffffff" />
<TextView
android:id="@+id/tv_utils"
android:layout_width="0dp"
android:layout_height="wrap_content"
android:layout_weight="1"
android:gravity="center"
android:text="工具"
android:textColor="#ffffffff" />
<TextView
android:id="@+id/tv_set"
android:layout_width="0dp"
android:layout_height="wrap_content"
android:layout_weight="1"
android:gravity="center"
android:text="設置"
android:textColor="#ffffffff" />
</LinearLayout>
<LinearLayout
android:id="@+id/layout_anim"
android:layout_width="fill_parent"
android:layout_height="wrap_content"
android:layout_below="@+id/menu"
android:background="#eeff8c00" >
<ImageView
android:id="@+id/iv_cursor"
android:layout_width="fill_parent"
android:layout_height="wrap_content"
android:scaleType="matrix"
android:src="@drawable/img_cursor" />
</LinearLayout>
<android.support.v4.view.ViewPager
android:id="@+id/myPager"
android:layout_width="wrap_content"
android:layout_height="wrap_content"
android:layout_below="@+id/layout_anim"
android:flipInterval="30"
android:persistentDrawingCache="animation" />
</RelativeLayout>
</RelativeLayout>
ViewPager中的三個選項卡xml view_main.xml,view_set.xml,view_utils.xml
復制代碼 代碼如下:
<?xml version="1.0" encoding="utf-8"?>
<LinearLayout xmlns:android="http://schemas.android.com/apk/res/android"
android:layout_width="match_parent"
android:layout_height="match_parent"
android:background="#77ff0000"
android:orientation="vertical" >
<GridView
android:id="@+id/myGridView"
android:layout_width="match_parent"
android:layout_height="match_parent"
android:numColumns="4"
android:layout_margin="10dp"
android:horizontalSpacing="20dp"
android:gravity="center"
android:verticalSpacing="20dp"
></GridView>
</LinearLayout>
這是選項卡一view_main.xml,後面的兩個和這個一樣,就不發了
最後就是還有一個GirdView的適配器xml
復制代碼 代碼如下:
<?xml version="1.0" encoding="utf-8"?>
<RelativeLayout xmlns:android="http://schemas.android.com/apk/res/android"
xmlns:tools="http://schemas.android.com/tools"
android:layout_width="match_parent"
android:layout_height="match_parent" >
<ImageView
android:id="@+id/imgbtn_img"
android:layout_width="wrap_content"
android:layout_height="wrap_content"
android:layout_centerHorizontal="true"
/>
<TextView
android:id="@+id/imgbtn_text"
android:layout_width="wrap_content"
android:layout_height="wrap_content"
android:layout_below="@+id/imgbtn_img"
android:layout_centerHorizontal="true"
android:text="Text"
android:textColor="#ff0000ff"
android:textSize="10sp" />
</RelativeLayout>
xml布局部分就這麼多了
 android 仿微信聊天界面
 360 Q5/plus參數對比 360安全手機配置說明
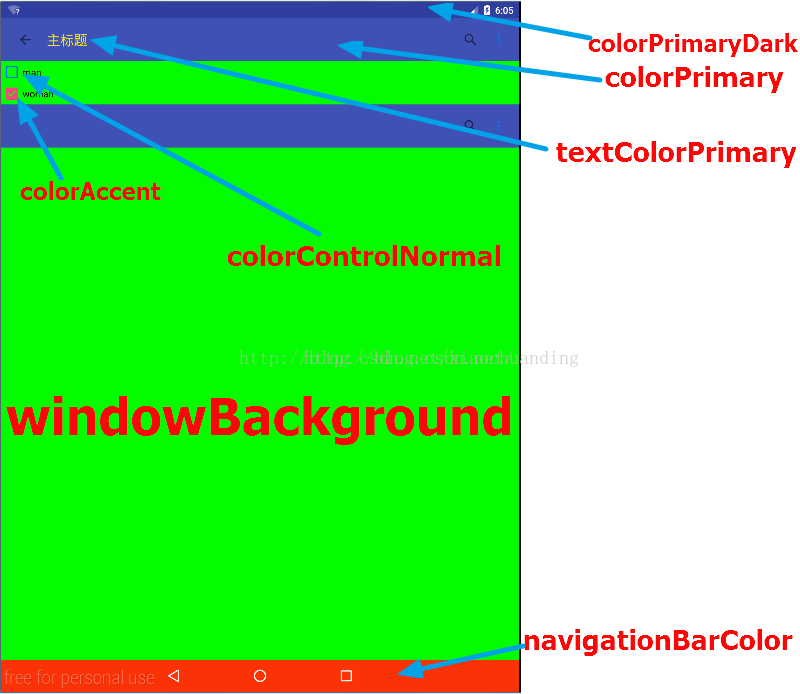 android 5.0 界面常用的顏色屬性
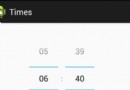 Android中TimePicker與DatePicker時間日期選擇組件的使用實例