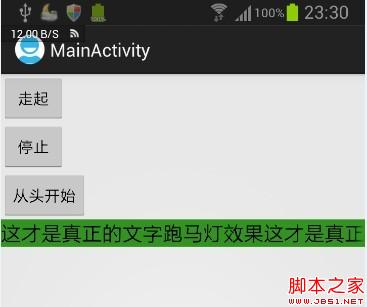
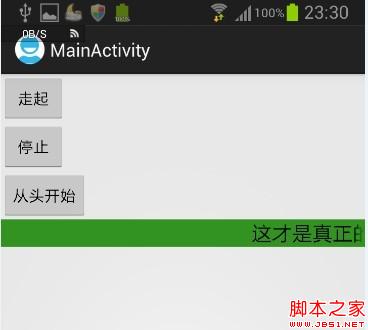
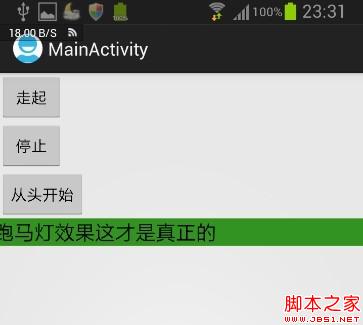
Android自帶的跑馬燈效果不太好控制,不能控制速度,不能即時停止和啟動,而且還受焦點的影響蛋疼不已。由於項目需求需要用的可控制性高的跑馬燈效果,所以自己寫了一個自定義的TextView
注意:在布局文件引用本view時,paddingLeft,paddingRigh都必須為0dp,需要增加這兩個屬性的,大家可以自行修改代碼。
android:ellipsize="marquee" android:singleLine="true" 這兩個屬性也要加上
復制代碼 代碼如下:
public class MarqueeText extends TextView implements Runnable {
private int currentScrollX;// 當前滾動的位置
private boolean isStop = false;
private int textWidth;
private boolean isMeasure = false;
public MarqueeText(Context context) {
super(context);
// TODO Auto-generated constructor stub
}
public MarqueeText(Context context, AttributeSet attrs) {
super(context, attrs);
}
public MarqueeText(Context context, AttributeSet attrs, int defStyle) {
super(context, attrs, defStyle);
}
@Override
protected void onDraw(Canvas canvas) {
// TODO Auto-generated method stub
super.onDraw(canvas);
if (!isMeasure) {// 文字寬度只需獲取一次就可以了
getTextWidth();
isMeasure = true;
}
}
/**
* 獲取文字寬度
*/
private void getTextWidth() {
Paint paint = this.getPaint();
String str = this.getText().toString();
textWidth = (int) paint.measureText(str);
}
@Override
public void run() {
currentScrollX -= 2;// 滾動速度
scrollTo(currentScrollX, 0);
if (isStop) {
return;
}
if (getScrollX() <= -(this.getWidth())) {
scrollTo(textWidth, 0);
currentScrollX = textWidth;
// return;
}
postDelayed(this, 5);
}
// 開始滾動
public void startScroll() {
isStop = false;
this.removeCallbacks(this);
post(this);
}
// 停止滾動
public void stopScroll() {
isStop = true;
}
// 從頭開始滾動
public void startFor0() {
currentScrollX = 0;
startScroll();
}
}
布局文件:
復制代碼 代碼如下:
<LinearLayout xmlns:android="http://schemas.android.com/apk/res/android"
xmlns:tools="http://schemas.android.com/tools"
android:layout_width="fill_parent"
android:layout_height="fill_parent"
android:orientation="vertical" >
<Button
android:id="@+id/start"
android:layout_width="wrap_content"
android:layout_height="wrap_content"
android:onClick="start"
android:text="走起" />
<Button
android:id="@+id/stop"
android:layout_width="wrap_content"
android:layout_height="wrap_content"
android:onClick="stop"
android:text="停止" />
<Button
android:id="@+id/startfor0"
android:layout_width="wrap_content"
android:layout_height="wrap_content"
android:onClick="startFor0"
android:text="從頭開始" />
<simtice.demo.marqueetext.MarqueeText
android:id="@+id/test"
android:layout_width="fill_parent"
android:layout_height="wrap_content"
android:background="#339320"
android:ellipsize="marquee"
android:singleLine="true"
android:text="這才是真正的文字跑馬燈效果這才是真正的字跑馬燈效果這才是真正的"
android:textColor="#000000"
android:textSize="20dp" >
</simtice.demo.marqueetext.MarqueeText>
</LinearLayout>
MainActivity
復制代碼 代碼如下:
public class MainActivity extends Activity {
private MarqueeText test;
@Override
public void onCreate(Bundle savedInstanceState) {
super.onCreate(savedInstanceState);
setContentView(R.layout.activity_main);
test = (MarqueeText) this.findViewById(R.id.test);
}
public void start(View v) {
test.startScroll();
}
public void stop(View v) {
test.stopScroll();
}
public void startFor0(View v){
test.startFor0();
}
}
 Android自定義動態布局 — 多圖片上傳
 android4.4 webview chromium實現硬件渲染的chromium內核結構
 基於Redux的ReactNative項目開發總結(一)
 Android4.4 framework分析——廣播的注冊(BroadcastReceiver)和發送(sendbroadcast)過程分析