編輯:關於Android編程
我們要實現的效果如下:

在這之前先帶大家了解一下xml bitmap,何為XML Bitmap?
XML Bitmap 是一個用XML定義的文件放在資源目錄,定義的對象是圖片,為bitmap定義別名,這個文件可以給bitmap定義一些額外的屬性。例如:抖動。
1、文件存放位置
res/drawable/filename.xml
2、語法
<?xml version="1.0" encoding="utf-8"?>
<bitmap
  xmlns:android="http://schemas.android.com/apk/res/android"
  android:src="@[package:]drawable/drawable_resource"
  android:antialias=["true" | "false"]
  android:dither=["true" | "false"]
  android:filter=["true" | "false"]
  android:gravity=["top" | "bottom" | "left" | "right" | "center_vertical" |
           "fill_vertical" | "center_horizontal" | "fill_horizontal" |
           "center" | "fill" | "clip_vertical" | "clip_horizontal"]
  android:tileMode=["disabled" | "clamp" | "repeat" | "mirror"] />
例子:
<RelativeLayout xmlns:android="http://schemas.android.com/apk/res/android"
  xmlns:tools="http://schemas.android.com/tools"
  android:layout_width="match_parent"
  android:layout_height="match_parent"
  tools:context=".MainActivity" >
  <!-- 與默認情況(@drawable/btn_default_pressed_holo_light)有差別 -->
  <Button
    android:layout_width="wrap_content"
    android:layout_height="wrap_content"
    android:layout_centerHorizontal="true"
    android:layout_centerVertical="true"
    android:background="@drawable/bm"
    android:text="sssssssssssssssssss" />

</RelativeLayout>

<RelativeLayout xmlns:android="http://schemas.android.com/apk/res/android"
  xmlns:tools="http://schemas.android.com/tools"
  android:layout_width="match_parent"
  android:layout_height="match_parent"
  tools:context=".MainActivity" >
 <!-- 與默認情況(@drawable/btn_default_pressed_holo_light)有差別 -->
  <Button
    android:layout_width="wrap_content"
    android:layout_height="wrap_content"
    android:layout_centerHorizontal="true"
    android:layout_centerVertical="true"
    android:background="@drawable/bm"
    android:text="sssssssssssssssssss" />

</RelativeLayout>
效果圖:
默認(@drawable/btn_default_pressed_holo_light):
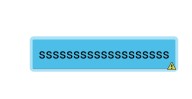
引用(\@drawable/bm):

從截圖上就可以看出來差別。
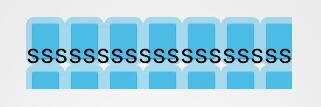
titileMode="repeat":
之後找了一些關於實現波浪線的方法,總感覺不大滿意,常見的方法分享給大家:
1、直接搞一個這樣的波浪線的切圖
這種方式最簡單,但是劣勢也非常明顯,如果view的寬度過大,則會出現圖片變形,如下圖所示:

如果過小則如下:

要求不高的話,這樣勉強可以蒙混過關,但是追求完美的話,這樣的效果顯然很不給力
2、自定義控件繪制
這個方法的確可以達到不錯的效果,但是實現比較麻煩。我也看到有朋友搞過,
3、用xml的bitmap標簽實現波浪線效果
首頁要搞一個周期的波浪線,即包括波峰和波谷,如下圖所示:
wave_item:

然後水平方向上平鋪,從而實現波浪線效果,代碼如下:
wave.xml:
<?xml version="1.0" encoding="utf-8"?>
<bitmap xmlns:android="http://schemas.android.com/apk/res/android"
  android:antialias="true"
  android:src="@drawable/wave_item"
  android:tileMode="repeat" />
activity_main.xml
<LinearLayout xmlns:android="http://schemas.android.com/apk/res/android"
  xmlns:tools="http://schemas.android.com/tools"
  android:layout_width="match_parent"
  android:layout_height="match_parent"
  android:orientation="vertical"
  android:paddingBottom="@dimen/activity_vertical_margin"
  android:paddingTop="@dimen/activity_vertical_margin" >

  <ImageView
    android:layout_width="match_parent"
    android:layout_height="wrap_content"
    android:background="@drawable/wave" />

</LinearLayout>
注意:這個ImageView通過background顯示圖片,src是顯示不了這樣的效果的。
希望本文所述對大家學習Android軟件編程有所幫助。
 android開源庫發布到jcenter圖文詳解與填坑
相信很多人都用過開源項目,特別是android studio普及以後,使用開源庫更方便簡單。而如何上傳開源庫到jcenter供大家方便使用,雖然網上也有教程,但還是遇坑
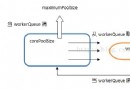 Android線程池框架下的線程池策略
線程的運行機制 1. 開啟線程過多,會消耗cpu2. 單核cpu,同一時刻只能處理一個線程,多核cpu同一時刻可以處理多個線程3. 操作系統為每個運行線程安排一
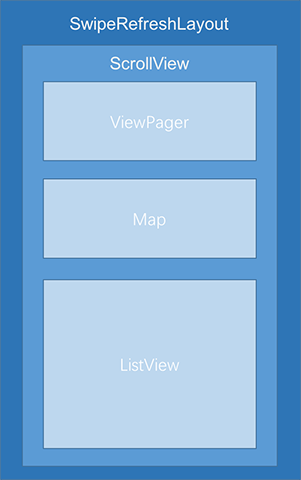 淺談Android實踐之ScrollView中滑動沖突處理解決方案
1. 前言 在Android開發中,如果是一些簡單的布局,都很容易搞定,但是一旦涉及到復雜的頁面,特別是為了兼容小屏手機而使用了ScrollView以後,就會出
 [Android] 通過GridView仿微信動態添加本地圖片示例代碼
前面文章講述的都是隨手拍中圖像處理的操作,此篇文章主要講述GridView控件實現添加本地圖片並顯示.主要是關於GridView控件的基本操作,通常可以通過自定義繼承Ba