編輯:關於Android編程
本文我們來看列表選擇框的實現。程序運行效果如下圖所示:
主布局文件main.xml內容如下所示:
<PRE class=html name="code"><?xml version="1.0" encoding="utf-8"?>
<LinearLayout xmlns:android="http://schemas.android.com/apk/res/android"
android:layout_width="fill_parent"
android:layout_height="fill_parent"
android:orientation="vertical" >
<TextView
android:layout_width="fill_parent"
android:layout_height="wrap_content"
android:text="@string/prompt" />
<Spinner
android:entries="@array/brands"
android:layout_height="wrap_content"
android:layout_width="wrap_content"
android:id="@+id/spinner"/>
<Button
android:text="提交"
android:id="@+id/button"
android:layout_width="wrap_content"
android:layout_height="wrap_content"/>
</LinearLayout>
</PRE><BR>
<PRE></PRE>
<P>Spinner標記指定了列表選擇框,列表選擇框的內容是由android:entries屬性指定的,即數組資源@array/brands,我們將該數組定義在一個單獨的資源文件BrandArray.xml中,其定義如下:</P>
<PRE class=html name="code"><?xml version="1.0" encoding="utf-8"?>
<resources>
<string-array name="brands">
<item>蘋果</item>
<item>三星</item>
<item>HTC</item>
<item>諾基亞</item>
<item>聯想</item>
<item>華為</item>
<item>其它</item>
</string-array>
</resources>
</PRE>
<P> </P>
<P><SPAN style="FONT-SIZE: 14px">最後,編寫主<SPAN style="FONT-FAMILY: Calibri">Activity</SPAN>文件,響應用戶的操作,其內容如下:</SPAN><BR>
</P>
<P><SPAN style="FONT-SIZE: 14px"></SPAN> </P>
<SPAN style="COLOR: teal"></SPAN><PRE class=html name="code">package com.liuhaoyu;
import android.app.Activity;
import android.os.Bundle;
import android.util.Log;
import android.view.View;
import android.view.View.OnClickListener;
import android.widget.AdapterView;
import android.widget.Button;
import android.widget.Spinner;
import android.widget.Toast;
import android.widget.AdapterView.OnItemSelectedListener;
public class MainActivity extends Activity {
/** Called when the activity is first created. */
@Override
public void onCreate(Bundle savedInstanceState) {
super.onCreate(savedInstanceState);
setContentView(R.layout.main);
final Spinner spinner = (Spinner) findViewById(R.id.spinner);
spinner.setOnItemSelectedListener(new OnItemSelectedListener() {
@Override
public void onItemSelected(AdapterView<?> parent, View arg1,
int pos, long id) {
String result = parent.getItemAtPosition(pos).toString();
Log.i("選擇結果是:", result);
}
@Override
public void onNothingSelected(AdapterView<?> arg0) {
}
});
Button button = (Button) findViewById(R.id.button);
button.setOnClickListener(new OnClickListener() {
@Override
public void onClick(View v) {
Toast.makeText(MainActivity.this,
"您選擇的品牌是:" + spinner.getSelectedItem().toString(),
Toast.LENGTH_SHORT).show();
}
});
}
}</PRE>
<P align=left><BR>
<SPAN style="COLOR: black"> </SPAN></P>
<P><SPAN style="COLOR: black">以上我們是通過在布局文件中通過數組資源直接為列表選擇框指定列表內容,如果不在布局文件中指定,也可以通過使用適配器的方式為其指定列表內容。下面我們來看一個例子,其運行效果如下:</SPAN></P>
<P><IMG alt="" src="http://img.blog.csdn.net/20130801163255843?watermark/2/text/aHR0cDovL2Jsb2cuY3Nkbi5uZXQvbGl1aGFveXV0eg==/font/5a6L5L2T/fontsize/400/fill/I0JBQkFCMA==/dissolve/70/gravity/SouthEast"></P>
<P><SPAN style="FONT-SIZE: 14px">主布局文件<SPAN style="FONT-FAMILY: Calibri">main.xml</SPAN>內容如下:</SPAN></P>
<SPAN style="COLOR: teal"></SPAN><PRE class=html name="code"><?xml version="1.0" encoding="utf-8"?>
<LinearLayout xmlns:android="http://schemas.android.com/apk/res/android"
android:layout_width="fill_parent"
android:layout_height="fill_parent"
android:orientation="vertical" >
<TextView
android:layout_width="fill_parent"
android:layout_height="wrap_content"
android:text="@string/prompt" />
<Spinner
android:layout_height="wrap_content"
android:layout_width="wrap_content"
android:id="@+id/spinner"/>
<Button android:text="提交"
android:id="@+id/button"
android:layout_width="wrap_content"
android:layout_height="wrap_content"/>
</LinearLayout></PRE>
<P align=left><BR>
<SPAN style="COLOR: teal">主</SPAN><SPAN style="COLOR: teal">Activity</SPAN><SPAN style="COLOR: teal">文件內容如下:</SPAN></P>
<SPAN style="FONT-FAMILY: Calibri; FONT-SIZE: 14px"></SPAN><PRE class=java name="code"><?xml version="1.0" encoding="utf-8"?>
<LinearLayout xmlns:android="http://schemas.android.com/apk/res/android"
android:layout_width="fill_parent"
android:layout_height="fill_parent"
android:orientation="vertical" >
<TextView
android:layout_width="fill_parent"
android:layout_height="wrap_content"
android:text="@string/prompt" />
<Spinner
android:layout_height="wrap_content"
android:layout_width="wrap_content"
android:id="@+id/spinner"/>
<Button android:text="提交"
android:id="@+id/button"
android:layout_width="wrap_content"
android:layout_height="wrap_content"/>
</LinearLayout>
主Activity文件內容如下:
package com.liuhaoyu;
import android.app.Activity;
import android.os.Bundle;
import android.util.Log;
import android.view.View;
import android.view.View.OnClickListener;
import android.widget.AdapterView;
import android.widget.AdapterView.OnItemSelectedListener;
import android.widget.ArrayAdapter;
import android.widget.Button;
import android.widget.Spinner;
import android.widget.Toast;
public class MainActivity extends Activity {
/** Called when the activity is first created. */
@Override
public void onCreate(Bundle savedInstanceState) {
super.onCreate(savedInstanceState);
setContentView(R.layout.main);
final Spinner spinner = (Spinner) findViewById(R.id.spinner);
// 通過在代碼中定義數組來創建適配器.
String[] brand=new String[]{"蘋果","三星","HTC","諾基亞","聯想","華為","其它"};
ArrayAdapter<String> adapter=new ArrayAdapter<String>(this,android.R.layout.simple_spinner_dropdown_item,brand);
// 也可以使用數組資源來創建適配器,而不是象上面那樣在代碼中定義 數組。
// ArrayAdapter<CharSequence> adapter = ArrayAdapter.createFromResource(
// this, R.array.brands,android.R.layout.simple_spinner_dropdown_item);
spinner.setAdapter(adapter); // 將適配器與選擇列表框關聯
spinner.setOnItemSelectedListener(new OnItemSelectedListener() {
@Override
public void onItemSelected(AdapterView<?> parent, View arg1, int pos, long id) {
String result = parent.getItemAtPosition(pos).toString();
Log.i("選擇結果是:", result);
}
@Override
public void onNothingSelected(AdapterView<?> arg0) {
}
});
Button button = (Button) findViewById(R.id.button);
button.setOnClickListener(new OnClickListener() {
@Override
public void onClick(View v) {
Toast.makeText(MainActivity.this,
"您選擇的品牌是:" + spinner.getSelectedItem().toString(),
Toast.LENGTH_SHORT).show();
}
});
}
}</PRE>
<P> </P>
 Android中利用NetworkInfo判斷網絡狀態時出現空指針(NullPointerException)問題的解決方法
在Android中,很多人會用如下的方法判斷當前網絡是否可用:/** * 獲取當前網絡狀態(是否可用) */ public static boolean isNetwor
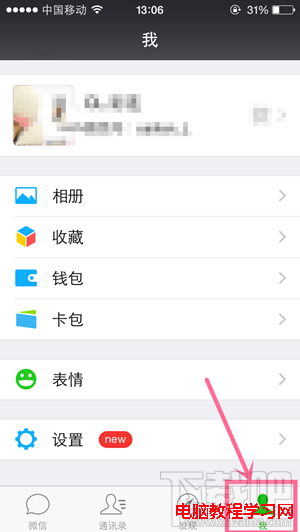 微信理財通怎麼用 微信理財通收益如何查看
你現在還是把錢都存在余額寶?相信你也注意到,現在理財方式越來越多,余額寶的收益也越來越低,比如說財付通的理財通,性質類似於余額寶。現在微信也有理財通,收益還
 Android App開發的自動化測試框架UI Automator使用教程
Android的自動化測試有很多框架,其中ui automator是google官方提供的黑盒UI相關的自動化測試工具,(GitHub主頁:case使用java寫,今天實
 違章查詢源碼分享
使用快遞100查詢接口實現源碼地址:http://xiazai.jb51.net/201612/yuanma/weizhang-master_jb51.rar測試安裝包: