編輯:關於Android編程
本文實例講述了Android編程獲取地理位置的經度和緯度。分享給大家供大家參考,具體如下:
在Android應用程序中,可以使用LocationManager來獲取移動設備所在的地理位置信息。看如下實例:新建android應用程序TestLocation。
1、activity_main.xml布局文件
<LinearLayout xmlns:android="http://schemas.android.com/apk/res/android"
  android:layout_width="fill_parent"
  android:layout_height="fill_parent"
  >
  <TextView
    android:id="@+id/positionView"
    android:layout_width="wrap_content"
    android:layout_height="wrap_content"
    />
</LinearLayout>
用於顯示獲取到的位置信息。
2、MainActivity.java
package com.example.testlocation;
import java.util.List;
import android.app.Activity;
import android.content.Context;
import android.location.Location;
import android.location.LocationListener;
import android.location.LocationManager;
import android.os.Bundle;
import android.view.Menu;
import android.widget.TextView;
import android.widget.Toast;
public class MainActivity extends Activity {
  private TextView postionView;
  private LocationManager locationManager;
  private String locationProvider;
  @Override
  protected void onCreate(Bundle savedInstanceState) {
    super.onCreate(savedInstanceState);
    setContentView(R.layout.activity_main);
    //獲取顯示地理位置信息的TextView
    postionView = (TextView) findViewById(R.id.positionView);
    //獲取地理位置管理器
    locationManager = (LocationManager) getSystemService(Context.LOCATION_SERVICE);
    //獲取所有可用的位置提供器
    List<String> providers = locationManager.getProviders(true);
    if(providers.contains(LocationManager.GPS_PROVIDER)){
      //如果是GPS
      locationProvider = LocationManager.GPS_PROVIDER;
    }else if(providers.contains(LocationManager.NETWORK_PROVIDER)){
      //如果是Network
      locationProvider = LocationManager.NETWORK_PROVIDER;
    }else{
      Toast.makeText(this, "沒有可用的位置提供器", Toast.LENGTH_SHORT).show();
      return ;
    }
    //獲取Location
    Location location = locationManager.getLastKnownLocation(locationProvider);
    if(location!=null){
      //不為空,顯示地理位置經緯度
      showLocation(location);
    }
    //監視地理位置變化
    locationManager.requestLocationUpdates(locationProvider, 3000, 1, locationListener);
  }
  /**
   * 顯示地理位置經度和緯度信息
   * @param location
   */
  private void showLocation(Location location){
    String locationStr = "維度:" + location.getLatitude() +"\n"
        + "經度:" + location.getLongitude();
    postionView.setText(locationStr);
  }
  /**
   * LocationListern監聽器
   * 參數:地理位置提供器、監聽位置變化的時間間隔、位置變化的距離間隔、LocationListener監聽器
   */
  LocationListener locationListener = new LocationListener() {
    @Override
    public void onStatusChanged(String provider, int status, Bundle arg2) {
    }
    @Override
    public void onProviderEnabled(String provider) {
    }
    @Override
    public void onProviderDisabled(String provider) {
    }
    @Override
    public void onLocationChanged(Location location) {
      //如果位置發生變化,重新顯示
      showLocation(location);
    }
  };
  @Override
  protected void onDestroy() {
    super.onDestroy();
    if(locationManager!=null){
      //移除監聽器
      locationManager.removeUpdates(locationListener);
    }
  }
  @Override
  public boolean onCreateOptionsMenu(Menu menu) {
    // Inflate the menu; this adds items to the action bar if it is present.
    getMenuInflater().inflate(R.menu.main, menu);
    return true;
  }
}
從上面可以看出,獲取地理位置信息主要分如下步驟:
(1)獲取LocationManager實例,通過getSystemService方法,傳入Context.LOCATION_SERVICE參數。
(2)獲取可用的位置提供器,有GPS_PROVIDER、NETWORK_PROVIDER、PASSIVE_PROVIDER三種,前兩種比較常用。
(3)將(2)獲取到的位置提供器傳入LocationManager的方法getLastKnownLocation,即可獲取Location信息。
如果移動設備地理位置不斷發生變化,則實時更新需要進行如下步驟:
(4)調用LocationManager的requestLocationUpdates方法,第一個參數是位置提供器,第二個參數是監聽位置變化的時間間隔(毫秒),第三個參數是監聽位置變化的距離間隔(米),第四個參數是LocationListener監聽器
(5)當位置發生變化後,就會調用監聽器的onLocationChanged方法。
(6)為了省電,節約資源,當程序關閉後,調用LocationManager的removeUpdates方法移除監聽器。
3、獲取權限
修改AndroidManifest.xml,添加如下代碼:
<uses-permission android:name="android.permission.ACCESS_FINE_LOCATION"/>
<uses-permission android:name="android.permission.ACCESS_COARSE_LOCATION" />
<uses-permission android:name="android.permission.ACCESS_COARSE_LOCATION"/>
4、效果
使用模擬器進行測試:點擊send


可以使用Geocoding API查找具體對應的位置。如下:
(1)修改MainActivity.java
package com.example.testlocation;
import java.util.List;
import org.apache.http.HttpEntity;
import org.apache.http.HttpResponse;
import org.apache.http.client.HttpClient;
import org.apache.http.client.methods.HttpGet;
import org.apache.http.impl.client.DefaultHttpClient;
import org.apache.http.util.EntityUtils;
import org.json.JSONArray;
import org.json.JSONObject;
import android.app.Activity;
import android.content.Context;
import android.location.Location;
import android.location.LocationListener;
import android.location.LocationManager;
import android.os.Bundle;
import android.os.Handler;
import android.os.Message;
import android.view.Menu;
import android.widget.TextView;
import android.widget.Toast;
public class MainActivity extends Activity {
  private TextView postionView;
  private LocationManager locationManager;
  private String locationProvider;
  public static final int SHOW_LOCATION = 0;
  @Override
  protected void onCreate(Bundle savedInstanceState) {
    super.onCreate(savedInstanceState);
    setContentView(R.layout.activity_main);
    //獲取顯示地理位置信息的TextView
    postionView = (TextView) findViewById(R.id.positionView);
    //獲取地理位置管理器
    locationManager = (LocationManager) getSystemService(Context.LOCATION_SERVICE);
    //獲取所有可用的位置提供器
    List<String> providers = locationManager.getProviders(true);
    if(providers.contains(LocationManager.GPS_PROVIDER)){
      //如果是GPS
      locationProvider = LocationManager.GPS_PROVIDER;
    }else if(providers.contains(LocationManager.NETWORK_PROVIDER)){
      //如果是Network
      locationProvider = LocationManager.NETWORK_PROVIDER;
    }else{
      Toast.makeText(this, "沒有可用的位置提供器", Toast.LENGTH_SHORT).show();
      return ;
    }
    //獲取Location
    Location location = locationManager.getLastKnownLocation(locationProvider);
    if(location!=null){
      //不為空,顯示地理位置經緯度
      showLocation(location);
    }else{
      Toast.makeText(this, "location為空", Toast.LENGTH_SHORT).show();
    }
    //監視地理位置變化
    locationManager.requestLocationUpdates(locationProvider, 3000, 1, locationListener);
  }
  private Handler handler = new Handler(){
    public void handleMessage(Message msg){
      switch(msg.what){
      case SHOW_LOCATION:
        String position = (String) msg.obj;
        postionView.setText(position);
        break;
      default:
        break;
      }
    }
  };
  /**
   * 顯示地理位置經度和緯度信息
   * @param location
   */
  private void showLocation(final Location location){
    /*String locationStr = "維度:" + location.getLatitude() +"\n"
        + "經度:" + location.getLongitude();
    postionView.setText(locationStr);*/
    new Thread(new Runnable() {
      @Override
      public void run() {
        try{
          //組裝反向地理編碼的接口位置
          StringBuilder url = new StringBuilder();
          url.append("http://maps.googleapis.com/maps/api/geocode/json?latlng=");
          url.append(location.getLatitude()).append(",");
          url.append(location.getLongitude());
          url.append("&sensor=false");
          HttpClient client = new DefaultHttpClient();
          HttpGet httpGet = new HttpGet(url.toString());
          httpGet.addHeader("Accept-Language","zh-CN");
          HttpResponse response = client.execute(httpGet);
          if(response.getStatusLine().getStatusCode() == 200){
            HttpEntity entity = response.getEntity();
            String res = EntityUtils.toString(entity);
            //解析
            JSONObject jsonObject = new JSONObject(res);
            //獲取results節點下的位置信息
            JSONArray resultArray = jsonObject.getJSONArray("results");
            if(resultArray.length() > 0){
              JSONObject obj = resultArray.getJSONObject(0);
              //取出格式化後的位置數據
              String address = obj.getString("formatted_address");
              Message msg = new Message();
              msg.what = SHOW_LOCATION;
              msg.obj = address;
              handler.sendMessage(msg);
            }
          }
        }catch(Exception e){
          e.printStackTrace();
        }
      }
    }).start();
  }
  /**
   * LocationListern監聽器
   * 參數:地理位置提供器、監聽位置變化的時間間隔、位置變化的距離間隔、LocationListener監聽器
   */
  LocationListener locationListener = new LocationListener() {
    @Override
    public void onStatusChanged(String provider, int status, Bundle arg2) {
    }
    @Override
    public void onProviderEnabled(String provider) {
    }
    @Override
    public void onProviderDisabled(String provider) {
    }
    @Override
    public void onLocationChanged(Location location) {
      //如果位置發生變化,重新顯示
      showLocation(location);
    }
  };
  @Override
  protected void onDestroy() {
    super.onDestroy();
    if(locationManager!=null){
      //移除監聽器
      locationManager.removeUpdates(locationListener);
    }
  }
  @Override
  public boolean onCreateOptionsMenu(Menu menu) {
    // Inflate the menu; this adds items to the action bar if it is present.
    getMenuInflater().inflate(R.menu.main, menu);
    return true;
  }
}
(2)修改AndroidManifest.xml
<uses-permission android:name="android.permission.ACCESS_FINE_LOCATION"/>
<uses-permission android:name="android.permission.ACCESS_COARSE_LOCATION" />
<uses-permission android:name="android.permission.ACCESS_COARSE_LOCATION"/>
<uses-permission android:name="android.permission.INTERNET"/>
希望本文所述對大家Android程序設計有所幫助。
 Android 仿余額寶數字動畫實現
簡介好久沒有寫博客了,最近公司產品剛發布了,終於有一點休閒的時間了,趁這個空閒的時間,今天給大家寫一個數字動畫的效果,可能在以後的時間,或許大家會用的到,值得大家收藏,直
 Android入門之ListView應用解析(二)
上一篇關於Android中ListView的介紹講的是如何制作一個具有兩行文本的自定義控件,作為ListView的Item的使用方法。本文接下來也是圍繞ListView和
 Android圖片緩存之Bitmap詳解(一)
前言:最近准備研究一下圖片緩存框架,基於這個想法覺得還是先了解有關圖片緩存的基礎知識,今天重點學習一下Bitmap、BitmapFactory這兩個類。 Bit
 Android自定義View 實現鬧鐘喚起播放鬧鐘鈴聲功能
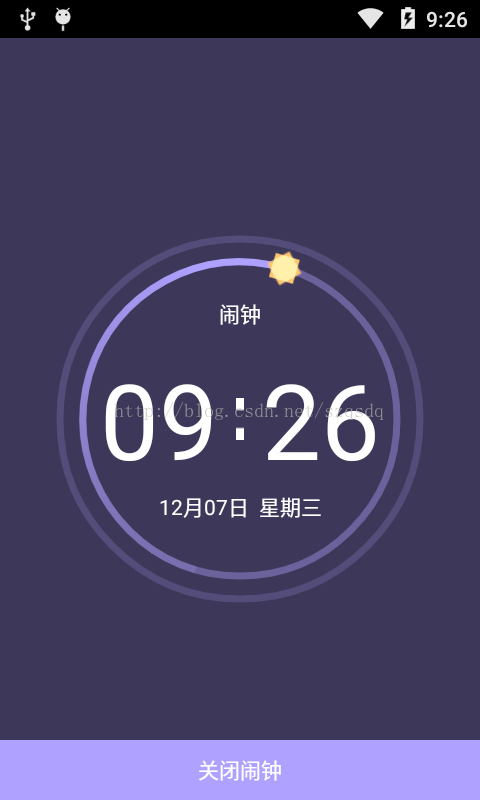
先上圖看一下鬧鐘喚期頁面的效果實現的功能:1:轉動的圖片根據天氣情況更換2:轉動時間可以設置,轉動結束,鬧鈴聲音就結束3:光圈顏色漸變效果直接上代碼啦:package c