編輯:關於Android編程
前面的幾篇文章都是講解的android中的窗口顯示機制,包括Activity窗口加載繪制流程,Dialog窗口加載繪制流程,PopupWindow窗口加載繪制流程,Toast窗口加載繪制流程等等。整個Android的界面顯示的原理都是類似的,都是通過Window對象控制View組件,實現加載與繪制流程。
這篇文章休息一下,不在講解Android的窗口繪制機制,穿插的講解一下Android系統的異常處理流程。O(∩_∩)O哈哈~
開發過android項目的童鞋對android系統中錯誤彈窗,force close應該不陌生了,當我們的App異常崩潰時,就會彈出一個force close的彈窗,告訴我們App崩潰,以及一下簡易的錯誤信息:
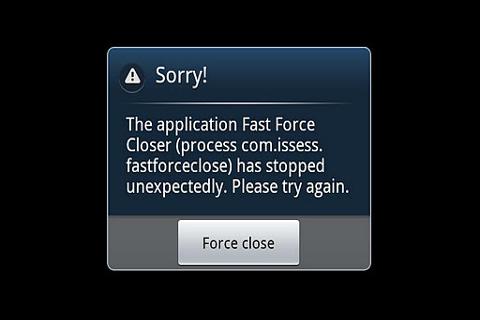
那麼這裡的force close彈窗是如何彈出的呢?
還有我們在開發App的過程中,經常會自定義Application,自定義UncaughtExceptionHandler實現App的全局異常處理,那麼這裡的UncaughtExceptionHandler是如何實現對異常的全局處理的呢?
帶著這兩個問題,我們開始今天的異常流程分析。
在android應用進程的啟動流程中我們在經過一系列的操作之後會調用RuntimeInit.zygoteInit方法
而我們也是從這裡開始分析我們的Android系統異常處理流程,好了,讓我們先來看一下zygoteInit方法的具體實現:
public static final void zygoteInit(int targetSdkVersion, String[] argv, ClassLoader classLoader)
            throws ZygoteInit.MethodAndArgsCaller {
        if (DEBUG) Slog.d(TAG, "RuntimeInit: Starting application from zygote");

        Trace.traceBegin(Trace.TRACE_TAG_ACTIVITY_MANAGER, "RuntimeInit");
        redirectLogStreams();

        commonInit();
        nativeZygoteInit();
        applicationInit(targetSdkVersion, argv, classLoader);
    }
可以看到在方法體中我們調用了commonInit方法,這個方法是用於初始化操作的,繼續看一下commonInit方法的實現:
private static final void commonInit() {
        ...
        Thread.setDefaultUncaughtExceptionHandler(new UncaughtHandler());
        ...
    }
可以看到在這裡我們調用了Thread.setDefaultUncaughtExceptionHandler方法,這樣當我們的進程出現異常的時候,異常信息就會被我們新創建的UncaughtHandler所捕獲。
看過我們前面寫過的關於Android全局異常處理文章的童鞋應該知道,我們實現對Android異常全局處理的操作也是通過設置Thread.setDefaultUncaughtExceptionHandler來實現的
所以Android系統默認的異常信息都會被這裡的UncaughtHandler所捕獲並被其uncaughtException方法回調,所以若我們不重寫Thread.setDefaultUncaughtExceptionHandler方法,那麼這裡的UncaughtHandler就是我們默認的異常處理操作 這樣我們看一下UncaughtHandler的具體實現:
private static class UncaughtHandler implements Thread.UncaughtExceptionHandler {
        public void uncaughtException(Thread t, Throwable e) {
            try {
                // Don't re-enter -- avoid infinite loops if crash-reporting crashes.
                if (mCrashing) return;
                mCrashing = true;

                if (mApplicationObject == null) {
                    Clog_e(TAG, "*** FATAL EXCEPTION IN SYSTEM PROCESS: " + t.getName(), e);
                } else {
                    StringBuilder message = new StringBuilder();
                    message.append("FATAL EXCEPTION: ").append(t.getName()).append("\n");
                    final String processName = ActivityThread.currentProcessName();
                    if (processName != null) {
                        message.append("Process: ").append(processName).append(", ");
                    }
                    message.append("PID: ").append(Process.myPid());
                    Clog_e(TAG, message.toString(), e);
                }

                // Bring up crash dialog, wait for it to be dismissed
                ActivityManagerNative.getDefault().handleApplicationCrash(
                        mApplicationObject, new ApplicationErrorReport.CrashInfo(e));
            } catch (Throwable t2) {
                try {
                    Clog_e(TAG, "Error reporting crash", t2);
                } catch (Throwable t3) {
                    // Even Clog_e() fails!  Oh well.
                }
            } finally {
                // Try everything to make sure this process goes away.
                Process.killProcess(Process.myPid());
                System.exit(10);
            }
        }
    }
這裡uncaughtException方法最終會被執行異常信息的處理,我們看一下在這裡我們調用了ActivityManagerNative.getDefault().handleApplicationCrash方法,看過我們前面Activity啟動流程的童鞋應該知道這裡的ActivityManagerNative其實是ActivityManagerService的Binder客戶端,而這裡的handleApplicationCrash方法最終會調用的是ActivityManagerService的handleApplicationCrash方法。最後在finally分之中,我們調用了Process.killProcess(Process.myPid)和System.exit(10),這樣我們的應用進程就會退出了。
然後我們在這裡先簡單的分析一下Binder的數據傳輸過程,看一下handleApplicationCrash方法具體做了哪些事,首先看一下ActivityManagerNative的getDefault方法是如何實現的?
static public IActivityManager getDefault() {
        return gDefault.get();
    }
可以發現,其是一個靜態方法,並執行了gDefault.get方法,我們在看一下gDefault.get方法的實現邏輯:
private static final Singleton gDefault = new Singleton() {
        protected IActivityManager create() {
            IBinder b = ServiceManager.getService("activity");
            if (false) {
                Log.v("ActivityManager", "default service binder = " + b);
            }
            IActivityManager am = asInterface(b);
            if (false) {
                Log.v("ActivityManager", "default service = " + am);
            }
            return am;
        }
    };
可以發現這裡返回一個IActivityManager類型的am對象,而這個am對象是通過調用asInterface方法創建的,我們再來看一下這個asInterface方法的實現邏輯。
static public IActivityManager asInterface(IBinder obj) {
        if (obj == null) {
            return null;
        }
        IActivityManager in =
            (IActivityManager)obj.queryLocalInterface(descriptor);
        if (in != null) {
            return in;
        }

        return new ActivityManagerProxy(obj);
    }
可以發現該方法最終返回的是一個ActivityManagerProxy對象,所以ActivityManagerNative.getDefault()方法最終返回的是一個ActivityManagerProxy對象,我們再來看一下ActivityManagerProxy的handleApplicationCrash方法。
public void handleApplicationCrash(IBinder app,
            ApplicationErrorReport.CrashInfo crashInfo) throws RemoteException
    {
        Parcel data = Parcel.obtain();
        Parcel reply = Parcel.obtain();
        data.writeInterfaceToken(IActivityManager.descriptor);
        data.writeStrongBinder(app);
        crashInfo.writeToParcel(data, 0);
        mRemote.transact(HANDLE_APPLICATION_CRASH_TRANSACTION, data, reply, 0);
        reply.readException();
        reply.recycle();
        data.recycle();
    }
這裡就是具體的Binder傳輸數據的邏輯了,這裡ActivityManagerNative最為Binder的clent端,而我們的ActivityManagerService同樣是繼承與ActivityManagerNative,最為Binder的server端,通過傳輸最終ActivityManagerService的handleApplicationCrash方法會被執行。
public void handleApplicationCrash(IBinder app, ApplicationErrorReport.CrashInfo crashInfo) {
        ProcessRecord r = findAppProcess(app, "Crash");
        final String processName = app == null ? "system_server"
                : (r == null ? "unknown" : r.processName);

        handleApplicationCrashInner("crash", r, processName, crashInfo);
    }
可以看到在ActivityManagerService的handleApplicationCrash方法中我們調用了handleApplicationCreashInner方法,這樣我們繼續看一下handleApplicationCrashInner方法的實現。
void handleApplicationCrashInner(String eventType, ProcessRecord r, String processName,
            ApplicationErrorReport.CrashInfo crashInfo) {
        EventLog.writeEvent(EventLogTags.AM_CRASH, Binder.getCallingPid(),
                UserHandle.getUserId(Binder.getCallingUid()), processName,
                r == null ? -1 : r.info.flags,
                crashInfo.exceptionClassName,
                crashInfo.exceptionMessage,
                crashInfo.throwFileName,
                crashInfo.throwLineNumber);

        addErrorToDropBox(eventType, r, processName, null, null, null, null, null, crashInfo);

        crashApplication(r, crashInfo);
    }
可以發現在handleApplicationCrashInner方法中主要調用了兩個方法addErrorToDropBox和crashApplication,我們首先看一下addErrorToDropBox方法的實現邏輯。
public void addErrorToDropBox(String eventType,
            ProcessRecord process, String processName, ActivityRecord activity,
            ActivityRecord parent, String subject,
            final String report, final File logFile,
            final ApplicationErrorReport.CrashInfo crashInfo) {
        // NOTE -- this must never acquire the ActivityManagerService lock,
        // otherwise the watchdog may be prevented from resetting the system.

        final String dropboxTag = processClass(process) + "_" + eventType;
        final DropBoxManager dbox = (DropBoxManager)
                mContext.getSystemService(Context.DROPBOX_SERVICE);

        // Exit early if the dropbox isn't configured to accept this report type.
        if (dbox == null || !dbox.isTagEnabled(dropboxTag)) return;

        final StringBuilder sb = new StringBuilder(1024);
        appendDropBoxProcessHeaders(process, processName, sb);
        if (activity != null) {
            sb.append("Activity: ").append(activity.shortComponentName).append("\n");
        }
        if (parent != null && parent.app != null && parent.app.pid != process.pid) {
            sb.append("Parent-Process: ").append(parent.app.processName).append("\n");
        }
        if (parent != null && parent != activity) {
            sb.append("Parent-Activity: ").append(parent.shortComponentName).append("\n");
        }
        if (subject != null) {
            sb.append("Subject: ").append(subject).append("\n");
        }
        sb.append("Build: ").append(Build.FINGERPRINT).append("\n");
        if (Debug.isDebuggerConnected()) {
            sb.append("Debugger: Connected\n");
        }
        sb.append("\n");

        // Do the rest in a worker thread to avoid blocking the caller on I/O
        // (After this point, we shouldn't access AMS internal data structures.)
        Thread worker = new Thread("Error dump: " + dropboxTag) {
            @Override
            public void run() {
                if (report != null) {
                    sb.append(report);
                }
                if (logFile != null) {
                    try {
                        sb.append(FileUtils.readTextFile(logFile, DROPBOX_MAX_SIZE,
                                    "\n\n[[TRUNCATED]]"));
                    } catch (IOException e) {
                        Slog.e(TAG, "Error reading " + logFile, e);
                    }
                }
                if (crashInfo != null && crashInfo.stackTrace != null) {
                    sb.append(crashInfo.stackTrace);
                }

                String setting = Settings.Global.ERROR_LOGCAT_PREFIX + dropboxTag;
                int lines = Settings.Global.getInt(mContext.getContentResolver(), setting, 0);
                if (lines > 0) {
                    sb.append("\n");

                    // Merge several logcat streams, and take the last N lines
                    InputStreamReader input = null;
                    try {
                        java.lang.Process logcat = new ProcessBuilder("/system/bin/logcat",
                                "-v", "time", "-b", "events", "-b", "system", "-b", "main",
                                "-b", "crash",
                                "-t", String.valueOf(lines)).redirectErrorStream(true).start();

                        try { logcat.getOutputStream().close(); } catch (IOException e) {}
                        try { logcat.getErrorStream().close(); } catch (IOException e) {}
                        input = new InputStreamReader(logcat.getInputStream());

                        int num;
                        char[] buf = new char[8192];
                        while ((num = input.read(buf)) > 0) sb.append(buf, 0, num);
                    } catch (IOException e) {
                        Slog.e(TAG, "Error running logcat", e);
                    } finally {
                        if (input != null) try { input.close(); } catch (IOException e) {}
                    }
                }

                dbox.addText(dropboxTag, sb.toString());
            }
        };

        if (process == null) {
            // If process is null, we are being called from some internal code
            // and may be about to die -- run this synchronously.
            worker.run();
        } else {
            worker.start();
        }
    }
可以看到方法體很長,但是邏輯比較簡單,在方法體最後通過判斷應用進程是否為空(是否被銷毀)來執行worker.run方法或者是worker.start方法,這裡的worker是一個Thread對象,而在我們的worker對象的run方法中主要的執行邏輯就是將崩潰信息寫入系統log中,所以addErrorToDropBox方法的主要執行邏輯就是講App的崩潰信息寫入系統log中。。。。
繼續回到我們的handleApplicationCrashInner方法中,看一下crashApplication方法是如何實現的。
private void crashApplication(ProcessRecord r, ApplicationErrorReport.CrashInfo crashInfo) {
        long timeMillis = System.currentTimeMillis();
        String shortMsg = crashInfo.exceptionClassName;
        String longMsg = crashInfo.exceptionMessage;
        String stackTrace = crashInfo.stackTrace;
        if (shortMsg != null && longMsg != null) {
            longMsg = shortMsg + ": " + longMsg;
        } else if (shortMsg != null) {
            longMsg = shortMsg;
        }

        AppErrorResult result = new AppErrorResult();
        synchronized (this) {
            if (mController != null) {
                try {
                    String name = r != null ? r.processName : null;
                    int pid = r != null ? r.pid : Binder.getCallingPid();
                    int uid = r != null ? r.info.uid : Binder.getCallingUid();
                    if (!mController.appCrashed(name, pid,
                            shortMsg, longMsg, timeMillis, crashInfo.stackTrace)) {
                        if ("1".equals(SystemProperties.get(SYSTEM_DEBUGGABLE, "0"))
                                && "Native crash".equals(crashInfo.exceptionClassName)) {
                            Slog.w(TAG, "Skip killing native crashed app " + name
                                    + "(" + pid + ") during testing");
                        } else {
                            Slog.w(TAG, "Force-killing crashed app " + name
                                    + " at watcher's request");
                            if (r != null) {
                                r.kill("crash", true);
                            } else {
                                // Huh.
                                Process.killProcess(pid);
                                killProcessGroup(uid, pid);
                            }
                        }
                        return;
                    }
                } catch (RemoteException e) {
                    mController = null;
                    Watchdog.getInstance().setActivityController(null);
                }
            }

            final long origId = Binder.clearCallingIdentity();

            // If this process is running instrumentation, finish it.
            if (r != null && r.instrumentationClass != null) {
                Slog.w(TAG, "Error in app " + r.processName
                      + " running instrumentation " + r.instrumentationClass + ":");
                if (shortMsg != null) Slog.w(TAG, "  " + shortMsg);
                if (longMsg != null) Slog.w(TAG, "  " + longMsg);
                Bundle info = new Bundle();
                info.putString("shortMsg", shortMsg);
                info.putString("longMsg", longMsg);
                finishInstrumentationLocked(r, Activity.RESULT_CANCELED, info);
                Binder.restoreCallingIdentity(origId);
                return;
            }

            // Log crash in battery stats.
            if (r != null) {
                mBatteryStatsService.noteProcessCrash(r.processName, r.uid);
            }

            // If we can't identify the process or it's already exceeded its crash quota,
            // quit right away without showing a crash dialog.
            if (r == null || !makeAppCrashingLocked(r, shortMsg, longMsg, stackTrace)) {
                Binder.restoreCallingIdentity(origId);
                return;
            }

            Message msg = Message.obtain();
            msg.what = SHOW_ERROR_MSG;
            HashMap data = new HashMap();
            data.put("result", result);
            data.put("app", r);
            msg.obj = data;
            mUiHandler.sendMessage(msg);

            Binder.restoreCallingIdentity(origId);
        }

        int res = result.get();

        Intent appErrorIntent = null;
        synchronized (this) {
            if (r != null && !r.isolated) {
                // XXX Can't keep track of crash time for isolated processes,
                // since they don't have a persistent identity.
                mProcessCrashTimes.put(r.info.processName, r.uid,
                        SystemClock.uptimeMillis());
            }
            if (res == AppErrorDialog.FORCE_QUIT_AND_REPORT) {
                appErrorIntent = createAppErrorIntentLocked(r, timeMillis, crashInfo);
            }
        }

        if (appErrorIntent != null) {
            try {
                mContext.startActivityAsUser(appErrorIntent, new UserHandle(r.userId));
            } catch (ActivityNotFoundException e) {
                Slog.w(TAG, "bug report receiver dissappeared", e);
            }
        }
    }
可以發現在方法體中我們調用了mUiHandler.sendMessage(msg),其中mUiHandler是一個在主線程中創建的Handler對象,而這裡的msg是一個what值為SHOW_ERROR_MSG的消息,這句話的本質就是向Ui線程中發送一個異步消息。我們來看一下mUiHander的處理邏輯。
在mUiHandler的handeMessage方法中,根據what值得不同,執行了如下邏輯:
case SHOW_ERROR_MSG: {
                HashMap data = (HashMap) msg.obj;
                boolean showBackground = Settings.Secure.getInt(mContext.getContentResolver(),
                        Settings.Secure.ANR_SHOW_BACKGROUND, 0) != 0;
                synchronized (ActivityManagerService.this) {
                    ProcessRecord proc = (ProcessRecord)data.get("app");
                    AppErrorResult res = (AppErrorResult) data.get("result");
                    if (proc != null && proc.crashDialog != null) {
                        Slog.e(TAG, "App already has crash dialog: " + proc);
                        if (res != null) {
                            res.set(0);
                        }
                        return;
                    }
                    boolean isBackground = (UserHandle.getAppId(proc.uid)
                            >= Process.FIRST_APPLICATION_UID
                            && proc.pid != MY_PID);
                    for (int userId : mCurrentProfileIds) {
                        isBackground &= (proc.userId != userId);
                    }
                    if (isBackground && !showBackground) {
                        Slog.w(TAG, "Skipping crash dialog of " + proc + ": background");
                        if (res != null) {
                            res.set(0);
                        }
                        return;
                    }
                    if (mShowDialogs && !mSleeping && !mShuttingDown) {
                        Dialog d = new AppErrorDialog(mContext,
                                ActivityManagerService.this, res, proc);
                        d.show();
                        proc.crashDialog = d;
                    } else {
                        // The device is asleep, so just pretend that the user
                        // saw a crash dialog and hit "force quit".
                        if (res != null) {
                            res.set(0);
                        }
                    }
                }

                ensureBootCompleted();
            }
可以看到在方法體中我們創建了一個AppErrorDialog對象,並執行了show方法,這樣該Dialog就會被顯示出來。而這裡的Dialog的顯示內容就是:App already has crash dialog: ….
O(∩_∩)O哈哈~,原來我們App崩潰的時候彈出昂的異常提示框就是在這裡彈出來的。這裡對AppErrorDialog不做過多的介紹,在其的構造方法中,調用了如下的代碼:
// After the timeout, pretend the user clicked the quit button
        mHandler.sendMessageDelayed(
                mHandler.obtainMessage(FORCE_QUIT),
                DISMISS_TIMEOUT);
這裡的常量DISMISS_TIME = 5 * 60 * 1000,也就是五分鐘,相當於這裡發送了一個延時異步消息五分鐘之後取消崩潰彈窗的顯示。所以我們的App若果崩潰之後不主動取消彈窗,崩潰彈窗也會默認在五分鐘之後取消。
好吧,文章開頭我們所提到的兩個問題我們已經解決掉一個了,force close彈窗是如何彈出來的,相信大家已經有所了解了,其實第二個問題也已經說明了,我們知道系統默認的App異常處理流程就是從Thread.setDefaultUncaughtExceptionHandler(new UncaughtHandler());開始的,並創建了自己的UncaughtHandler對象,那麼我們接管系統默認的異常處理邏輯其實也就是從Thread.setDefaultUncaughtExceptionHandler開始的,並重寫其uncaughtException方法,那麼App異常信息就會被我們自定義的UncaughtHandler所捕獲,捕獲之後奔潰信息的記錄與上報就可以做定制了。。。
這樣我們就大概分析完成了Android系統的異常處理流程。O(∩_∩)O哈哈~
總結:
App應用進程啟動時會經過一系列的調用,執行Thread.setDefaultUncaughtExceptionHandler方法,創建默認的UncaughtHandler異常處理對象。
默認的UncaughtHandler異常處理對象,在其回調方法uncaughtException方法中會執行彈窗異常彈窗的操作,這也就是我們原生的force close彈窗,並且彈窗如果不主動取消的話,會在五分鐘內默認取消。
自定義App的全局異常處理邏輯,需要接管UncaughtHandler,也就是創建自身的UncaughtHandler對象,並調用Thread.setDefaultUncaughtExceptionHandler方法,接管默認的異常處理邏輯。
force close彈窗,彈窗的時候App應用可能已經退出,該彈窗的彈窗是SystemServer進程中的ActivityManagerService服務控制的。
 Android使用GPS獲取用戶地理位置並監聽位置變化的方法
本文實例講述了Android使用GPS獲取用戶地理位置並監聽位置變化的方法。分享給大家供大家參考,具體如下:LocationActivity.java/* Locatio
 Android多媒體開發
一、什麼是多媒體多媒體(duō méi tǐ) 的英文單詞是Multimedia,它由media和multi兩部分組成。一般理解為多種媒體的綜合多媒體是計算
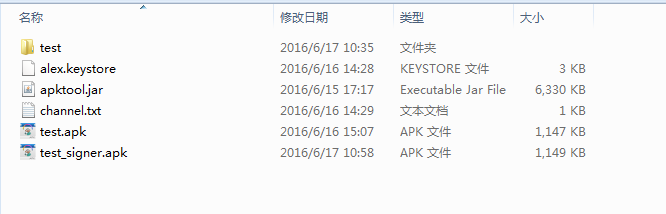 apktool編譯和反編譯apk與ecplise多渠道打包
想自己做個apk,還在為素材而苦惱嗎?看到優秀的apk設計,還在為怎麼看到別人的實現代碼而苦惱嗎?看著AndroidStudio 多渠道打包那麼爽,而自己坑爹的還在用Ec
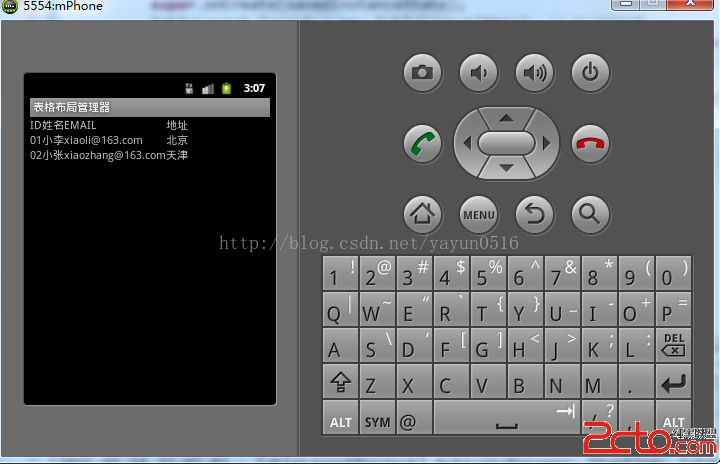 Android-Activity程序動態的生成表格布局管理器
.java代碼如下: package org.lxh.demo; import android.app.Activity; import android