編輯:關於Android編程
首先具體分析一下,實現的功能,其中需求分析是必不可少的,需求、邏輯清除之後,再上手寫代碼,思路會很清晰。
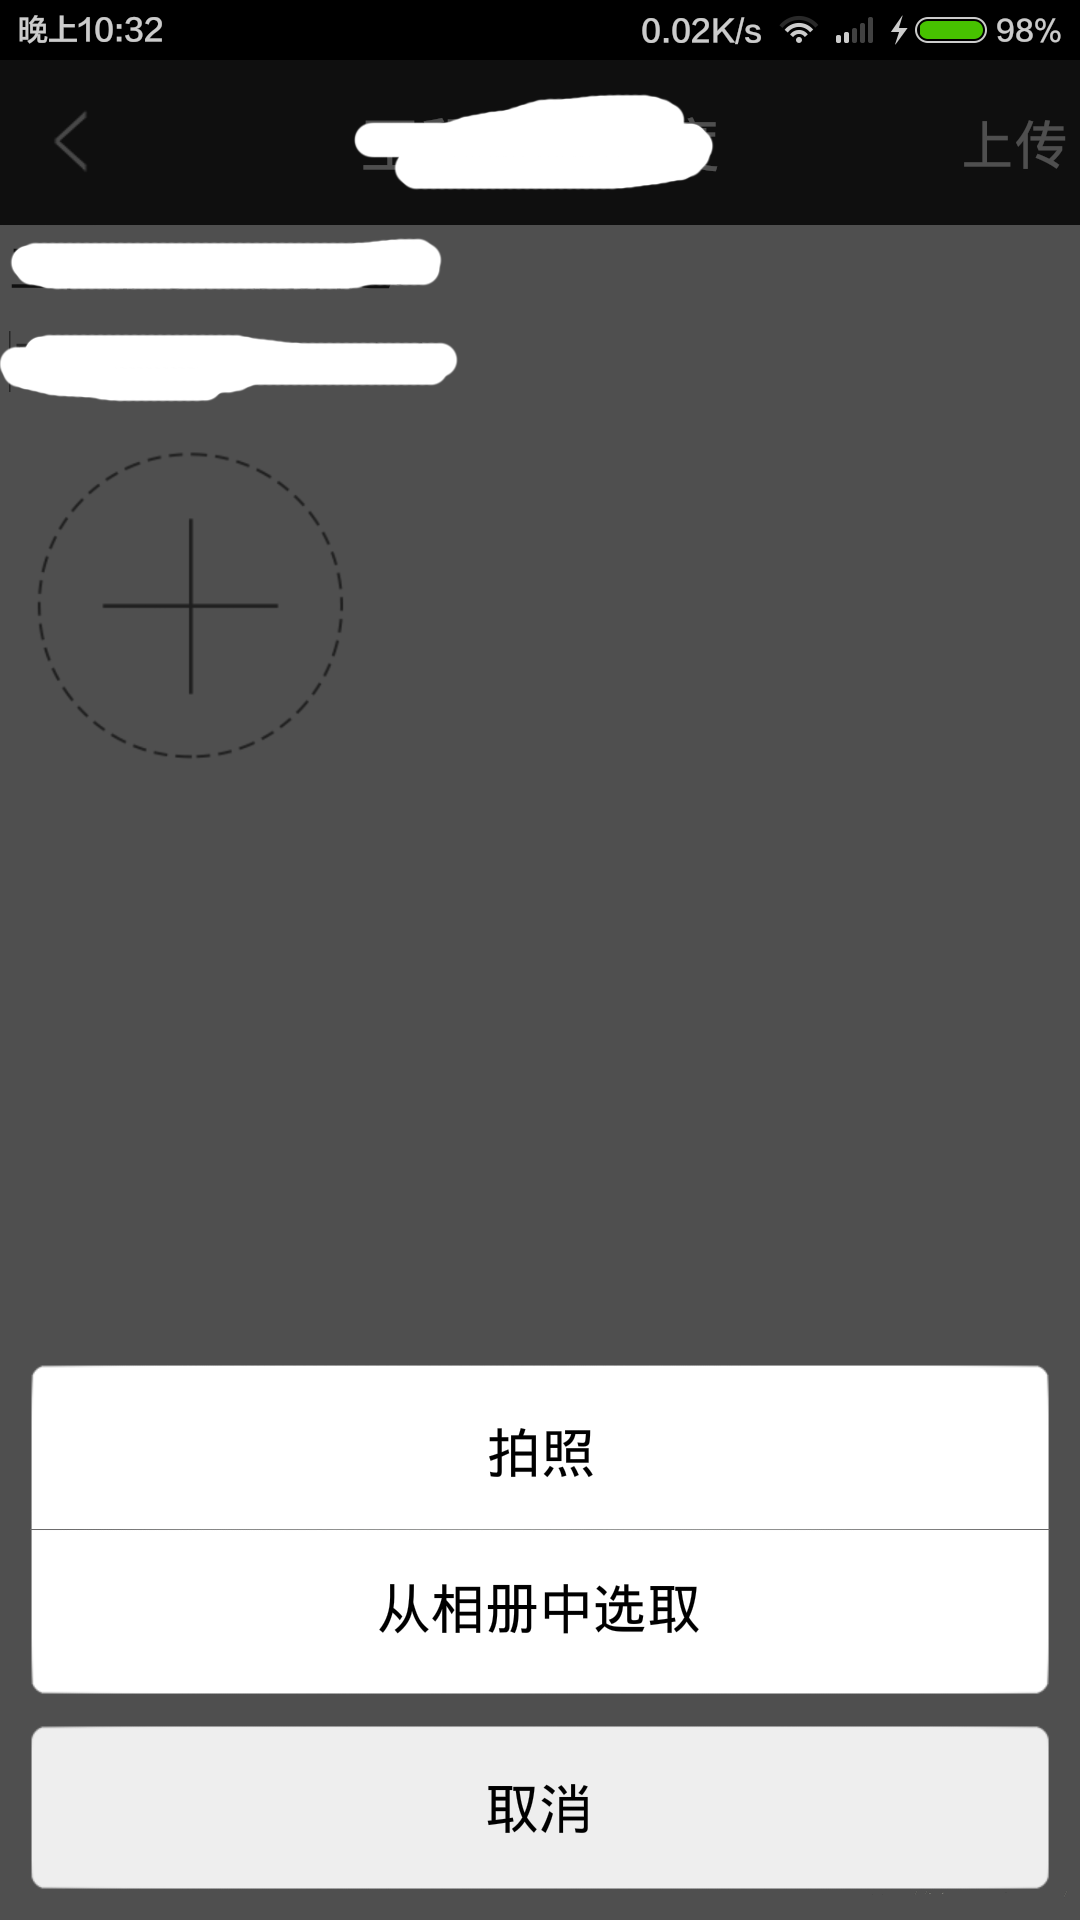
1.多圖上傳首先得選擇圖片(這裡項目需求是既可以拍照上傳也可以從相冊中選擇)
2.拍照上傳很簡單了網上也有很多例子,調用照相機,返回uri,獲取圖片
3.從相冊中選擇圖片
主要的邏輯大體是這樣,下面具體看一下實現:
一、首先看一下界面:
<com.view.NoScrollGridView
          android:id="@+id/noScrollgridview"
          android:layout_marginLeft="@dimen/smaller_space"
          android:layout_marginRight="@dimen/smaller_space"
          android:layout_width="match_parent"
          android:layout_height="wrap_content"
          android:horizontalSpacing="3dp"
          android:listSelector="@color/transparent"
          android:numColumns="3"
          android:scrollbars="none"
          android:layout_gravity="center"
          android:layout_marginTop="@dimen/smaller_space"
          android:verticalSpacing="5dp" />
是一個 NoScrollGridView,項目需要,所以用了不滾動的GridView,大家用GridView也是一樣的。
noScrollgridview = (GridView) findViewById(R.id.noScrollgridview);
    noScrollgridview.setSelector(new ColorDrawable(Color.TRANSPARENT));
    /*新建傳值給adapter*/
    if (file == null) {
      picAdapter = new PictureAdapter(this, 0, null);
    } else {
      //添加失敗的圖片到數組中
      for (int i=0;i<file.getMulFailFilePaths().length;i++){
        ImageItem imageItem = new ImageItem();
        imageItem.setImagePath(file.getMulFailFilePaths()[i].trim());
        Bimp.tempSelectBitmap.add(imageItem);
      }
      /*上傳失敗傳值給adapter*/
      picAdapter = new PictureAdapter(this, 2, file);
    }
這個是初始化圖片數組,適配器(新建、上傳失敗、上傳成功的圖片我用的都是一個adapter)
ImageItem是圖片的模型,下面有它的屬性
//從圖庫選擇的圖片model
public class ImageItem extends File implements Serializable {
  @Id
  public String imageId; //圖片id
  public String thumbnailPath;
  public String imagePath; //圖片路徑
  private Bitmap bitmap;
  public boolean isSelected = false;

  public String getImageId() {
    return imageId;
  }
  public void setImageId(String imageId) {
    this.imageId = imageId;
  }
  public String getThumbnailPath() {
    return thumbnailPath;
  }
  public void setThumbnailPath(String thumbnailPath) {
    this.thumbnailPath = thumbnailPath;
  }
  public String getImagePath() {
    return imagePath;
  }
  public void setImagePath(String imagePath) {
    this.imagePath = imagePath;
  }
  public boolean isSelected() {
    return isSelected;
  }
  public void setSelected(boolean isSelected) {
    this.isSelected = isSelected;
  }
[java] view plain copy print?
/*根據圖片路徑獲取圖片的bitmap*/
public Bitmap getBitmap() {
  if(bitmap == null){
    try {
      bitmap = Bimp.revitionImageSize(imagePath);
    } catch (IOException e) {
      // TODO Auto-generated catch block
      e.printStackTrace();
    }
  }
  return bitmap;
}
public void setBitmap(Bitmap bitmap) {
  this.bitmap = bitmap;
}
接下來是適配器:
由於涉及到添加圖片,adapter中添加一個flag用來顯示新建的圖片,將選擇的圖片添加到公有的圖片數組中,初始化的時候加載圖片數組顯示。(大家在看的時候可以忽略掉我的flag)
@SuppressLint("HandlerLeak")
public class PictureAdapter extends BaseAdapter {
  private LayoutInflater inflater;
  private int selectedPosition = -1;
  private boolean shape;
  private int flag = 0;//0 默認新建 1上傳成功 2上傳失敗
  private AppItem_file file;
  public boolean isShape() {
    return shape;
  }
  private Activity context;

  public void setShape(boolean shape) {
    this.shape = shape;
  }

  public PictureAdapter(Activity context,int flag,AppItem_file file) {
    this.context = context;
    inflater = LayoutInflater.from(context);
    this.flag = flag;
    this.file = file;
  }

//  public void update() {
//    loading();
//  }

  public int getCount() {
    if (flag==0){  //新建圖片
      if (Bimp.tempSelectBitmap.size() == 6) {
        return 6;
      }
      return (Bimp.tempSelectBitmap.size() + 1);
    }
    else if (flag==1){ //上傳成功
      return file.getFileList().size();
    }
    else { //上傳失敗
      return file.getMulFailFilePaths().length;
    }

  }


  public Object getItem(int arg0) {
    if (flag==1){
      return file.getFileList().get(arg0);
    }else {
      return file.getMulFailFilePaths()[arg0];
    }
  }

  public long getItemId(int arg0) {
    return arg0;
  }

  public void setSelectedPosition(int position) {
    selectedPosition = position;
  }

  public int getSelectedPosition() {
    return selectedPosition;
  }

  public View getView(int position, View convertView, ViewGroup parent) {
    ViewHolder holder = null;
    if (convertView == null) {
      //根據圖片的數量加載不同布局
      if (getCount()==1&&flag!=0){
        convertView = inflater.inflate(R.layout.item_published_singal_item,
            parent, false);
      }
      else {
        convertView = inflater.inflate(R.layout.item_published_grida,
            parent, false);
      }

      holder = new ViewHolder();
      holder.image = (ImageView) convertView
          .findViewById(R.id.item_grida_image);
      convertView.setTag(holder);
    } else {
      holder = (ViewHolder) convertView.getTag();
    }

    /**
     * 根據初始化adapter傳過來的flag值,去不同的地方找圖片
     * flag=0,去Bimp的圖片數組中找
     * flag=1,證明上傳成功的,去下載好的getFileList中找
     * flag=2,為上傳失敗的,圖片保存在FailFile中的List<ImageItem>中
     * 優化圖片顯示
     */
    if (flag==0){  //新建圖片
      if (position == Bimp.tempSelectBitmap.size()) {
        holder.image.setImageBitmap(BitmapFactory.decodeResource(
            convertView.getResources(), R.drawable.icon_add_pic_unfocused));
        if (position == 6) {
          if (flag==0){
            holder.image.setVisibility(View.GONE);
          }
        }
      } else {
        holder.image.setImageBitmap(Bimp.tempSelectBitmap.get(position).getBitmap());
      }
    }
    else if (flag==1){ //上傳成功
//      List<Integer> ids = new ArrayList<Integer>();
//      for (int i=0;i<file.getFileList().size();i++){
//        ids.add(file.getFileList().get(i).getS_id());
//      }
      int id=file.getFileList().get(position).getS_id();
      try {
//        File file= NeedApplication.db.findById(File.class,id);
        String fileBigImgUri =NeedApplication.db.findById(File.class,id).getFileUriBig();
        if (fileBigImgUri!=null&&!"null".equals(fileBigImgUri))
        ImageLoader.getInstance().displayImage((fileBigImgUri).trim(),holder.image);
      } catch (DbException e) {
        e.printStackTrace();
      }
    }
    else { //上傳失敗
        String url = "file://"+file.getMulFailFilePaths()[position].trim();
        ImageLoader.getInstance().displayImage(url, holder.image);
    }


    return convertView;
  }

  public class ViewHolder {
    public ImageView image;
  }

}
下面是自定義相冊界面,用來選擇圖片的
<RelativeLayout xmlns:android="http://schemas.android.com/apk/res/android"
  android:layout_width="match_parent"
  android:layout_height="match_parent"
  android:background="#E1E0DE"
  >

  <RelativeLayout
    android:id="@+id/headview"
    android:layout_width="fill_parent"
    android:layout_height="45dp"
    android:background="@drawable/plugin_camera_title_bar"
    android:gravity="center_vertical"
    android:layout_marginBottom="3dp"
    >
    <Button
      android:layout_width="60dp"
      android:layout_height="wrap_content"
      android:textSize="14sp"
      android:textColor="#fff"
      android:id="@+id/back"
      android:text="相冊"
      android:background="@drawable/plugin_camera_title_btn_back"
      android:layout_marginTop="5dp"
      android:layout_marginBottom="5dp"
      android:layout_centerVertical="true"
      />
    <Button
      android:layout_width="67dp"
      android:layout_height="wrap_content"
      android:textSize="14sp"
      android:textColor="#fff"
      android:id="@+id/cancel"
      android:text="取消"
      android:background="@drawable/plugin_camera_title_btn_cancel"
      android:layout_centerVertical="true"
      android:layout_marginRight="5dp"
      android:layout_alignParentRight="true"
      />
  </RelativeLayout>

  <RelativeLayout
    android:id="@+id/bottom_layout"
    android:layout_width="match_parent"
    android:layout_height="50dp"
    android:layout_alignParentBottom="true"
    android:background="@drawable/plugin_camera_bottom_bar"
    android:layout_marginTop="3dp"
    >
    <Button
      android:id="@+id/preview"
      android:layout_width="90dp"
      android:layout_height="wrap_content"
      android:layout_alignParentLeft="true"
      android:layout_centerVertical="true"
      android:layout_marginLeft="10dp"
      android:text="預覽"
      android:background="@drawable/plugin_camera_title_btn_preview"
      />
    <Button
      android:id="@+id/ok_button"
      android:layout_width="90dp"
      android:layout_height="wrap_content"
      android:layout_alignParentRight="true"
      android:layout_centerVertical="true"
      android:layout_marginRight="10dp"
      android:background="@drawable/plugin_camera_ok_btn_state"
      />
  </RelativeLayout>

  <GridView
    android:id="@+id/myGrid"
    android:layout_width="fill_parent"
    android:layout_height="fill_parent"
    android:layout_above="@id/bottom_layout"
    android:layout_below="@id/headview"
    android:layout_centerInParent="true"
    android:layout_marginTop="2dp"
    android:horizontalSpacing="10dp"
    android:numColumns="4"
    android:verticalSpacing="10dp"
    android:background="#E1E0DE" />
  <TextView
    android:id="@+id/myText"
    android:layout_width="match_parent"
    android:layout_height="match_parent"
    android:gravity="center"
    android:text="相冊沒有圖片"
    android:textColor="@color/black"
    />

</RelativeLayout>
同樣也是用了GridView,獲取手機中的圖片,添加到數組中,顯示
這裡用到了一個AlbumHelper(相冊幫助類),網上找的代碼,感覺挺好的
public List<ImageBucket> getImagesBucketList(boolean refresh) {
    if (refresh || (!refresh && !hasBuildImagesBucketList)) {
      buildImagesBucketList();
    }
    List<ImageBucket> tmpList = new ArrayList<ImageBucket>();
    Iterator<Entry<String, ImageBucket>> itr = bucketList.entrySet()
        .iterator();
    while (itr.hasNext()) {
      Entry<String, ImageBucket> entry = (Entry<String, ImageBucket>) itr
          .next();
      tmpList.add(entry.getValue());
    }
    return tmpList;
  }
獲取到數據源之後,該顯示了,也就是利用的獲取圖片幫助類裡面的方法
// 初始化,給一些對象賦值
  private void init() {
    helper = AlbumHelper.getHelper();
    helper.init(getApplicationContext());

    contentList = helper.getImagesBucketList(false);
    dataList = new ArrayList<ImageItem>();
    for(int i = 0; i<contentList.size(); i++){
      dataList.addAll( contentList.get(i).imageList );
    }

    back = (Button) findViewById(R.id.back);
    cancel = (Button) findViewById(R.id.cancel);
    cancel.setOnClickListener(new CancelListener());
    back.setOnClickListener(new BackListener());
    preview = (Button) findViewById(R.id.preview);
    preview.setOnClickListener(new PreviewListener());
    intent = getIntent();
    Bundle bundle = intent.getExtras();
    gridView = (GridView) findViewById(R.id.myGrid);
    gridImageAdapter = new AlbumGridViewAdapter(mContext,dataList,Bimp.tempSelectBitmap);
    gridView.setAdapter(gridImageAdapter);
    tv = (TextView) findViewById(R.id.myText);
    gridView.setEmptyView(tv);
    okButton = (Button) findViewById(R.id.ok_button);
    okButton.setText("完成"+"(" + Bimp.tempSelectBitmap.size()
        + "/"+ NeedApplication.picNums+")");
  }
gridImageAdapter
        .setOnItemClickListener(new AlbumGridViewAdapter.OnItemClickListener() {

          @Override
          public void onItemClick(final ToggleButton toggleButton,
              int position, boolean isChecked,Button chooseBt) {
            if (Bimp.tempSelectBitmap.size() >= NeedApplication.picNums) {
              toggleButton.setChecked(false);
              chooseBt.setVisibility(View.GONE);
              if (!removeOneData(dataList.get(position))) {
                Toast.makeText(AlbumActivity.this, "超出可選圖片張數", Toast.LENGTH_SHORT).show();
              }
              return;
            }
            if (isChecked) {
              chooseBt.setVisibility(View.VISIBLE);
              Bimp.tempSelectBitmap.add(dataList.get(position));
              okButton.setText("完成"+"(" + Bimp.tempSelectBitmap.size()
                  + "/"+ NeedApplication.picNums+")");
            } else {
              Bimp.tempSelectBitmap.remove(dataList.get(position));
              chooseBt.setVisibility(View.GONE);
              okButton.setText("完成"+"(" + Bimp.tempSelectBitmap.size() + "/"+ NeedApplication.picNums+")");
            }
            isShowOkBt();
          }
        });
點擊圖片選擇加到公有圖片數組中顯示已選擇。
最後是預覽圖片,利用自定義viewpager,實現圖片滑動,下面貼兩張截圖吧:
以上就是本文的全部內容,希望對大家的學習有所幫助。
 Android實現跑馬燈效果的方法
本文實例講述了Android實現跑馬燈效果的方法。分享給大家供大家參考。具體如下:運行效果截圖如下:直接在布局裡寫代碼就好了:<TextView android
 微信指紋支付怎麼取消 微信指紋支付取消方法
微信指紋支付是目前微信為了進一步提升交易安全所推出的支付驗證手段,但也有很多用戶在使用中會發現很多小問題,比如手上出汗時,就不能順利驗證支付,小編就這個問題
 手機微信怎麼用 微信怎麼注冊
微信作為現代主要通訊之一,很多朋友已經使用微信作為通訊工具了,出門微信一步到位,見面交友也多是問你微信號多少,我加你。那麼手機微信怎麼用呢?怎樣注冊微信號來
 Android Service綁定過程完整分析
通常我們使用Service都要和它通信,當想要與Service通信的時候,那麼Service要處於綁定狀態的。然後客戶端可以拿到一個Binder與服務端進行通信,這個過程