編輯:關於Android編程
本文和大家一起了解了一下android客戶端與服務端是怎樣交互的,具體內容如下
1.後台使用簡單的servlet,支持GET或POST。這個servlet最終返回給前台一個字符串flag,值是true或false,表示登錄是否成功。
servlet使用之前需要配置,主義servlet的servlet-name要和servlet-mapping的servlet-name一致,否則找不到路徑
我是在myEclipse上創建的一個web service 項目,然後部署到tomcat服務器上以便android客戶端訪問
<servlet>

    <servlet-name>helloWorld</servlet-name>

    <servlet-class>com.zhongzhong.wap.action.HelloServlet</servlet-class>

  </servlet>

  <servlet-mapping>

    <servlet-name>helloWorld</servlet-name>

    <url-pattern>/queryOrder</url-pattern>

  </servlet-mapping>


import java.io.IOException;

import java.io.PrintWriter;


import javax.servlet.ServletException;

import javax.servlet.http.HttpServlet;

import javax.servlet.http.HttpServletRequest;

import javax.servlet.http.HttpServletResponse;

import javax.servlet.http.HttpSession;


import com.zhongzhong.wap.bean.UserBean;


public class HelloServlet extends HttpServlet {


  @Override

  protected void doGet(HttpServletRequest req, HttpServletResponse resp)

      throws ServletException, IOException {

    doPost(req, resp);

  }


  @Override

  protected void doPost(HttpServletRequest req, HttpServletResponse resp)

      throws ServletException, IOException {


     resp.setContentType(text/html);

      PrintWriter out = resp.getWriter();

      Boolean flag = false;

      String userName = req.getParameter(un);

      String password = req.getParameter(pw);

      if(userName.equals(htp)&&password.equals(123))

      {

        flag = true;

      }


      else flag = false;

      System.out.println(userName:+userName+ password:+password);

      out.print(flag);

      out.flush();

      out.close();

  }


}
2.然後我是在安卓的ADT上創建一個安卓項目,建立兩個Activity,分別作為登錄界面和登錄成功界面。
<relativelayout android:layout_height="match_parent" android:layout_width="match_parent" android:paddingbottom="@dimen/activity_vertical_margin" android:paddingleft="@dimen/activity_horizontal_margin" android:paddingright="@dimen/activity_horizontal_margin" android:paddingtop="@dimen/activity_vertical_margin" tools:context=".MainActivity" xmlns:android="http://schemas.android.com/apk/res/android" xmlns:tools="http://schemas.android.com/tools">


  <textview android:id="@+id/textView1" android:layout_alignparenttop="true" android:layout_centerhorizontal="true" android:layout_height="wrap_content" android:layout_margintop="40dp" android:layout_width="wrap_content" android:text="HelloWorld登陸示例">


  <edittext android:ems="10" android:hint="請輸入賬號" android:id="@+id/et_user" android:layout_below="@+id/textView1" android:layout_centerhorizontal="true" android:layout_height="wrap_content" android:layout_margintop="33dp" android:layout_width="wrap_content">


    <requestfocus>

  </requestfocus></edittext>


  <edittext android:ems="10" android:hint="請輸入密碼" android:id="@+id/et_psw" android:inputtype="textPassword" android:layout_below="@+id/et_user" android:layout_centerhorizontal="true" android:layout_height="wrap_content" android:layout_margintop="40dp" android:layout_width="wrap_content"><button android:id="@+id/btn_login" android:layout_below="@+id/et_psw" android:layout_centerhorizontal="true" android:layout_height="wrap_content" android:layout_margintop="37dp" android:layout_width="wrap_content" android:text="登陸"></button></edittext></textview></relativelayout>


<relativelayout android:layout_height="match_parent" android:layout_width="match_parent" android:paddingbottom="@dimen/activity_vertical_margin" android:paddingleft="@dimen/activity_horizontal_margin" android:paddingright="@dimen/activity_horizontal_margin" android:paddingtop="@dimen/activity_vertical_margin" tools:context=".NaviActivity" xmlns:android="http://schemas.android.com/apk/res/android" xmlns:tools="http://schemas.android.com/tools">


  <textview android:layout_alignparenttop="true" android:layout_centerhorizontal="true" android:layout_height="wrap_content" android:layout_margintop="46dp" android:layout_width="wrap_content" android:text="登陸成功">


</textview></relativelayout>
3.HTTP的訪問公共類,用於處理GET和POST請求。
 package com.example.logindemo;


import java.util.ArrayList;

import java.util.List;

import java.util.Map;


import org.apache.http.HttpResponse;

import org.apache.http.NameValuePair;

import org.apache.http.client.HttpClient;

import org.apache.http.client.entity.UrlEncodedFormEntity;

import org.apache.http.client.methods.HttpGet;

import org.apache.http.client.methods.HttpPost;

import org.apache.http.impl.client.DefaultHttpClient;

import org.apache.http.message.BasicNameValuePair;

import org.apache.http.util.EntityUtils;


import android.content.Entity;

import android.util.Log;


public class HttpUtil {

  // 創建HttpClient對象

  public static HttpClient httpClient = new DefaultHttpClient();

  public static final String BASE_URL = http://192.168.3.14:8090/HelloWord/;


  /**

   *

   * @param url

   *      發送請求的URL

   * @return 服務器響應字符串

   * @throws Exception

   */

  public static String getRequest(String url) throws Exception {

    // 創建HttpGet對象。

    HttpGet get = new HttpGet(url);

    // 發送GET請求

    HttpResponse httpResponse = httpClient.execute(get);

    // 如果服務器成功地返回響應

    if (httpResponse.getStatusLine().getStatusCode() == 200) {

      // 獲取服務器響應字符串

      String result = EntityUtils.toString(httpResponse.getEntity());

      return result;

    } else {

      Log.d(服務器響應代碼, (new Integer(httpResponse.getStatusLine()

          .getStatusCode())).toString());

      return null;

    }

  }


  /**

   *

   * @param url

   *      發送請求的URL

   * @param params

   *      請求參數

   * @return 服務器響應字符串

   * @throws Exception

   */

  public static String postRequest(String url, Map<string, string=""> rawParams)

      throws Exception {

    // 創建HttpPost對象。

    HttpPost post = new HttpPost(url);

    // 如果傳遞參數個數比較多的話可以對傳遞的參數進行封裝

    List<namevaluepair> params = new ArrayList<namevaluepair>();

    for (String key : rawParams.keySet()) {

      // 封裝請求參數

      params.add(new BasicNameValuePair(key, rawParams.get(key)));

    }

    // 設置請求參數

    post.setEntity(new UrlEncodedFormEntity(params, UTF-8));

    // 發送POST請求

    HttpResponse httpResponse = httpClient.execute(post);

    // 如果服務器成功地返回響應

    if (httpResponse.getStatusLine().getStatusCode() == 200) {

      // 獲取服務器響應字符串

      String result = EntityUtils.toString(httpResponse.getEntity());

      return result;

    }

    return null;

  }

}

</namevaluepair></namevaluepair></string,>
4.IntentService服務,用於在後台以隊列方式處理耗時操作。
package com.example.logindemo;


import java.util.HashMap;


import android.app.IntentService;

import android.content.Intent;

import android.util.Log;


public class ConnectService extends IntentService {

  private static final String ACTION_RECV_MSG = com.example.logindemo.action.RECEIVE_MESSAGE;


  public ConnectService() {

    super(TestIntentService);

    // TODO Auto-generated constructor stub

  }


  @Override

  protected void onHandleIntent(Intent intent) {

    // TODO Auto-generated method stub

    /**

     * 經測試,IntentService裡面是可以進行耗時的操作的

     * IntentService使用隊列的方式將請求的Intent加入隊列,

     * 然後開啟一個worker thread(線程)來處理隊列中的Intent

     * 對於異步的startService請求,IntentService會處理完成一個之後再處理第二個

     */

    Boolean flag = false;

    //通過intent獲取主線程傳來的用戶名和密碼字符串

    String username = intent.getStringExtra(username);

    String password = intent.getStringExtra(password);

    flag = doLogin(username, password);

    Log.d(登錄結果, flag.toString());


    Intent broadcastIntent = new Intent();

    broadcastIntent.setAction(ACTION_RECV_MSG);

    broadcastIntent.addCategory(Intent.CATEGORY_DEFAULT);

    broadcastIntent.putExtra(result, flag.toString());

    sendBroadcast(broadcastIntent);


  }


   // 定義發送請求的方法

  private Boolean doLogin(String username, String password)

  {

    String strFlag = ;

    // 使用Map封裝請求參數

    HashMap<string, string=""> map = new HashMap<string, string="">();

    map.put(un, username);

    map.put(pw, password);

    // 定義發送請求的URL

   String url = HttpUtil.BASE_URL + queryOrder?un= + username + &pw= + password; //GET方式

    // String url = HttpUtil.BASE_URL + LoginServlet; //POST方式

    Log.d(url, url);

    Log.d(username, username);

    Log.d(password, password);

    try {

      // 發送請求

      strFlag = HttpUtil.postRequest(url, map); //POST方式

//     strFlag = HttpUtil.getRequest(url); //GET方式

      Log.d(服務器返回值, strFlag);

    } catch (Exception e) {

      // TODO Auto-generated catch block

      e.printStackTrace();

    }


    if(strFlag.trim().equals(true)){

      return true;

    }else{

      return false;

    }


  }

}

</string,></string,>
5.在AndroidManifest.xml中注冊IntentService。注意uses-permission節點,為程序開啟訪問網絡的權限。
<!--?xml version=1.0 encoding=utf-8?-->

<manifest android:versioncode="1" android:versionname="1.0" package="com.example.logindemo" xmlns:android="http://schemas.android.com/apk/res/android">


  <uses-sdk android:minsdkversion="8" android:targetsdkversion="18">


  <uses-permission android:name="android.permission.INTERNET">


      <intent-filter>


        <category android:name="android.intent.category.LAUNCHER">

      </category></action></intent-filter>

    </activity>


    </activity>


    <service android:name="com.example.logindemo.ConnectService">

    </service>

  </application>


</uses-permission></uses-sdk></manifest>
6.登陸界面處理,注意
按鈕監聽事件中,使用Intent將要傳遞的值傳給service。接收廣播類中,同樣使用Intent將要傳遞的值傳給下一個Activity。在onCreate()中,動態注冊接收廣播類的實例receiver。在接收廣播類中,不要使用完畢後忘記注銷接收器,否則會報一個Are you missing a call to unregisterReceiver()? 的異常。
package com.example.logindemo;


import android.os.Bundle;

import android.app.Activity;

import android.content.BroadcastReceiver;

import android.content.Context;

import android.content.Intent;

import android.content.IntentFilter;

import android.util.Log;

import android.view.Menu;

import android.view.View;

import android.view.View.OnClickListener;

import android.widget.Button;

import android.widget.EditText;

import android.widget.Toast;


public class MainActivity extends Activity {

   private static final String ACTION_RECV_MSG = com.example.logindemo.action.RECEIVE_MESSAGE;

  private Button loginBtn;

  private EditText et_username;

  private EditText et_password;

  private String userName;

  private String passWord;

  private MessageReceiver receiver ;

  @Override

  protected void onCreate(Bundle savedInstanceState) {

    super.onCreate(savedInstanceState);

    setContentView(R.layout.activity_main);

    initView();

    //動態注冊receiver

    IntentFilter filter = new IntentFilter(ACTION_RECV_MSG);

    filter.addCategory(Intent.CATEGORY_DEFAULT);

    receiver = new MessageReceiver();

    registerReceiver(receiver, filter);

  }


  private void initView() {

    // TODO Auto-generated method stub

    et_username = (EditText)findViewById(R.id.et_user);

    et_password =( EditText)findViewById(R.id.et_psw);

    loginBtn = (Button)findViewById(R.id.btn_login);

    loginBtn.setOnClickListener(new OnClickListener() {


      @Override

      public void onClick(View v) {

        // TODO Auto-generated method stub

        if(matchLoginMsg())

        {

          // 如果校驗成功

          Intent msgIntent = new Intent(MainActivity.this, ConnectService.class);

          msgIntent.putExtra(username, et_username.getText().toString().trim());

          msgIntent.putExtra(password, et_password.getText().toString().trim());

          startService(msgIntent);

        }


      }

    });

  }


  protected boolean matchLoginMsg() {

    // TODO Auto-generated method stub

    userName = et_username.getText().toString().trim();

    passWord = et_password.getText().toString().trim();

    if(userName.equals())

    {

      Toast.makeText(MainActivity.this, 賬號不能為空,Toast.LENGTH_SHORT).show();

      return false;

    }

    if(passWord.equals())

    {

      Toast.makeText(MainActivity.this, 密碼不能為空,Toast.LENGTH_SHORT).show();

      return false;

    }

    return true;

  }

  //接收廣播類

  public class MessageReceiver extends BroadcastReceiver {

    @Override

    public void onReceive(Context context, Intent intent) {

      String message = intent.getStringExtra(result);

      Log.i(MessageReceiver, message);

    // 如果登錄成功

      if (message.equals(true)){

        // 啟動Main Activity

        Intent nextIntent = new Intent(MainActivity.this, NaviActivity.class);

        startActivity(nextIntent);

        // 結束該Activity

        finish();

        //注銷廣播接收器

        context.unregisterReceiver(this);

      }else{

        Toast.makeText(MainActivity.this, 用戶名或密碼錯誤,請重新輸入!,Toast.LENGTH_SHORT).show();

      }


    }

  }

  @Override

  public boolean onCreateOptionsMenu(Menu menu) {

    // Inflate the menu; this adds items to the action bar if it is present.

    getMenuInflater().inflate(R.menu.main, menu);

    return true;

  }


}
以上就是本文的全部內容,希望對大家的學習有所幫助。
 android LinearLayout和RelativeLayout組合實現精確布局方法介紹
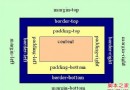
先明確幾個概念的區別: padding margin都是邊距的含義,關鍵問題得明白是什麼相對什麼的邊距. padding是控件的內容相對控件的邊緣的邊距. margin是
 Android常用UI組件 - TextView
TextView是Android裡面用的最多的UI組件,一般使用在需要顯示一些信息的時候,其不能輸入,只能初始設定或者在程序中修改。 實例:TextViewDemo
 Android自定義View實現仿GitHub的提交活躍表格
說明本文可能需要一些基礎知識點,如Canvas,Paint,Path,Rect等類的基本使用,建議不熟悉的同學可以學習GcsSloop安卓自定義View教程目錄,會幫助很
 詳解Android應用開發--MP3音樂播放器代碼實現(一)
需求1:將內存卡中的MP3音樂讀取出來並顯示到列表當中1.從數據庫中查詢所有音樂數據,保存到List集合當中,List當中存放的是Mp3Info對象2.迭代List集合,