編輯:關於Android編程
我們在界面上經常會用到button按鈕,但通常button點擊後看不到點擊的效果,如果用戶連續點擊了兩次,就會報NAR錯誤,這樣交互性就比較差了。如果我們自定義了button點擊效果,比如我們點擊了button能讓我們看到我們確實點擊了button按鈕,這樣就會有效的避免重復點擊了。
自定義點擊效果有兩種方式,一種是在xml中定義,另一種是在代碼中定義。
首先看一下如何在xml中定義:
在drawable下新建selector.xml文件:
<?xml version="1.0" encoding="utf-8"?>
<selector xmlns:android="http://schemas.android.com/apk/res/android">

  <item android:drawable="@drawable/button_press" android:state_pressed="true"/>
  <item android:drawable="@drawable/button_nomal" android:state_focused="false" android:state_pressed="false"/>
  <item android:drawable="@drawable/button_focus" android:state_focused="true"/>
  <item android:drawable="@drawable/button_nomal" android:state_focused="false"/>

</selector>
定義了兩種狀態:一種是按下 一種是獲得焦點。
drawable分別引用了這三張圖片

然後在main.xml下添加button按鈕
  <Button
 android:id="@+id/button1"
 android:layout_width="wrap_content"
 android:layout_height="wrap_content"
 android:text="button效果演示"
 android:background="@drawable/selector" />
在MainActivtiy中得到button
Button button1=(Button) this.findViewById(R.id.button1);
    button1.setOnClickListener(new View.OnClickListener() {

      @Override
      public void onClick(View v) {
        // TODO Auto-generated method stub
        Toast.makeText(getApplicationContext(), "你點擊了button按鈕", Toast.LENGTH_SHORT).show();
      }
    });
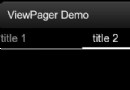
下面看下點擊效果:
點擊button前:

當按下button按鈕時:

接下來 看下第二種實現方式,在代碼中實現:
首先在main.xml中添加:
   <Button
   android:id="@+id/button2"
   android:layout_width="wrap_content"
   android:layout_height="wrap_content"
   android:text="button效果演示"
   android:background="@drawable/button_nomal"/>
接下面在MainActivity中實現:
  Button button2=(Button) this.findViewById(R.id.button2);
    button2.setOnTouchListener(new OnTouchListener() {

    @Override
    public boolean onTouch(View v, MotionEvent event) {
      // TODO Auto-generated method stub
      if(event.getAction()==MotionEvent.ACTION_DOWN){
        v.setBackgroundResource(R.drawable.button_press);
      }else if(event.getAction()==MotionEvent.ACTION_UP){
        v.setBackgroundResource(R.drawable.button_nomal);
      }
      return false;
    }
  });
在這類綁定了button的OnTouchListener監聽,因為OnClickListener繼承了OnTouchListener。運行效果和上面一樣,這裡不做過多解釋。
以上就是Android自定義button點擊效果實現方式的全部內容,希望能給大家一個參考,也希望大家多多支持本站。
 Android開發學習之路--網絡編程之xml、json
一般網絡數據通過http來get,post,那麼其中的數據不可能雜亂無章,比如我要post一段數據,肯定是要有一定的格式,協議的。常用的就是xml和json了。在此先要搭
 Android 學習(三)下: UI 控件
· ·點此進入上篇: Android 學習(三)上: UI 控件 · · · · ·AnalogClock和DigitalClock // 獲得當前的時間,獲得小時和分鐘
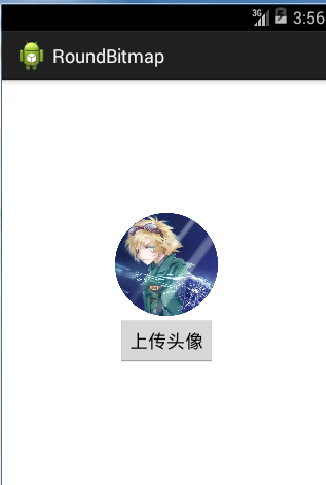 Android實現本地上傳圖片並設置為圓形頭像
先從本地把圖片上傳到服務器,然後根據URL把頭像處理成圓形頭像。因為上傳圖片用到bmob的平台,所以要到bmob(http://www.bmob.cn)申請密鑰。效果圖:
 hibernate配置屬性
屬性名 用途 hibernate.dialect 一個HibernateDialect類名允許Hibernate針對特定的關系數據庫生成優化的SQL.取值