編輯:關於Android編程
TabHost組件可以在界面中存放多個選項卡, 很多軟件都使用了改組件進行設計。
一、基礎知識
TabWidget : 該組件就是TabHost標簽頁中上部 或者 下部的按鈕, 可以點擊按鈕切換選項卡;
TabSpec : 代表了選項卡界面, 添加一個TabSpec即可添加到TabHost中;
-- 創建選項卡 : newTabSpec(String tag), 創建一個選項卡;
-- 添加選項卡 : addTab(tabSpec);
二、實例講解
TabHost的基本使用,主要是layout的聲明要使用特定的id號,然後activity繼承TabActivity即可。
main.xml:
<TabHost xmlns:android="http://schemas.android.com/apk/res/android"
  xmlns:tools="http://schemas.android.com/tools"
  android:id="@android:id/tabhost"
  android:layout_width="match_parent"
  android:layout_height="match_parent"
  tools:context=".Main" >

  <LinearLayout
    android:layout_width="match_parent"
    android:layout_height="match_parent"
    android:orientation="vertical" >

    <TabWidget
      android:id="@android:id/tabs"
      android:layout_width="match_parent"
      android:layout_height="wrap_content" >
    </TabWidget>

    <FrameLayout
      android:id="@android:id/tabcontent"
      android:layout_width="match_parent"
      android:layout_height="wrap_content" >

      <LinearLayout
        android:id="@+id/tab1"
        android:layout_width="match_parent"
        android:layout_height="wrap_content"
        android:orientation="vertical" >

        <TextView
          android:layout_width="match_parent"
          android:layout_height="match_parent"
          android:text="aa" />
      </LinearLayout>

      <LinearLayout
        android:id="@+id/tab2"
        android:layout_width="match_parent"
        android:layout_height="wrap_content"
        android:orientation="vertical" >

        <TextView
          android:layout_width="match_parent"
          android:layout_height="match_parent"
          android:text="bb" />
      </LinearLayout>
    </FrameLayout>
  </LinearLayout>

</TabHost>
Main.java:
package com.app.main;

import android.app.TabActivity;
import android.os.Bundle;
import android.view.View;
import android.view.View.OnClickListener;
import android.widget.TabHost;
import android.widget.TabHost.OnTabChangeListener;
import android.widget.TabHost.TabSpec;
import android.widget.TabWidget;

public class Main extends TabActivity {

  @Override
  protected void onCreate(Bundle savedInstanceState) {
    super.onCreate(savedInstanceState);
    setContentView(R.layout.main);

    final TabHost tabHost = this.getTabHost();

    TabSpec tab1 = tabHost.newTabSpec("tab1").setIndicator("tab1")
        .setContent(R.id.tab1);

    tabHost.addTab(tab1);

    TabSpec tab2 = tabHost.newTabSpec("tab2").setIndicator("tab2")
        .setContent(R.id.tab2);

    tabHost.addTab(tab2);


  }

}
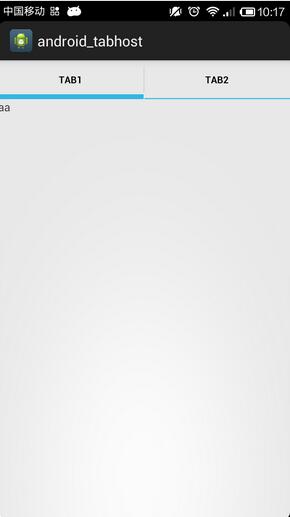
實現效果:
其他:
當點擊tabwidget的時候,若想注冊事件監聽器,可以使用:
1.調用
tabHost.setOnTabChangedListener(new TabChangeListener(){

  public void onTabChanged(String id)

    {
    }

});
這個傳入的id,就是tabwidget的indicator,這裡是"tab1","tab2";
2.調用
tabWidget.getChildAt(0).setOnClickListener(new OnClickListener(){


});
以上就是本文的全部內容,希望能給大家一個參考,也希望大家多多支持本站。
 Android 自定義圓形頭像CircleImageView支持加載網絡圖片的實現代碼
在Android開發中我們常常用到圓形的頭像,如果每次加載之後再進行圓形裁剪特別麻煩。所以在這裡寫一個自定義圓形ImageView,直接去加載網絡圖片,這樣的話就特別的方
 Android中的二維碼生成與掃描功能
0. 前言今天這篇文章主要描述二維碼的生成與掃描,使用目前流行的Zxing,為什麼要講二維碼,因為二維碼太普遍了,隨便一個Android APP都會有二維碼掃描。本篇旨在
 Android RecyclerView瀑布流布局添加Footer實現上拉加載
這篇文章應該是晚到了好幾個月,之前想寫,但是中途遇到了一些棘手的問題,無奈沒有去寫。寫這篇文章的最初來源是一個朋友問我在Android中如何實現瀑布流布局?,當時我的回答
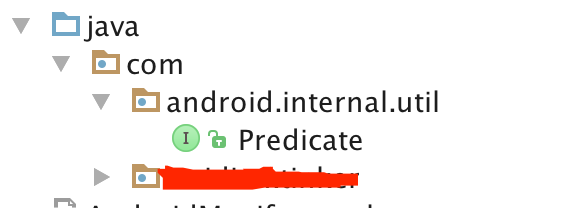 Android Classloader熱修復技術之百家齊放
大概在2015年10月底,QQ空間發了一篇叫《安卓App熱補丁動態修復技術介紹》的文章,文章中提到為了能讓Class進行熱修復,其中一個條件就是防止類被打上CLASS_I