編輯:關於Android編程
0. 前言
今天這篇文章主要描述二維碼的生成與掃描,使用目前流行的Zxing,為什麼要講二維碼,因為二維碼太普遍了,隨便一個Android APP都會有二維碼掃描。本篇旨在幫助有需求的同學快速完成二維碼生成和掃描的功能。
1. Zxing的使用
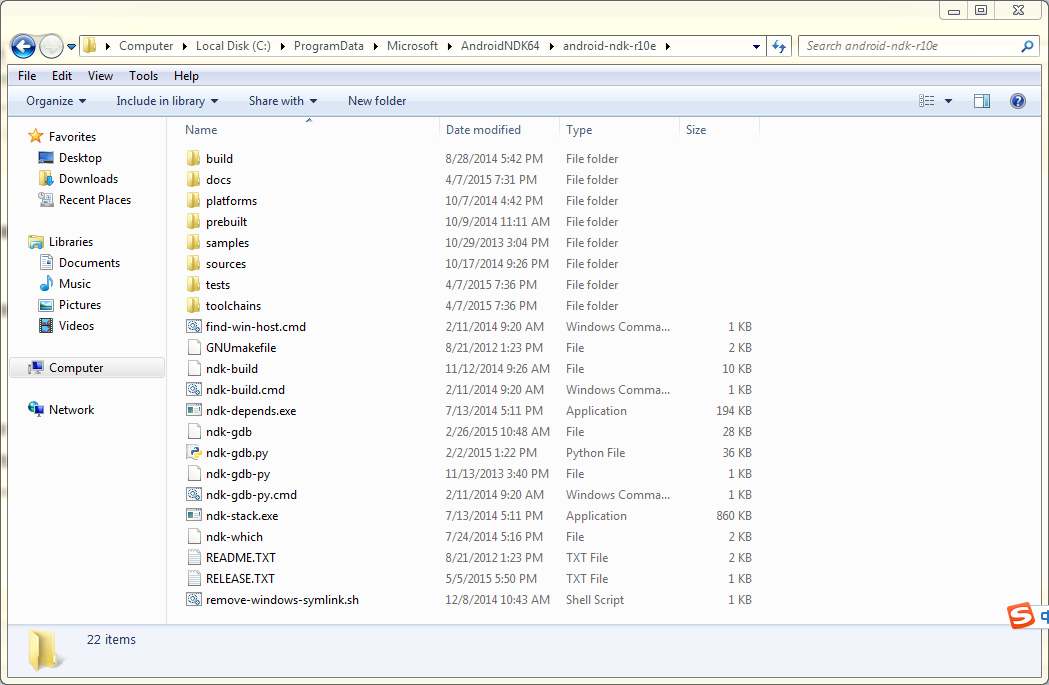
從github上下載項目後,可以看到整體代碼結構如下:

我們只需將Zxing包下的所有代碼copy一份到我們的項目中去,除了這些還需要zxing的jar包,最後相應的資源文件,包括values文件下的ids文件、raw文件中的資源文件(可以替換)、layout文件下的activity_capture.xml(可以進行相應的訂制) 和圖片資源。
2. 生成二維碼的實現
等上面工作全部准備完畢後,就可以創建我們的二維碼了。如何生成二維碼?
需要EncodingUtils這個二維碼生成工具類。通過調用工具類中的createQRCode()方法來生成二維碼。該方法參數介紹如下:
/*
* content:二維碼內容
* widthPix:二維碼寬度
* heightPix:二維碼高度
* logoBm:二維碼中間的logo對應的Bitmap
*/
public static Bitmap createQRCode(String content, int widthPix, int heightPix, Bitmap logoBm)
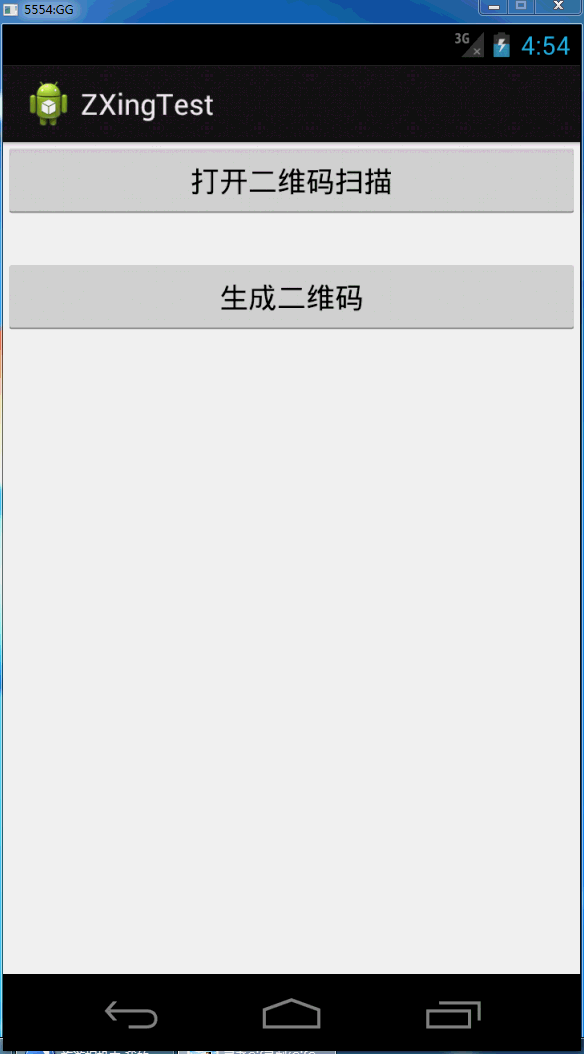
下面完成的是生成的一個百度地址的二維碼,中間LOGO是Android小機器人。並保存圖片到本地,方便後續測試二維碼的本地讀取功能。
/**
 * 創建、展示二維碼並將bitmap保存在本地
 */
 private void create() {
 int width = DensityUtil.dip2px(this, 200);
 Bitmap bitmap = EncodingUtils.createQRCode("http://www.baidu.com",
  width, width, BitmapFactory.decodeResource(getResources(),R.drawable.ic_launcher));
 iv_zxing.setImageBitmap(bitmap);
 saveBitmap(bitmap);
 }
 /**
 * 將Bitmap保存在本地
 *
 * @param bitmap
 */
 public void saveBitmap(Bitmap bitmap) {
 // 首先保存圖片
 File appDir = new File(Environment.getExternalStorageDirectory(),"zxing_image");
 if (!appDir.exists()) {
  appDir.mkdir();
 }
 String fileName = "zxing_image" + ".jpg";
 File file = new File(appDir, fileName);
 try {
  FileOutputStream fos = new FileOutputStream(file);
  bitmap.compress(CompressFormat.JPEG, 100, fos);
  fos.flush();
  fos.close();
 } catch (Exception e) {
  e.printStackTrace();
 }
 // 把文件插入到系統圖庫
 try {
  MediaStore.Images.Media.insertImage(this.getContentResolver(),file.getAbsolutePath(), fileName, null);
 } catch (FileNotFoundException e) {
  e.printStackTrace();
 }
 // 通知圖庫更新
 sendBroadcast(new Intent(Intent.ACTION_MEDIA_SCANNER_SCAN_FILE,
  Uri.parse("file://" + "/sdcard/namecard/")));
}
看到如下效果:
3. 讀取二維碼的實現
3.1 攝像頭掃描的方式
二維碼掃描需要借助於CaptureActivity這個類,打開CaptureActivity界面並進行掃描,掃描完畢後回調onActivityResult()方法,從onActivityResult()中得到掃描後的結果。效果就不演示的,因為使用的是模擬器。詳細代碼如下:
 /**
 * 打開二維碼掃描
 */
private void open() {
 config();
 startActivityForResult(new Intent(MainActivity.this,CaptureActivity.class), 0);
}
/**
 * 提高屏幕亮度
 */
private void config() {
 WindowManager.LayoutParams lp = getWindow().getAttributes();
 lp.screenBrightness = 1.0f;
 getWindow().setAttributes(lp);
}
@Override
protected void onActivityResult(int requestCode, int resultCode, Intent data) {
 super.onActivityResult(requestCode, resultCode, data);
 if (resultCode == RESULT_OK) {
 Bundle bundle = data.getExtras();
 String result = bundle.getString("result");
 tv_result.setText(result);
 }
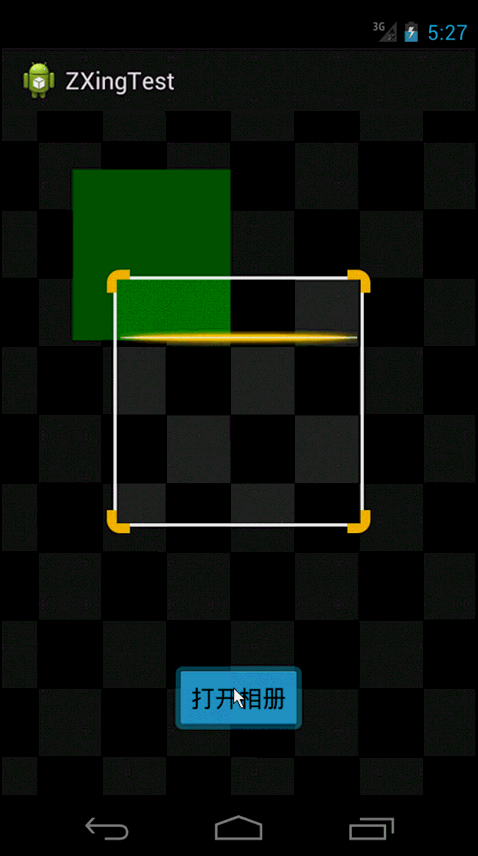
3.2 本地圖片掃描的方式
掃描本地圖片需要我們在CaptureActivity中進行相應的修改,為此我在掃描界面底部增加了一個按鈕,用來選擇本地圖片。layout代碼這裡就不展示,我們直接看點擊後的事件處理。
/**
* 打開本地圖片
*/
private void openLocalImage() {
 // 打開手機中的相冊
 Intent innerIntent = new Intent(Intent.ACTION_GET_CONTENT);
 innerIntent.setType("image/*");
 Intent wrapperIntent = Intent.createChooser(innerIntent, "選擇二維碼圖片");
 this.startActivityForResult(wrapperIntent, 0x01);
}
打開系統圖片庫後選擇圖片,這時需要重寫onActivityResult()方法用於返回圖片信息。
@Override
 protected void onActivityResult(int requestCode, int resultCode, Intent data) {
 super.onActivityResult(requestCode, resultCode, data);
 if (resultCode == RESULT_OK) {
  switch (requestCode) {
  case 0x01:
  // 獲取選中圖片的路徑
  Cursor cursor = getContentResolver().query(data.getData(),null, null, null, null);
  if (cursor.moveToFirst()) {
   photo_path = cursor.getString(cursor.getColumnIndex(MediaStore.Images.Media.DATA));
  }
  cursor.close();
  new Thread(new Runnable() {
   @Override
   public void run() {
   Result result = scanningImage(photo_path);
   if (result != null) {
    handleDecode(result, new Bundle());
   }
   }
  }).start();
  break;
  }
 }
}
獲取圖片路徑photo_path後,調用scanningImage()方法進行掃描,Zxing源碼中,掃描到的結果都是存放在Result結果集中。獲取到Result後,就進行結果的回傳,閱讀CaptureActivity源碼可以得知最後Result結果集會傳遞給handleDecode()方法。
/**
 * A valid barcode has been found, so give an indication of success and show
 * the results.
 *
 * @param rawResult
 *  The contents of the barcode.
 * @param bundle
 *  The extras
 */
 public void handleDecode(Result rawResult, Bundle bundle) {
 inactivityTimer.onActivity();
 beepManager.playBeepSoundAndVibrate();
 Intent resultIntent = new Intent();
 bundle.putInt("width", mCropRect.width());
 bundle.putInt("height", mCropRect.height());
 bundle.putString("result", rawResult.getText());
 resultIntent.putExtras(bundle);
 this.setResult(RESULT_OK, resultIntent);
 CaptureActivity.this.finish();
}
獲取到圖片路徑後需要將其二維碼信息包裝成Result對象,因此需要解析圖片:
/**
 * 掃描二維碼圖片的方法
 *
 * @param path
 * @return
 */
 public Result scanningImage(String path) {
 if (TextUtils.isEmpty(path)) {
  return null;
 }
 Hashtable<DecodeHintType, String> hints = new Hashtable<DecodeHintType, String>();
 hints.put(DecodeHintType.CHARACTER_SET, "UTF8"); // 設置二維碼內容的編碼
 BitmapFactory.Options options = new BitmapFactory.Options();
 options.inJustDecodeBounds = true; // 先獲取原大小
 scanBitmap = BitmapFactory.decodeFile(path, options);
 options.inJustDecodeBounds = false; // 獲取新的大小
 int sampleSize = (int) (options.outHeight / (float) 200);
 if (sampleSize <= 0)
  sampleSize = 1;
 options.inSampleSize = sampleSize;
 scanBitmap = BitmapFactory.decodeFile(path, options);
 int width = scanBitmap.getWidth();
 int height = scanBitmap.getHeight();
 int[] pixels = new int[width * height];
 scanBitmap.getPixels(pixels, 0, width, 0, 0, width, height);
 /**
 * 第三個參數是圖片的像素
 */
 RGBLuminanceSource source = new RGBLuminanceSource(width, height,
  pixels);
 BinaryBitmap bitmap1 = new BinaryBitmap(new HybridBinarizer(source));
 QRCodeReader reader = new QRCodeReader();
 try {
  return reader.decode(bitmap1, hints);
 } catch (NotFoundException e) {
  e.printStackTrace();
 } catch (ChecksumException e) {
  e.printStackTrace();
 } catch (FormatException e) {
  e.printStackTrace();
 }
 return null;
 }
根據路徑獲取Bitmap,最後通過QRCodeReader 中的decode方法解析成Result對象並返回,最終傳遞給handleDecode方法。運行程序效果如下,掃描出來的是之前定義的百度地址。
最後不要忘了申明權限和CaptureActivity。
<uses-permission android:name="android.permission.WRITE_EXTERNAL_STORAGE"/>
<uses-permission android:name="android.permission.MOUNT_UNMOUNT_FILESYSTEMS"/>
<uses-permission android:name="android.permission.CAMERA"/>
<uses-permission android:name="android.permission.VIBRATE"/>
<activity android:name="com.example.zxingtest.zxing.activity.CaptureActivity"/>
大家可以參考下這篇文章:Android實現二維碼掃描和生成的簡單方法
以上所述是小編給大家介紹的Android中的二維碼生成與掃描功能,希望對大家有所幫助,如果大家有任何疑問請給我留言,小編會及時回復大家的。在此也非常感謝大家對本站網站的支持!
 錘子科技堅果手機哪個版本好
其實一般的手機是兩個版本的,但是蘋果6S出來的時候是三個版本的,那麼昨晚發布的堅果手機有幾個版本?從手機ROM存儲角度來說,堅果手機目前有16GB和32GB
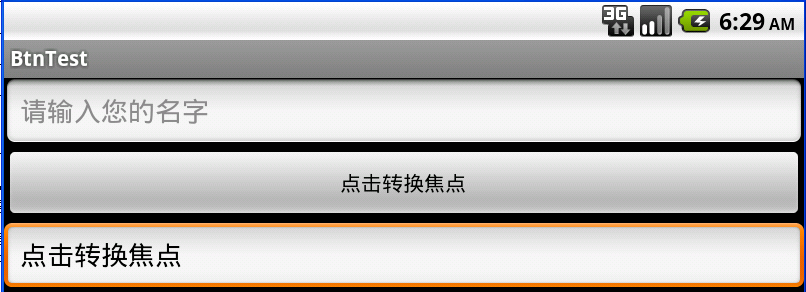 Android控件系列之EditText使用方法
學習目的:1、掌握在Android中如何建立EditText2、掌握EditText的常用屬性3、掌握EditText焦點的事件、按鍵的事件(監聽器)介紹:EditTex
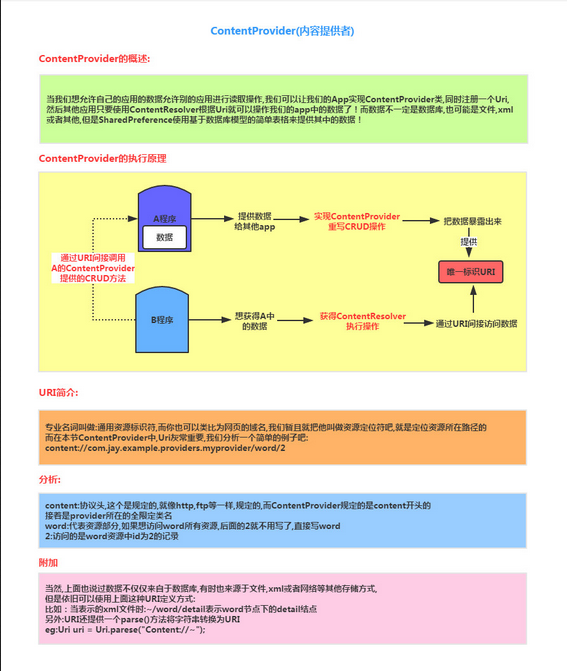 Android四大組件之ContentProvider(上)
(一)概述本節給大家帶來的是Android四大組件中的最後一個——ContentProvider(內容提供者),可能部分讀者 有疑問了,&rdqu
 Android AIDL淺談
接觸Android久的朋友,就會在面試或者實際開發中遇到AIDL,那麼今天我們就來看看AIDL。一、官方描述1.1 文檔說明AIDL-Android Interface