編輯:關於Android編程
1.二維碼的前世今生
“二維條碼/二維碼(2-dimensional bar code)是用某種特定的幾何圖形按一定規律在平面(二維方向上)分布的黑白相間的圖形記錄數據符號信息的;在代碼編制上巧妙地利用構成計算機內部邏輯基礎的“0”、“1”比特流的概念,使用若干個與二進制相對應的幾何形體來表示文字數值信息,通過圖象輸入設備或光電掃描設備自動識讀以實現信息自動處理:它具有條碼技術的一些共性:每種碼制有其特定的字符集;每個字符占有一定的寬度;具有一定的校驗功能等。同時還具有對不同行的信息自動識別功能、及處理圖形旋轉變化點。 [1] ”
上面是百度百科的解釋。既然有二維碼,那麼肯定有一維碼。
一維碼。最為常見的就是食品 & 書本後面的條碼。
條碼起源與20世紀40年代,後來在1970年 UPC碼發明,並開始廣泛應用與食品包裝。
具體的介紹可以看百度百科 一維碼。
其實二維碼與一維碼本質上是類似的,就跟一維數組和二維數組一樣。
2.二維碼的java支持庫
為了讓java或者說android方便繼承條碼的功能,google就開發了一個zxing的庫:
https://github.com/zxing/zxing
3.生成二維碼
public class EncodeThread {
public static void encode(final String url, final int width, final int height, final EncodeResult result) {
if (result == null) {
return;
}
if (TextUtils.isEmpty(url)) {
result.onEncodeResult(null);
return;
}
new Thread() {
@Override
public void run() {
try {
MultiFormatWriter writer = new MultiFormatWriter();
Hashtable<EncodeHintType, String> hints = new Hashtable<>();
hints.put(EncodeHintType.CHARACTER_SET, "utf-8");
BitMatrix bitMatrix = writer.encode(url, BarcodeFormat.QR_CODE, width, height, hints);
Bitmap bitmap = parseBitMatrix(bitMatrix);
result.onEncodeResult(bitmap);
return;
} catch (WriterException e) {
e.printStackTrace();
}
result.onEncodeResult(null);
}
}.start();
}
/**
* 生成二維碼內容<br>
*
* @param matrix
* @return
*/
public static Bitmap parseBitMatrix(BitMatrix matrix) {
final int QR_WIDTH = matrix.getWidth();
final int QR_HEIGHT = matrix.getHeight();
int[] pixels = new int[QR_WIDTH * QR_HEIGHT];
//this we using qrcode algorithm
for (int y = 0; y < QR_HEIGHT; y++) {
for (int x = 0; x < QR_WIDTH; x++) {
if (matrix.get(x, y)) {
pixels[y * QR_WIDTH + x] = 0xff000000;
} else {
pixels[y * QR_WIDTH + x] = 0xffffffff;
}
}
}
Bitmap bitmap = Bitmap.createBitmap(QR_WIDTH, QR_HEIGHT, Bitmap.Config.ARGB_8888);
bitmap.setPixels(pixels, 0, QR_WIDTH, 0, 0, QR_WIDTH, QR_HEIGHT);
return bitmap;
}
public interface EncodeResult {
void onEncodeResult(Bitmap bitmap);
}
}
zxing 支持很多條碼格式:我們這裡使用QR_CODE碼。也就是我們常見的微信裡面的二維碼。
我們先來分析下這段代碼:
MultiFormatWriter writer = new MultiFormatWriter();
這個是一個工具類,把所有支持的幾個write寫在裡面了。
public BitMatrix encode(String contents,
BarcodeFormat format,
int width, int height,
Map<EncodeHintType,?> hints) throws WriterException {
Writer writer;
switch (format) {
case EAN_8:
writer = new EAN8Writer();
break;
case UPC_E:
writer = new UPCEWriter();
break;
case EAN_13:
writer = new EAN13Writer();
break;
case UPC_A:
writer = new UPCAWriter();
break;
case QR_CODE:
writer = new QRCodeWriter();
break;
case CODE_39:
writer = new Code39Writer();
break;
case CODE_93:
writer = new Code93Writer();
break;
case CODE_128:
writer = new Code128Writer();
break;
case ITF:
writer = new ITFWriter();
break;
case PDF_417:
writer = new PDF417Writer();
break;
case CODABAR:
writer = new CodaBarWriter();
break;
case DATA_MATRIX:
writer = new DataMatrixWriter();
break;
case AZTEC:
writer = new AztecWriter();
break;
default:
throw new IllegalArgumentException("No encoder available for format " + format);
}
return writer.encode(contents, format, width, height, hints);
}
這是官方最新支持的格式,具體看引入的jar裡面支持的格式。
對與bitmatrix的結果,通過摸個算法,設置每個點白色,或者黑色。
最後創建一張二維碼的圖片。
4.識別二維碼
如何從一張圖片上面,識別二維碼呢:
public class ReDecodeThread {
public static void encode(final Bitmap bitmap, final ReDecodeThreadResult listener) {
if (listener == null) {
return;
}
if (bitmap == null) {
listener.onReDecodeResult(null);
return;
}
new Thread() {
@Override
public void run() {
try {
MultiFormatReader multiFormatReader = new MultiFormatReader();
BitmapLuminanceSource source = new BitmapLuminanceSource(bitmap);
BinaryBitmap bitmap1 = new BinaryBitmap(new HybridBinarizer(source));
Result result1 = multiFormatReader.decode(bitmap1);
listener.onReDecodeResult(result1.getText());
return;
} catch (NotFoundException e) {
e.printStackTrace();
}
listener.onReDecodeResult(null);
}
}.start();
}
public interface ReDecodeThreadResult {
void onReDecodeResult(String url);
}
}
過程也是很簡單,使用MultiFormatReader來分析圖片,這裡不需要缺人圖片的條碼格式。
如果分析下源碼,就是依次使用每種格式的reader來分析,直到找到合適的為止。
當然回了能夠把Bitmap轉化成Bitmatrix,然後在分析。
public final class BitmapLuminanceSource extends LuminanceSource{
private final byte[] luminances;
public BitmapLuminanceSource(String path) throws FileNotFoundException {
this(loadBitmap(path));
}
public BitmapLuminanceSource(Bitmap bitmap) {
super(bitmap.getWidth(), bitmap.getHeight());
int width = bitmap.getWidth();
int height = bitmap.getHeight();
int[] pixels = new int[width * height];
bitmap.getPixels(pixels, 0, width, 0, 0, width, height);
// In order to measure pure decoding speed, we convert the entire image
// to a greyscale array
// up front, which is the same as the Y channel of the
// YUVLuminanceSource in the real app.
luminances = new byte[width * height];
for (int y = 0; y < height; y++) {
int offset = y * width;
for (int x = 0; x < width; x++) {
int pixel = pixels[offset + x];
int r = (pixel >> 16) & 0xff;
int g = (pixel >> 8) & 0xff;
int b = pixel & 0xff;
if (r == g && g == b) {
// Image is already greyscale, so pick any channel.
luminances[offset + x] = (byte) r;
} else {
// Calculate luminance cheaply, favoring green.
luminances[offset + x] = (byte) ((r + g + g + b) >> 2);
}
}
}
}
@Override
public byte[] getRow(int y, byte[] row) {
if (y < 0 || y >= getHeight()) {
throw new IllegalArgumentException("Requested row is outside the image: " + y);
}
int width = getWidth();
if (row == null || row.length < width) {
row = new byte[width];
}
System.arraycopy(luminances, y * width, row, 0, width);
return row;
}
// Since this class does not support cropping, the underlying byte array
// already contains
// exactly what the caller is asking for, so give it to them without a copy.
@Override
public byte[] getMatrix() {
return luminances;
}
private static Bitmap loadBitmap(String path) throws FileNotFoundException {
Bitmap bitmap = BitmapFactory.decodeFile(path);
if (bitmap == null) {
throw new FileNotFoundException("Couldn't open " + path);
}
return bitmap;
}
}
5.掃描二維碼
掃描二維碼,其實比上面只多了一步,就是把camera獲取的東西直接轉換,然後進行識別。
public void requestPreviewFrame(Handler handler, int message) {
if (camera != null && previewing) {
previewCallback.setHandler(handler, message);
if (useOneShotPreviewCallback) {
camera.setOneShotPreviewCallback(previewCallback);
} else {
camera.setPreviewCallback(previewCallback);
}
}
}
首先把camera預覽的數據放入previewCallback中。
final class PreviewCallback implements Camera.PreviewCallback

public void onPreviewFrame(byte[] data, Camera camera) {
Point cameraResolution = configManager.getCameraResolution();
if (!useOneShotPreviewCallback) {
camera.setPreviewCallback(null);
}
if (previewHandler != null) {
Message message = previewHandler.obtainMessage(previewMessage, cameraResolution.x,
cameraResolution.y, data);
message.sendToTarget();
previewHandler = null;
} else {
Log.d(TAG, "Got preview callback, but no handler for it");
}
}
可以看到,預覽的數據data,回傳遞過來,然後handler的方式傳遞出去。
接收data的地方:
@Override
public void handleMessage(Message message) {
switch (message.what) {
case R.id.decode:
//Log.d(TAG, "Got decode message");
decode((byte[]) message.obj, message.arg1, message.arg2);
break;
case R.id.quit:
Looper.myLooper().quit();
break;
}
}
然後是decode data
private void decode(byte[] data, int width, int height) {
long start = System.currentTimeMillis();
Result rawResult = null;
//modify here
byte[] rotatedData = new byte[data.length];
for (int y = 0; y < height; y++) {
for (int x = 0; x < width; x++)
rotatedData[x * height + height - y - 1] = data[x + y * width];
}
int tmp = width; // Here we are swapping, that's the difference to #11
width = height;
height = tmp;
PlanarYUVLuminanceSource source = CameraManager.get().buildLuminanceSource(rotatedData, width, height);
BinaryBitmap bitmap = new BinaryBitmap(new HybridBinarizer(source));
try {
rawResult = multiFormatReader.decodeWithState(bitmap);
} catch (ReaderException re) {
// continue
} finally {
multiFormatReader.reset();
}
if (rawResult != null) {
long end = System.currentTimeMillis();
Log.d(TAG, "Found barcode (" + (end - start) + " ms):\n" + rawResult.toString());
Message message = Message.obtain(activity.getHandler(), R.id.decode_succeeded, rawResult);
Bundle bundle = new Bundle();
bundle.putParcelable(DecodeThread.BARCODE_BITMAP, source.renderCroppedGreyscaleBitmap());
message.setData(bundle);
//Log.d(TAG, "Sending decode succeeded message...");
message.sendToTarget();
} else {
Message message = Message.obtain(activity.getHandler(), R.id.decode_failed);
message.sendToTarget();
}
}
當把camera上的圖片轉換成BinaryBitmap以後,剩下的事情,就更直接從圖片識別是一樣的。
PlanarYUVLuminanceSource source = CameraManager.get().buildLuminanceSource(rotatedData, width, height);
BinaryBitmap bitmap = new BinaryBitmap(new HybridBinarizer(source));
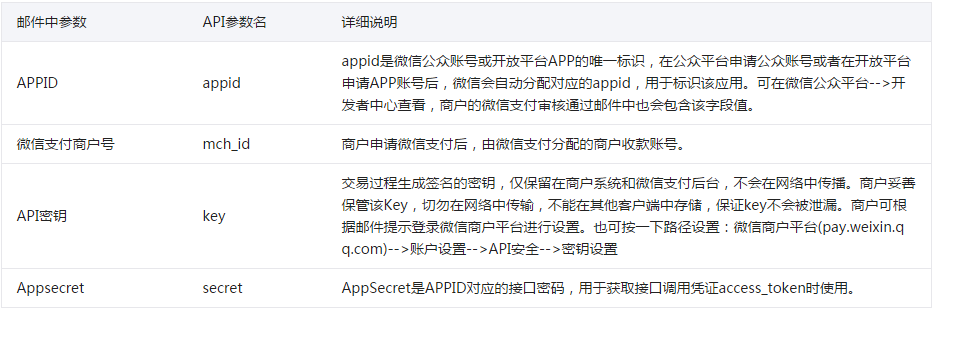 Android支付開發(微信)
微信接入支付流程跟支付寶差不多,這裡介紹一下接入流程以及注意事項。接入流程:1.1、到微信開放平台添加移動應用,申請權限到微信開放平台注冊開發者賬號,並添加應用,申請支付
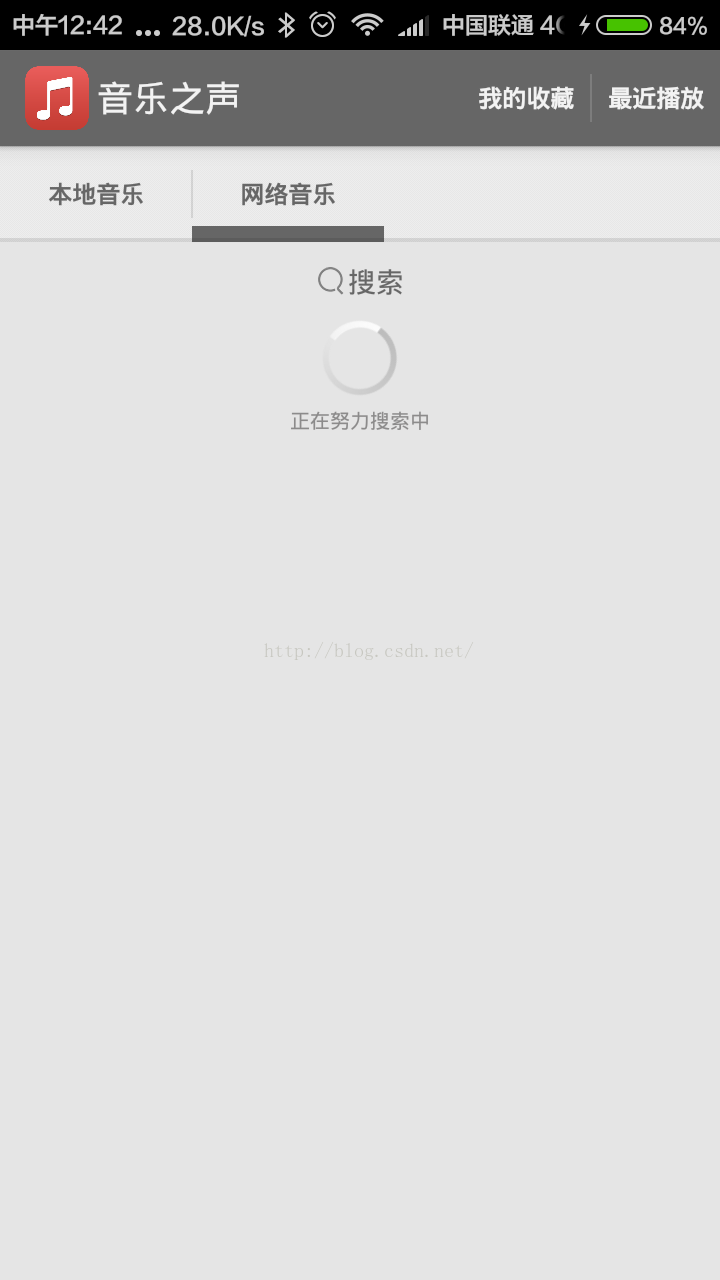 Android開發本地及網絡Mp3音樂播放器(十二)創建NetMusicListAdapter、SearchResult顯示網絡音樂列表
實現功能:實現NetMusicListAdapter(網絡音樂列表適配器)實現SearchResult(搜索音樂對象)使用Jsoup組件請求網絡,並解析音樂數據,並,音樂
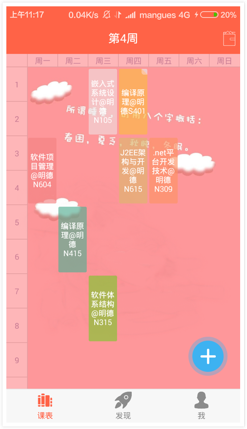 Android課程表的設計開發
導語 實現了教務系統中課程的導入,分類顯示課程。學期的修改,增加,修改。課程按照周的顯示。課程修改上課星期和上課周。上課課程的自動歸類。一、主要功能界面 開發過程一開始
 Android(十四)解決AppBarLayout滑動不暢
最近在開發的App中需要實現Toolbar與頂部內容區域級聯滾動的效果,一開始就想到了Android 5.0 中新添加的AppBarLayout控件,其正好是實現這個效果